Beams Reflected is the second crossover area where the Trader’s mirrors from the Mirror Isles (East) meet the beam emitters of Vault of the Beamcasters (West). It is filed under MxB (Mirrors × Beamcasters), like its neighbour Reflected Beams. Where Reflected Beams is about mirrors that bend beams, this area is about what happens when beams pile up: orange beams that stack, purple beams that loop back into their own emitter, and clones that have to be merged again. This page solves all 9 puzzles.
Where it is: after the last room of Reflected Beams, ride the new purple beam up and step off when it switches off. 塞德莎 labels the tile N1W5. The map wraps, so Heroes and Mirrors (north-east) is right next door on the left. Puzzles 1–6 are open on arrival. Puzzles 7–9 only open late in the game (塞德莎 plays them in his part 39, after the first ending).
How to use this page: there is no chaptered solution video for this area yet, so the numbers follow 塞德莎’s order in part 23 and part 39, and every step links his narrated walkthrough. For puzzles 1–6 the heading also links the moment the room starts in Mikan Hako’s uncut playthrough (no chapters, includes his attempts), which plays them in the same order. In part 39, 塞德莎 plays puzzle 9 first, then puzzles 7 and 8.
Rules that matter here
- Orange beams multiply. Standing in one orange beam makes every step 2 tiles. Where two orange beams cross, a step is 4 tiles. Where four overlap, it is 16. 塞德莎 tests this in puzzle 2: the jump length is 2 to the power of the number of beams, not the sum.
- A purple beam can end at its own emitter. A purple beam carries you to whatever stops it. If you bend it round with mirrors until it runs back into the emitter, the emitter itself becomes the end. That is how you cross to an island with nothing else to land on (puzzles 3 and 4).
- Merging clones. Mirrors split you into clones that all move together. To become one again, make every clone arrive on the same tile at the same moment: ride the same purple beam to the same end (puzzle 5), or give the clones different jump lengths so they land together (puzzle 6).
- Who can push. The Explorer can’t push anything on his own; a cyan beam lets him push. The Trader can push one object, and in a cyan beam he can shove a whole row.
- Same block, any distance. As in Reflected Beams, a Trader’s mirror only fires while you stand inside its glowing block, but it then moves things at any distance.
- Late-game beams (puzzles 7–9). A white beam can power a gem holder, so a beam switches on without a gem sitting in its path. In puzzle 9 a multicoloured beam plus a red beam re-activates an energy block, which then slams down like a piston.
Puzzle 1
Key idea: two heroes, two exits, one on each side. Loop the orange beam back through the room so it crosses itself: on the crossing tile a step is 4 tiles, exactly the width you need to clear. (Mikan Hako 9:10 · 塞德莎 0:24)
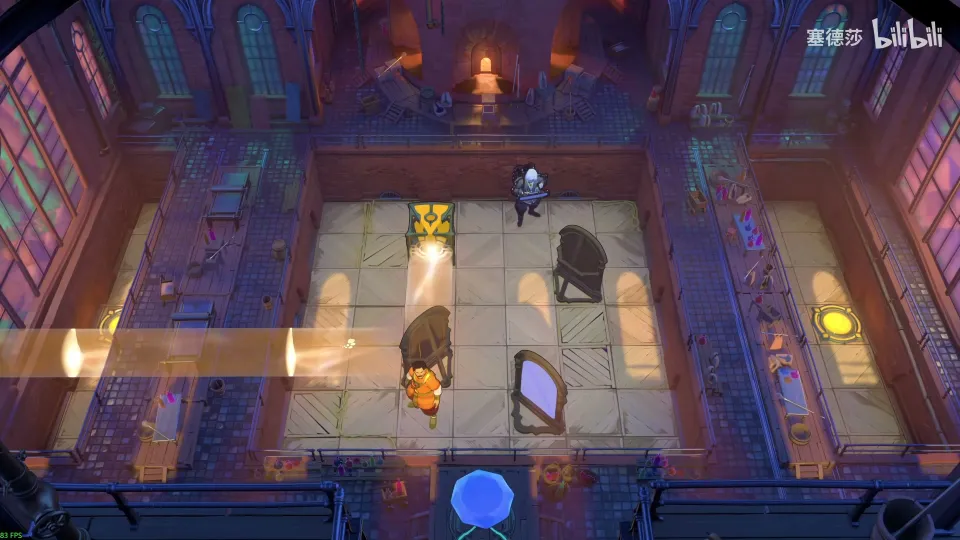
- The plan: make a crossing of two orange beams, then jump 4 tiles to the right exit with one hero and 4 tiles to the left exit with the other. (0:26)
- For the right side, use three mirrors to send the beam back towards itself. Push the first mirror out, nudge the emitter left, and park the mirrors against the wall where 塞德莎 shows. (0:43)
- Aim the beam at the mirror in the second column from the right. It loops round and crosses its own path, and that crossing tile counts double. (1:07)
- Send the Explorer first, since he can’t push anything and is no help afterwards: from the crossing he jumps 4 tiles right onto his exit. (1:19)
- For the left exit, move the emitter and that mirror over to the left so the crossing moves with them; it is again exactly 4 tiles to the exit. (1:30)
Puzzle 2
Key idea: six tiles of wall stand between you and the exit, too far for a 4-tile jump. Overlap both orange beams completely, so every tile on that stretch carries two beams, and the single tile where they cross carries four: from there one step is 16 tiles. (Mikan Hako 12:50 · 塞德莎 2:00)
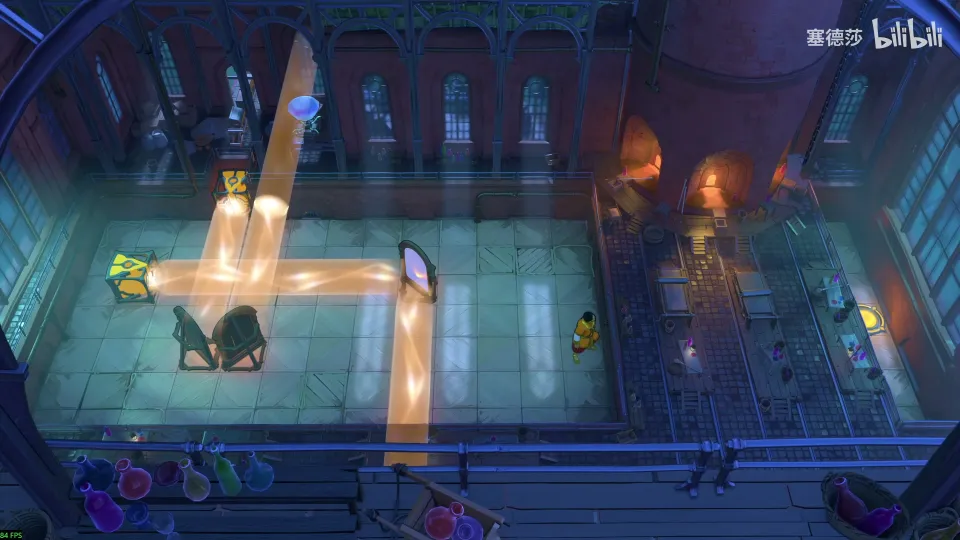
Getting there: reset the mirrors on the area map, push the mirror two tiles right and jump in from there. (1:45)
- Count the wall: six tiles. A single crossing (4 tiles) won’t do, but this room has two orange emitters. (2:03)
- Push one mirror up, push another across, and push the third one tile down. Now the beam from above and the beam from the left run on top of each other, so every tile there is a 4-tile step. (2:41)
- Stand on the centre crossing, where all four beams meet, and press right: you jump 16 tiles straight onto the exit. (3:14)
- 塞德莎’s conclusion: orange beams multiply, they don’t add. One beam is 2, two are 4, three would be 8, four are 16. (3:36)
Puzzle 3
Key idea: the Trader has to get from the right island to the left one by riding the purple beam, so the left island needs a beam end. The gem won’t do (you could never get back across the water) and you can’t hit the back of the mirror, so the only end left is the purple emitter itself: loop the beam round into it. (Mikan Hako 25:00 · 塞德莎 4:13)
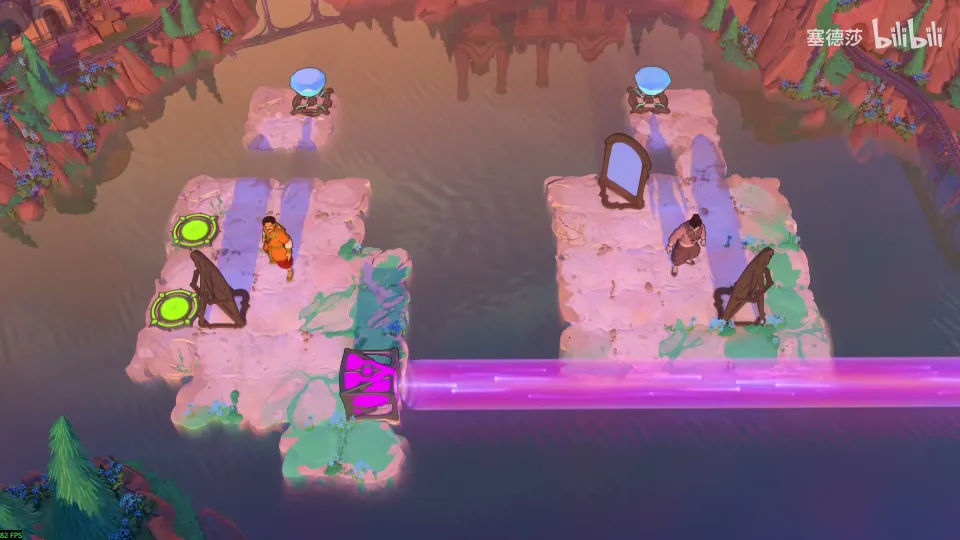
Getting there: in the top-right corner of the area, push the obstacle aside, go in while the purple beam is off and jump into the room. (4:01)
- Work out the end first: not the top gem, not the back of the single mirror, so it has to be the emitter. You will build a loop that sends the beam back into its own emitter. (4:14)
- One mirror is stuck where you can’t reach it. First aim the purple beam at the top-right gem, use that as the end to cross over, and take the mirror out. (5:02)
- Aim the purple beam along the row 塞德莎 shows and leave the mirror in that row alone for now. Place the up-left mirror, then the up-right mirror, and the last one goes in at the end. (5:19)
- The beam now runs round and back into the emitter. Ride it across to the left island and finish. (5:40)
Puzzle 4
Key idea: the same loop as puzzle 3, with two mirrors on each side. The hard part is moving the mirrors: the hero on the right can’t push, so the cyan beam on the left has to give him the power to push. (Mikan Hako 26:40 · 塞德莎 5:50)
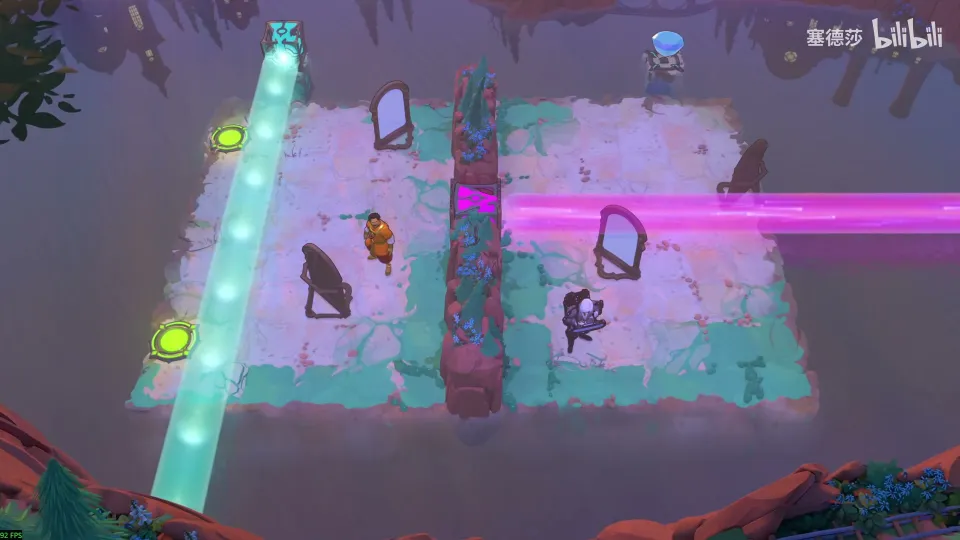
- Goal: build a purple loop back into its emitter again, this time with two mirrors on the left half and two on the right. (5:51)
- First push the down-left mirror up one tile so it blocks the purple beam; otherwise pushing the right-hand mirror later goes wrong. (6:17)
- Move the cyan emitter: put it in place, push it down two tiles, move it again and push it down two more, then push a mirror down one tile. (6:25)
- Bring the cyan beam across to the right-hand hero and push up from the spot 塞德莎 shows. That finishes the right side. (6:40)
- Push the two left mirrors over, one of them behind the purple emitter facing its back, then give the other one last push. Ride the loop across. (6:47)
Puzzle 5
Key idea: the room splits you into four clones at once, and the only reflection point is then blocked by a wall, so you can’t reflect again. With one exit you have to merge the four, and the purple beam does it: if all four ride the same beam at the same time, they all land on the same end. (Mikan Hako 30:50 · 塞德莎 7:17)
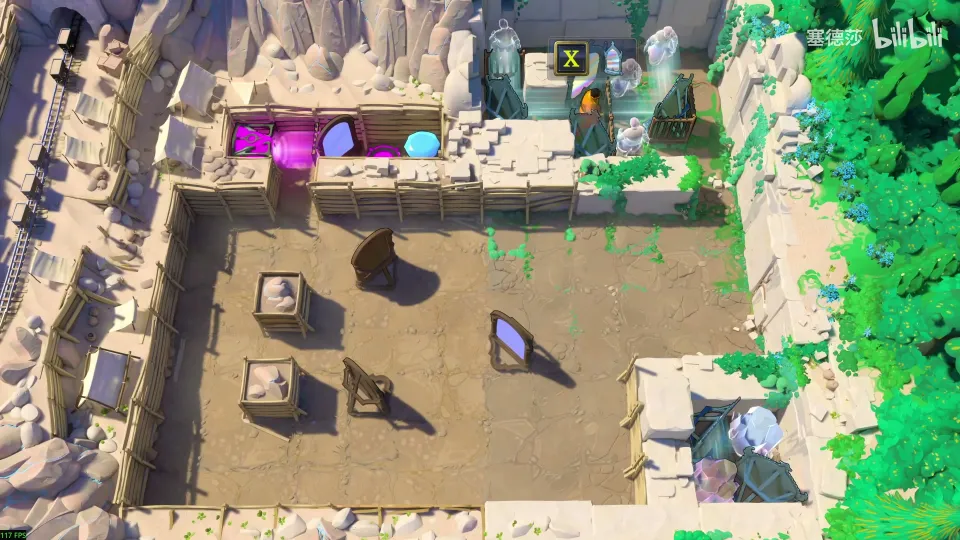
Getting there: from the area map go up; you don’t need to wait for the purple beam, its end is up there anyway. (7:07)
- You start as four clones, and the reflection in the bottom right is blocked by a wall. There is no way to mirror again, so the four have to become one some other way. (7:18)
- The mirror that points at the exit and the one at the start can’t move. Spread the others as far apart as possible: one to the top (it goes in last, deepest in), one to the bottom, one in the middle. The beam now runs down, makes a U-turn and comes back up to the exit, a long path. (8:06)
- Shuffle the clones into the shape the beam needs: two side by side with a one-tile gap on top, one below them, and one more below that after a gap. It takes some careful nudging. (8:39)
- Move all four down at once. They step into the beam together, all ride to the same end and merge into one hero at the exit. (9:17)
Puzzle 6
Key idea: the same merging job, done with orange instead of purple. On the crossing tile a step is 4 tiles, everywhere else in the beam it is 2. Put the two clones two tiles apart with the left one on the crossing, step right, and they land on the same tile. (Mikan Hako 34:10 · 塞德莎 9:34)
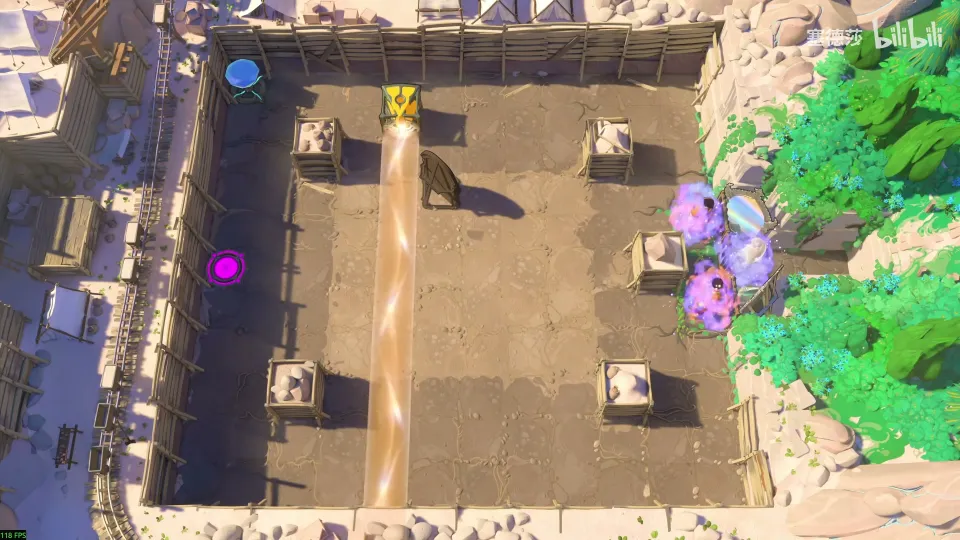
- Put the mirror on the tile 塞德莎 shows so the orange beam crosses itself. (9:46)
- The crossing tile gives 4-tile steps, the rest of the beam 2-tile steps. That difference is what merges the clones. (9:55)
- Line the two clones up side by side with one empty tile between them, the left one on the crossing. (10:07)
- Press right: the left clone jumps 4, the right clone jumps 2, and both land on the same tile. You are one hero again and can walk to the exit. (10:13)
The two rooms below (puzzles 7 and 8) can’t be reached yet. 塞德莎 points out that Heroes and Mirrors lies just to the left, then heads back down to Reflected Beams. (10:30)
Puzzle 7
Key idea: a late-game room. The purple beam has to end on the stone to the right of a particular tile, but if a gem switches the emitter on, the gem itself blocks the beam. Power the gem holder with the white beam instead, so the purple beam runs with no gem in the way. (塞德莎 P39 14:19)
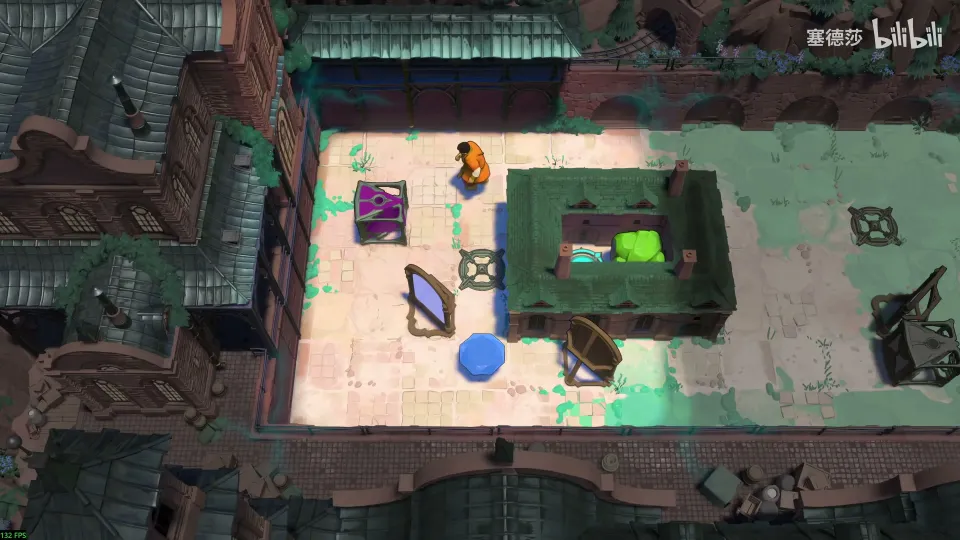
Getting there: after the late-game unlock, reset the mirror on the area map, move it across and jump down to the two lower rooms. (P39 14:02)
- Goal: the purple beam has to run to the right and stop on the stone from the tile 塞德莎 points at, so you can ride it there. (14:25)
- A gem in the holder would switch the beam on but also block it. There is a white beam on the right: aim it at the gem holder and it keeps the purple emitter lit without a gem. (14:38)
- Bring the white beam over, then push the two mirrors into place. (14:59)
- Aim the beams as shown and ride to the exit. 塞德莎 calls this one very simple once you see the white-beam trick. (15:14)
Puzzle 8
Key idea: the white beam has to power two holders in the top-left corner to switch on the orange beam, and they are too far apart for one hero. The room has exactly two mirrors: split into two clones, power both holders at once, then merge again. (塞德莎 P39 15:18)
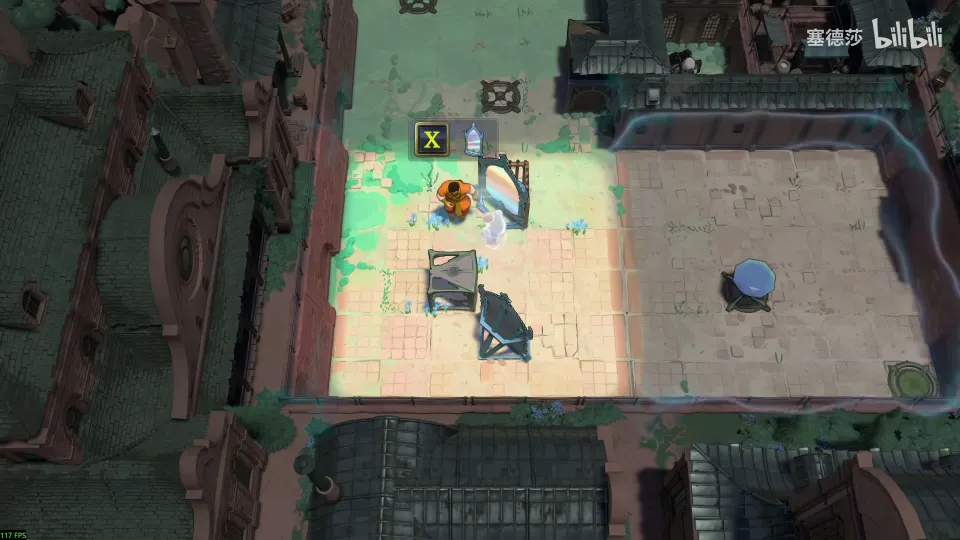
- Goal: get the white beam onto both holders in the top left so the orange beam appears. One hero can’t reach both. (15:22)
- Bring the beam back first, then reflect in the two mirrors to split into two clones. (15:49)
- Reflect once more into the arrangement 塞德莎 shows and stand on the tile he points at. (15:55)
- The Explorer goes in first, then you merge back into one hero and finish. (16:03)
Puzzle 9
Key idea: an extra late-game room. The exit is blocked by a mirror, two stones and a red block, and all of them must go. Red beam for the block, yellow plus the multicoloured beam for the stones. The mirror can’t be broken by yellow, so crush it with the energy block in the middle, which slams down like a piston when it is re-activated. (塞德莎 P39 11:37)
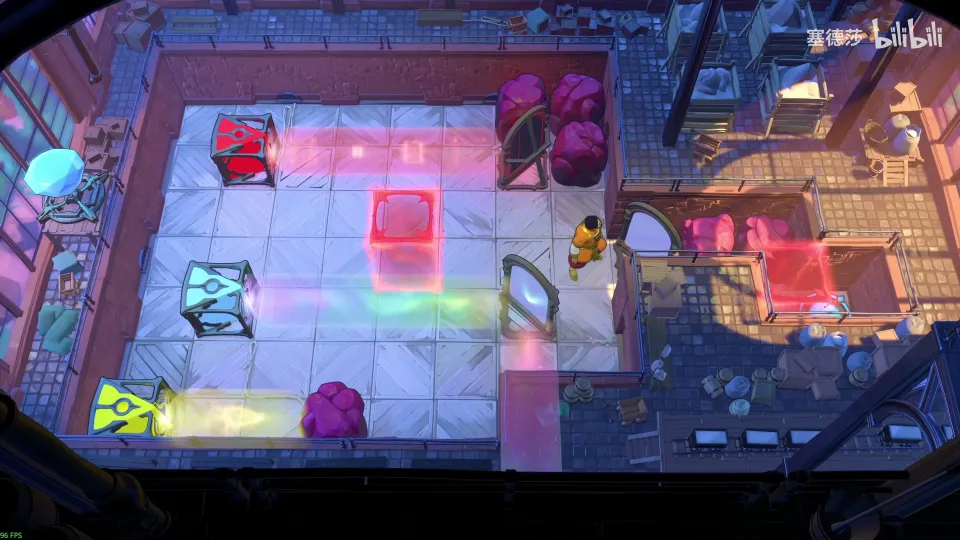
Getting there: 塞德莎 reaches it from the west side of the area, through the gap left by a stone he broke in the neighbouring north-west area, and calls it an extra room of the east–west crossover. (P39 11:28)
- Goal: clear everything in the way: a mirror, two stones and a red block. The red block is easy, touch it with the red beam. (11:47)
- Stones: shove each one against the wall, break it with yellow, then touch the pieces with the multicoloured beam and they are gone. (12:11)
- The mirror can’t be broken with yellow. Hit the energy block in the middle with the multicoloured beam plus the red beam and it re-activates; it faces down, so it presses down like a piston and crushes whatever is under it. (12:39)
- Put the upward-firing emitter, the red emitter and the downward-facing mirror where 塞德莎 places them, and the mirror is crushed. Open the block again; the debris can then be blown up. (13:20)
- Keep the top-left mirror: it reflects the yellow beam for the last blast. Then open the door with the red beam. (13:44)
That completes Beams Reflected. For the neighbouring rooms in the south, see Reflected Beams.