Spoiler warning: this page covers the Antipode, the end of the game’s first stage. It sticks to puzzle solutions and leaves out the story, but the room names and layouts give away late-game content. If you haven’t opened a Gold Room teleporter yet, you may want to stop here.
The Antipode is the area you reach through the teleporters in the six Gold Rooms. Its big star puzzle is the game’s first Endgame: a central platform sends you into 15 short rooms that bring the four worlds back together, first one at a time, then in pairs, in threes and finally all four at once. This page solves the overworld puzzle that opens the star and all 15 puzzles inside it.
Where it is: 塞德莎 labels the star N6W5 on his map, and The Exit, which opens afterwards, N5W5.
How to use this page: numbers follow The Flying Chungus’s chaptered solution video. Each heading has the key idea and two links: the matching Chungus chapter (no commentary on the puzzles) and the moment in 塞德莎’s narrated walkthrough where the room starts. The numbered steps link to 塞德莎’s video, because the steps follow his explanation. His order differs in two places: he plays the pairs as 5, 6, 8, 7, 9, 10 and the threes as 12, 11, 14, 13. Both videos also contain story scenes between the groups of rooms; we don’t describe them.
How to get here: the six teleporters
What the sources show about the teleporters:
- One teleporter per Gold Room. Each of the six Gold Rooms, one for each pair of worlds, holds a teleporter to the Antipode (Postmode). The Steam achievements name all six: Antipode HxM, MxS, HxB, SxB, HxS and MxB, each “Activate the … teleporter to the Antipode”. See all achievements and Gold Rooms: all 6 solutions.
- Seven seals each. Postmode reports that a teleporter needs seven lectern seals before it works. His seventh seal for the MxS teleporter came from the last big star puzzle in Mirrors and Stones, so expect to finish most of a crossover area before its teleporter switches on.
- Four are enough. The Flying Chungus notes on screen that you can begin the Antipode’s overworld puzzle once at least four teleporters are active, and Postmode says four are needed for the first ending. 塞德莎 starts it after finishing four crossover areas. (塞德莎 0:09)
- The same six pairs inside. Puzzles 5–10 below use exactly the six pairs of the Gold Rooms. Neither video shows whether a pair’s room needs that pair’s teleporter: both players already had four or more active.
Rules that matter here
- The central platform. Inside the star you stand on a square platform with a symbol for each world: Heroes at the top, Mirrors on the right, Stones at the bottom and Beams on the left. Push the gold block onto a symbol to open that world’s room. After each room, push the block on to the next symbol. 塞德莎 points out the logic of the order: first the four single points, then the six lines between two of them, then the four triangles of three, then all four together. (塞德莎 3:22)
- Every room mixes world rules. The heroes push, pull, swap and so on as in the North; mirrors reflect what stands on their beams as in the East; the Sailor skips stones and lily pads drift as in the South; beams lend their powers as in the West (green walks through walls, red opens red blocks, purple carries you to the beam’s far end).
- Purple ends. The purple beam carries whatever stands in it to the far end. A stone or a plant that blocks the beam marks where that end is, which is the key to puzzles 10, 14 and 15.
- Moving things change direction when pushed. A skipping stone or lily pad keeps moving until it stops, and a push or a reflection on the way changes its direction. Puzzles 6, 13 and 15 depend on timing this.
- A fixed bug in puzzle 3. At launch some players found the lily pad in the Stones room sinking or vanishing (塞德莎 4:10). The October 17 patch (r67271) fixed a missing lily in an end level, so with the game updated you should not run into it. If it still happens, restart the room.
Overworld puzzle 1
Key idea: once four teleporters are active, the objects around the big star come alive. Use the green beam on the left to walk through the wall and fetch the stone that holds the button. (YouTube 0:00 · 塞德莎 0:21)
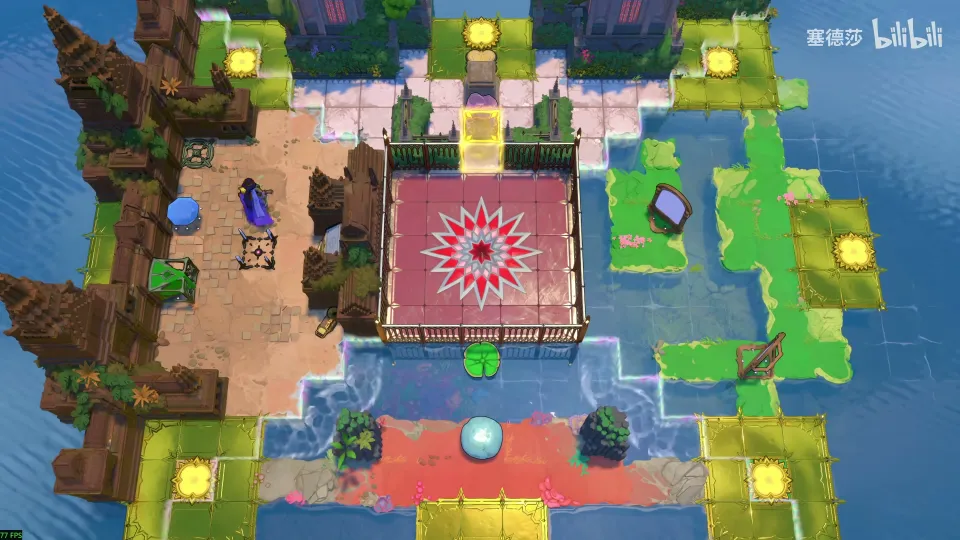
- Push the green beam emitter into place and push the gem onto the activator. (0:31)
- Knock the lily pad right so it drifts up to the top. (0:37)
- Push the stone right, push the upper mirror into place and push the lower mirror left. The green beam now runs all the way round. (0:44)
- Walk through the wall in the green beam and take the stone out, so it holds the button. The big star opens. (0:52)
Puzzle 1
Key idea (Heroes): push the goblins into each other so they cancel out. (YouTube 2:53 · 塞德莎 3:33)
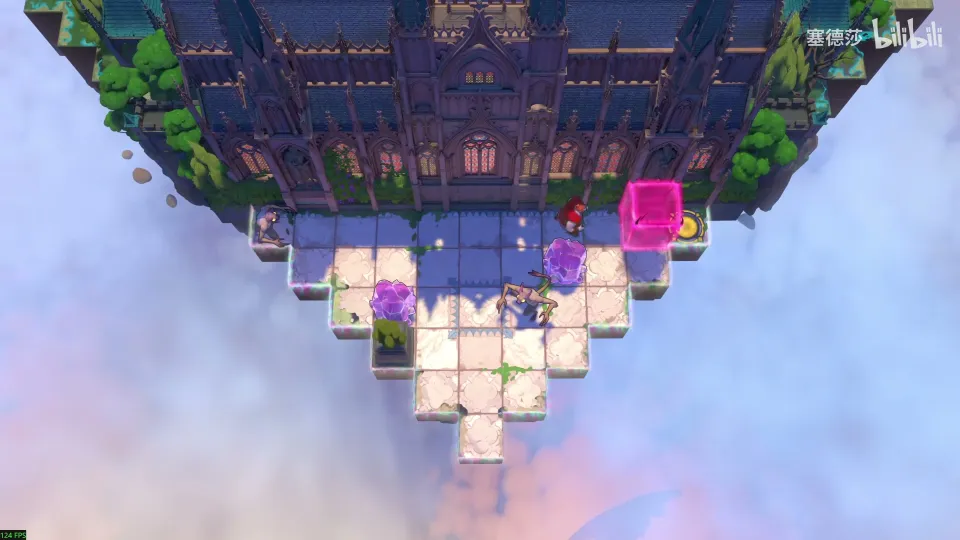
- Push the goblin towards the top-left so it meets the other goblin and both disappear. (3:36)
- If you push one tile too far, go up and then left to line it up again. (3:40)
Puzzle 2
Key idea (Mirrors): the mirror first fetches the crystal, then carries you to its farthest reflection point next to the exit island. (YouTube 3:20 · 塞德莎 3:49)
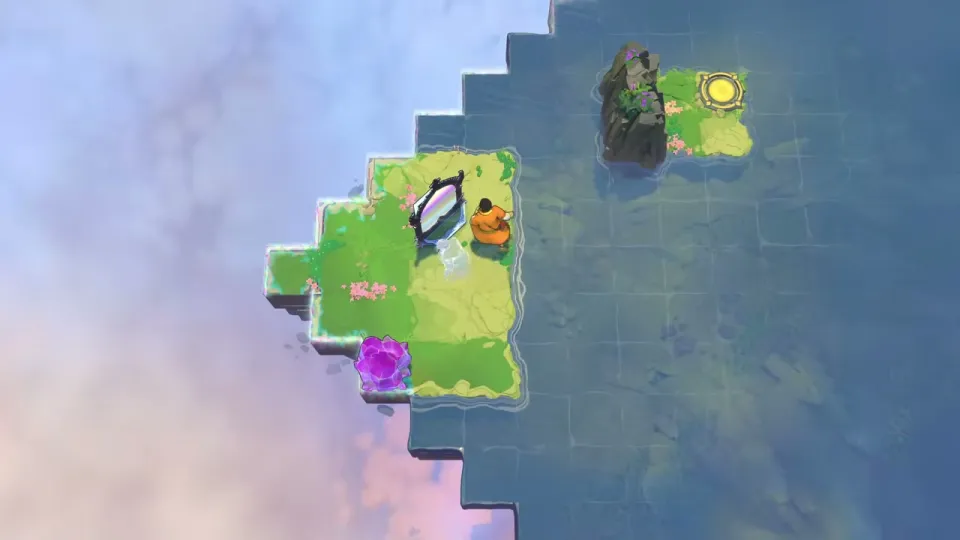
- Reflect the crystal out with the mirror and leave it on the marked tile. (3:53)
- Use the farthest reflection point to send yourself across, then walk to the exit. (3:58)
Puzzle 3
Key idea (Stones): you need a stone out in the water, and you get it there by stacking two: sink one stone first, then push the second across it. (YouTube 3:42 · 塞德莎 4:04)
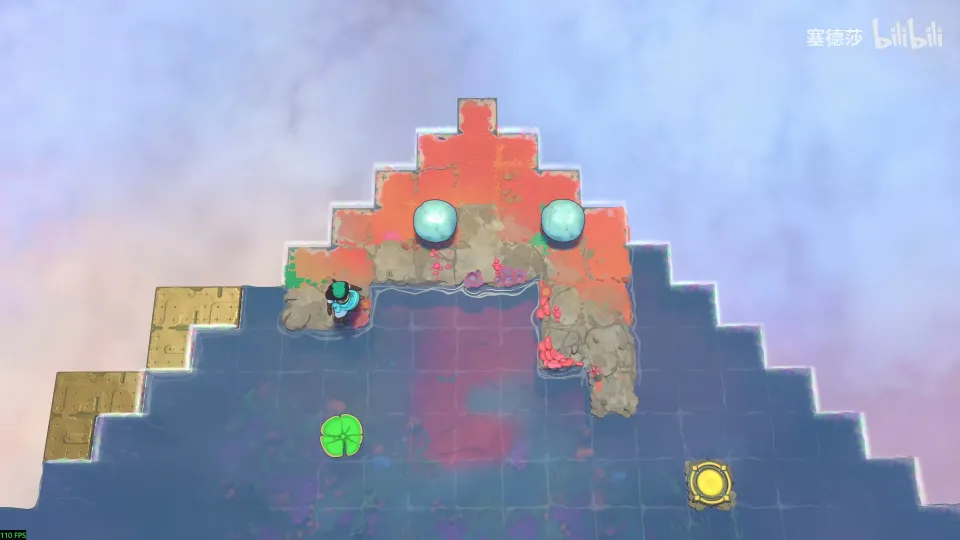
- Put one stone on the marked tile first. (4:33)
- Push from the left so it sinks. Now the other stone can be pushed left over it. (4:35)
- Ride the lily pad to the yellow exit. If the lily pad sinks or vanishes, see the note on the fixed bug above. (4:10)
Puzzle 4
Key idea (Beams): wait for the robot to come out before you light the beam, then stand behind it. (YouTube 4:07 · 塞德莎 4:47)
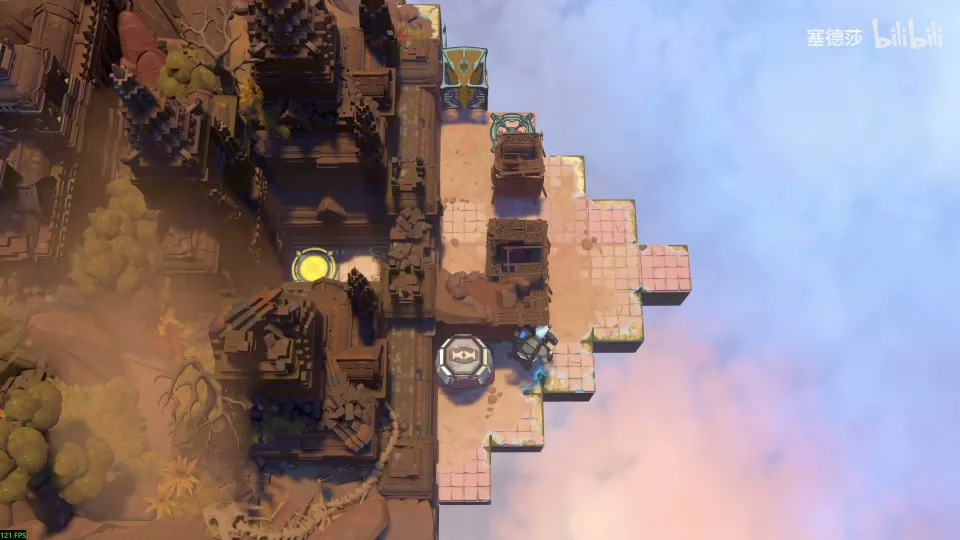
- Go down and pick up the gem. (4:51)
- Wait for the robot to come out, then put the gem in so the beam appears. (4:54)
- Go down and stand on the tile behind the robot. (4:57)
Puzzle 5
Key idea (Heroes × Mirrors): the Bard’s song drags the crystal along, and the mirror lets you get it up past the gap. Then mirror back and climb the stairs without touching the top-left. (YouTube 5:19 · 塞德莎 6:09)
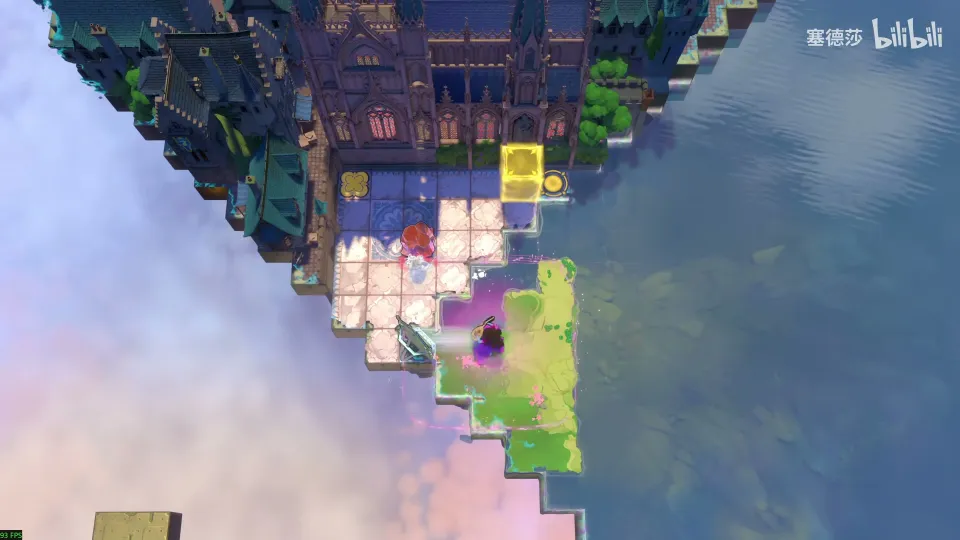
- Go down, bring the crystal up and reflect it to the top. (6:19)
- Come back and nudge the crystal one more tile up. (6:27)
- Reflect in from a spot close to the mirror. Nudge left, then one more tile. (6:30)
- Reflect back. Don’t touch the top-left, and walk up the steps to the exit. (6:39)
Puzzle 6
Key idea (Mirrors × Stones): the mirror belongs where the lily pad is now, which reflects you to the bottom-right. You can’t push the mirror onto the pad there, so bring the pad to the shore, load the mirror and send it back. (YouTube 5:51 · 塞德莎 6:45)
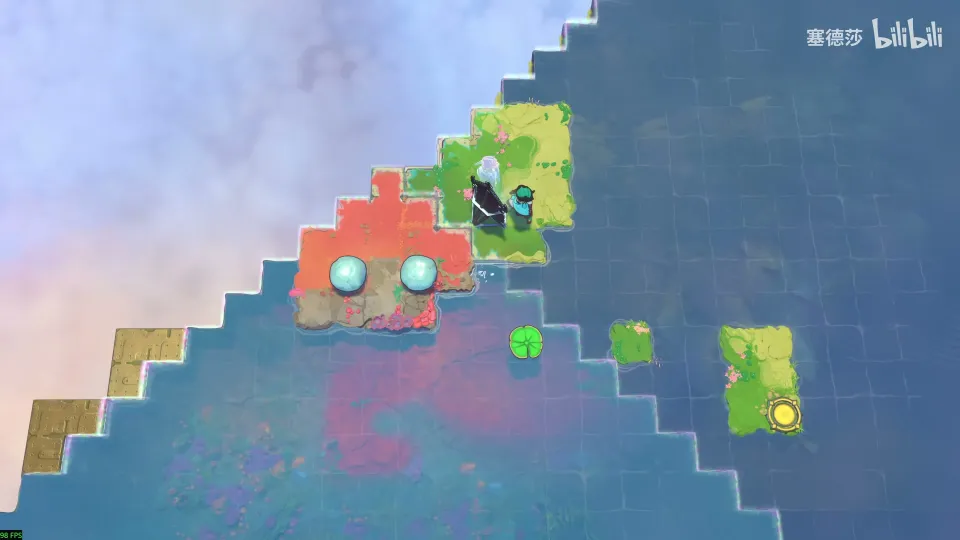
- Set up: put the mirror and a stone on the marked tiles so a skipping stone knocks the lily pad left, to the shore. (7:18)
- When the pad arrives, push the mirror onto it. (7:25)
- Knock the pad back right at the right moment. (7:27)
- Time your reflection so you land at the bottom-right exit. (7:30)
Puzzle 7
Key idea (Stones × Beams): body-block a skipping stone and use the cart on the left to push it across. (YouTube 6:25 · 塞德莎 8:13)
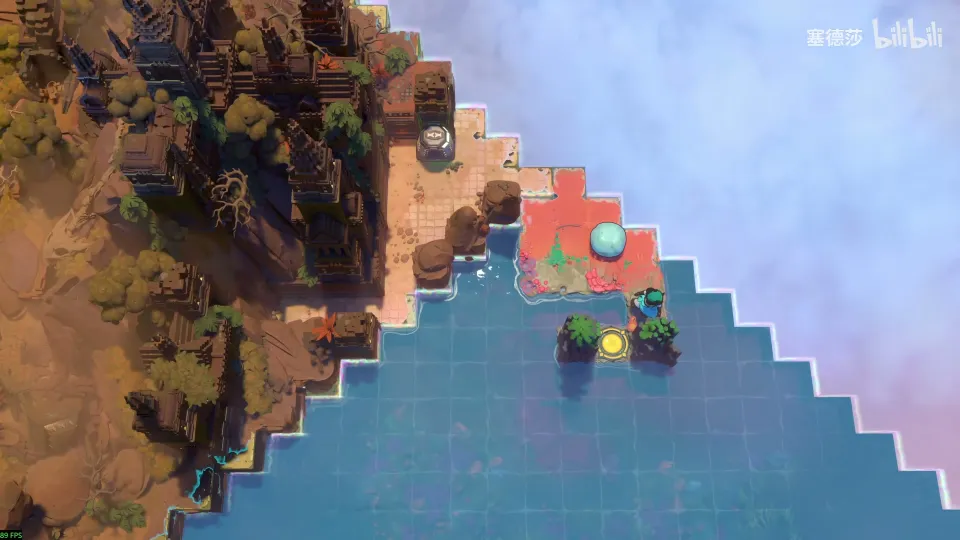
- Stand in the stone’s path to stop it where you need it. (8:18)
- Push the cart over first, then go to the marked tile. (8:25)
- Set the last piece on the marked tile, then hurry right to the exit. The narration doesn’t name the tile: watch the video at 8:32. (8:32)
Puzzle 8
Key idea (Heroes × Beams): goblins block every way up except one. Pull the green beam up along that route and walk through the wall. (YouTube 6:54 · 塞德莎 7:36)
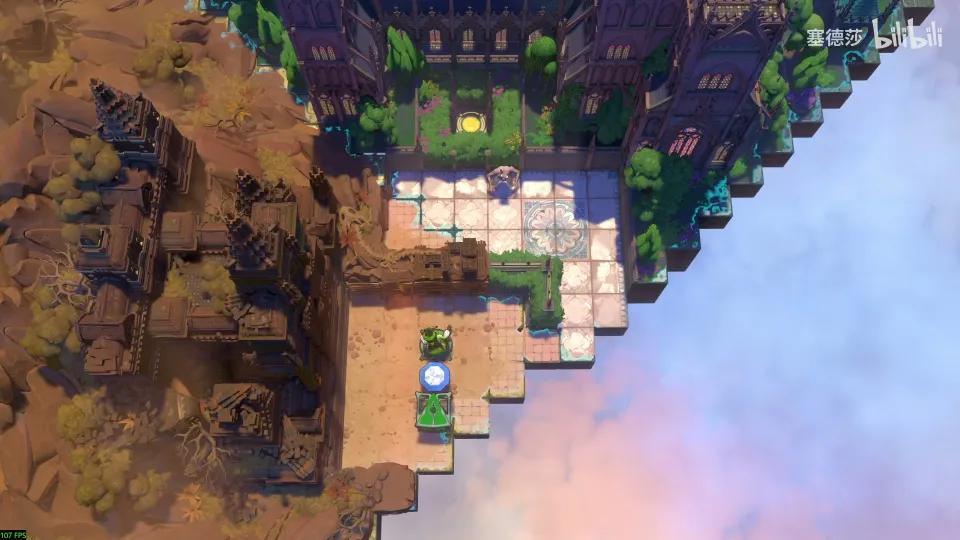
- Turn on the green beam. (7:46)
- The beam must run up along the current route to the top; the goblins block every other way. Right now the gem is in its way. (7:48)
- Pull the green beam emitter up, then walk through the wall in the beam. (8:00)
Puzzle 9
Key idea (Heroes × Stones): the Sailor skips a stone over to the island, and the Wizard swaps with it to get across. (YouTube 7:18 · 塞德莎 8:46)
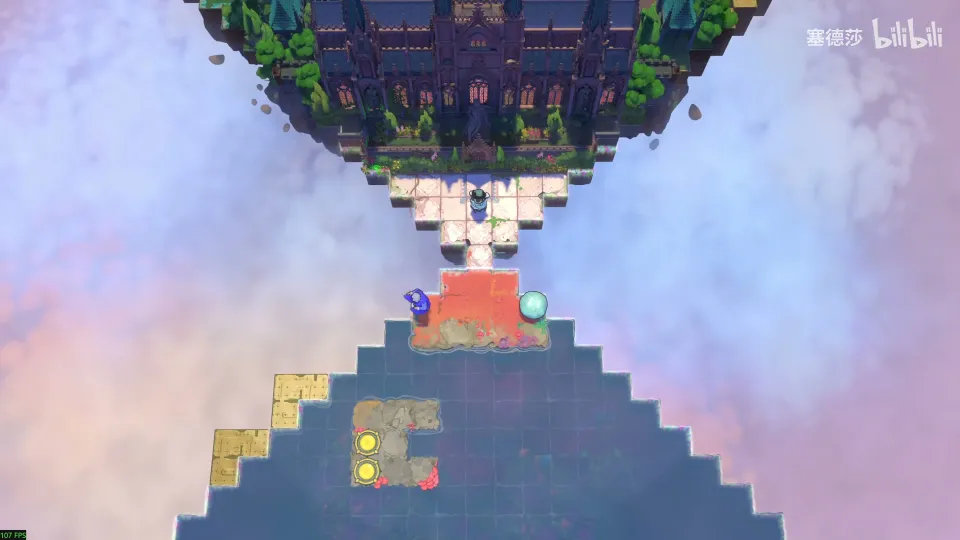
- Move the stone to the left, then have the Sailor skip it over. (8:52)
- The Wizard swaps with it onto the bottom-left island. (8:58)
- Have the Sailor push the stone one more tile down, then swap down to it. (9:05)
- Bring the Sailor down, step aside, and swap to the stone once more to reach both exits. (9:10)
Puzzle 10
Key idea (Mirrors × Beams): turn the purple beam to face right and ride it to the purple box at the top-left. For the second exit, turn the beam away, step one tile and turn it back. (YouTube 7:51 · 塞德莎 9:21)
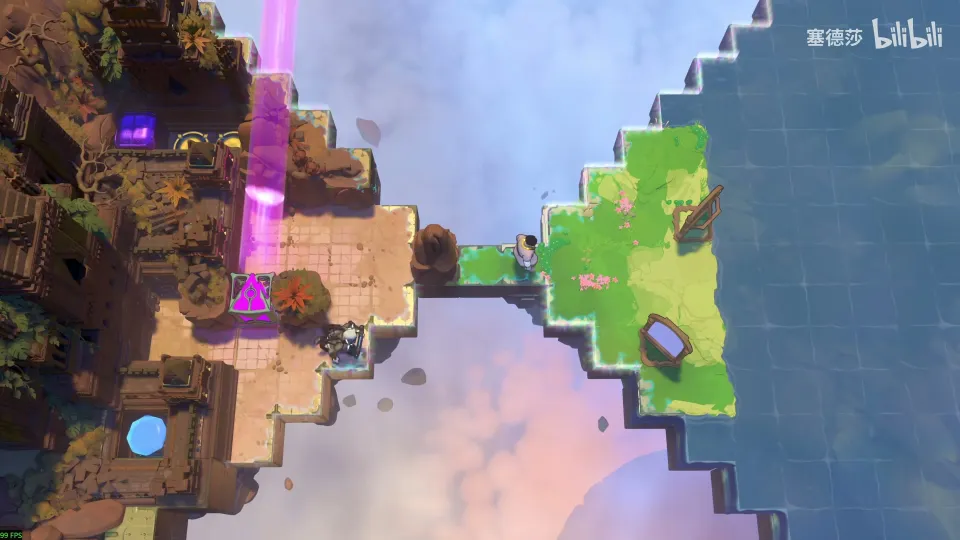
- Turn the purple beam up, then down, then right; that’s the only order the layout allows. (9:26)
- The goal is to ride the beam’s far end to the purple box at the top-left. Move the mirror up and set the piece on the marked tile. (9:33)
- Send the Trader in first. (9:49)
- For the exit right of the Trader, the Explorer turns the beam another way, steps one tile right, turns it back and rides across. (9:57)
Puzzle 11
Key idea (Heroes × Mirrors × Beams): the mirror is fixed and both of its reflection points are in the water, so park a goblin on each to stand on. (YouTube 9:13 · 塞德莎 12:15)
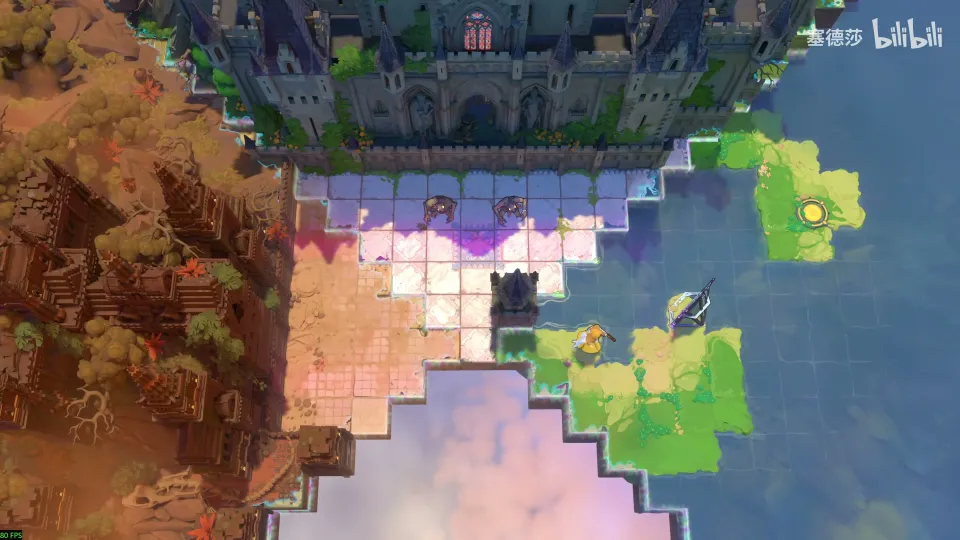
- Pick up the item next to the start first. (12:21)
- You have to reflect to the top-right, but both reflection points are in the water. (12:28)
- Move one goblin onto the first point and the other onto the second. (12:37)
- Come up from below and reflect to the exit. (12:47)
Puzzle 12
Key idea (Heroes × Mirrors × Stones): walk up the dragon’s fire line after the mirror bends it. Halfway there is no tile for the Cleric, so first put a skipping stone there as a stepping point. (YouTube 9:37 · 塞德莎 11:05)
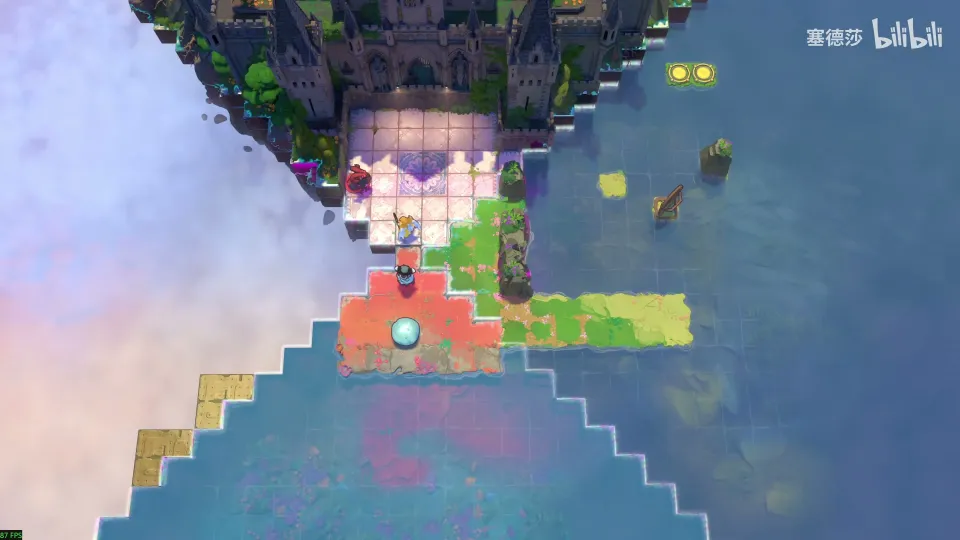
- The target is the top-right, along the fire line the mirror reflects. (11:13)
- The Sailor can push the floating Cleric partway, but only the Sailor can step onto the halfway point. The Cleric needs a stone there. (11:31)
- Push the dragon up first and let the Cleric body-block the gap above. (11:50)
- Push the stone up so it lands on the halfway point. (11:58)
- Come back, pull the stone back down, head right and switch heroes to finish. (12:00)
Puzzle 13
Key idea (Mirrors × Stones × Beams): to open the red door, the red beam has to run one row lower, and only a skipping stone can get there to move it. There is no spot to push a stone upward, so use the mirror to turn a sideways skip into an upward one. (YouTube 10:15 · 塞德莎 13:54)
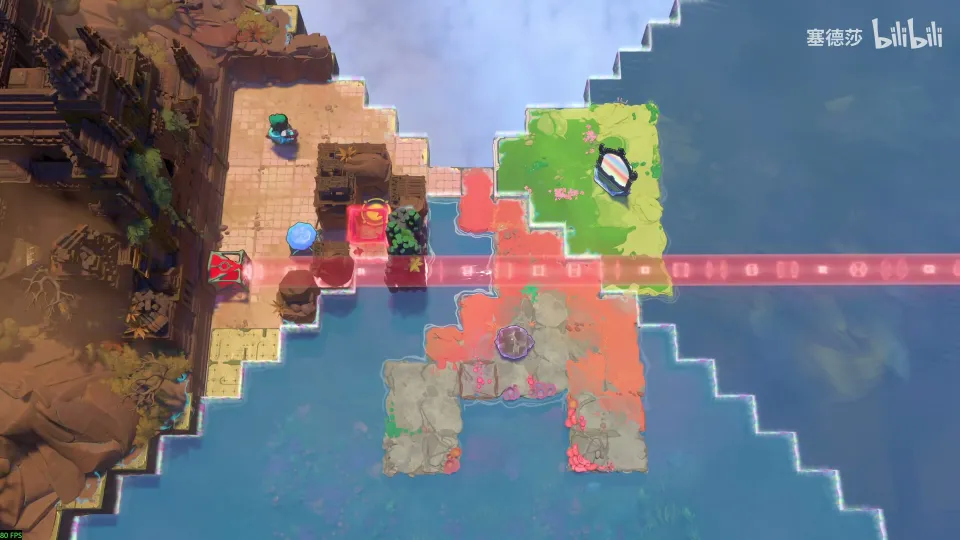
- Firing the red beam straight doesn’t work: the gem blocks it. Settle for one row lower. (14:02)
- You can’t reach the target yourself; only a skipping stone can. (14:15)
- Place the mirror so it turns a left-to-right skip upward. (14:29)
- Push the stone left to right from the marked tile, reflect it, and it stops in exactly the right place. Walk to the exit. (14:37)
Puzzle 14
Key idea (Heroes × Stones × Beams): ride the purple beam’s far end twice. The first time the big stone ends the beam; the second time the Druid turns a drifting stone into a plant at the right moment, and the plant ends the beam. (YouTube 11:08 · 塞德莎 12:54)
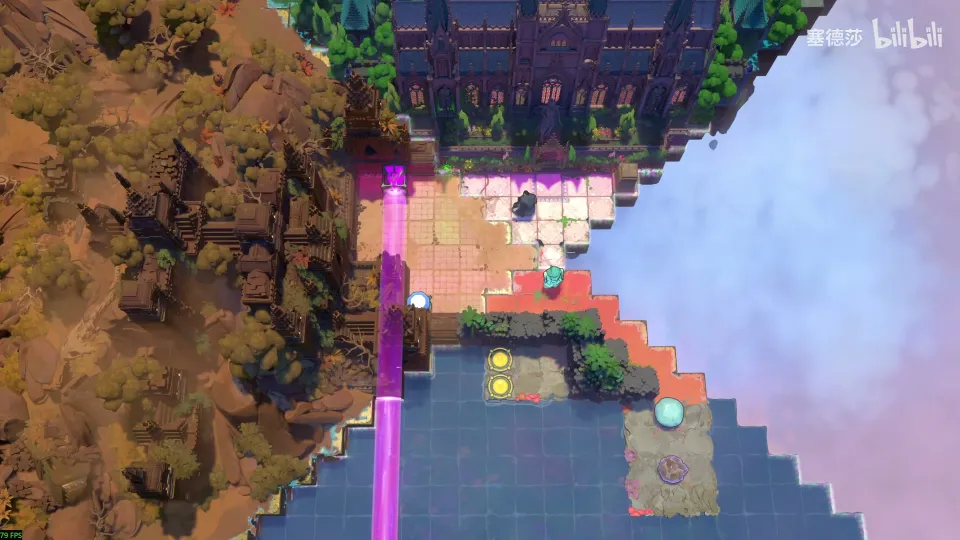
- For the first ride, the big stone that blocks light is the end point. Push the purple beam emitter a little right and keep the Druid waiting nearby. (13:06)
- Have the Sailor push, and go down when the timing is right. (13:20)
- Push the crystal stone left, switch to the Druid and turn it into a plant at the right moment, so it stops in the middle. (13:38)
- The plant blocks light. Push the purple beam one more tile right and ride it to the exit. (13:45)
Puzzle 15
Key idea (all four worlds): the yellow button at the top-left is walled in, so only the purple beam’s far end can put something on it, and it can’t be a hero. A dragon won’t work, so it has to be the skipping stone: send it up with the mirror, have the Warrior push it left along the top row, and switch on the purple beam just as it passes. (YouTube 12:39 · 塞德莎 16:05)
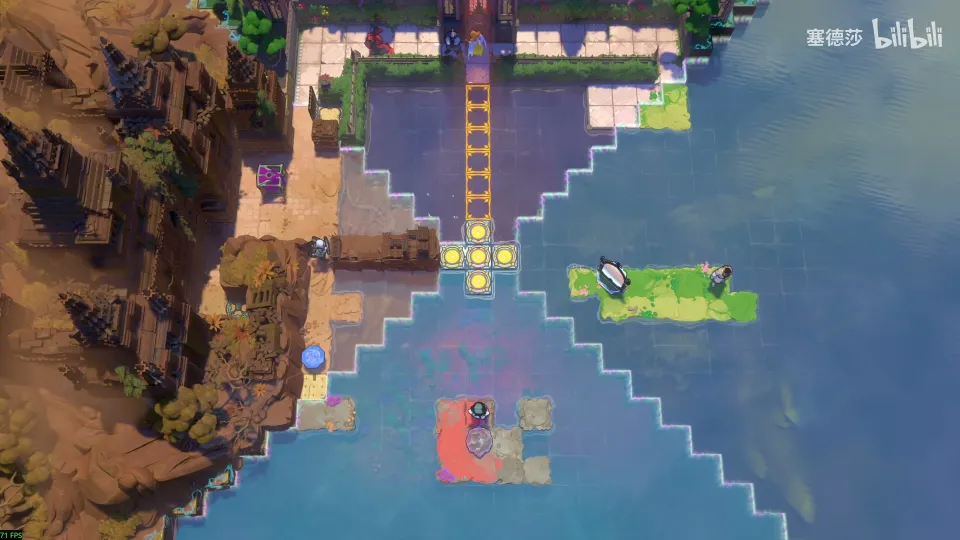
- Why not the dragon: the purple beam passes through it, and nothing can push it left into the button. (16:39)
- Plan: with the purple beam pointing right, the stone must be travelling left along the top row when the beam takes it in. (17:01)
- Getting it up: place the mirror on the marked tile. A skip to the right then continues upward after the reflection. (17:34)
- Getting it left: put the dragon breathing fire to the left, the Cleric and the Warrior on the marked tiles, ready to push the stone left as it arrives. (18:07)
- Keep the purple beam off until then, or nothing else works. Right after the push, put the gem in the activator at the bottom-left. (18:34)
- Setup in order: the Trader pushes the mirror into place and is done; the Explorer picks up the gem and waits; the Warrior steps aside; bring the Cleric over; move the dragon into place; move the purple beam emitter to its spot without switching it on. (19:10)
- Run it: the Sailor skips the stone right, it reflects, the Warrior pushes it left at the right moment, then the Explorer places the gem. The stone lands on the button. (19:58)
- Clean up: take the gem back, move the Warrior back, park the Cleric where the others can climb up, fetch the two heroes at the bottom-right, then send everyone to the exit. (20:15)
Finishing this room completes the Endgame (Steam achievement “Endgame”, “Complete the Endgame”).
After the Endgame: The Exit
- If the cage at the bottom-left doesn’t open, 塞德莎 had to press Z once to make it open in his version. (21:44)
- Go down and touch the sign: it unlocks The Exit (塞德莎’s N5W5). The way through has a few easy pushes; follow 塞德莎 from 22:22 if you get stuck.
- Leaving through the final exit closes the game on purpose. Load the save again and you are back on the tile just before it. To get back to the main map, 塞德莎 takes the purple beam back and the elevator. (31:25)
The game doesn’t end here: a second stage follows. See how to ascend to start it, and Endgame High for its ending.