Light Follows the Mirror (our working name; in-game Chinese 光随镜转, English name not confirmed yet) is a small post-game area of the Mirrors × Beamcasters crossover, where the Trader’s mirrors from the Mirror Isles (East) meet the beams of Vault of the Beamcasters (West). Its rooms are built around crystal mirrors: mirrors that beams act on, so they walk through walls, float on water and stop purple beams. This page solves all 5 puzzles and the overworld puzzle at the entrance.
Where it is: on the ground layer in the far south-west, on the tile 塞德莎 labels S4W5, just below Reflected Beams. It opens after the first ending: once a cage on the ground layer is unlocked, push one more stone across and walk in. The title card shows at 23:55.
How to use this page: we found no English video of this area, so the puzzle numbers are ours and follow the order of 塞德莎’s narrated walkthrough. Each heading has the key idea and a link to the moment the room starts, and the numbered steps link to the same video. Puzzle 2 is three stages played one after another. Puzzle 5 is the area’s big star room. Short walks on the area map between rooms are folded into a Getting there line.
Rules that matter here
- Mirrors, as in the Mirror Isles. A Trader’s mirror reflects you or an object across it, as long as you stand in the same block. Two mirrors facing each other copy a mirror, and a U-shaped reflection (out and back through two mirrors) turns a mirror 90° clockwise (puzzle 1). A reflection can also split you into two copies, so on a plain walk don’t reflect (puzzle 1).
- Beams, as in the West. Green lets you walk through walls, orange makes every step two tiles, red opens red doors, and purple carries you to the far end of the beam. Mirrors bend beams.
- Crystal mirrors take beam powers. A crystal mirror counts as alive, like a crystal stone. In green it slides through walls (puzzle 2). In orange it floats on water, so it can ferry a hero (puzzle 3). It blocks a purple beam, so it can be the end you teleport to (puzzles 4 and 5).
- Shallow water and orange. Where the water is one tile deep, an orange beam’s two-tile drop lands on the floor under it, so in orange you can walk on the water.
Overworld puzzle 1
Key idea: the way in. Reflect the crystal mirror below to the left so the red beam fires left, then bring the mirror back up and go through. (塞德莎 P41 23:42)
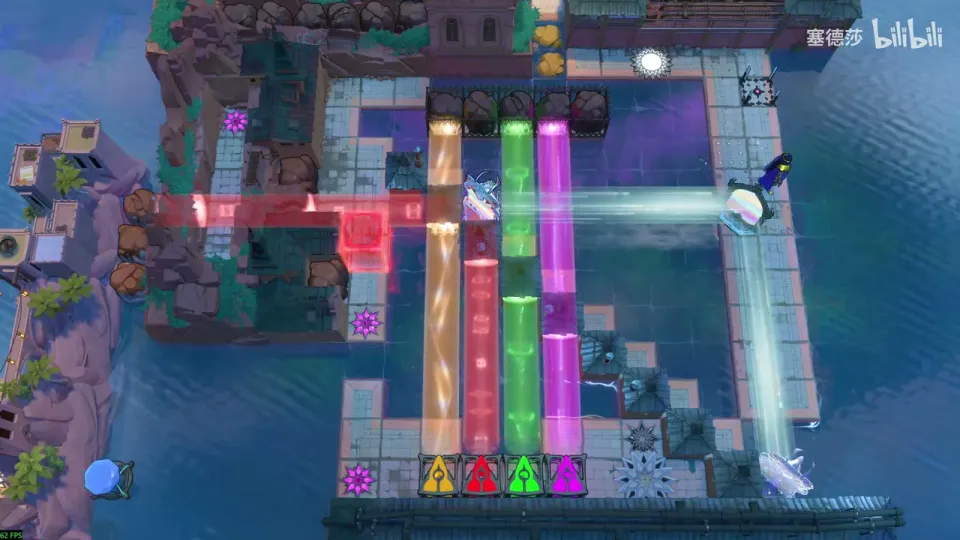
Getting there: after the first ending, walk along the ground layer to the cage 塞德莎 shows. Once it is unlocked, push one more stone across to walk in. (P41 23:19, 23:29)
- Reflect the crystal mirror at the bottom over to the left spot, so the red beam fires left. (23:55)
- Bring the mirror back up and go across to the first room. (24:05)
Puzzle 1
Key idea: the beam’s route is fixed: one mirror sends it left, the next down, the next right, the next up, and a fifth sends it in, a spiral round the red block. That needs five mirrors, but you only have three. Copy mirrors with two facing mirrors, then fix a copy that faces the wrong way with a U-shaped reflection. (塞德莎 P41 24:16)
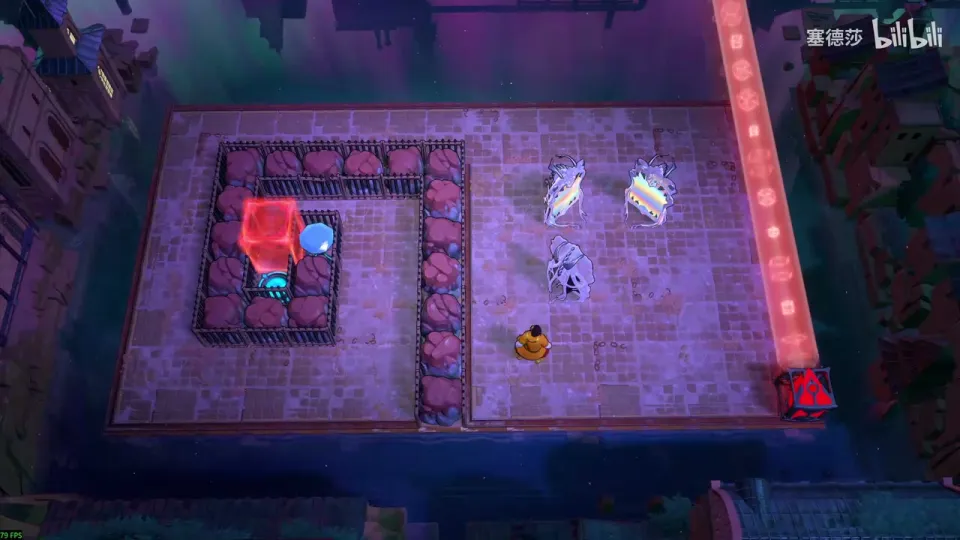
- Work out the route first: left, down, right, up, then into the target. There is only one way to lay it. (24:24)
- Copy mirrors: move this mirror here and put that one there, copy one, then move the first one up and the other one away. You now have five, but one faces the wrong way. (24:31, 24:45)
- Put the wrong mirror on the tile shown and set up a U-shaped reflection above it. One U-shaped reflection turns the mirror 90° clockwise, which is the right way. (24:57)
- Push the mirrors in, starting with the innermost. If you place the outer ones first, the inner ones get stuck on the way in. (25:16)
- The rest is hauling: the bottom-left, top-left and top-right mirrors. Then walk to the exit. Don’t reflect on the way, because that would split you in two. (25:37, 25:57)
Puzzle 2
Key idea: three stages in a row, all about a crystal mirror in a green beam: in green it slides through walls just as you do. In stage 1 you push it through the wall to the left platform. In stage 2 you turn it and park it in the right column. In stage 3 you tuck it inside a wall so that three mirrors tie the green beam into a knot that crosses itself. (塞德莎 P41 26:25)
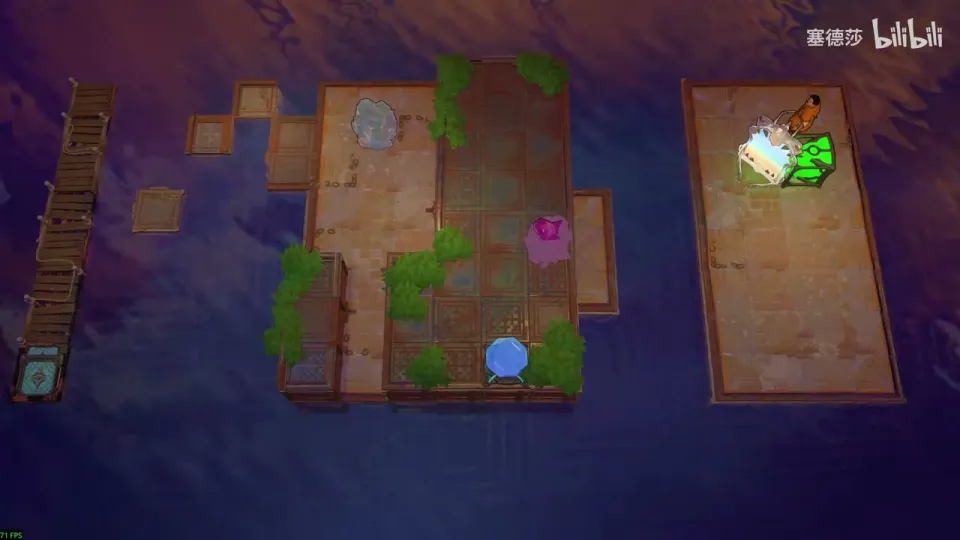
Getting there: go back and move the magic mirror back, then over to the green beam, and go through. (P41 25:57)
- Stage 1: two water holes are in the way. Set the crystal mirror on the tile shown, walk through the wall in green and push the two stones over to fill the holes. (26:30)
- Push the crystal mirror left all the way. It passes the walls because the green beam is on it. Push the green emitter down one tile, then push the mirror up onto the left platform. (26:55)
- Stage 2: the crystal mirror faces the wrong way; reflect it off the other mirror to turn it. Push it across, go through the wall and push it up: it is now in the right column. (27:25)
- Aim the green beam at the spot shown so you can pass the walls again, and come back through by reflecting. Turn the lower crystal mirror, push the mirror down and reflect in. (27:45)
- That reflection would leave you pressed against the wall. So first step into the wall while you are still in green, then reflect: the green beam now comes up, you climb back out of the wall and push the mirror down. (28:05, 28:18)
- Stage 3: with three mirrors, send the green beam right, down, left and up so that it crosses itself, with a turn in the middle. The crystal mirror has to reflect from inside a wall. (28:33)
- Set up the right side first: push this mirror over, push the next one, and swap the two mirrors’ places. (28:54)
- Tuck the magic mirror into the wall and turn the beam upward to finish. (29:03)
Puzzle 3
Key idea: both heroes have to reach the two goals at the bottom right, by walking on the water in orange. The Explorer starts shut in and has to be fetched. The crystal mirror floats on the water in orange too, so push it down the column and reflect the Explorer to the lower platform on the way, then ferry him over. (塞德莎 P41 29:30)
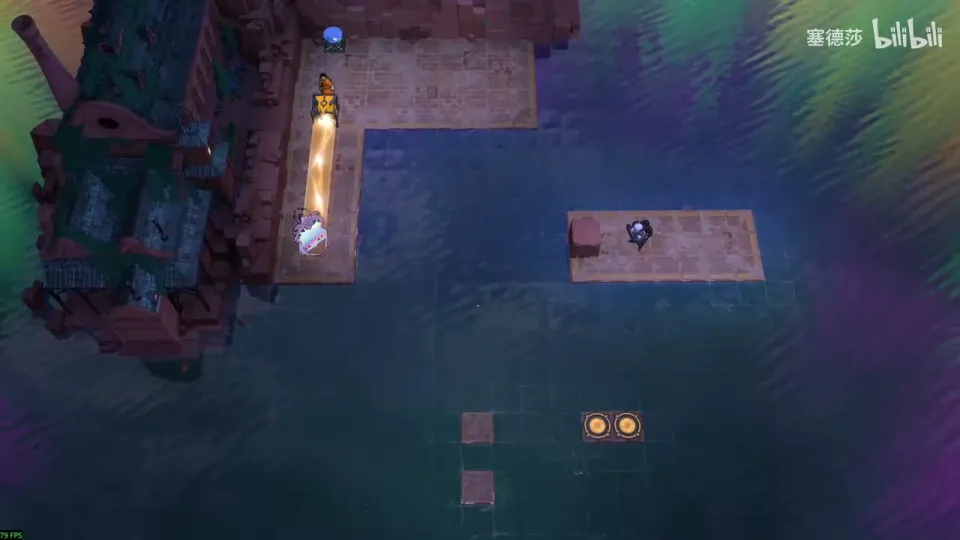
Getting there: go back, move the magic mirror down again and switch to the orange beam. Jump right to the spot shown, push the mirror aside and come down into the room. (P41 29:10)
- The final route: push the orange beam up so you can water-walk from it to the goals; the parity has to fit. (29:45)
- Put the orange beam at the top of this column. Mind the parity: put the crystal mirror on the tile shown. (30:35)
- Go in and push the mirror down the column. At the spot shown, reflect the Explorer onto the bottom platform. (30:55)
- Keep pushing to the next tile, push him right, and one reflection puts him on the orange beam; go right to the goal. Bring the Trader the same way. (31:10)
- On the way back, water-walk over in orange. Reset, because the magic mirror ended up in the water, then set up the purple beam and ride its end down to the next room. (31:30)
Puzzle 4
Key idea: the goal is in the middle, and there is a wall or building two tiles away on every side, so an orange double jump can never land on it. The only way up is a purple end-teleport onto the tile next to the goal, and the only thing that can be that end is the crystal mirror. (塞德莎 P41 32:13)
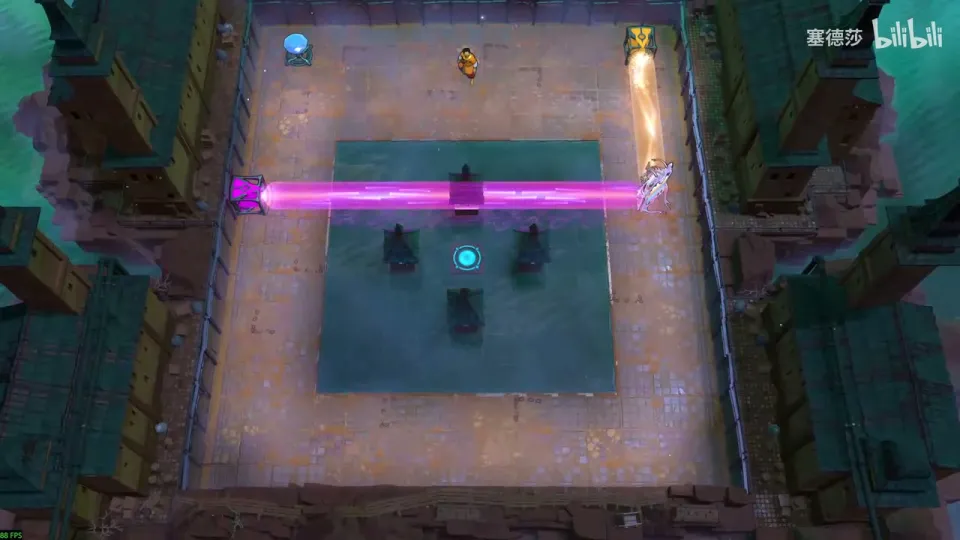
- Put the purple emitter on the tile shown. (32:50)
- Put the crystal mirror on the tile 塞德莎 checks, then push it down. (33:04)
- Ride the purple beam to its end beside the goal and step right onto the goal. (33:10)
Puzzle 5
Key idea: the big star room, and the same trick as puzzle 4: end-teleport onto the crystal mirror beside the goal. This time the purple emitter is fixed in place, so use the three spare mirrors for a detour. The purple beam hits the magic mirror, goes down, loops round and comes back into the magic mirror’s back. (塞德莎 P41 33:22)
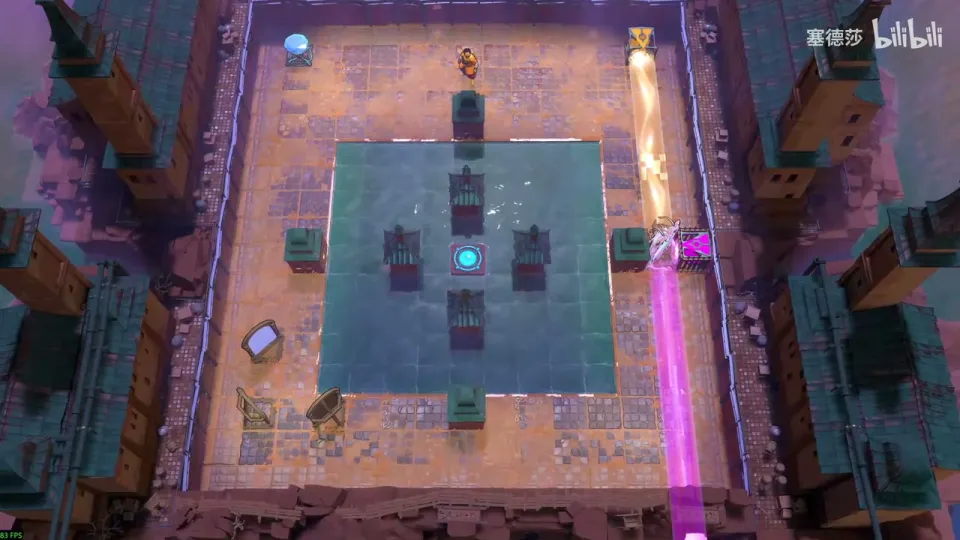
- Put the pink-purple emitter on the tile shown. (33:35)
- Put the crystal mirror where it was in puzzle 4; you will push it down later. (33:51)
- Push the three spare mirrors down into place, one on each tile shown. (33:59)
- Now the purple beam hits the magic mirror, goes down, loops round and hits the magic mirror from behind. Push the crystal mirror down. (34:06)
- Step into the purple beam and move the opposite way; you land on the goal. (34:21)
That clears Light Follows the Mirror. 塞德莎 calls it the east–west crossover’s extra big star room, and says it completes the ground layer: every room on the first map is solved. He then checks each area’s sign. (P41 34:21, 34:38)