Dragons, Squeezed (our working name; in-game Chinese 巨龙挤一挤, English name not confirmed yet) is the dragon area just below Stones Illuminated. It is part of the same crossover, where the Explorer’s beams from Vault of the Beamcasters (West) meet the Sailor’s skipping stones and lily pads (South), and it adds dragons: creatures you swap places with, that block beams and give off multicoloured light. This page solves all 10 puzzles and the overworld puzzle between them.
Where it is: under Stones Illuminated, on the tiles 塞德莎 labels S4W2 and S4W3. He calls the place 巨龙遗迹 (Dragon Ruins). It is locked on a first run, and he comes back after the first ending: go up, take the teleporter, come down into the fog below Stones Illuminated, and the title card appears at 16:55.
How to use this page: we found no English video of this area, so the puzzle numbers are ours and follow the order of 塞德莎’s narrated walkthrough. Each heading has the key idea and a link to the moment the room starts, and the numbered steps link to the same video. Puzzles 1–3 have no dragons: an entrance room, a fence room and one of the four large crystal bonus rooms (the south-west one). From puzzle 4 on, 塞德莎 says, you are in the real dragon part.
Rules that matter here
- Beams, as in Stones Illuminated. Standing in a beam gives you its power: yellow breaks things, cyan lets you push, orange makes you jump two tiles, and purple carries you to the far end of the beam. Crystal skipping stones let light through and take a beam’s power too. Using the purple beam’s end to get somewhere is what 塞德莎 calls an endpoint jump.
- Blue beams. This area adds a deep blue beam. In it, crystal skipping stones (and you) pass through walls and drop past the fences that block normal pushes. Most of puzzles 1–3 is about where the blue emitters point.
- Multicoloured light. Added to another beam, it strengthens it: orange jumps three tiles instead of two, cyan pulls instead of pushing, and yellow plus multicoloured shatters every crystal in the same group at once. Under yellow plus multicoloured, a blocked crystal you push breaks but can’t break what it’s pressed against. Under plain yellow it breaks that too, which can ruin a room.
- Dragons swap. Walk into a dragon and you trade places with it (塞德莎’s “swap”). A swap needs room around the dragon, so you can’t swap a dragon through a one-tile-wide gap. Lay a stone in the water to make a path, or go round and swap twice.
- Dragons block light and glow. A dragon stops a beam, so it can be the end of a purple beam you jump along. It also lights the tiles around it with multicoloured light, which is where the three-tile orange jumps and the cyan pulls come from. Dragons can ride lily pads, and you can swap with one from a passing pad.
Puzzle 1
Key idea: the entrance room is about the multicoloured blast and has nothing to do with dragons. Break a crystal where the yellow and multicoloured beams cross so the whole group shatters, then use a cart to carry the lily pad left before knocking it down with the skipping stone. (塞德莎 P39 17:00)
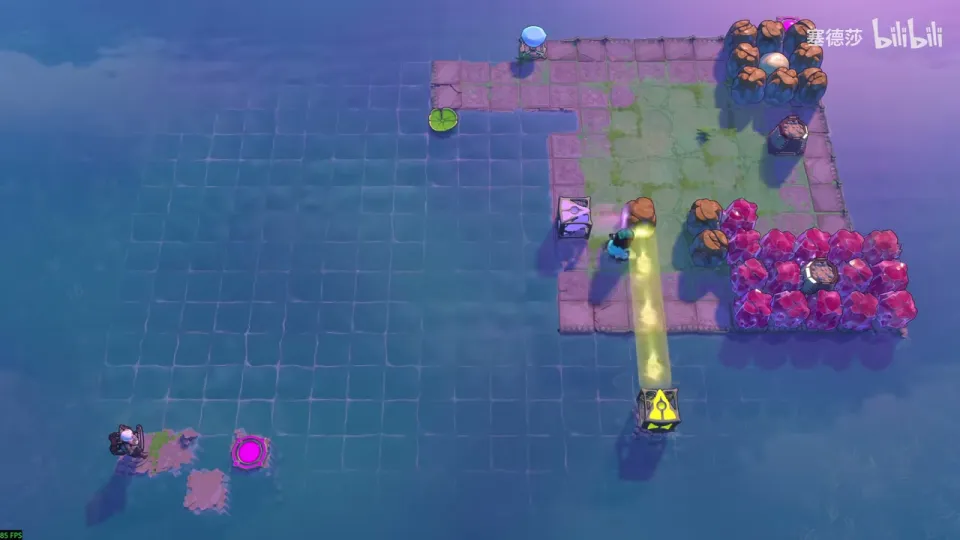
- Light the beams. Where the yellow and multicoloured beams cross, push a crystal so that it can’t move: it breaks into shards, and its whole group goes with it. (17:14)
- Don’t switch the multicoloured beam off to do this with yellow alone. A crystal is alive, so under plain yellow it also breaks whatever it is pressed against. You can’t afford to lose anything else here, and the room becomes unsolvable. (17:46)
- Under yellow plus multicoloured, a pushed crystal can’t break its neighbour. Line things up so that pushing up breaks only the crystal and not the skipping stone beside it; the bottom-right group then shatters. (18:27)
- That leaves two carts and a skipping stone. The stone is for knocking the lily pad down, but the pad first has to go a few columns left. A cart pushed down carries the pad along with it, which 塞德莎 tests here. (19:02)
- Break one cart into shards at the spot he marks. Push the other cart down, blast it with the multicoloured light the moment the pad reaches the right column, then knock the pad down with the skipping stone. (20:01)
Overworld puzzle 1
Key idea: on the area map, a fenced pond with two blue emitters. Point the blue beams so that a crystal skipping stone you push passes through the wall and drops past the fences. (塞德莎 P39 20:27)
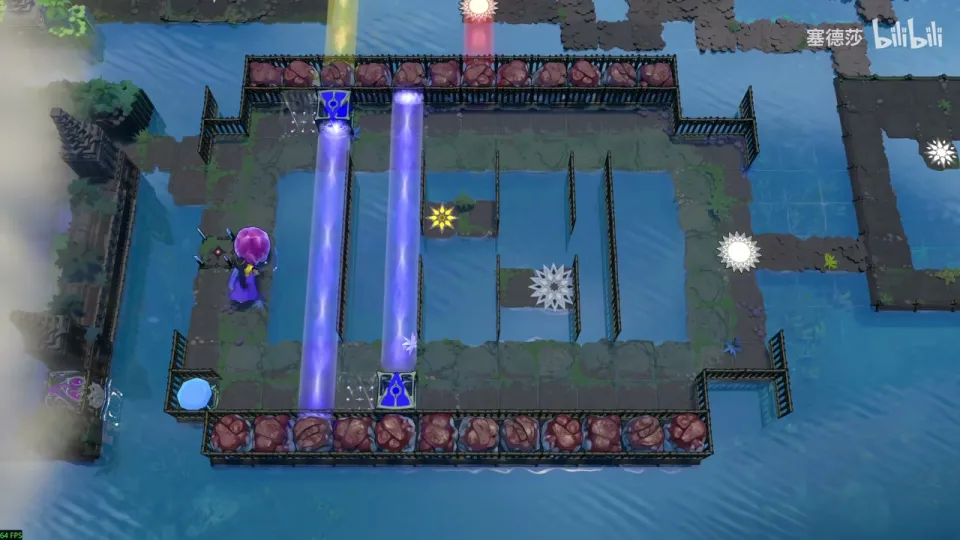
- Place the two blue beams as he shows and switch them on. Push the crystal skipping stone in from this side: it goes through the wall, then drops through the fence. (20:31)
- You use this pond again to reach puzzle 3 (see “Getting there” below).
Puzzle 2
Key idea: fences, a skipping stone and two blue beams. The stone can only cross a fence when you push it down from the raised platform at the top, or when it moves through blue light. Move the emitters so the beams are where the stone needs them, without letting the stone block a beam. (塞德莎 P39 20:50)
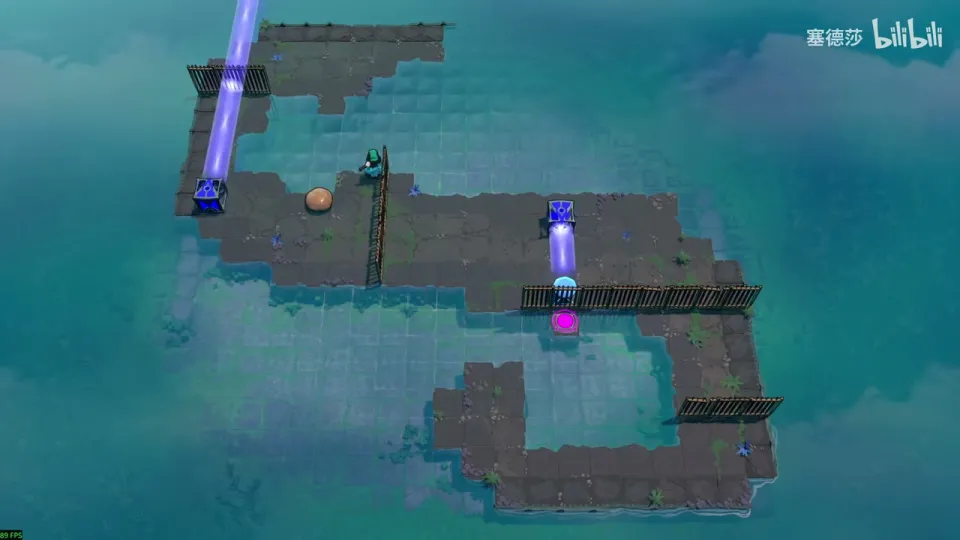
- First take the skipping stone out. It can only cross the fence when pushed down from the platform at the top, so push it back up first. (20:50)
- To push it up further, park it on the fence to the left so it doesn’t block the blue beam. Come down, move the blue beam over, then fetch the stone through the blue light and push it down. (21:10)
- Second half: to carry on right from the middle, push the upward-firing blue emitter here and cross. (21:32)
- To get back, set the downward-firing emitter so you can go left, then turn it back so you can come in from the right. Push the stone down, left, then right, cross the blue light again and push it out. Pick the beam back up. (21:53)
- Last part: bring the stone next to the goal. Jump into the water here, knock it down through the fence and push it right. Keep the beam pointing right first, or the stone blocks it once it’s across (塞德莎 makes this slip himself). Then push it down and back left, take it out, push it onto any tile beside the goal, and go in through the blue beam. (22:15)
Puzzle 3
Key idea: one of the four large crystal bonus rooms (塞德莎 says this is the south-west one). You only have to get the crystal skipping stone out and down beside the goal. The hard step needs timing: push the blue emitter into place just as the stone reaches the fence. (塞德莎 P39 23:10)
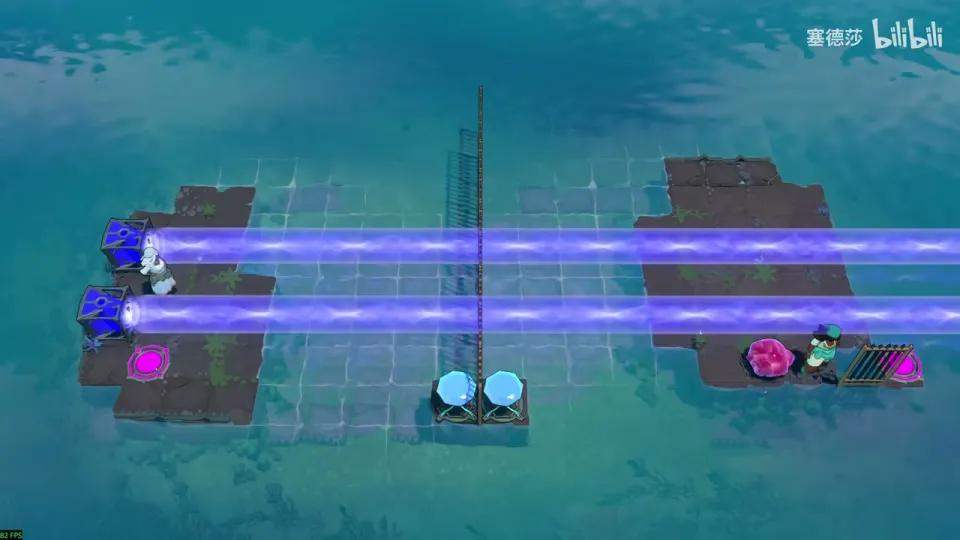
Getting there: back at the fenced pond from the overworld puzzle, reset it. Aim the two blue beams so the crystal stone passes both fences on its way right. Then move the upper emitter so the stone runs left along the bottom row and stops in the pool below this room. (22:48)
- At the start there’s only one move: fire one blue beam across and push left, and the stone comes over. (23:19)
- Push right from this spot to send the stone back, cross the fence in the blue light, then push left from here. (23:28)
- Now the stone has to go right again to get out, and no blue beam reaches that spot. You can’t set a second emitter up there: the right-facing one from step 1 is stuck where it is, and could only be pushed into the water. (23:42)
- Timing: push right, come down, and just as the stone is about to cross the fence, push the blue emitter up. It lights the stone for that moment and the stone passes. (24:23)
- Before finishing, don’t push this one down yet or it goes straight through the fence. Push it into the water too, then finish. (24:46)
Puzzle 4
Key idea: the first real dragon room. The dragon blocks light, so it can be the end of the purple beam, and walking into it swaps your places. Swap it into the right row, endpoint-jump to the middle and to the goal. (塞德莎 P39 25:14)
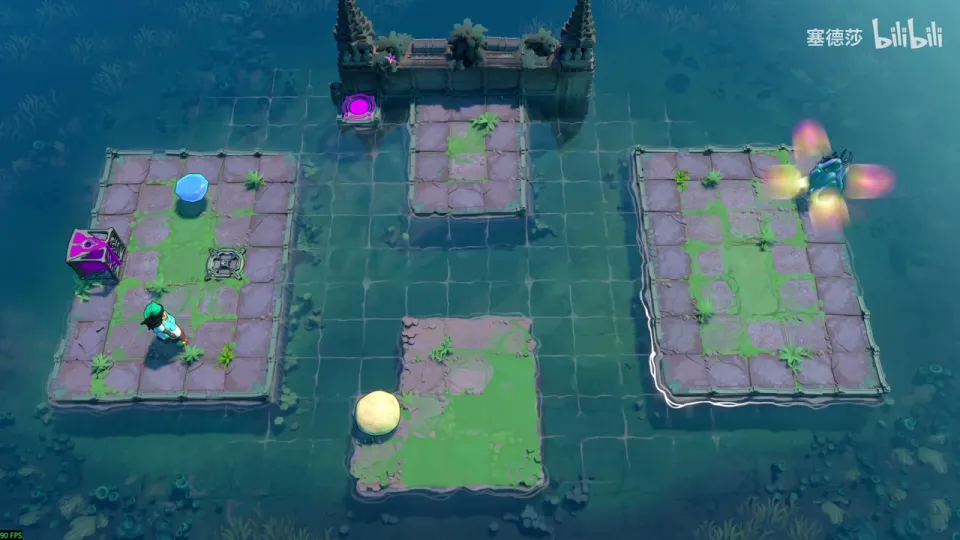
- The plan: endpoint-jump down, push the stone up, endpoint-jump up to the goal. Light the beam first. (25:19)
- Jump to the side. Then walk into the dragon to swap places with it, which puts the dragon in this row. Go left and bring the beam down onto it. (25:40)
- Endpoint-jump to the middle and push the stone up, then go right and move the dragon again. (26:22)
- Move it up here, come back up, aim the beam at the dragon and endpoint-jump to the goal. (26:32)
Puzzle 5
Key idea: the orange beam alone jumps two tiles and drops you in the water. Bring the dragon over so its multicoloured light stretches the jump to three. You can’t swap it through the narrow gap, so lay a stone in the water to make a path. (塞德莎 P39 26:50)
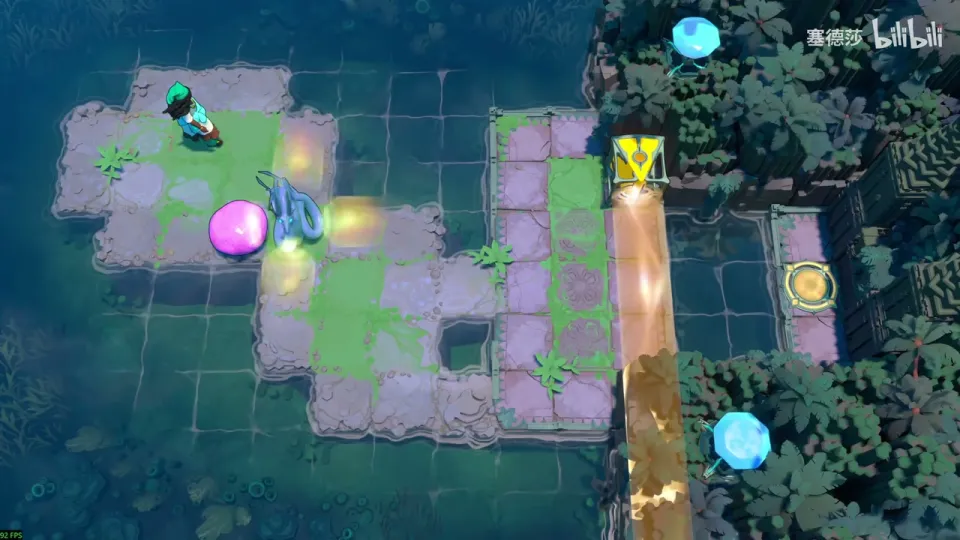
- You can’t swap the dragon down through this narrow gap. Instead, fill one tile of water nearby with the stone. (27:23)
- Put the dragon here, push the stone left against the dragon, and swap. (27:34)
- The rest is plain swapping. Move the dragon to this spot, jump in from above where the multicoloured and orange light overlap, and jump right onto the goal. (27:45)
Puzzle 6
Key idea: the only way to remove the crystal here is cyan plus multicoloured light, which turns your push into a pull. So the dragon has to reach the bottom right, and the bottleneck means you swap it through twice, using lily pads. (塞德莎 P39 28:21)
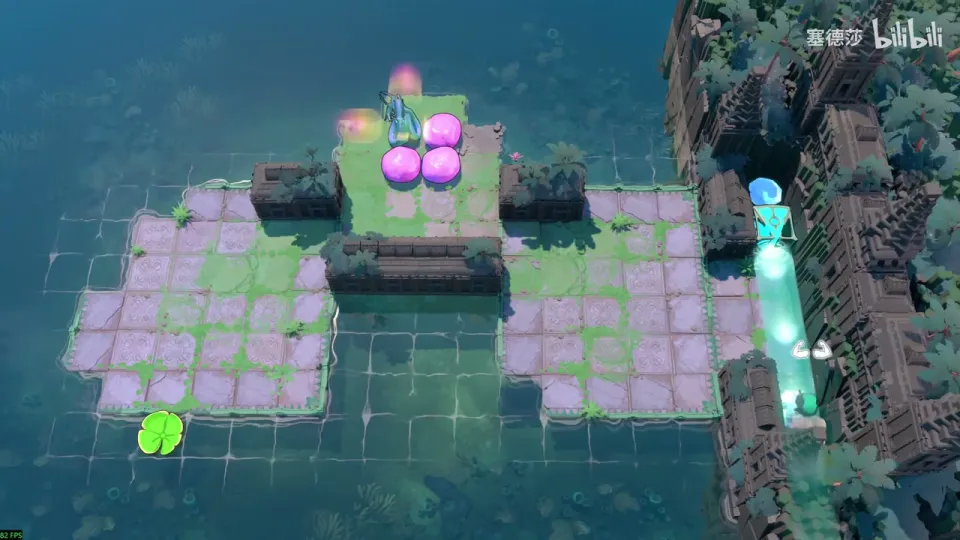
Getting there: the two rooms here are entered differently. This one, the more central, is an endpoint jump; if you land wrong, swap the dragon one tile left and jump again. (28:06)
- To get the dragon through the bottleneck: put it here, go round the outside and swap, then go round again and swap a second time. (28:44)
- Set up first. On the left, put one skipping stone beside the lily pad to start it, and push a second one over to change the pad’s direction later. Put another at the bottom right, also to turn the pad. (29:04)
- Put the dragon here. Push the stone down and cross. Knock the pad back, come up and swap once. Wait for the pad here, send it right, and cross once more to swap the dragon over. (29:25)
- Bring the dragon down, pull the crystal up in the cyan light, and pull once more to finish. (29:56)
Puzzle 7
Key idea: you need a path across the middle. The obvious plan, the dragon as a stopper while you push the far stone, leaves the near stone impossible to push. Move the left stone first with a stacked-stone push, then use the dragon as the stopper for the other one. (塞德莎 P39 30:36)
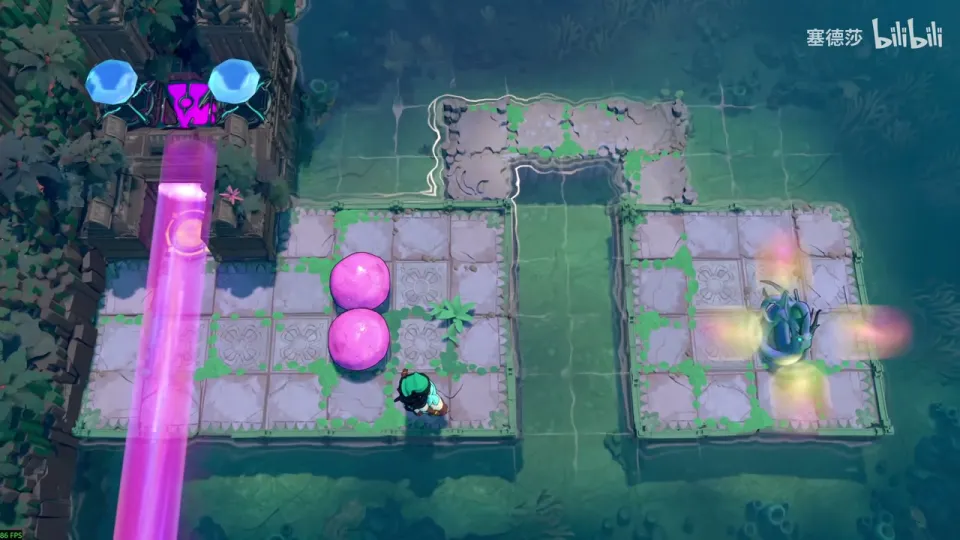
Getting there: this room can’t be reached with an endpoint jump. Instead, move the dragon so it blocks the purple beam and walk in. (30:10)
- Don’t start by parking the dragon here and pushing the far stone: the near stone then can’t be pushed at all. (30:46)
- Push the left stone first, with two stones stacked: block with one stone here, push left, then with the dragon as the stopper push the other stone down. That finishes the room. (31:08)
Puzzle 8
Key idea: the dragon has to reach the left side, and the only way across is the lily pad at the top right. You can’t swap it onto the pad from the shore. Ride the pad yourself and swap as you pass the dragon, and swap it off the same way. (塞德莎 P39 32:08)
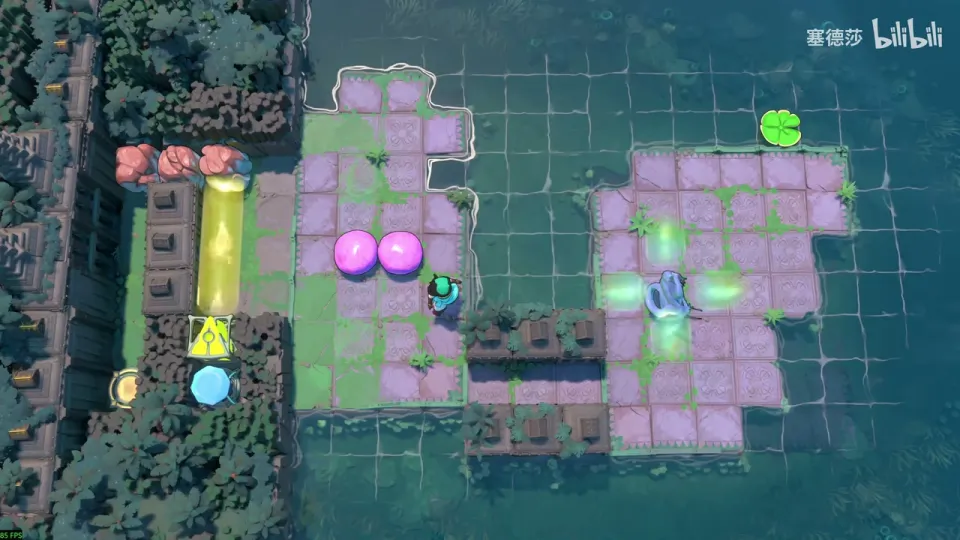
Getting there: after puzzle 7, swap the dragon across and endpoint-jump in here; this frees a skipping stone. Push that stone here to shorten the purple beam, put the dragon here, and endpoint-jump into this room. (31:21)
- Swapping the dragon onto the pad from land doesn’t work, because with the dragon there you can’t reach the pad. Instead, bring the stone to the shore, start the pad, stand on it, and swap with the dragon as the pad passes it. (32:27)
- To get it off: the pad stops here, so knock it down from this spot and it floats down. Wait here, swap the dragon onto land as the pad arrives, and the pad carries on down so you can come back. (32:58)
- Do it: push the stone over, start the pad, swap. Go left, start this pad, swap early, come back up. (33:19)
- To finish, break this with the stone first, then blast with yellow plus multicoloured. (33:29)
Puzzle 9
Key idea: the dragon has to reach the top right, and one lily pad can’t take it there. Pass it from one moving pad to another: you stand on the second pad and swap as the dragon’s pad floats by. (塞德莎 P39 33:57)
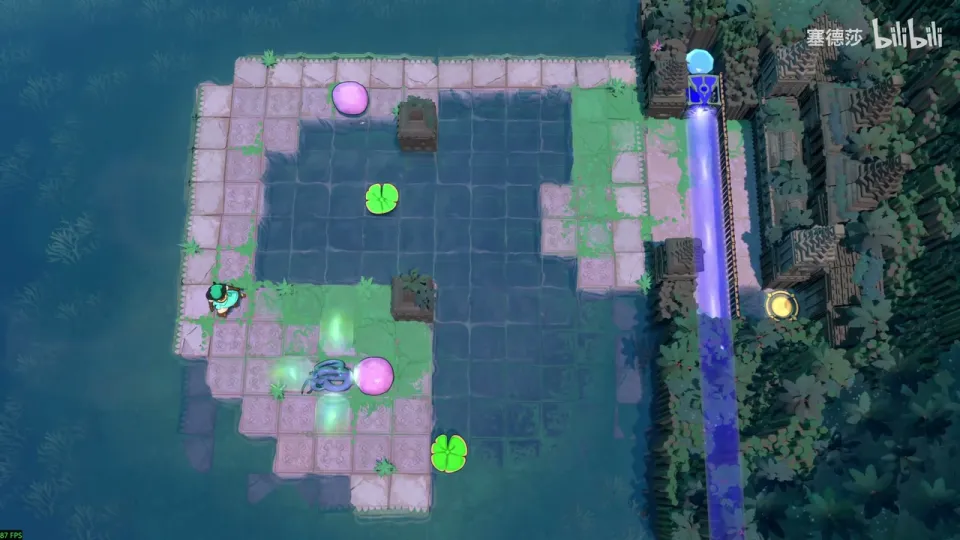
- Getting the dragon onto the bottom-right pad is easy. But that pad only floats up to here, so it can’t take the dragon right. Use the middle pad, the one below you, for a handover. (34:26)
- When the bottom-right pad brings the dragon to the middle, you must be standing on the other pad to swap. So first knock that pad down to the shore. You can’t just put the dragon straight onto that pad: there’s no room for the dragon to get on. (34:56)
- Timing: start the lower pad, get the dragon on, then start the other pad at the right moment so the two meet without stopping. Swap, and the dragon crosses over. (35:16)
- The goal is to break two fences (they don’t have to be next to each other). Then push the pad in, dive, fetch the stone and push it right from here. Move the dragon aside, push the stone down and right. (35:49)
Puzzle 10
Key idea: the big room, with the Sailor and the Explorer. Only the Explorer can make the dragon follow him, and he can leave it anywhere, even on water. Walk the dragon to the bottom right, light the orange beams, then jump three tiles to the goal with orange plus the dragon’s multicoloured light. (塞德莎 P39 36:40)
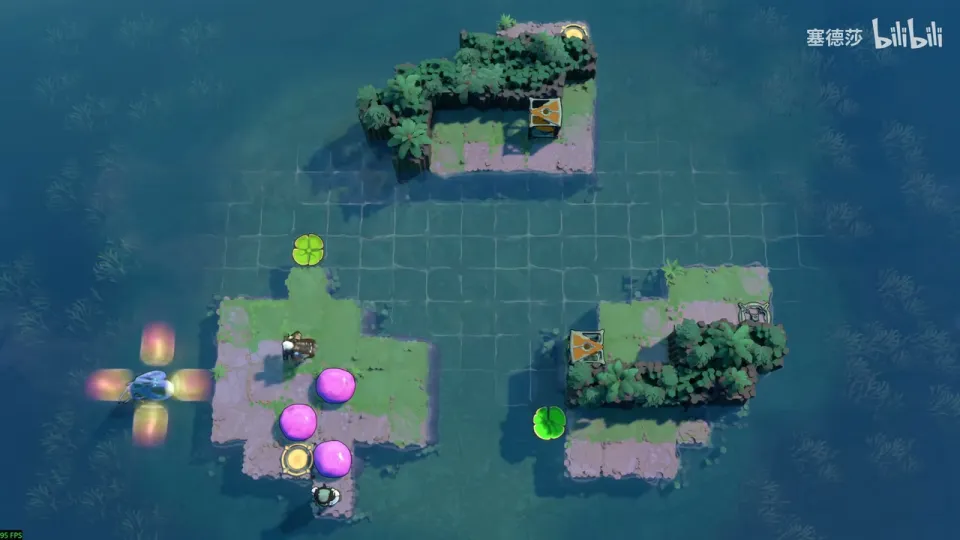
Getting there: the entrance is out of reach at first. Push the skipping stone here and endpoint-jump from the same spot as before, landing on the big room’s platform. (36:08)
- Fill this spot with a stone first, so the Explorer can stand next to the dragon and use his special action to have it follow him. (36:58)
- The plan: walk the dragon to the bottom right and have the Explorer light the activator there, which turns on all the orange beams. Then take the dragon up top and jump three tiles to the goal with orange plus multicoloured. (37:21)
- Reaching the bottom right takes an orange jump of two or three tiles, then the lily pad, which the Sailor starts from a distance with a skipping stone. Set the stones up. (37:43)
- The dragon can’t follow a jump, but the Explorer can drop it on water. Send this pad right and drop the dragon here, next to it. Light the beam, jump down and start the pad. When the pad floats past the dragon, call it to follow again. (38:03)
- That handover is the whole trick; finish with the three-tile jump. (38:43)
That clears this south-west bonus area. The neighbouring rooms are on Stones Illuminated.