Spoilers: this page covers the third stage of Order of the Sinking Star, after the second ending. It sticks to puzzle solutions, but the zone names and layouts give away third-stage content. If you haven’t gone down yet, see how to descend first.
Low Skipping Stones is our name for the Skipping Stones part of Antipode Low, the lowest layer, which opens after the second ending (see how to descend and the Antipode Low hub). It is the Low counterpart of Skipping Stones to Lonely Homes and High Skipping Stones: lily pads, currents and skipping stones again, now combined with mirrors, dragons and the heroes, plus a zone of “flat objects” you can pick up and move. This page solves all 19 puzzles and the 6 overworld puzzles 塞德莎 plays in the south.
Where it is: from Crossroads Low, head south. 塞德莎 labels the map tiles S1, S2, S2E1, S2E2 and S2E3 (his part 51) and S3, S4, S3E1 and S3E2 (part 52). See also the South hub for the first-stage Skipping Stones world.
How to use this page: there was no English solution video for these rooms when we wrote it, so the numbers follow 塞德莎’s narrated walkthrough, counted straight through his parts 51 and 52 in the order he plays them. Each heading has the key idea and a link to the moment the room starts; the numbered steps link to the second where he explains that move. Short walks on the area map between rooms are folded into a Getting there line. Antipode Low has no single Skipping Stones sign: its rooms count towards crossover signs on Crossroads Low (see how to descend).
Zones at a glance (Chinese names as shown in 塞德莎’s game or part titles; all English names are our translations and unconfirmed):
| Zone (塞德莎’s Chinese name) | English name | Puzzles | 塞德莎 part |
|---|---|---|---|
| no name card (S1; his part title files it under 魔镜与河流) | – | 1–4 | P51 |
| 魔镜与河流 | Mirrors and Rivers | 5–12, overworld puzzles 1–3 | P51 |
| 扁平物件挪一挪 | Moving Flat Things | 13–17, overworld puzzle 4 | P52 |
| 魔镜跳石进阶 (from his part title; no name card shown) | Mirrors and Skipping Stones, Advanced | 18–19, overworld puzzles 5–6 | P52 |
The first four rooms sit at S1, just south of Crossroads Low. They are pure timing rooms with lily pads, and 塞德莎 calls them the dullest in the whole game. The Mirrors and Rivers name card appears after puzzles 5 and 6 and the first overworld puzzle; they share its theme, so we put them there. The Moving Flat Things card appears just after puzzle 13. On his area map only Mirrors and Rivers and Moving Flat Things are labelled in the south.
Rules that matter here
- Lily pads turn what they carry. When a lily pad turns a corner in a current, whatever stands on it turns too, a mirror included (P51 8:15). Hitting the pad straight on just as it reaches a corner stops it turning there (P51 9:12), and hitting it straight down skips half a turn (P51 10:05).
- Damming a current. A stone dropped into a current dams it, so the water takes a longer route and anything on it turns once more. Where you drop the stone matters: too early or too late and the turn comes in the wrong place (P51 10:45, P51 11:19).
- Turn priority. A current that has to turn prefers turning right; 塞德莎 says you can only force a left turn by blocking the water first (P51 13:35).
- Mirrors steer water. A mirror placed at the head of a current guides the water along its slant. 塞德莎 calls it a mechanic no earlier room teaches, used only in puzzle 9 (P51 14:42, P51 15:01).
- Separate resets. One room has a reset inside it that doesn’t reset the stone (P51 2:31). On the area map the lily-pad reset resets everything while the stone reset only resets stones (P51 16:39).
- Flat objects. Buttons, energy gates, room entrances, gem activators and lily pads all count as flat objects: they can sit on top of a crystal, a lily pad or a hero and travel with it (P52 3:03, P52 5:07). A blue energy block lifts what stands on it to the second level (P52 0:52).
- U-shaped bounces. Two mirrors set in a U send a skipping stone back the way it came; set in a Z they shift it to another row. Each bounce moves it one tile sideways (P52 13:17, P52 13:49).
- Slow down. For the timing rooms 塞德莎 holds Ctrl to slow the game (P51 7:14, P52 16:18).
Puzzle 1
S1 timing rooms (no name card)
Key idea (big star puzzle): a long ride on lily pads: board, switch pads on the way at the right moment, and reach the button at the bottom left. It is all about timing and hand-overs between pads. (塞德莎 P51 0:24)
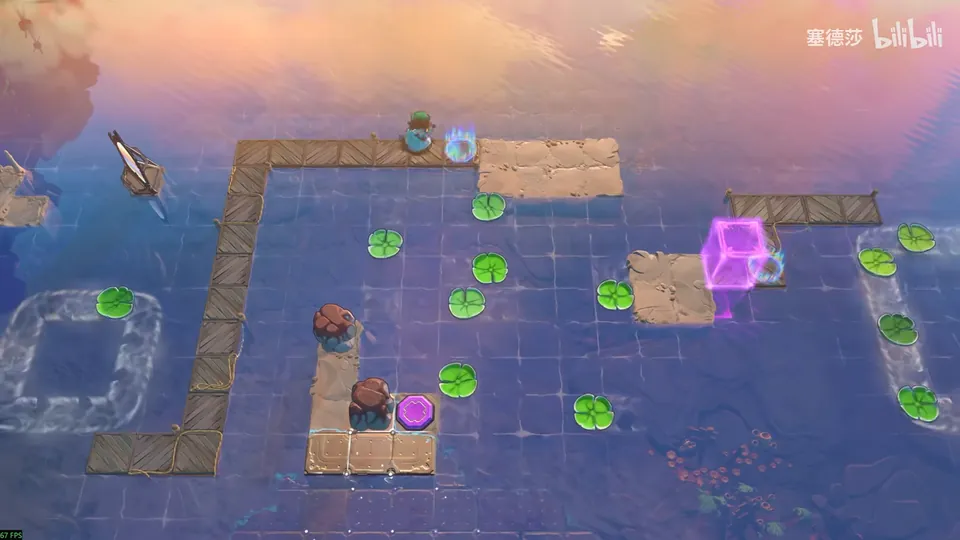
Getting there: from Crossroads Low go south; the room is in the first block. (0:12)
- At the top right only one lily pad can hand you over: of all the pads in the middle, it is the only one in step. Get to its front quickly; only it reaches the pad on the right. (0:57 · 1:13)
- The next stretch needs several hand-overs: step onto the upper three pads, ride to the end, come back onto the other three, then take the single pad to the right. Then go up against the flow. (1:21 · 1:39)
- The right side is too far away: push this stone into the water through the hole to change the current’s route. (1:48)
- Push the lily pad onto the current when the right-hand pad is on the bottom-right tile; too early doesn’t work. (2:04)
- The next part has its own reset, which doesn’t reset the stone. Push the stone down on the right, reset, then hit the stone down so the lily pad moves right, and push the stone back up. Use the reset to bring the left side in step with the right. (2:28 · 2:50)
- Shuffle back and forth between these pads until you are on the darkest green one, which can hand over to the bottom-right pad. (3:08)
- Board this pad, then the one below, and reset. Time it so your pad stops the top-left pad in the middle and makes a bridge: the top-left pad should be near this tile, a little later than you’d think. (3:28)
Puzzle 2
Key idea: two stones to place, both by pushing them onto lily pads at the right moment: one onto the button, one next to the exit. (塞德莎 P51 4:22)
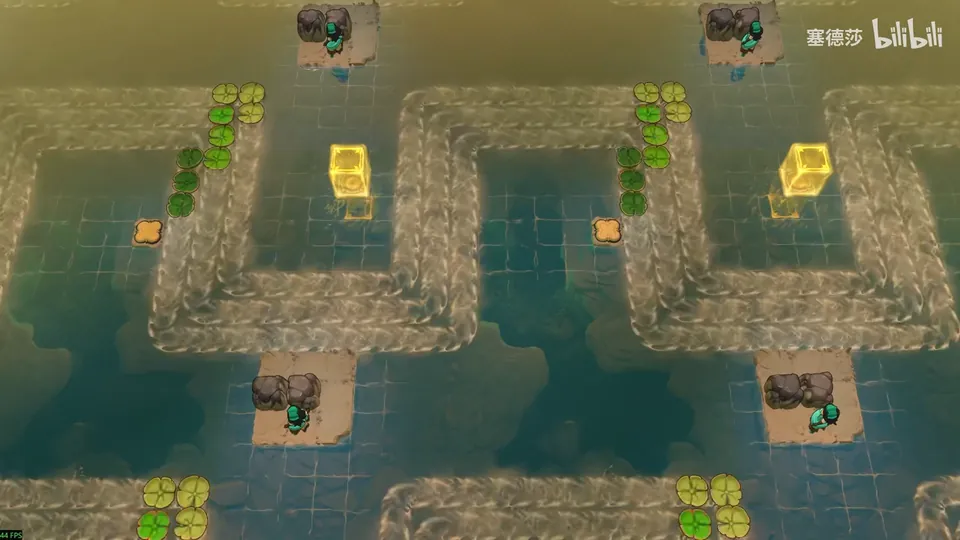
Getting there: once the cage by the lily pad has opened, go down from here. (4:12)
- Push a stone onto the button. It only reaches the button from the leftmost of the three dark lily pads below, so wait for that moment and push left. (4:29)
- Push the other stone so it ends up next to the exit: it has to go onto the top-left lily pad. Slow motion helps. (4:50 · 5:09)
- Wait here, push left, and get on straight away so you don’t wait another lap. (5:15)
Puzzle 3
Key idea: another timing room: ride over, push a stone onto the button and ride back. 塞德莎 finds it even duller than puzzle 2. (塞德莎 P51 5:56)
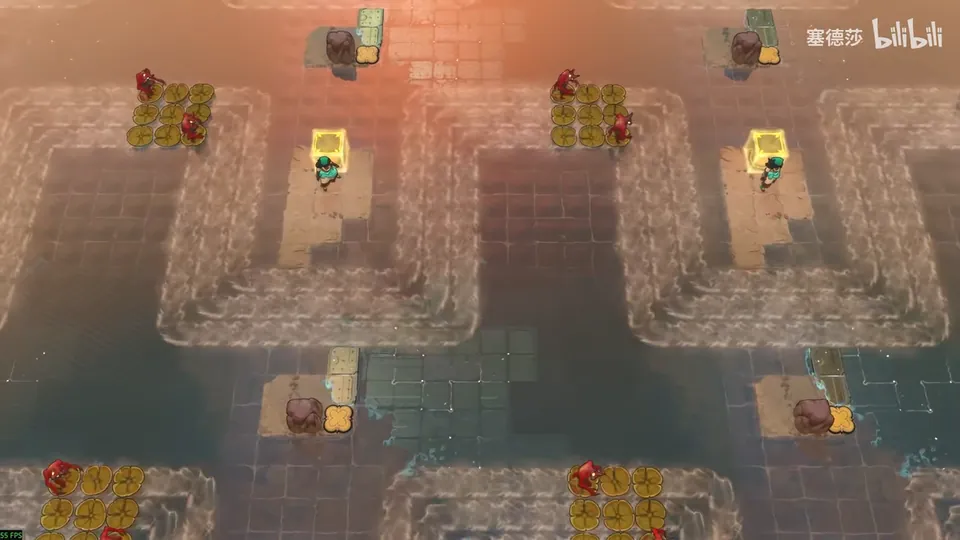
Getting there: push this stone onto the lower lily pad of the outer ring as a fire shield, come up, block the right-hand fire line here and go over. (5:39)
- Come up here and wait; you can’t move yet. (5:59)
- When it lines up, switch over, come down, push the stone onto the button and go back. (6:06)
- Dodge the goblin or it knocks you off. Come up, wait for the timing again, cross and finish back at the start. (6:18)
Puzzle 4
Key idea: because of two dragons you can’t reach the upper three rows of the top 4×4 block of lily pads or the lower three rows of the bottom one. Carry a stone round on the pads so that it ends up covering the upper dragon’s fire line completely. (塞德莎 P51 6:41)
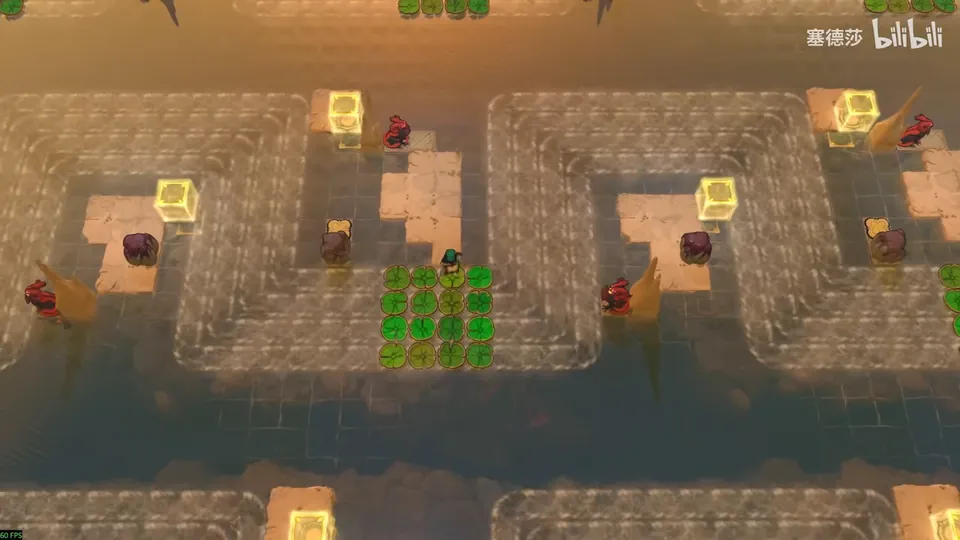
Getting there: push this one on the way. (6:32)
- Before going down, move up quickly or you get burnt. (6:57)
- Pick up the stone here, come back, move down to here and follow the lily pads. (7:03)
- Hold Ctrl throughout. Route: down three, right, up two, left, up, right; slowly push it onto this lily pad; then right, down, right and push it up two. (7:14 · 7:22)
- Wait on top, then come down: the stone now covers the upper dragon’s fire line. Go up and out. (7:38)
Puzzle 5
Mirrors and Rivers (魔镜与河流)
Key idea: the tutorial for this area. When a lily pad turns a corner in a current, whatever it carries turns with it, so a mirror on a lily pad changes its facing at each corner. (塞德莎 P51 8:12)
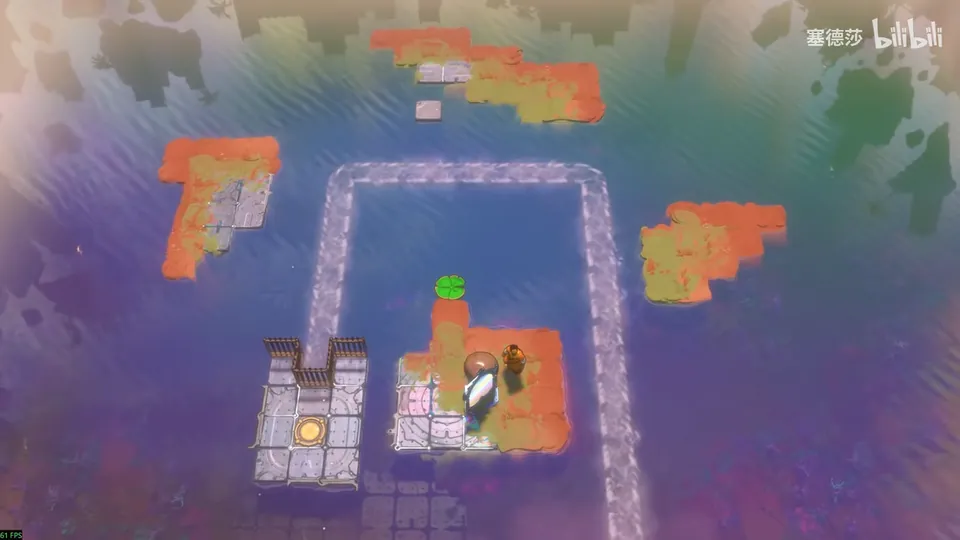
- Set off as it is and go to the island on the right. (8:26)
- Stand here: as the pad enters the current the mirror turns 90 degrees anticlockwise, and after another quarter turn you can reflect to here. (8:31)
- Stand here; after one more anticlockwise quarter turn you reflect to the exit. (8:41)
Puzzle 6
Key idea: the stone can only knock the mirror out when the mirror is on the bottom side, but by then it faces the wrong way. Turn it half round by stopping the lily pad from turning at two corners. (塞德莎 P51 8:48)
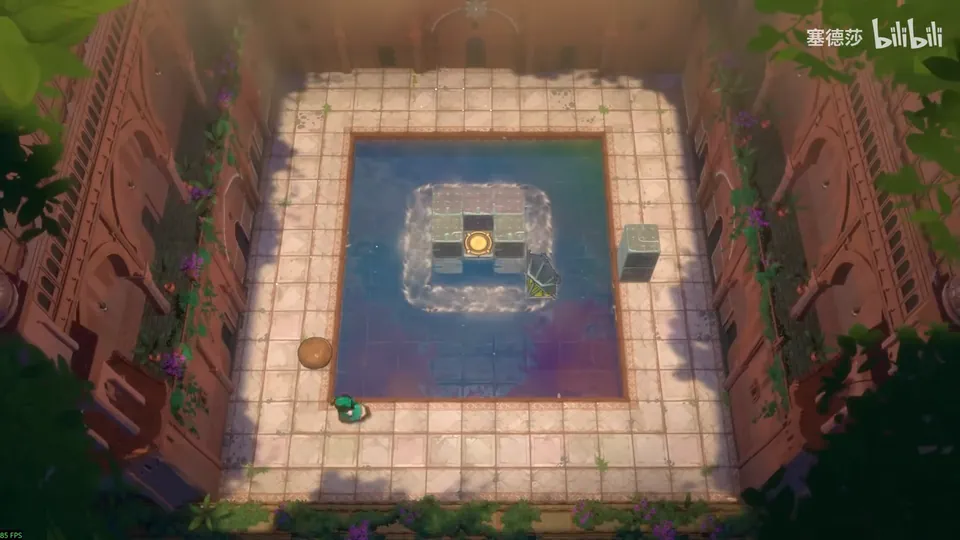
- The mirror needs to turn 180 degrees. (8:59)
- In this row, hit the lily pad right just as it reaches the corner, so it goes straight on instead of turning. (9:08)
- Hit it again here; he is too late once, so go a little earlier. (9:22)
- Then hit it down at the right moment and reflect out. (9:35)
Overworld puzzle 1
Key idea: the mirror on the area map faces the wrong way. Wait for its lily pad to come up and hit it straight down: it skips two turns, half a turn in all, and the mirror faces the right way. (塞德莎 P51 9:55)
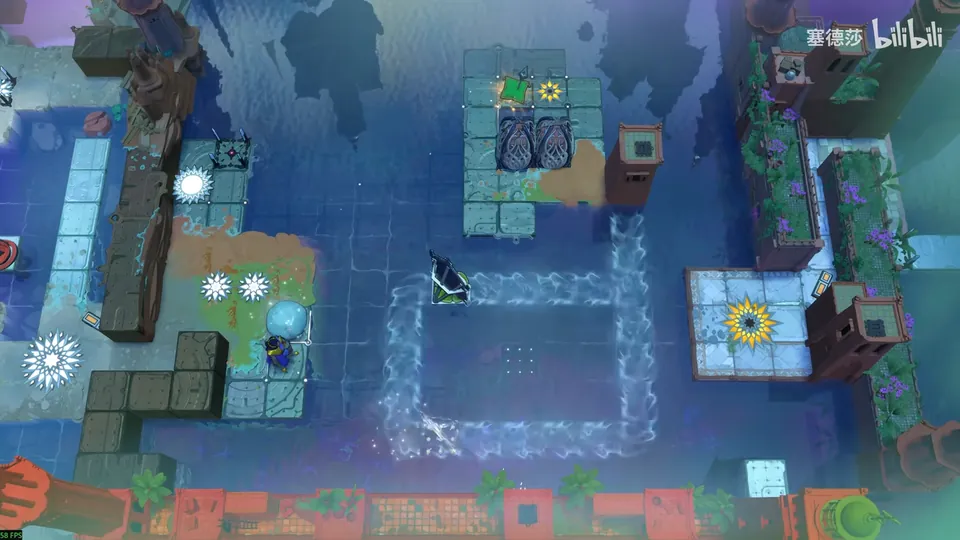
- When the lily pad comes up, hit it straight down. (10:05)
- When it comes round, the mirror faces the right way; reflect and go up. The Mirrors and Rivers name card appears here. (10:13)
Puzzle 7
Key idea: the mirror has to face bottom-left, half a turn from where it is, so that from the current at the top left you can redirect to the bottom right. Hitting the pad onto the current gives the first quarter turn; for the second, dam the current so the pad goes further and turns once more. (塞德莎 P51 10:23)
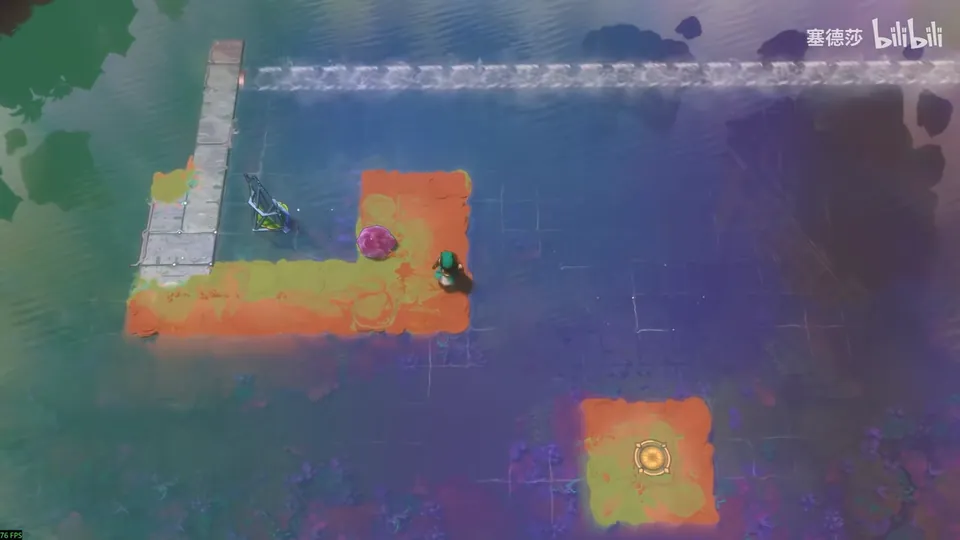
- Hit this stone from left to right so it lies on this tile. (10:59)
- Then reflect it onto the current to dam it. (11:06)
- The dam point has to be exact, neither too far forward nor too far back. Stand here; when the pad turns, reflect to the exit. (11:11 · 11:19)
Overworld puzzle 2
Key idea: the same idea on the lower current: dam it with two stones to change the mirror’s position again. (塞德莎 P51 11:26)
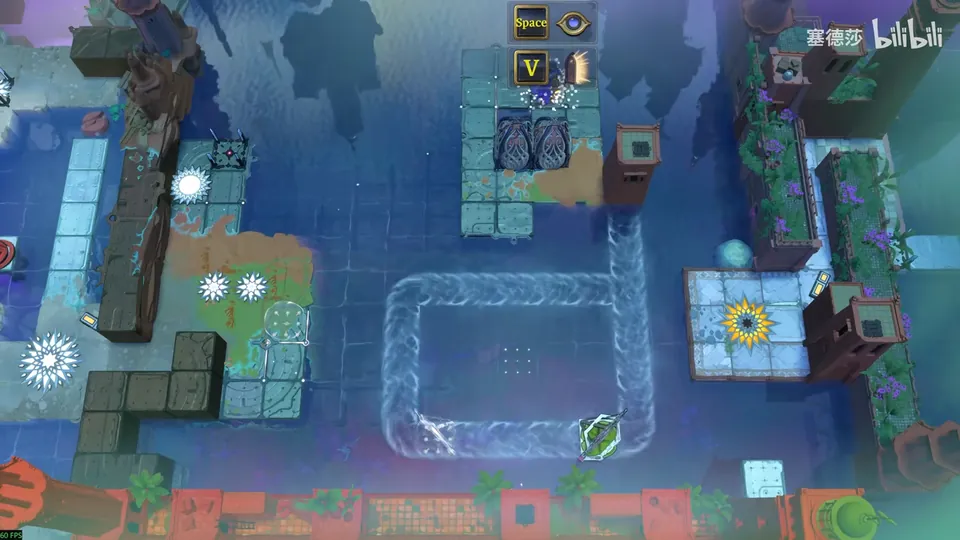
- Push this stone over and drop it in here, then drop the other stone in here. (11:34)
- Wait here and you can reflect to the right. (11:40)
Puzzle 8
Key idea (big star puzzle): like puzzle 7, but reflecting to the dam point directly is too far. Instead hit the stone out over the water and reflect when it is near the mirror, so it drops into the current there. (塞德莎 P51 11:49)
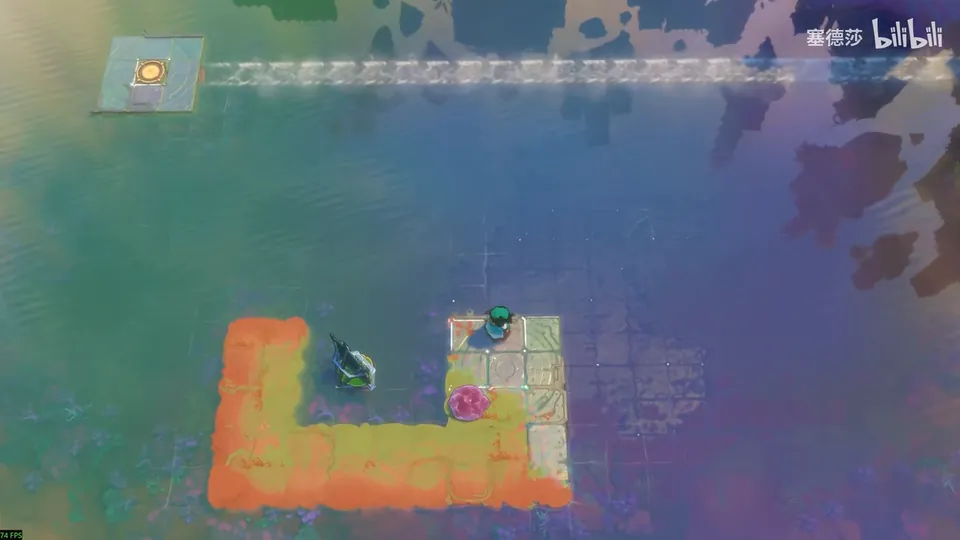
- Start the lily pad. (12:08)
- When the pad is nearly at this column, push the stone up from here. (12:16)
- Reflect; the stone stops next to it and you are through. (12:22)
Overworld puzzle 3
Key idea: to the right there is another path with two current loops. Damming straight away just drains both loops. First put two stones on the lily pad and reflect at the far end, then dam: that joins the two currents into one. (塞德莎 P51 12:40)
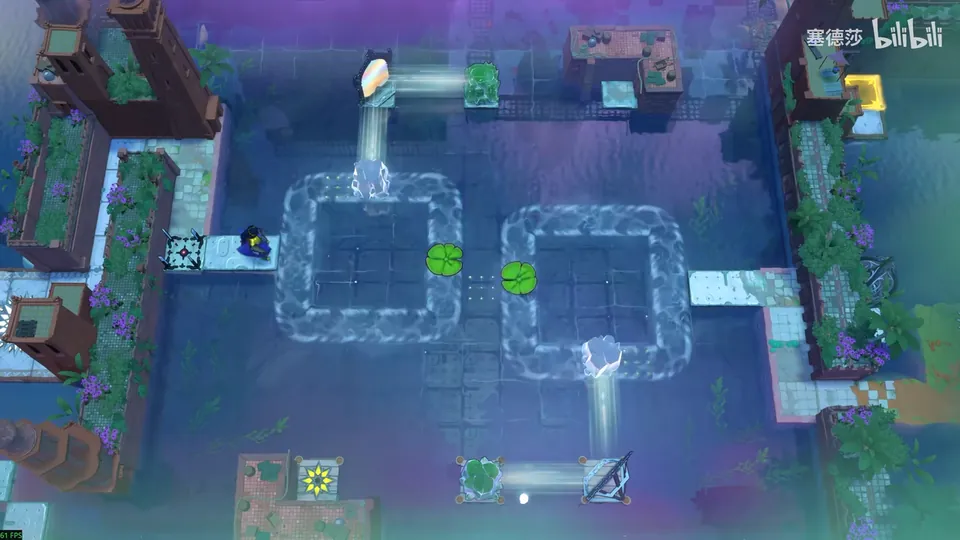
- Damming directly makes both currents run dry, so don’t. (12:44)
- Get two stones onto the lily pad, reflect at the far end, then dam: the two currents merge. (12:52 · 13:00)
- Come up; reflecting off the top-right stone takes you to the room at the bottom left. (13:05)
Puzzle 9
Key idea: it looks like a damming room: walk the current step by step over to the exit column, then ride a lily pad over. Stones alone aren’t enough, because currents prefer right turns. The answer is a mechanic no earlier room shows: a slanted mirror placed in the water steers the current along its slant. (塞德莎 P51 13:13)
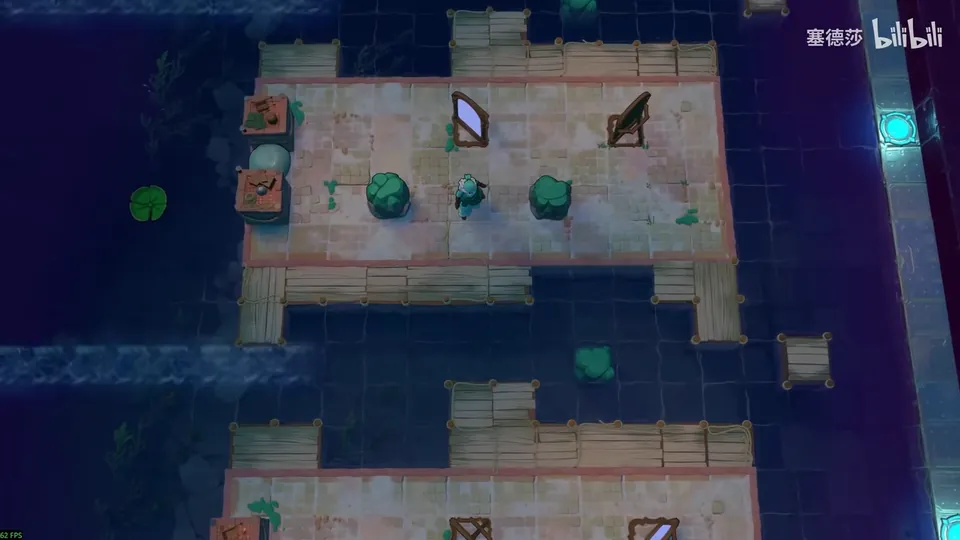
- Dam once like this first. (13:29)
- Damming here next makes the current turn right and stop here, because right turns come first. To make it turn left you would have to block it first, after which it prefers left, and you run out of stones. (13:32 · 13:45)
- Put a mirror facing this way at the head of the current: it turns left instead of right. (15:01)
- Put the front mirror here so it turns right, dam with this stone here, then take the lily pad. (15:31 · 15:44)
Puzzle 10
Key idea: break the current for a moment and slip through to the right in the gap. (塞德莎 P51 17:01)
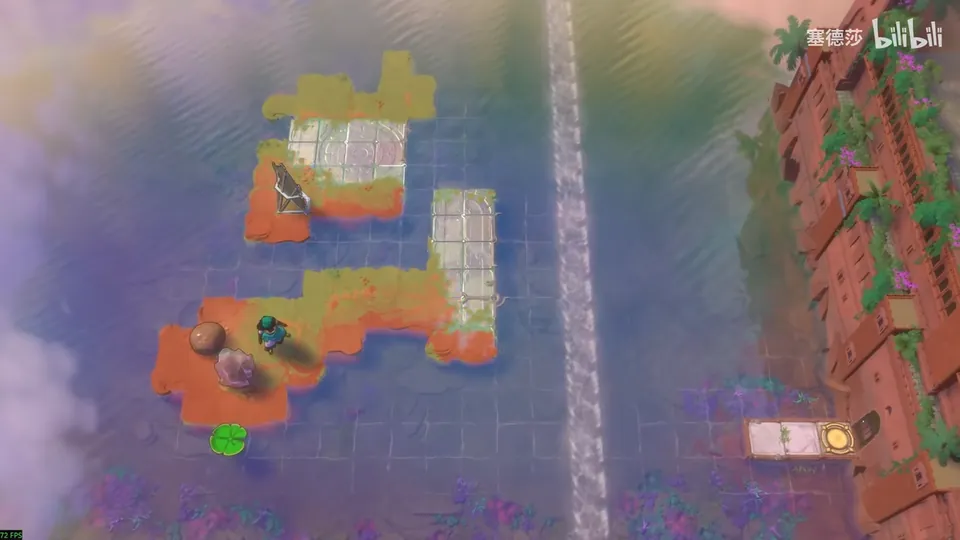
Getting there: the button opens a current at the top left. The lily-pad reset resets everything, but this one only resets stones: hit the lily pad right, reset the stone at once and push it onto the yellow button. That takes you to the top right. (16:30 · 16:46)
- There is only one way: move this stone up to here. (17:17)
- Come up and nudge the mirror right, so the stone can be sent to the top right. (17:23)
- Only one spot dams the current: stone here, mirror here. (17:29)
- Once dammed, the current changes direction for a moment and leaves a gap one or two tiles wide; slip through it. (17:40)
- Timing: start the lily pad and reflect the moment you board it. (17:56)
Puzzle 11
Key idea: five dragons at the top left. Your shields are the three stones on lily pads that drop when you press the button, but they move in step, so they cover only one row. Reroute the middle current once and the bottom one twice, so the stones end up one and two tiles behind and line up side by side; then two heroes can cross. (塞德莎 P51 18:22)
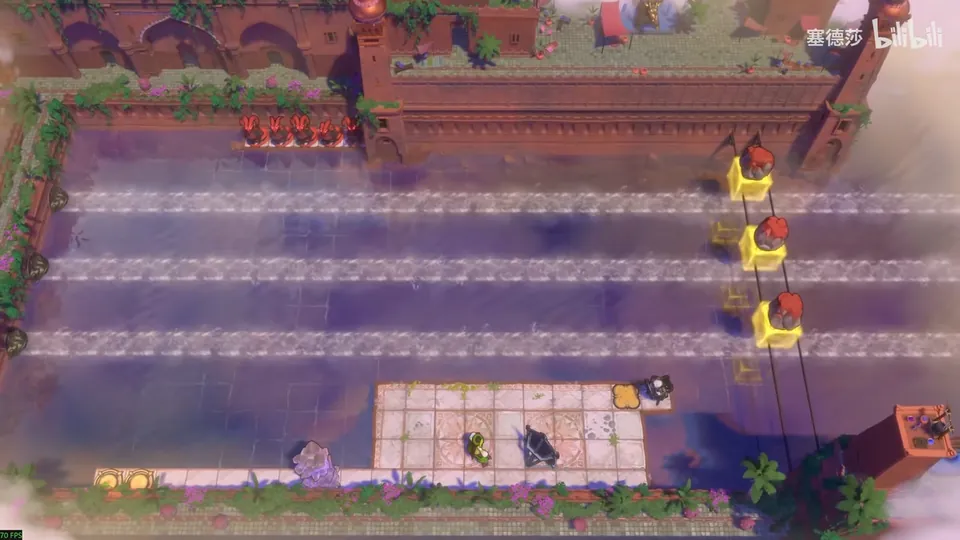
- Take the three stones out first. (19:23)
- Stone here, mirror here: dam the middle current, dead centre. (19:29)
- For the bottom current go a bit closer and dam again, level with the upper one. (19:34)
- The Thief waits over here; the Explorer presses the button and hurries over. When the three stones come past, watch them and step left a little at a time. (19:47 · 19:57)
Puzzle 12
Key idea (big star puzzle): it looks like puzzle 11, but the ground is two levels high, so the cover has to be two tiles tall, and a bridge between the levels catches anything two tall that a lily pad carries. So the heroes ride the lower two lily pads instead, and you sync the top pad with them by damming, with one stone on it to block the fire. (塞德莎 P51 20:52)
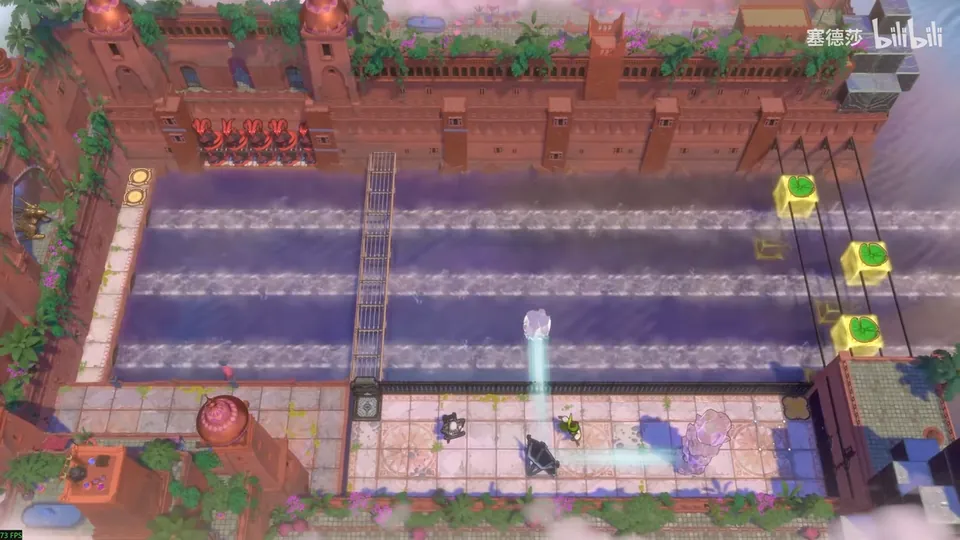
Getting there: the freed button opens the blue gate at the top right. Reset everything, start the lily pad, reset the stones at once and press the yellow button; let the current out a little, then press the blue button and board the lily pad quickly. (20:15 · 20:25)
- Why the puzzle 11 approach fails: the fire is two levels high here, and the bridge stops a two-tall load on a lily pad, so no hero can cross on the lower platform. (21:05 · 21:28)
- Plan: the Thief and the Explorer each stand on one of the two lower lily pads, which move in step; bring the top pad into step with them and put a crystal on it to block the fire. (21:57)
- To sync them, dam the bottom current with one stone and the top current with two, and later put one more stone on the top lily pad as the fire shield. (22:28)
- Move the Explorer aside and dam the nearest current; any spot close by works. (22:49)
- For the far current, place the first stone as close as you can and the second a little further. (23:00 · 23:13)
- Bring this piece up and place it here. The top pad reaches this column first; drop the stone on it, then reflect the Thief onto the bottom (or middle) pad as the other two follow. The Explorer waits on top. (23:27 · 23:44)
- Start, put the stone on the top pad as it arrives, reflect onto the lower pad, and let the Explorer step on when his pad comes. The three pads are in step, the stone blocks all the fire, and the Thief pulls the Explorer to the exit. (24:12 · 24:33)
That finishes Mirrors and Rivers, and part 51. 塞德莎 notes that he had in fact already cleared the whole south when recording; part 52 picks up from here. (24:41)
Puzzle 13
Moving Flat Things (扁平物件挪一挪)
Key idea: a button sits on top of a crystal. You need it held down to get to the middle, and a blue energy block lifts things to the second level. (塞德莎 P52 0:29)
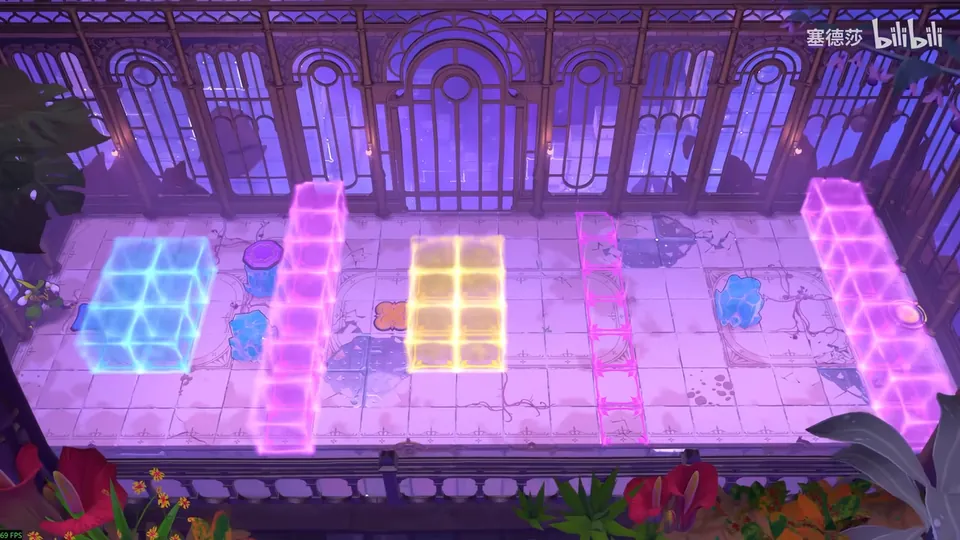
- First press something onto the button, then pull the stone right: both go up onto the second level. Keep the crystal with the button next to them. (0:45 · 0:58)
- Pull the stone onto the button and take the two-tall stack to the middle. (1:11)
- Release the button again: set this aside, go up and pull them apart, then recover the stone, which you need again. (1:21 · 1:30)
- To get past here the button must be pressed, which cuts this path. But the yellow platform and the pink energy block are only two tiles apart: fill the gap with two stones and walk across while the button is held. (1:37 · 1:45)
- Drop a stone onto the button on your way: the button must be the lower item, on the right. Take a stone up, walk right to pull it onto the button, and the rising energy gate cuts your pull. Go down and out. (2:11 · 2:23)
Puzzle 14
Key idea: more buttons on objects. The pink-purple button has to be lowered by one level, and the way to do that is to push it into the water. (塞德莎 P52 3:36)
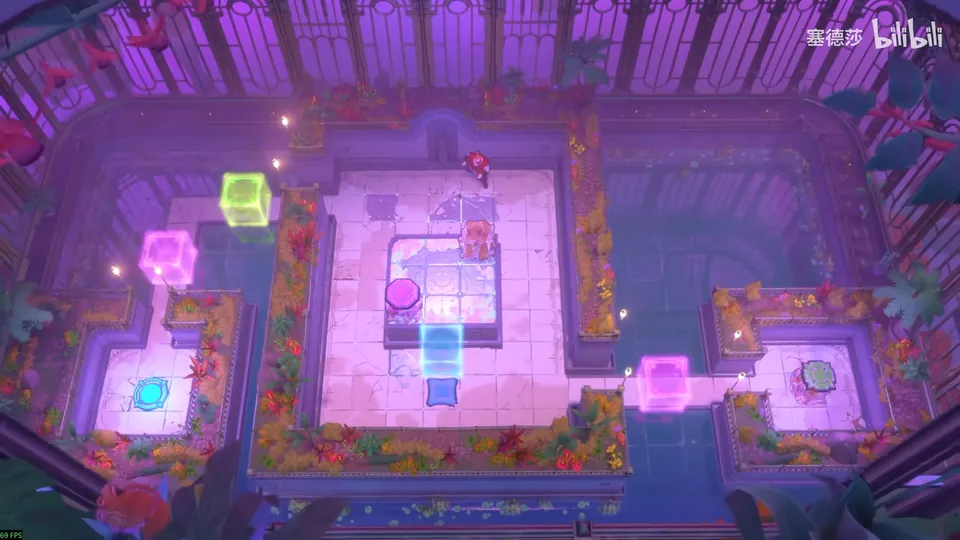
Getting there: activate the teleporter; the Moving Flat Things name card appears here. 塞德莎 points out that everything in this zone is about flat objects: buttons, energy gates and even room entrances. To reach the room above the start, put the stone next to it and press the button to push it left. (2:46 · 3:03 · 3:19)
- Come up. To press the pink button, push it down first, tuck it next to the crystal and go back up. (3:42 · 3:47)
- Take out the green button and press it, or you can’t get through. (3:56)
- Now the pink-purple button. The obvious idea, lifting the two-tall object with the energy block below and pushing it up, doesn’t fit the terrain. (4:04)
- Pressing the green button opened this area, which has water. Push the pink-purple button into the water: it drops one level, and you can press it here. (4:22 · 4:30)
Puzzle 15
Key idea: a bigger room made of several small puzzles. Gem activators are flat objects too, and here some of them sit on lily pads, which you can float away or bring along. The goal is the green laser in the top-right block, which lets you walk through the wall to the exit. (塞德莎 P52 4:56)
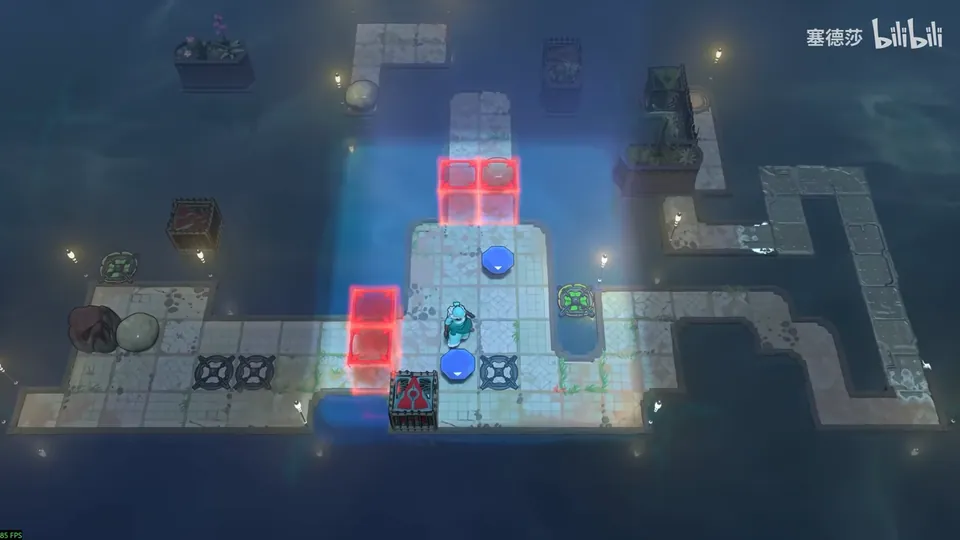
Getting there: reset, then push this stone down. (4:46)
- Activate the two gems and open the door. Note that the gem activator here lies on a lily pad. (5:05)
- On the left, pushing both gems over doesn’t light it, because a lily pad here carries another activator. Float that lily pad out of the block. Left or right both work, but go right or you get stuck later. (5:19 · 5:33 · 5:45)
- With the pad gone, the remaining activators light, the red gate opens and you can take out a skipping stone. (5:54)
- Up here is an orange beam emitter; lit, it lets you fetch the skipping stone on the left. Put a gem on the lily pad you just moved and hit it up to light the orange beam, jump across and push the stone down. In effect you trade a gem for a skipping stone. (6:04 · 6:20 · 6:31)
- Now send the lily pad with a gem to the green laser at the top right. Trap: don’t let it stop on the tile right below the emitter. That tile does light it, but the gem itself blocks the green beam. So first push a skipping stone over here. (6:50 · 6:57 · 7:13)
- Use the other skipping stone to start the lily pad upwards, pushing from right to left. When the pad is about to hit the wall, hit it right. (7:25 · 7:33)
- The green laser is lit and nothing blocks it: walk through the wall to the exit. (7:48)
Overworld puzzle 4
Key idea: solving puzzle 15 frees the lily pad with an activator at the bottom left. The gem at the bottom right is already in place, so floating that pad out of the block lights the orange beam below. (塞德莎 P52 8:02)
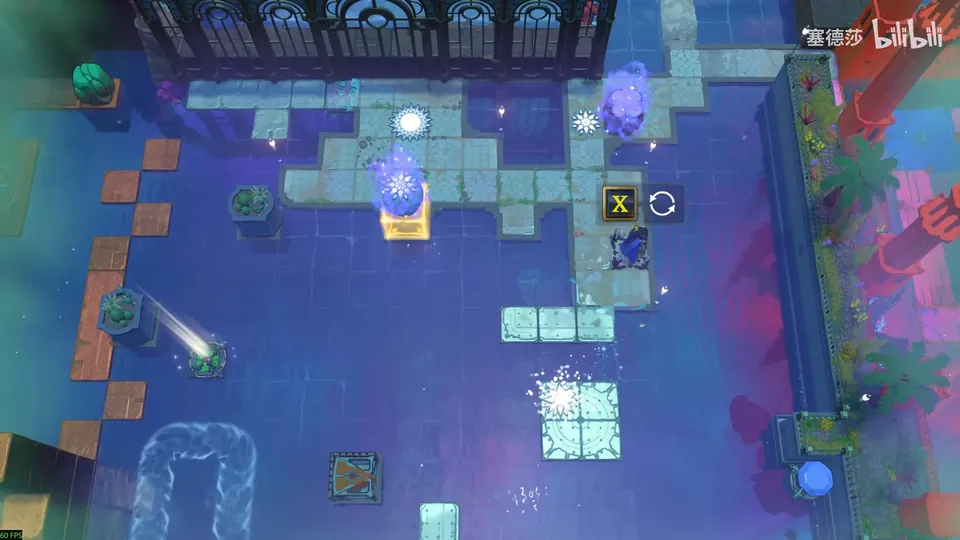
- Put the stone with the button here, then push the skipping stone right (the word is garbled in the transcript). (8:26 · 8:30)
- That starts the lily pad; float it down, and the area below opens. (8:33)
- Reset: it doesn’t reset that lily pad. Now you can go left from here; wait a moment first, because the beam is gone when you come back. (8:41 · 8:51)
Puzzle 16
Key idea: you must press three pink buttons and then the pink-purple one to reach the exit, but pressing all three would take the Warrior, the Cleric and the dragon, one each. So reduce the number of buttons: pile them onto one tile by letting two goblins die on the button that is already on the floor. (塞德莎 P52 9:07)
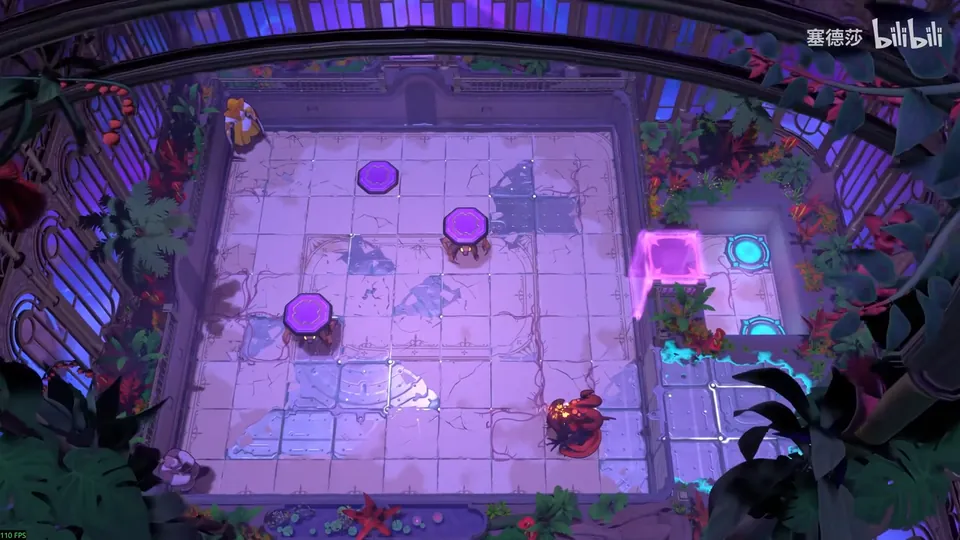
Getting there: the lily pad you floated cycles the orange beam here: on while it is up, off while it is down. (8:56)
- Move the first goblin over, and use the Cleric to hold back the second so it doesn’t die too early. (9:47)
- Let the dragon burn this one, then move the second: up, then one to the right. (9:55 · 10:00)
- Push the dragon straight up: the three buttons are now stacked, and the dragon presses all three at once. (10:05)
Puzzle 17
Key idea (big star puzzle): the Trader stands in the middle with four heroes round him, and the five exits are on their heads. A mirror can drop an exit off a head onto the floor, but you can only drop four that way. The fifth doesn’t need dropping: the Trader can carry a hero, so the exit on his head can be stepped on where it is. (塞德莎 P52 10:49)
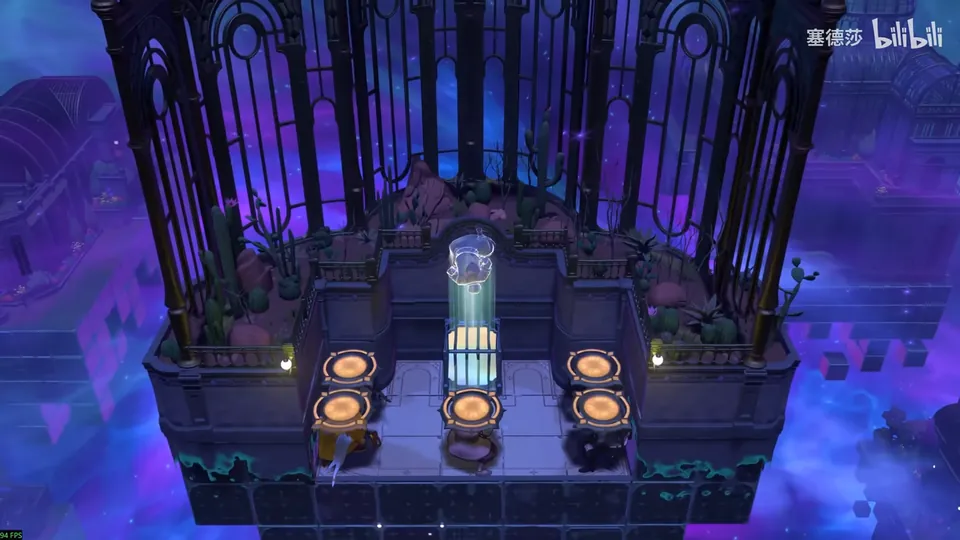
Getting there: coming out of puzzle 16, the cage on the left opens. Jump across while the orange beam is on and walk down while it is off. While it is on again, push the crystal below aside; the big star room’s entrance ends up riding on top of something, which 塞德莎 calls a rare, funny sight. Teleport while the beam is there and come back: the entrance drops to the floor. (10:20 · 10:29 · 10:45)
- Use the mirror to drop exits off heads: one, two; then push the mirror one step sideways (it only moves that far) for three and four. (11:06 · 11:15)
- The fifth stays on the Trader’s head: he can carry a hero, so someone can stand on it there. (11:31)
- Drop the other four exits, move this aside, let the Trader push this one, and start stepping onto the exits; one hero climbs onto the Trader’s head. (11:51 · 12:08)
- Don’t try to stack exits: none of the five can be removed (there is no Druid here), so you need five exits. (12:26)
Overworld puzzle 5
Mirrors and Skipping Stones, Advanced (魔镜跳石进阶)
Key idea: to reach the area below, the crystal skipping stone at the top left has to fill the pit at the very bottom. Use a U-shaped bounce between two mirrors. (塞德莎 P52 12:56)
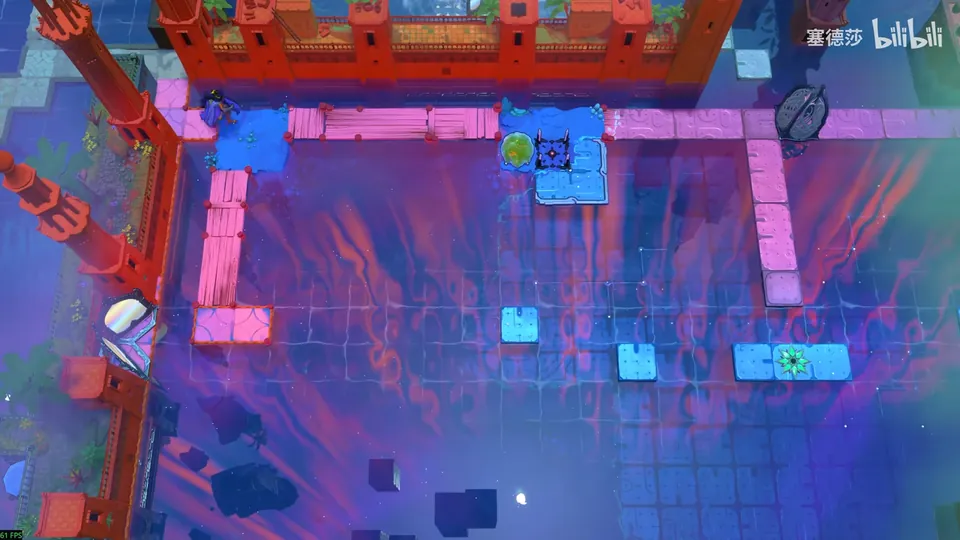
- Push the stone left, then to here. (13:08)
- Change its course here and again here. Each change moves it one tile left, so stop it here. (13:17 · 13:21)
- Push it one more tile left and it lands in the pit. (13:28)
Puzzle 18
Key idea: two mirrors reroute a stone you hit to the right. Set in a U, they turn it round so it travels left; set in a Z (or S), they shift it up a row. Combine them: a U to turn it left, then a Z to lift it to the right row. (塞德莎 P52 13:36)
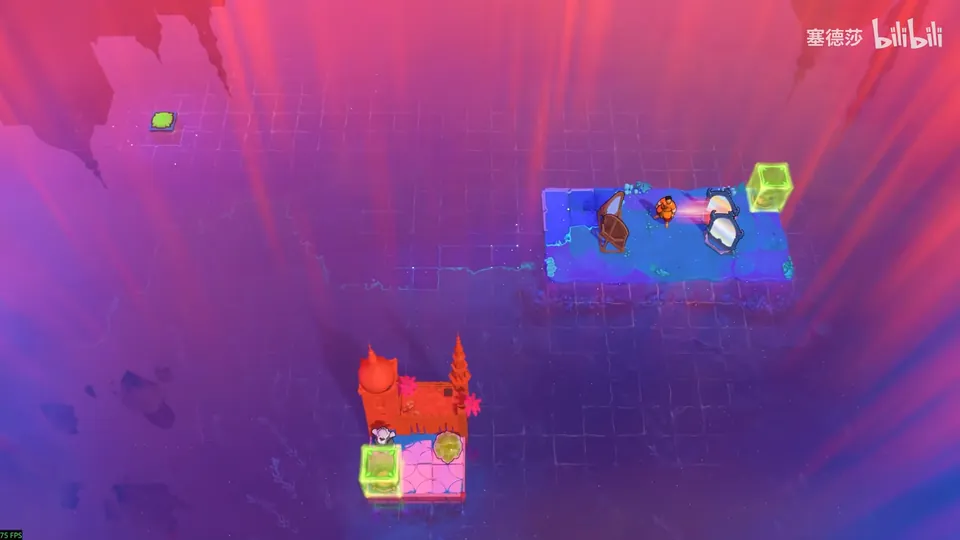
- The U-shaped setup turns a stone hit to the right into one going left. (13:49)
- The other setup moves a stone travelling right up a row. (14:03)
- Together: the U on the right turns it left, then the Z/S lifts it up, with the mirrors where they are in the video. (14:22 · 14:44)
- A little trial and adjustment finds the exact spots. (14:53)
Overworld puzzle 6
Key idea: the same stone-laying trick as overworld puzzle 5, over a longer distance, to reach the big star room on the right. Zoom out (塞德莎 uses Q) or you can’t see the right side. (塞德莎 P52 15:04)
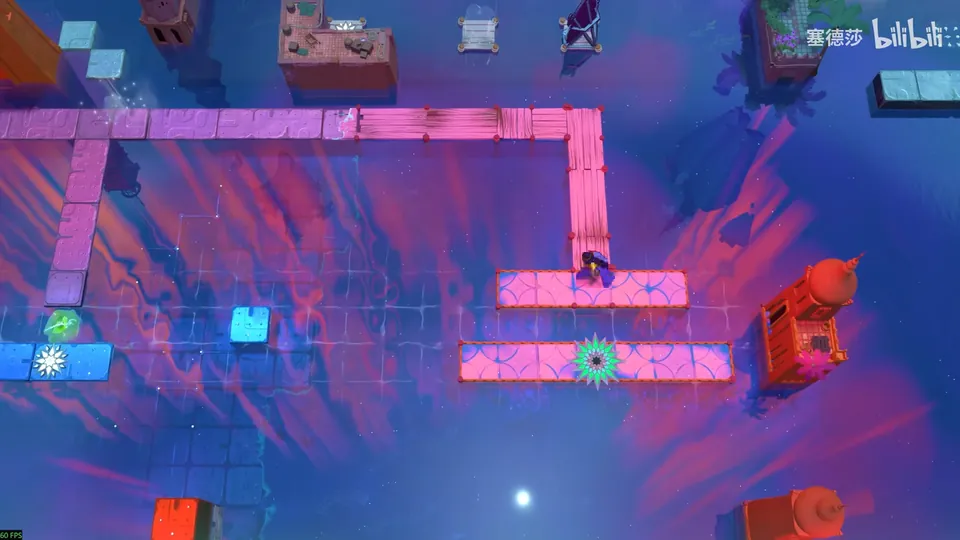
- Start over and use the U bounce: reflect from here to here, then here. (15:13 · 15:19)
- Keep it going right to here and reflect again. (15:26)
- As before, stop it to the right of the big star room and reflect once more to reach it. (15:32 · 15:35)
Puzzle 19
Key idea (big star puzzle): not hard to see, but it takes precise play. Start the stone and walk it, one mirror bounce at a time, to the row of the button on the right. 塞德莎 holds Ctrl throughout. (塞德莎 P52 15:45)
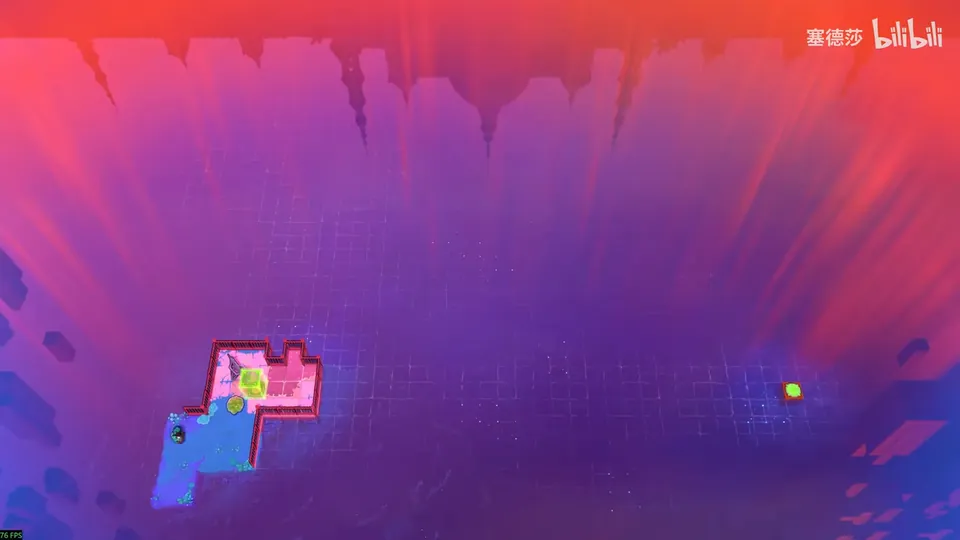
- Move the skipping stone here and the mirror here, go right, round, and push the mirror down. (16:12 · 16:20)
- Reflect to the left: the stone goes up from here. (16:25)
- Move the mirror up, reflect here, move right to here, wait a moment and reflect. (16:30)
- Move up to here, wait and reflect, then move to here. (16:41)
- Reflect from here into this pit, then push the mirror down: the chain of bounces has put the stone on the button. (16:50)
That is every room in the south 塞德莎 can reach so far. He says everything left lies in places you reach through the west, which he expects to take three or four parts; the series is still being updated. (17:08 · 17:20) Back to the Antipode Low hub.