Spoilers: this page covers the start of the third stage, after the second ending (Endgame High). It sticks to puzzle solutions and leaves out the story, but the way down and the new hub give away late-game content. If you haven’t finished the second ending yet, see the Endgame High walkthrough first.
The third stage starts on Crossroads Low, a hub below the Crossroads at the start of Antipode Low. You get there by blasting open an elevator in the middle of Crossroads High, and Steam’s hidden Descend achievement marks the trip down (see the achievement list). This page shows how to set that up, one fetch in each world, and solves the 1 puzzle on Crossroads Low. The rest of the layer is on the Antipode Low hub, starting with Low Heroes.
Name: 塞德莎’s Chinese version labels the hub 交汇之地:低处. We call it Crossroads Low by analogy with the confirmed Crossroads High; we haven’t seen it in the English version yet.
How to use this page: we found no English video of this part, so the order follows 塞德莎’s narrated walkthrough. The route has many single pushes that are easier to watch than to read, so each step links to the exact second and says where he gives only “here”.
Where the route goes (Chinese names as shown in 塞德莎’s game; English names as on our High pages):
| Area (塞德莎’s Chinese name) | English name | What you do there | 塞德莎 part |
|---|---|---|---|
| 升降机, 力量 | Elevators, Strength (High Beamcasters) | Push the gem to its holder | P45 |
| 英雄与第三维度, 堆叠与水 | Heroes and Depth, Stacks and Water (High Heroes) | Bring down an ordinary stone | P45 |
| (no name shown) | High Mirrors | Bring a crystal out | P45 |
| 飞跃与坠落, 双倍光束坠落 | Skipping and Falling (High Skipping Stones), Double Beam Falling (High Beamcasters) | Bring a skipping stone up | P45 |
| 交汇之地:低处 | Crossroads Low (our name, unconfirmed) | Puzzle 1 and the six signs | P45 |
Rules that matter here
- Yellow plus multicoloured blasts. Where the yellow and the multicoloured beam cross, a stone, crystal or skipping stone is blown apart. That is how the three objects are cleared (5:02).
- Red signs and red marks. After the second ending the Antipode High map still has red-marked spots. Touch a red sign to unlock it; that can also open a cage elsewhere (0:08, 0:54).
- Teleport points carry objects. Pushing the gem through a teleport point saves a very long detour; 塞德莎 counts it as a puzzle that needs one (2:23).
- Resetting is part of the route. Several fetches reset a room on purpose to rebuild a tower or reuse a stone (2:51, 9:40).
- No new mechanics below. 塞德莎 says the third stage adds nothing new; it explores old mechanics in combinations that didn’t come up before (20:23).
How to get down there
塞德莎 starts right after the second ending: the map still shows red blocks, and the West is the place where the goal is easiest to see (0:00 · 0:17).
West: the gem and the two beams
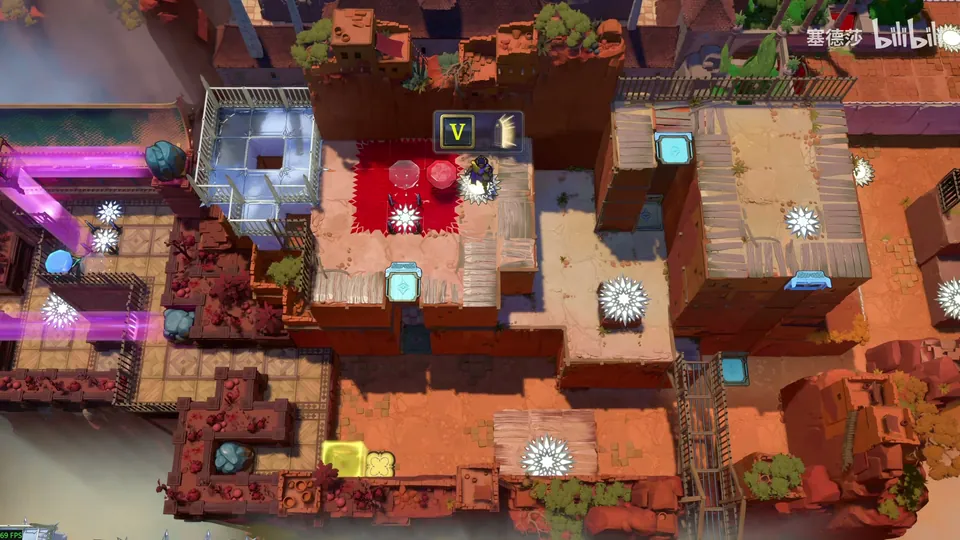
- In Elevators there is a gem you have only ever used as a step. This is where it gets its real job. (0:28)
- Go to the spot he shows and unlock the red sign at the top right. A cage elsewhere unlocks with it, and in the top-right corner of that red-earth area is a gem holder: the gem has to go there. (0:50 · 1:13)
- Prepare first: put the two carts up there and get them in step with each other. (1:23)
- Back left with the gem: push it down from here, right out of the pit, up the elevator, round from the lower elevator, and drop it right. Without the unlocked cage you couldn’t push it there. (1:45 · 2:16)
- To get it from left to right, push it through the teleport point. (2:23)
- Dropped on the right it can’t be pushed on, so take it round the Strength area instead: reset, rebuild the three-tall tower from that zone, then a four-tall one, and push the gem to the far right. A spot above lets it double back. (2:41 · 3:37 · 3:56)
- Now the synced carts: put the gem on the upper cart, push from the lower cart, then change the right-hand cart and loop round on the left so it carries the gem on. (4:04 · 4:21 · 4:39)
- With the gem in its holder, two beams switch on: a yellow one at the top left and a multicoloured one at the bottom right of Crossroads High. (4:50)
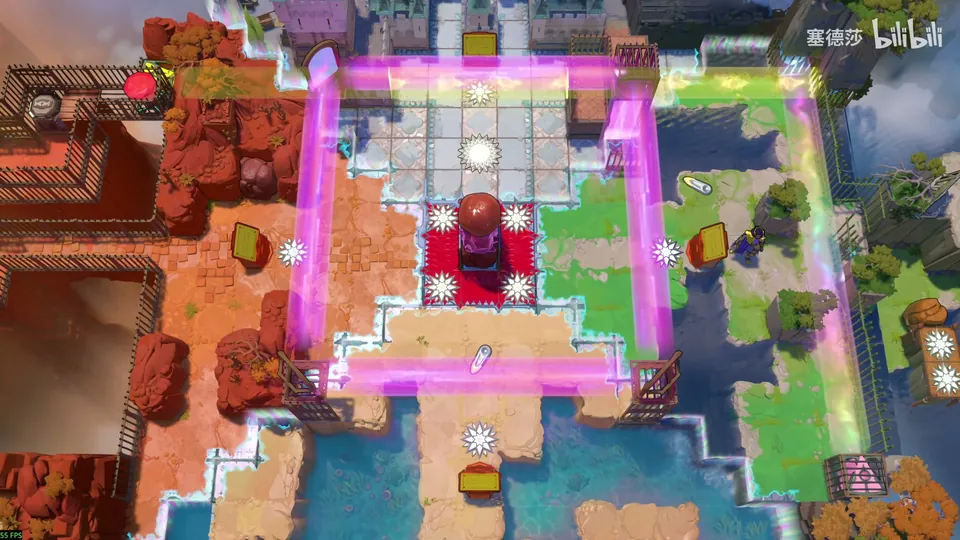
The yellow and multicoloured beams together can blast things. Three objects in the middle have to go, an ordinary stone, a crystal and a skipping stone, and you fetch one of each: the stone from the North, the crystal from the East and the skipping stone from the South. (5:02 · 5:19)
North: the stone
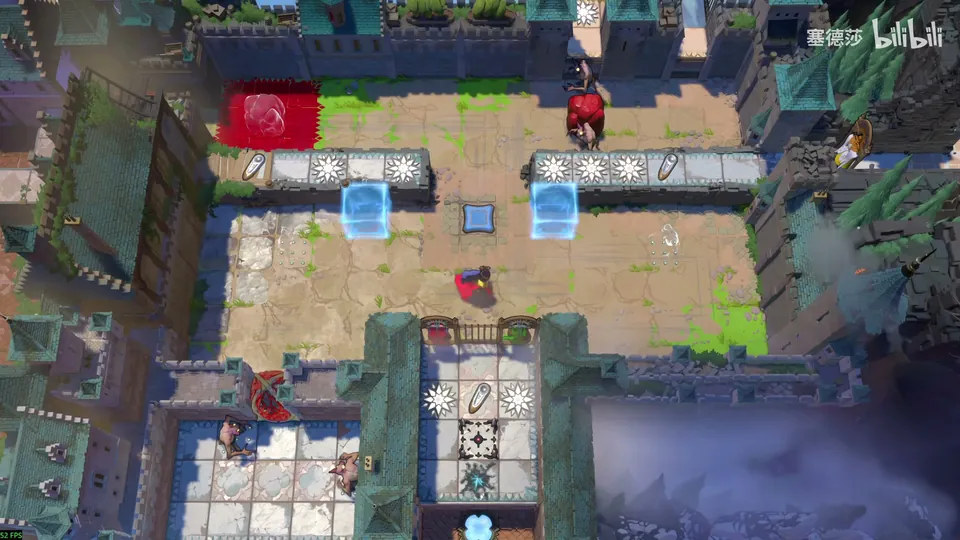
塞德莎 calls this the most tedious of the three fetches. (5:35)
- In Heroes and Depth, reset, then unlock the red sign below. It opens the dragon above. (5:47)
- Two goblins block the way below and must die. For the first, push it right, pull the stone down and right, push it up and the monster down one, then pull right. You can’t change into the Warrior here, so change on the left, push it over, pull up and push down. (5:59 · 6:38)
- The second goblin goes the same way; he shortens the steps here, so follow the clip. Finish in the Thief costume and the stone drops. He admits he isn’t sure why three dragons sit here. (7:06 · 7:45)
- Now bring the stone down step by step over the platform on the right. Each level means placing a few stones as steps, using the teleport point to get to the right, and resetting. (8:06 · 8:48 · 9:40)
- The hardest step: push the stones into the shape he shows, then this one here and that one there, and the stone is finally on the bottom. (9:43 · 10:09)
- One small detour remains, and the way out is blocked: reset here and push the three stones to the spot he shows. He adds that the goblin part could probably be done faster. (10:20 · 10:31)
- Move the stone left, loop round to Crossroads High, push it right onto the crossing point and blast it with yellow. (10:52 · 11:07)
East: the crystal
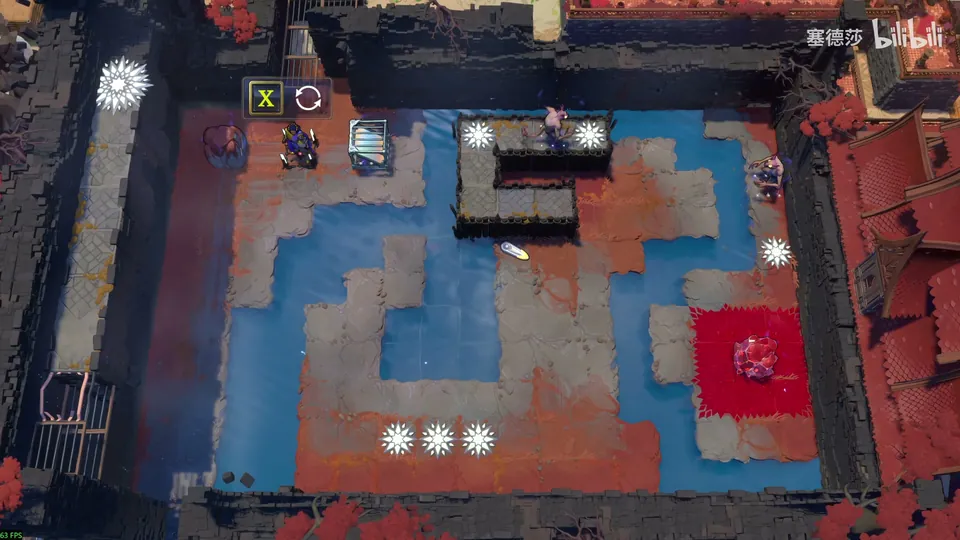
- Go to the room he shows in High Mirrors. The crystal at the bottom right is the one to move; reset first. (11:23)
- Put the vertical mirror here, and as soon as the crystal comes across, push it away at once so they don’t stack. (11:36)
- Set up: stones up first, the crystal far off in the same row, go up, reflect the stone here, push it out at the top, then down. (11:46 · 12:07)
- Reflect or push it down. A notch is placed on purpose: wait in it, reflect back up, and you can push down again. Then reflect to the right so you can push it left. (12:17 · 12:32)
- Redirect it upwards using the left side, push the jutting part left, push down, reflect up, go round from the right and push left. The only way on is down; the camera hides that this spot is a 3×3 space. (12:39 · 13:17)
- Unlock the red sign here. Push the crystal to the crossing, go round a big loop and push it left; it can’t be pushed down here. (13:27 · 13:54)
- The mirror on the high platform is the answer. Reset, redirect, and push down from the right-hand spot; he slows it down because the reflection lasts an instant. It lands in the middle of Crossroads High, where you blast it. (14:00 · 14:27 · 14:46)
South: the skipping stone
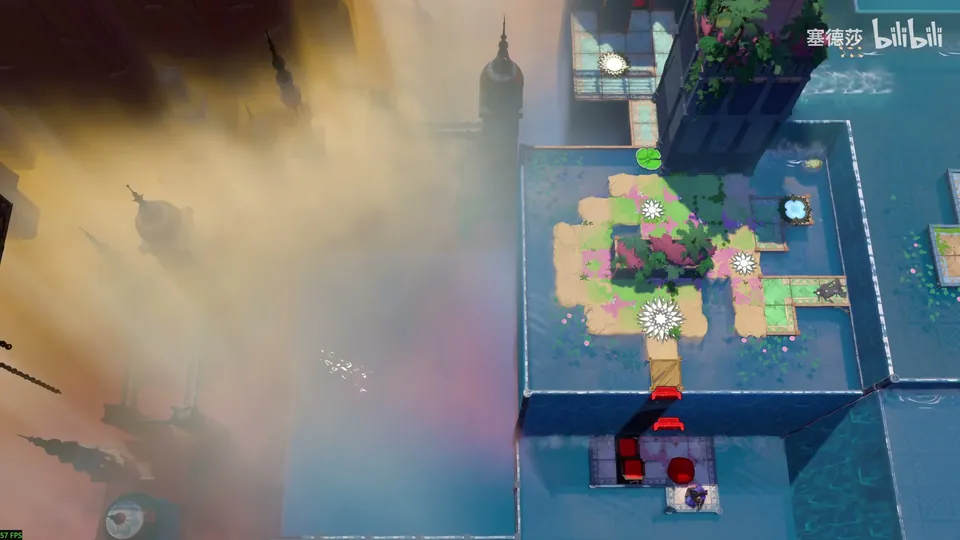
- The red sign is above this spot in Skipping and Falling. Reset, bring the stone below up, push it up to the sign and unlock it. (15:04 · 15:17)
- That unlocks an ordinary stone: push it straight into the water and reset. Push this one over and up, then use the stone in the water to climb up and push through the gap. (15:27 · 15:35)
- Teleport up; the stone is now on the upper level. Below are two odd elevators: use the front one to bring the stone up. (15:45 · 16:01)
- Push it right, come up and do the lily-pad route again: reset the pad, push this down and reset the middle at once. Crush the goblin, then push the stone up twice. (16:20 · 16:32)
- The nasty part: push it onto the elevator, then call the elevator from above. The only way up is the high bridge on the left, reached from Double Beam Falling: come across, reset and jump, drop down here and call it. (16:42 · 16:50 · 17:14)
- A straight push right doesn’t go through, so loop round once more, this time from below because the mirror is gone. Cross the double beams quickly, come up, drop down and push the stone up onto its target. (17:17 · 17:33 · 17:56)
The blast and the elevator
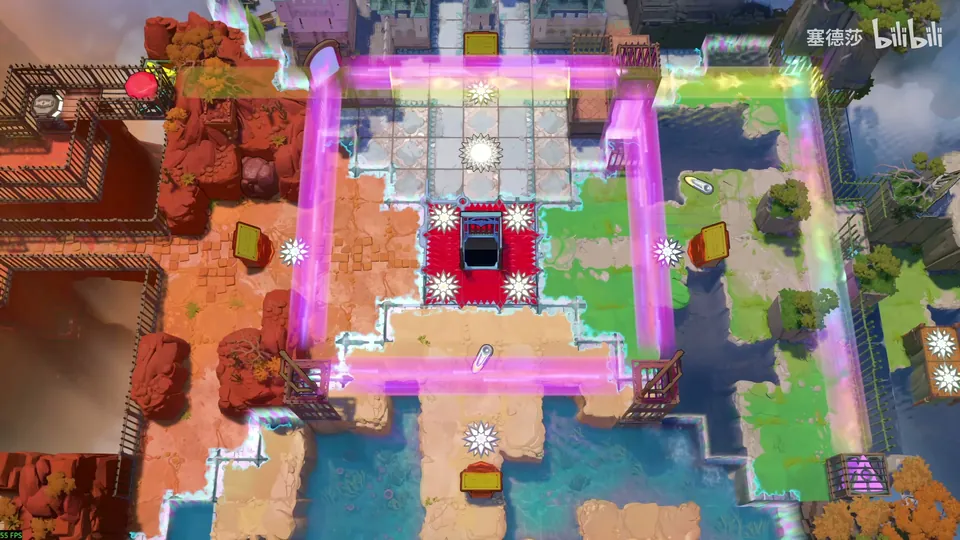
- Back in the middle, push the skipping stone up (or right first, either works) and blast it with the beams. (18:04 · 18:24)
- With all three blasted, the elevator in the very middle is exposed. Take it down: you arrive on Crossroads Low. 塞德莎 calls the three layers upper, middle and lower from here on. (18:28 · 18:36)
Puzzle 1
Key idea (entry room): a big room of stepped ledges with a few stones. Each stone you push down frees the stones under it, so pick the drop spots that let you take the lower stones out, then build a ring of stones to push the last one into the pit. (塞德莎 18:52)
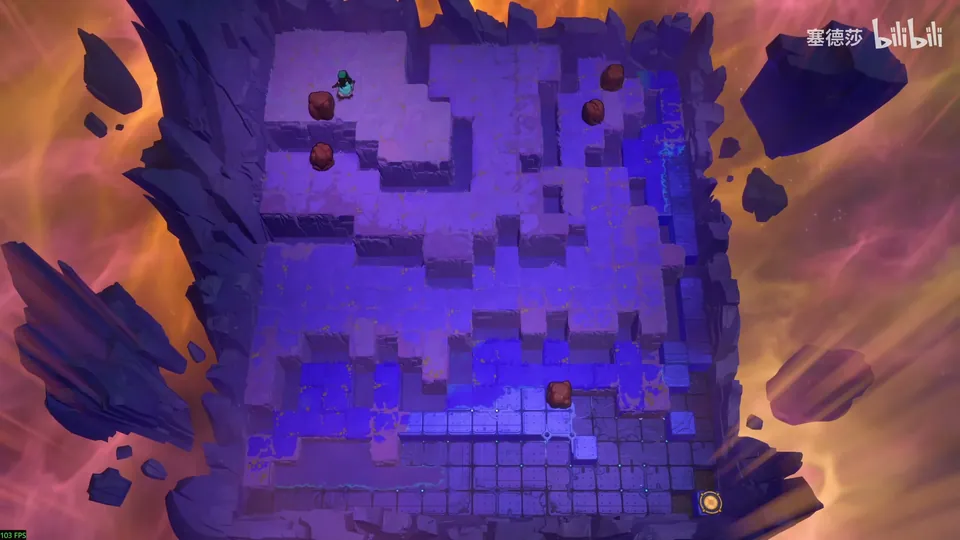
- Push this stone here first, so you can take the stone below it out. (19:09)
- Choose where to push the next stone down so the two stones below come free; 塞德莎 drops it here. (19:15 · 19:22)
- Push those two to the right places so the next layer of stones can be pushed on down. This takes some planning, and he doesn’t break it down: one stone goes here, one to the left to form a ring, and one fills a tile on the right. (19:29 · 19:40)
- Come down. The last stone has to be pushed down from here: go round on the right, push it down, use the ring to push it on, and push it into the pit here. (19:50 · 20:06)
Crossroads Low and the six signs
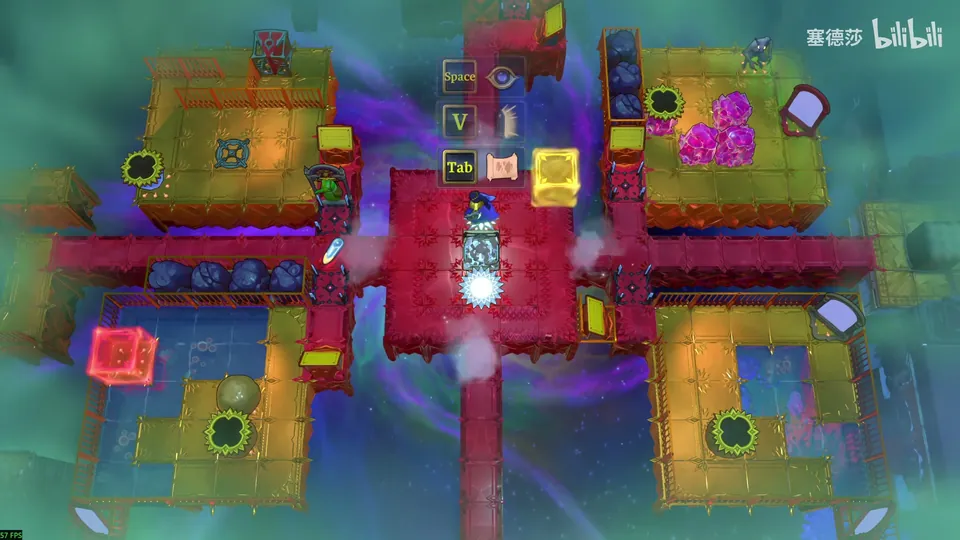
Solving puzzle 1 opens the hub. 塞德莎 explains what the layer is: no new mechanics and no single 3D theme like Antipode High, but small ideas about the old mechanics that didn’t fit anywhere else. He calls it a mixed layer and warns that it can feel a bit chaotic, though many rooms have ideas you won’t expect. (20:12 · 20:43)
The signs here count crossovers, one for each pair of worlds. He reads them as below; the second number is how many you need, so you can hardly skip a room this time. (22:07 · 23:00)
| Sign | Pair of worlds (by direction) | Sign (as read in the video) |
|---|---|---|
| North-east | Heroes × Mirrors | 8, 7 needed |
| South-east | Mirrors × Skipping Stones | 7, 6 needed |
| North-west | Heroes × Beamcasters | 9, 8 needed |
| South-west | Skipping Stones × Beamcasters | 12, 10 needed |
| North–south | Heroes × Skipping Stones | 6, 5 needed |
| East–west | Mirrors × Beamcasters | 8, 7 needed |
The pairings follow the usual directions (North Heroes, East Mirrors, South Skipping Stones, West Beamcasters); the Steam achievements Low HxM, HxS, HxB, MxS, MxB and SxB name the same six pairs. Rooms for different signs sit mixed together: walking north you meet north-east, north-west and north–south rooms in turn, though each small block has one theme. 塞德莎 goes North first, then East, South and West (23:10 · 23:52). Continue with Low Heroes, Low Mirrors, Low Skipping Stones and Low Beamcasters, or see everything on the Antipode Low hub.