Spoilers: this page covers the second stage of Order of the Sinking Star, after the first ending. It sticks to puzzle solutions, but the zone names and layouts give away second-stage content. If you haven’t finished The Antipode yet, you may want to stop here.
High Skipping Stones is the Skipping Stones part of Antipode High, the upper layer that opens after the first ending (see how to ascend). It is the High counterpart of Skipping Stones to Lonely Homes: the Sailor, skipping stones and lily pads are back, but now they fall, stack and spin. This page solves all 27 puzzles and the 4 overworld puzzles between them. Reaching the area unlocks the Steam achievement High Skipping Stones (“Reach the Skipping Stones part of Antipode High”; see all achievements).
Where it is: from Crossroads High, head south. 塞德莎 labels the map tiles S1, S2, S2W1, S3 and S3E2 (his part 34) and S4E1, S4 and S5W1 (part 35).
How to use this page: there was no English solution video for these rooms yet when we wrote it, so the numbers follow 塞德莎’s narrated walkthrough, counted straight through his parts 34 and 35 in the order he plays them. Each heading has the key idea and a link to the moment the room starts; the numbered steps link to the second where he explains that move. Short walks on the area map between rooms are folded into a Getting there line. The end of his part 35 (a North room of Protection and Support) is on the High Heroes page.
Zones at a glance (Chinese names as shown in 塞德莎’s game; Skipping and Falling is a confirmed English name, the others are our translations and unconfirmed):
| Zone (塞德莎’s Chinese name) | English name | Puzzles | 塞德莎 part |
|---|---|---|---|
| 飞跃与坠落 | Skipping and Falling | 1–8 | P34 |
| 竖直之镜与飞跃 | Vertical Mirrors and Skipping | 9–14, overworld puzzle 1 | P34 |
| 旋转光束 | Rotating Beams | 15–19, overworld puzzles 2–4 | P35 |
| 堆叠与飞跃 | Stacking and Skipping | 20–27 | P35 |
| 飞跃之路 | Skipping Road | no rooms (a timing run, see the end) | P35 |
A zone’s name card appears when you walk in, so the borders between neighbouring zones are approximate. We put puzzle 9, the vertical-mirror tutorial, with Vertical Mirrors and Skipping although 塞德莎 plays it just before the name card shows.
Rules that matter here
- Falling kills sideways speed. A skipping stone that drops off a ledge mid-skip sinks straight down on the spot, and a drifting lily pad that falls also stops dead and drops (P34 0:20, P34 0:53).
- Stacking. Skipping stones stack, and a stack of three is three tiles tall; the Warrior can carry one on his head and act as a wall (P34 2:42, P34 5:03).
- Vertical mirrors. You can reflect while falling. Reflected off a vertical mirror, a straight drop onto water turns into a skip across it, and reflecting again drops it back (P34 16:25).
- The spin rule. Anything skipping on water turns 90 degrees clockwise per tile it moves. Four tiles is a full turn, so only the remainder after dividing by four matters: 1 = a quarter turn clockwise, 2 = half a turn, 3 = a quarter turn anticlockwise (P35 2:09). It turns beams, dragons and the Sailor alike.
- Blue beams let you walk through gates and fences, which green beams can’t cross (P35 4:45). Purple beams teleport a hero to their end point, as elsewhere.
- Cleric protection. A Cleric hit by a dragon’s fire floats, and a hero standing in the row the Cleric protects floats too (P35 31:09).
- Slow down. Several rooms are about timing; 塞德莎 holds Ctrl to slow the game (P34 34:55). Skipping stones and lily pads reset separately (P34 4:00).
Puzzle 1
Skipping and Falling (飞跃与坠落)
Key idea: a falling lily pad stops dead and drops straight down. Make it fall at the one spot from which you can still hit it left into the current that leads to the exit. (塞德莎 P34 0:53)
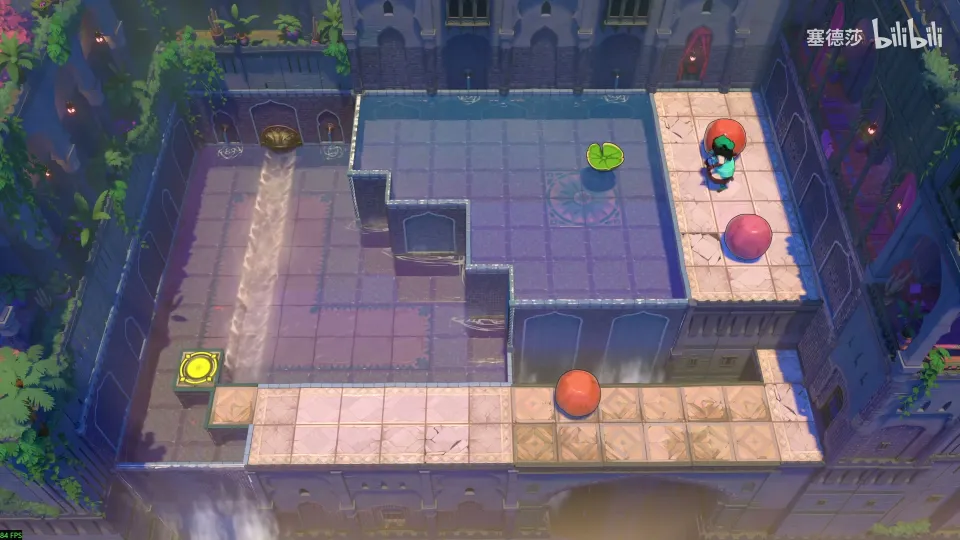
Getting there: from Crossroads High go south, start the lily pad on its loop, then recall the skipping stone and push it down; it sinks where it falls and fills the gap. (0:00)
- The goal is to get a lily pad into the current on the left and ride to the exit. (1:18)
- The only tile where a fallen lily pad can still be hit left is by the wall just above the Sailor. (1:38)
- Keep that spot clear, hit the upper lily pad left, and as it nears the spot hit it down so it drops there. (1:49)
- Hit it left once more with the skipping stone and ride out. (1:58)
Puzzle 2
Key idea: the exit is three tiles up from the water, and three stacked skipping stones make exactly three tiles. It’s a fast sequence: drop the stones so they land on each other. (塞德莎 P34 2:31)
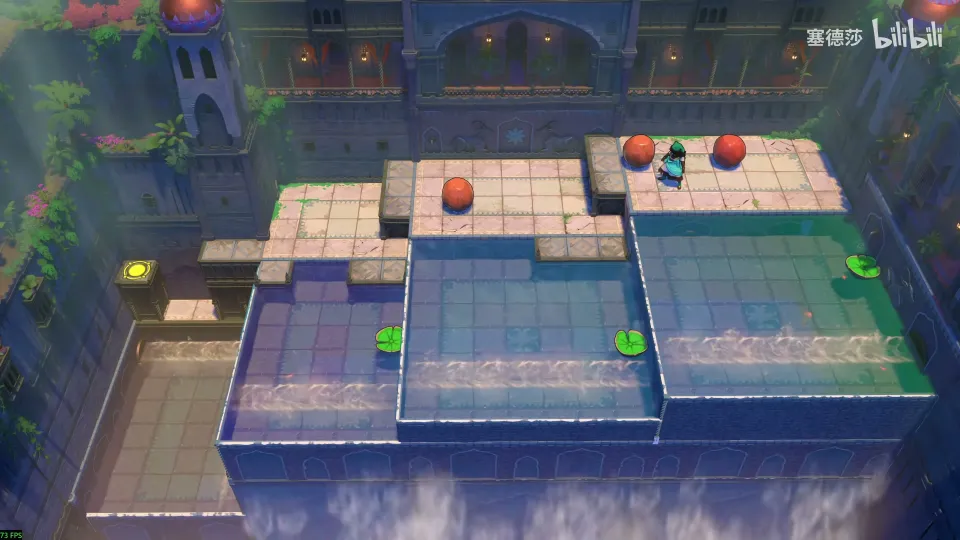
Getting there: solving puzzle 1 unlocks a lily pad; wait for it and ride up. (1:58)
- Start the pillar, then quickly push the first stone down. (2:53)
- Push the next stone into its ready spot; when the lily pad is almost down, push it out so the two stack. (3:03)
- Push the last stone left the same way. Its lily pad is further away, so hit it a little early. (3:14)
- Wait on top, and jump down when the stack reaches the corner. (3:25)
Puzzle 3
Key idea: you need skipping stones on the two tiles in front of the Sailor. One is easy to drop from above; for the other, the Warrior holding a skipping stone on his head becomes the wall that stops it. (塞德莎 P34 4:22)
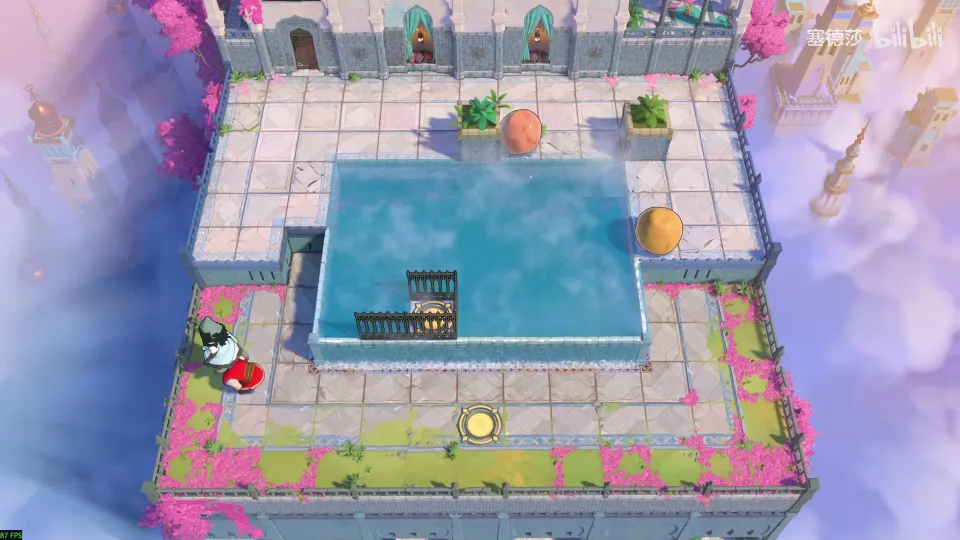
Getting there: skipping stones and lily pads reset separately. Start the lily pad, reset the stone, push it down and jump on the lily pad; the stone below gives you a step up. (4:00)
- The tile above the Sailor just needs a stone pushed down from above. (4:42)
- For the Sailor’s own tile, park the Warrior there with a skipping stone on his head, then push a stone down from above; it stops against him. Do this one first. (5:03)
- Take the first stone out at the top and push it straight down; the fence below stops it. (5:24)
- Recover the second stone, push it up, then hit it straight down. (5:45)
- Catch it, and the Sailor climbs up to the exit. (5:57)
Puzzle 4
Key idea: a big star puzzle that looks tidier than puzzle 3 and is harder for it. All you need is one stone on the tile right below the Sailor, pushed up from below, and the push comes from two stones stacked into one. (塞德莎 P34 6:10)
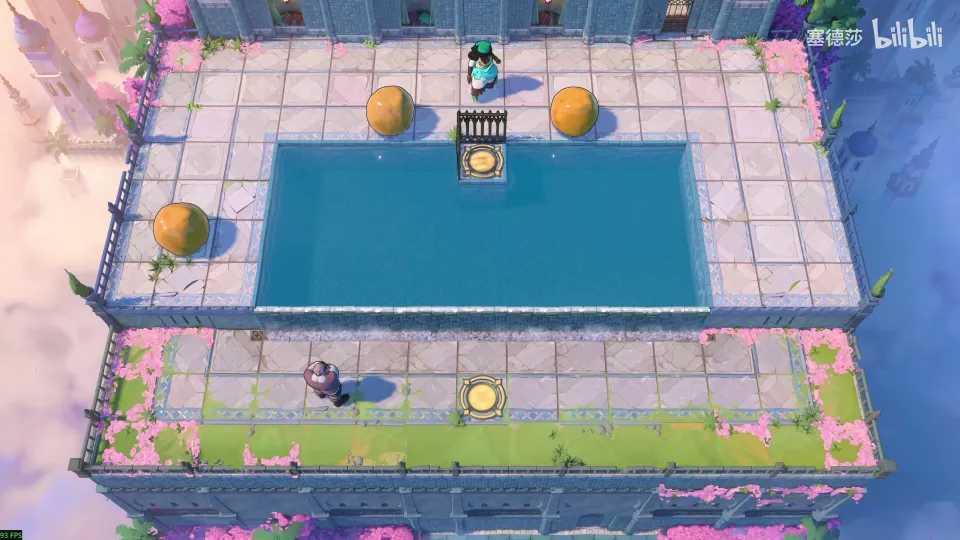
- Pushing from the side doesn’t work: the stone would end up on the exit. (6:38)
- Stop one stone at the marked spot, then push another stone up that column from below. (6:51)
- For the upward push, stack the other two stones into one. (7:00)
- Bring the Warrior over to catch it, step back and push. (7:12)
Puzzle 5
Key idea: a chain of four small stages with dragons riding lily pads. Push dragons into the water or up onto islands, and keep the dragon you need for the next stage alive. The last stage is not about floating at all. (塞德莎 P34 8:15)
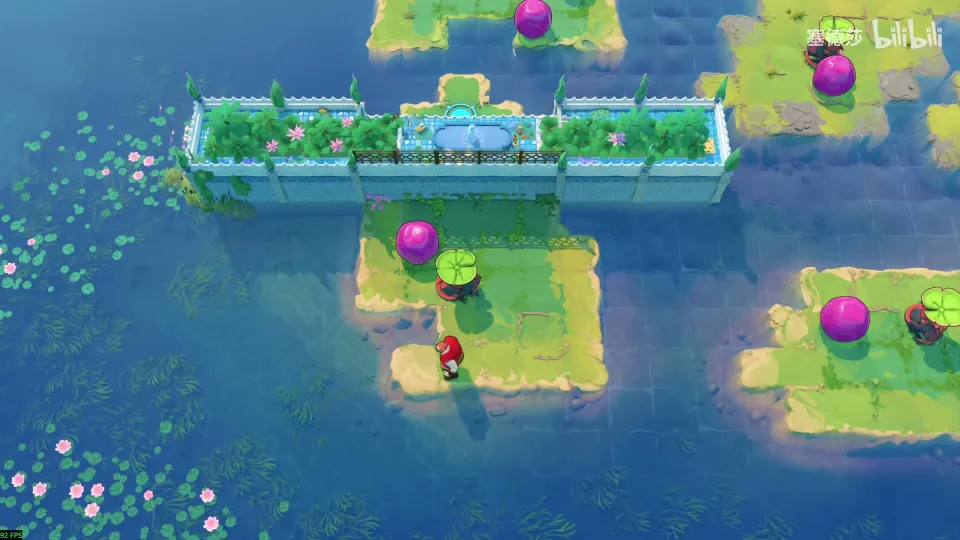
Getting there: teleport back, reset everything and head left. Start the lily pad, reset quickly and push the stone down onto the goblin, or it kills you when you land. (7:55)
- Stage 1: push the dragon a little right into the water below, then start it with the skipping stone. (8:15)
- Stage 2: the island on the right is cut off, so go up on the left. Push both dragons up from the top row, using the skipping stone as a step; for the second, nudge it left first. (8:45)
- Stage 3: pushing the dragon straight up kills the dragon you need next. Nudge it right with the skipping stone first, push it up, take the stone round behind, block in front and push them down. Without the nudge you can’t recover the stone. (9:18)
- Stage 4: pave a road with the lily pad and the skipping stone. A monster stops the stone where it lands; then push the lily pad into the water. (9:58)
Puzzle 6
Key idea: the lily pad and the crystal share a tile, so a goblin has to carry the lily pad into the water. The Wizard wearing the lily pad as a hat swaps it onto the goblin. (塞德莎 P34 10:19)
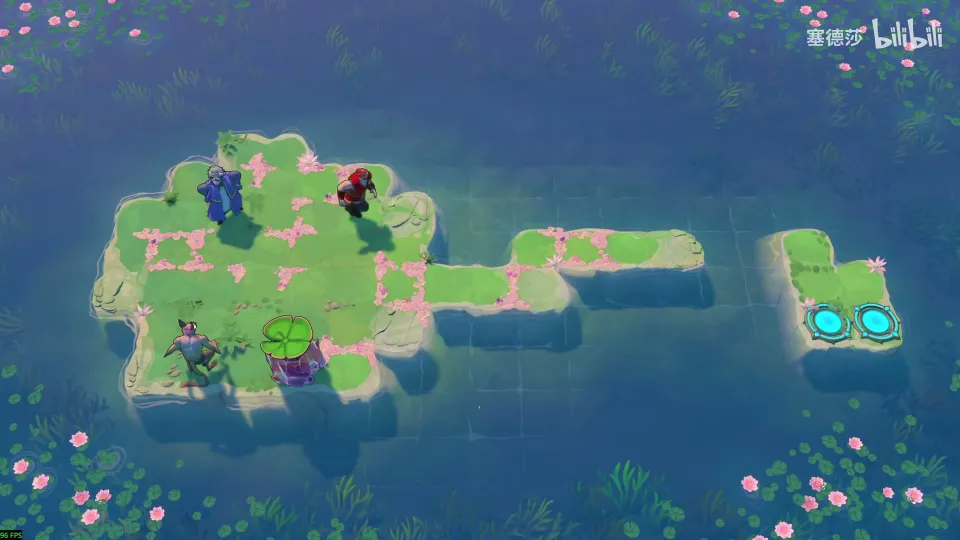
- Pushing the lily pad into the water while it holds the crystal wastes it. (10:41)
- Before the Wizard puts the lily pad on, swap the goblin up to the fourth row from the top, on the long strip to the right. (10:51)
- Go to the far end and swap left with the goblin while wearing the lily pad: it ends up on the goblin’s head. (11:15)
- Bring the crystal next to the goblin: send it up, park the Warrior, swap with him, then move him away. (11:28)
- Push both into the water. (11:38)
Puzzle 7
Key idea: a big star puzzle. When you reflect, the lily pad on your head doesn’t come with you; it drops. Use that to drop the lily pad onto the crystal skipping stone, then do the same with the skipping stone while it flies over the water. (塞德莎 P34 11:49)
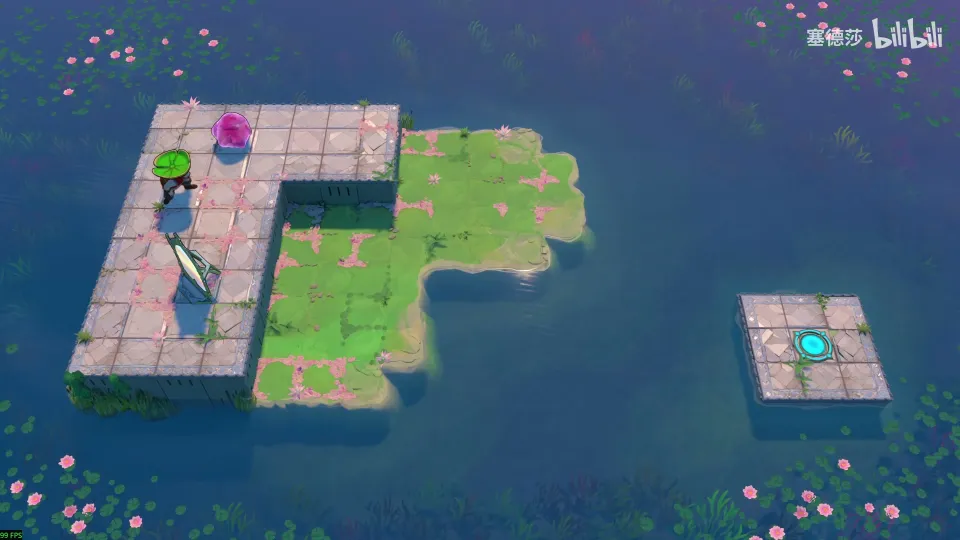
- You can’t enter the water, so first move the lily pad onto the crystal skipping stone: drop the stone below and bring the mirror over. (12:14)
- Stand above the stone and reflect: you move, the lily pad falls onto the stone. (12:34)
- Bring the mirror down too. As the skipping stone flies over the water, reflect it so the lily pad comes down into the water. (12:44)
- Start it and go right. (12:54)
Puzzle 8
Key idea: a two-stage room with a checkpoint. Its first stage teaches one move: walk just as a lily pad lands and you go (or push) one tile further than it does. Use that to free a stone from the wall. (塞德莎 P34 13:25)
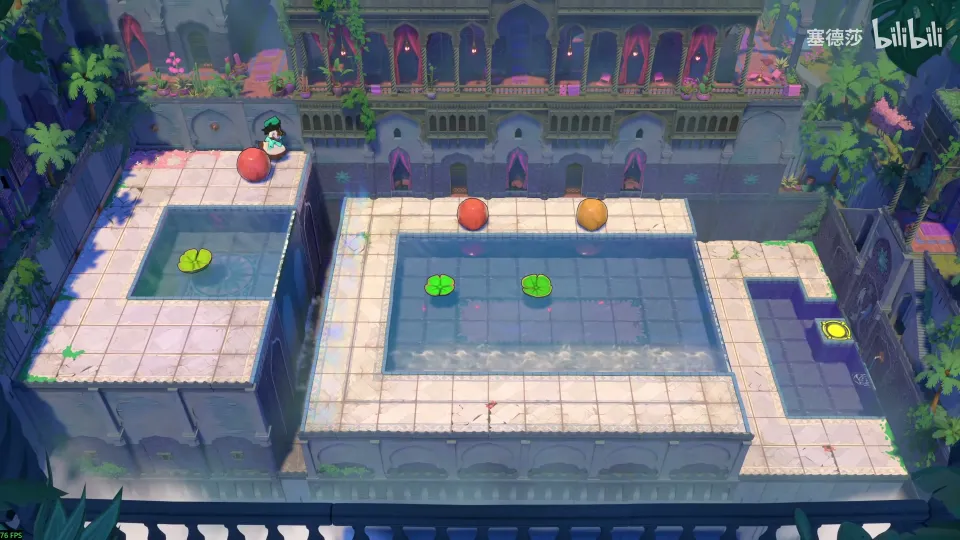
Getting there: a red elevator goes down (nothing there yet); go up instead, past a teleporter and a big elevator. (13:06)
- Stage 1: start the lily pad, recover the stone and hit the lily pad down, then recover the stone again and send the lily pad up-right. (13:48)
- If you just ride, you fall in. As the lily pad lands, walk right: you land one tile further, on the platform with the checkpoint. (14:08)
- Stage 2: a stone against the wall can’t be pushed out. Push two lily pads side by side into the pond, timing each push just before the front one lands, so the stone moves off the wall. (14:41)
- Push the stone across. (15:22)
Puzzle 9
Vertical Mirrors and Skipping (竖直之镜与飞跃)
Key idea: the vertical-mirror tutorial. Reflect a skipping stone while it falls and the drop becomes a skip across the water; reflect again and it drops back. (塞德莎 P34 16:15)
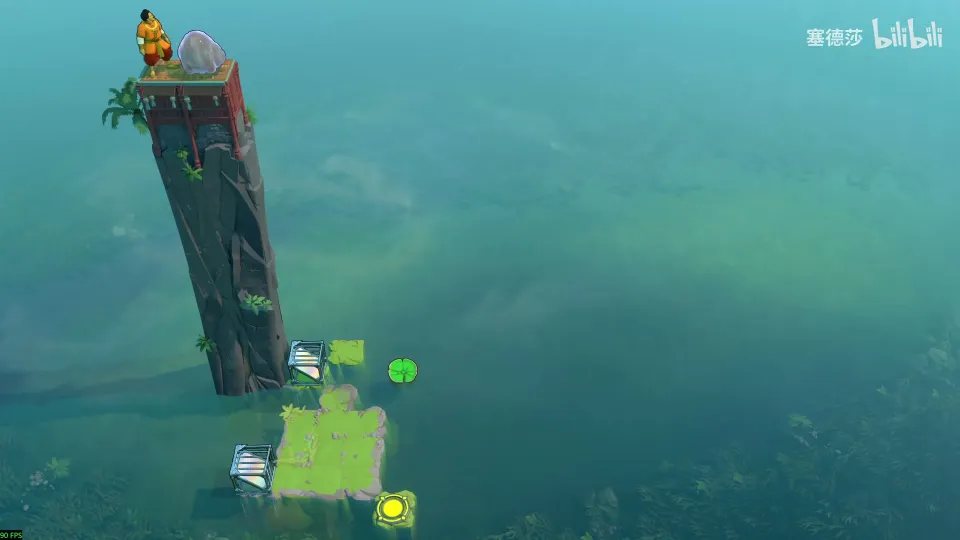
Getting there: teleport back to the middle, recall the lily pad and jump down when the two lily pads cross. On the right, a vertical mirror takes you across. (15:46)
- All you can do is push the stone right off the pillar. (16:15)
- Reflect while it falls: it lands skipping, and knocks the lily pad over. (16:25)
- Send the stone out, reflect so it drops, reflect again so it comes back, and block it with your body on the spot you need. (16:53)
Puzzle 10
Key idea: put stones from three islands on three buttons in one lily-pad ride. Ride the current to the far island, then use the vertical mirror to hop back left island by island. The hard part is choosing the mirror’s row so nothing blocks the way back. (塞德莎 P34 17:33)
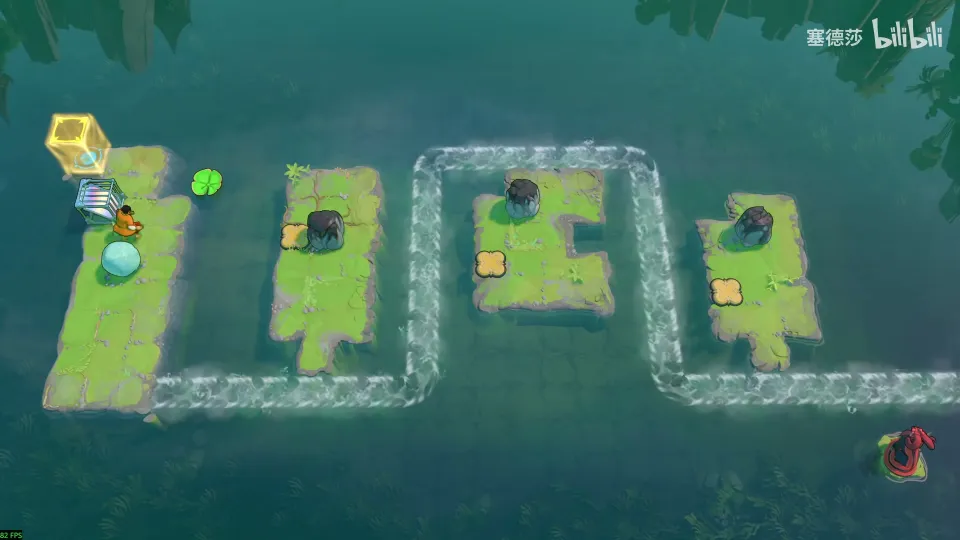
Getting there: take the vertical mirror up to the left. (16:53)
- The dragon at the bottom right only stops you riding too far; ignore it. Plan: start the lily pad, ride to the last island, solve it, then reflect left to the next island, and so on. (17:33)
- The bottom rows have nowhere to stand, the top rows are open, and every middle row seems to get blocked by a stone. (19:48)
- The trick: on the way out, while riding past the middle island (its wide landing is the hint), push its stone down. That keeps the right row clear. (19:48)
- Place the mirror, start the lily pad from the top, skip the first island, push the second island’s stone down, and finish island by island. (21:11)
Overworld puzzle 1
Key idea: take a stone to the middle platform on the right to send two lily pads down, take the mirror with you, then a pure timing run: push the stone, reflect twice so it skips back, and knock a lily pad over each pass. (塞德莎 P34 21:22)
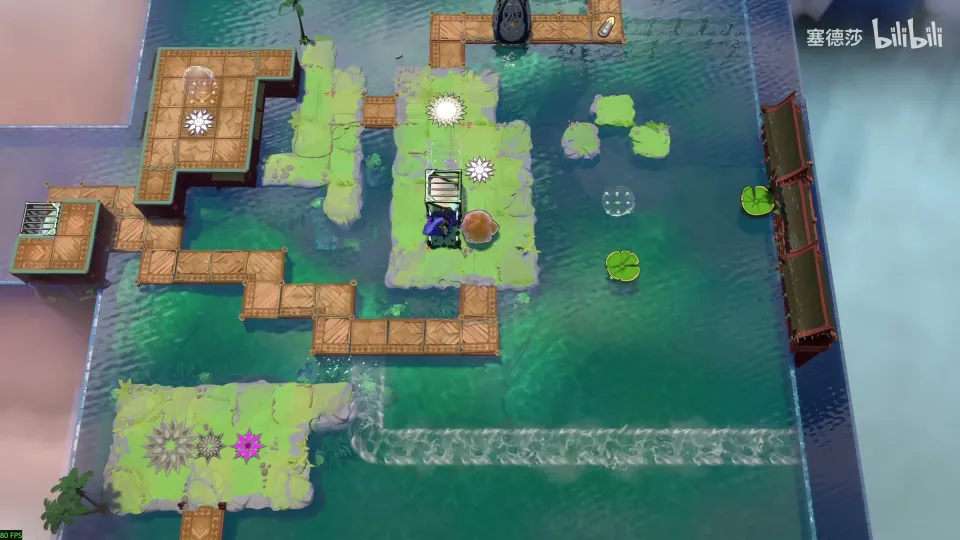
- Push the stone down, then right; push it onto its spot, down, and loop round with the mirror to take it out again. Push the mirror down, right, turn it and push it up to recover it. (21:22)
- Hit one lily pad straight right and recover the stone; start the lower lily pad, reflect before the stone hits the wall, then start the last one. 塞德莎 says the order isn’t unique.
- For the timing run, watch the video around 22:40: push the stone, reflect twice to bring it back and hit a lily pad over, recover the stone, repeat.
Puzzle 11
Key idea: five lily pads in a row: 1, 3 and 5 must go up, 2 and 4 down. Use the two lily pads on the right and the vertical mirror to come back along the row, switching into the air to skip the ones you must not hit. (塞德莎 P34 24:25)
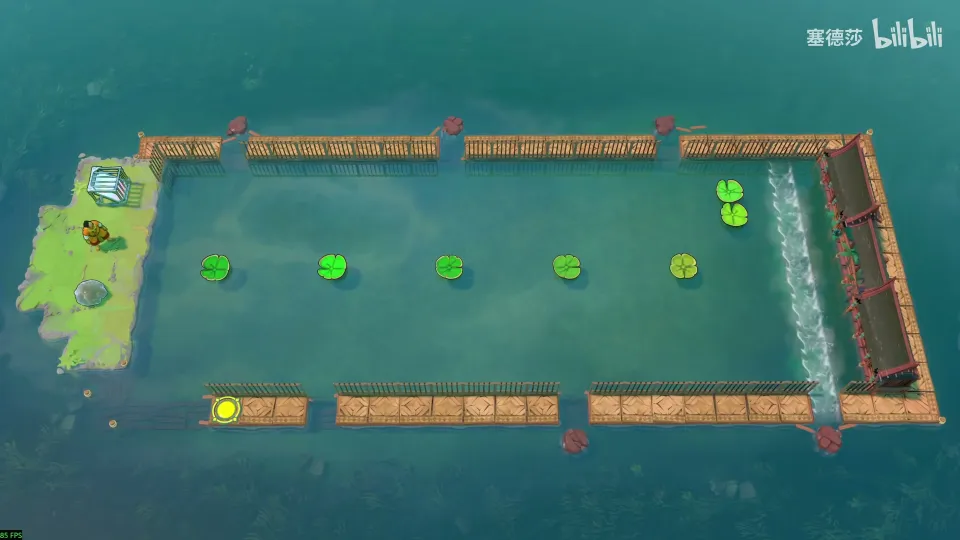
- Hit the skipping stone right onto a lily pad; it rides the current down, and at the right moment the vertical mirror pulls it back. (24:34)
- One lily pad has no stone under it, so it must be hit last or it drifts away. Order: 1, 3 and 5 up, then 2 and 4 down, then leave at once.
- For 1, 3 and 5, put the mirror on the lower row and ride a lily pad over. (25:57)
- Hit 5, skip 4, hit 3 and 1. (26:17)
- Move the mirror to the right place for 2 and 4 (塞德莎 corrects its position) and set off after a reflection. (26:42)
- When the lily pad comes down, go left quickly. (26:52)
Puzzle 12
Key idea: a timing room with very slow lily pads. Send one to the top right (easy) and one to the top left, which sits one column off, so it needs a leftward hit made by skipping a stone out and pulling it back with the vertical mirror. (塞德莎 P34 27:08)
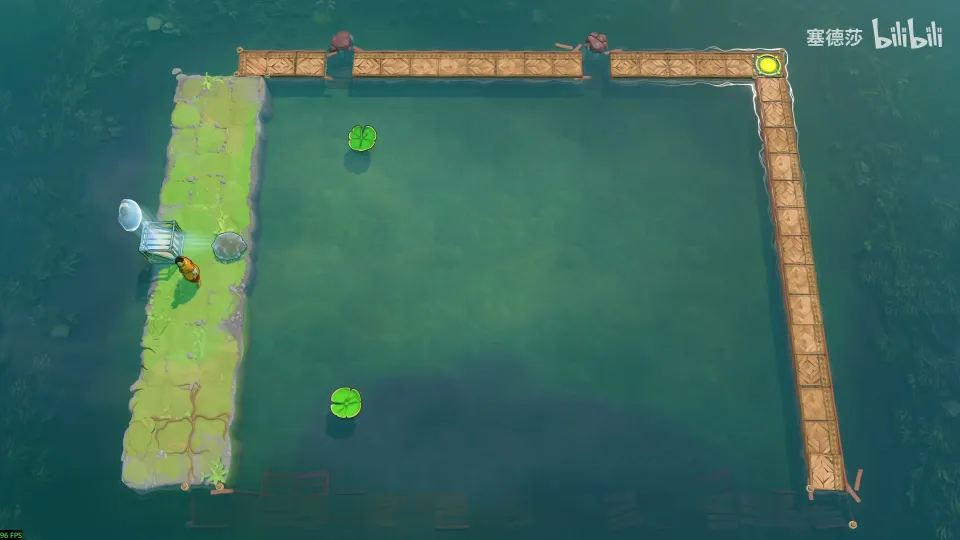
- Top right first: hit the lower lily pad over and recover the stone. (27:17)
- For the top left, first hit the lily pad right to gain distance, recover the stone, then let it drift down. (28:41)
- Push the mirror into place, wait, skip the stone right and pull it back so it hits the lily pad left. (29:03)
- At the next good moment, hit it up. (29:13)
Below this room there is an audio log and four “unsolvable” rooms that explain how mechanics combine; 塞德莎 skips them. (29:33)
Puzzle 13
Key idea: the exit is on two skipping stones, so both must stop in the right place. The Sailor’s level has one sensible spot, right in front of him; build a two-high stack as he flies past, then stop the upper stone with a well-timed push. (塞德莎 P34 31:19)
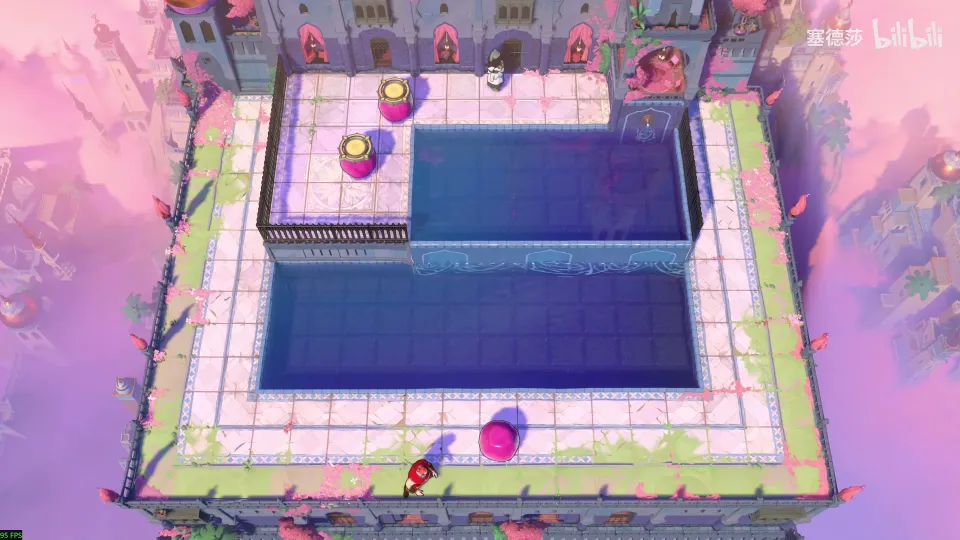
Getting there: to drop down to the left, pin the upper lily pad: push the skipping stone over and down at the right moment, then go back up and walk left off the edge. (30:25)
- Use the lower skipping stone to block the tile in front of the Sailor. (31:37)
- As the Sailor flies left, push down here so the two stones stack. (31:57)
- Push the stone over to the right first (start from the right, it’s further). While it is blocked on its way left, push the skipping stone down so the upper one stops. (32:21)
- Get rid of the two stones in the water by ramming them up into the corner wall. (32:41)
Puzzle 14
Key idea: the button opens the block on the exit only while held, so a stone must sit on it, pushed from outside the room’s hole. Stack two stones and send a third with the Sailor on top along a parallel row; the terrain lines up the timing. (塞德莎 P34 33:12)
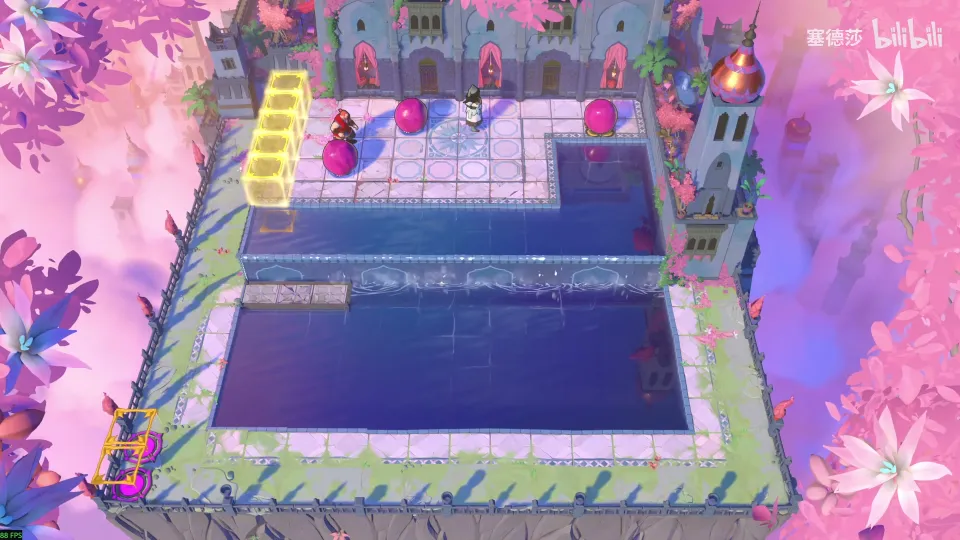
- The target is the tile under the hole: a stone pushed up from there lands on the button. (33:39)
- Stack any two stones, push one more down and put the Sailor on it. (34:35)
- Place both setups, push this one first, then hold Ctrl and go right, up, right, right, right. (34:55)
- When it reaches the column, push up. (35:06)
Puzzle 15
Rotating Beams (旋转光束)
Key idea: the green beam must point right to cross the wall, but it points up. Put it on a skipping stone: it spins a quarter turn clockwise per tile, so pick the lane whose length gives the right facing. (塞德莎 P35 0:23)
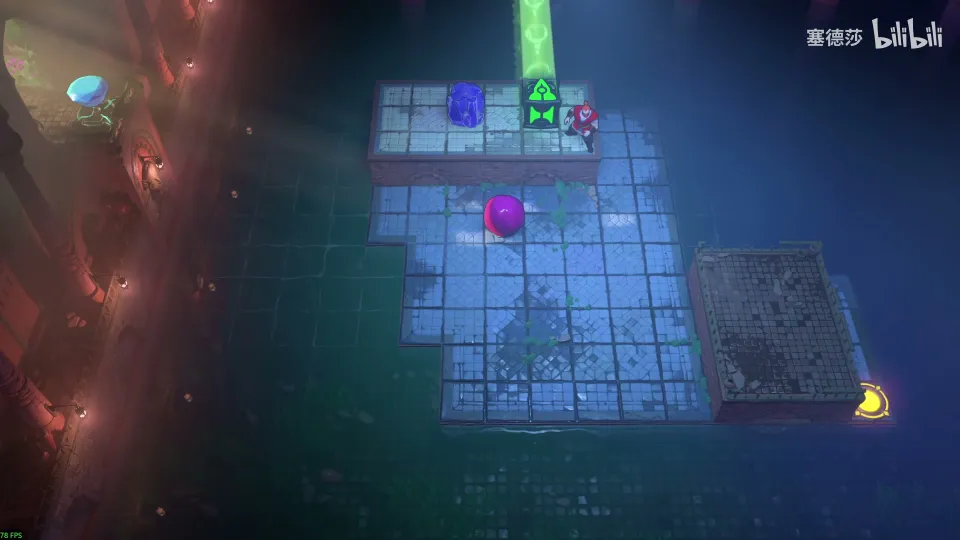
Getting there: continue south; take the path to the right first. (0:06)
- Push the beam onto the skipping stone and try a lane: from up it can end down, left or right depending on where you push. (1:20)
- Pushing left from one row gives right; the other row doesn’t, so pad a tile with the spare crystal. (1:56)
- 塞德莎 explains the rule: 90 degrees per tile, counted modulo four. (2:09)
Overworld puzzle 2
Key idea: the new blue beam. Pushing left here moves three tiles, a quarter turn anticlockwise, so set the beam facing down first to end facing right. Its light lets you walk through gates. (塞德莎 P35 3:32)
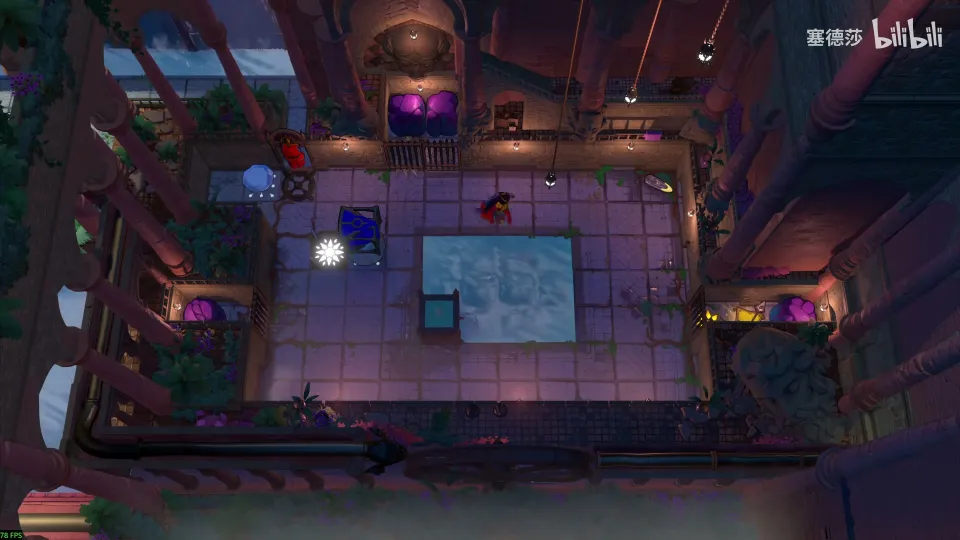
- Go right to the spot with the area-name carpet and aim the beam this way. (4:00)
- Three tiles left = a quarter turn anticlockwise, so make it face down, then push left. (4:12)
- Activate the gem. Standing in blue light lets you pass through the gate. (4:45)
Puzzle 16
Key idea: turn dragons with the spin. A four-tile push leaves a dragon facing up; to get three turns, stop the spin early by pulling the stone from the side with the Thief. (塞德莎 P35 5:06)
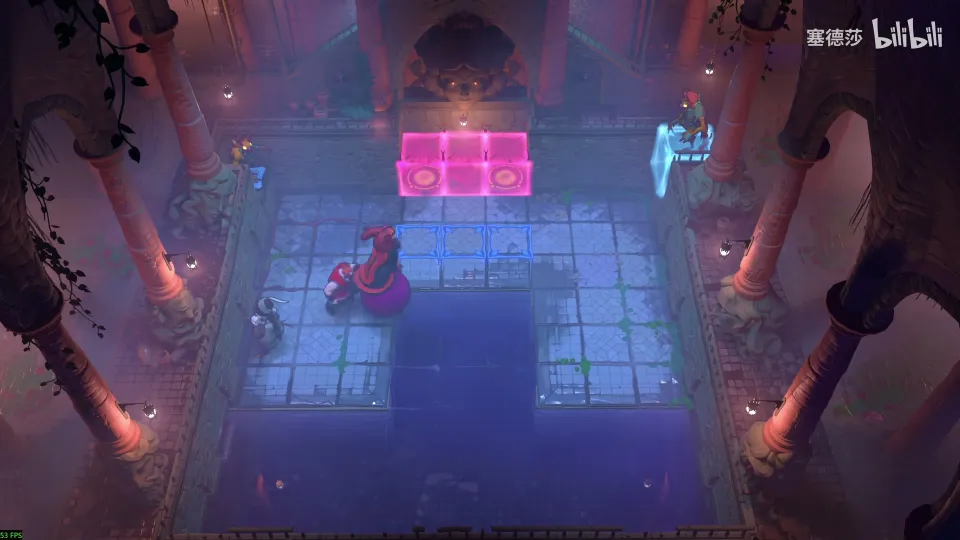
- Pushing straight goes four tiles and the dragon still faces up. (5:28)
- To face left it must turn three times: have the Thief pull it up from the side to end the spin early, then burn the first target. (5:39)
- On the right three energy blocks appear and the side pull isn’t possible. Push the stone out and let the Thief pull early; repeat once more until the facing is right, then fire. (6:08)
- To kill the dragon itself, block with the Thief opposite, ram the stone into him and push the dragon down. (6:39)
Overworld puzzle 3
Key idea: walk through the left fence in blue light; the beam goes through walls, so make it face left. Three tiles left means it must face up before the push, which you set with repeated five-tile pushes. (塞德莎 P35 7:00)
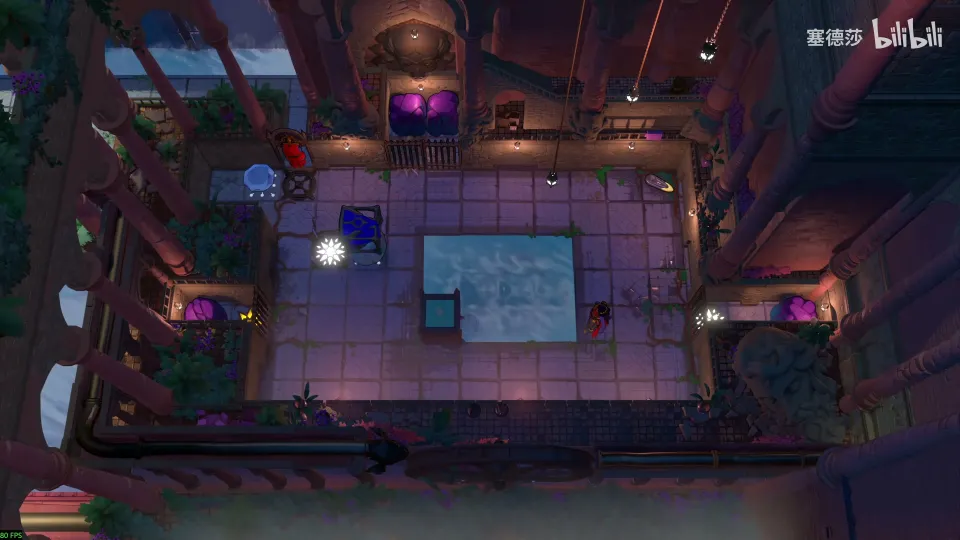
- Push left from here so the beam ends facing left. (7:14)
- Set it to face up first: each five-tile push turns it once; three of them do it. (7:24)
Puzzle 17
Key idea: choose one of four lanes. Write down the facing on every tile of each lane (always starting from right): only the bottom lane has an “up” facing where the three targets above can be hit, and that fixes where each of the three dragons goes. (塞德莎 P35 7:48)
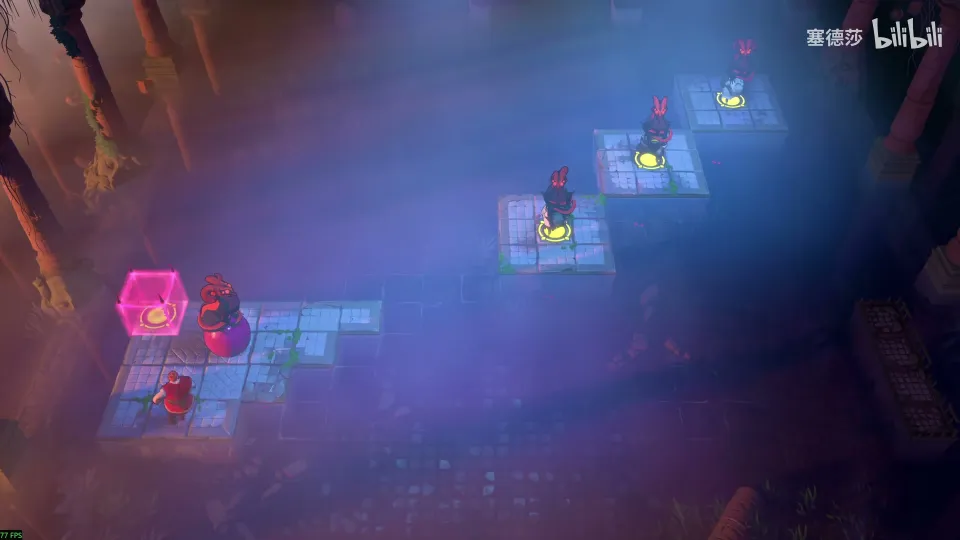
- List each lane’s facings: down, left, up, right, repeating. (8:08)
- Only the bottom lane works. Its up-facing tiles put the dragons in the left, middle and right columns. Two must not face down (they’d fire too early); the last must face down so they burn each other. (9:23)
- Push right along the bottom lane, set the facings (one left, one down) and push out for the double kill. (10:38)
Overworld puzzle 4
Key idea: pushing the beam down two tiles turns it half round, so set it to the opposite of the facing you need, then push down to go up. (塞德莎 P35 11:03)
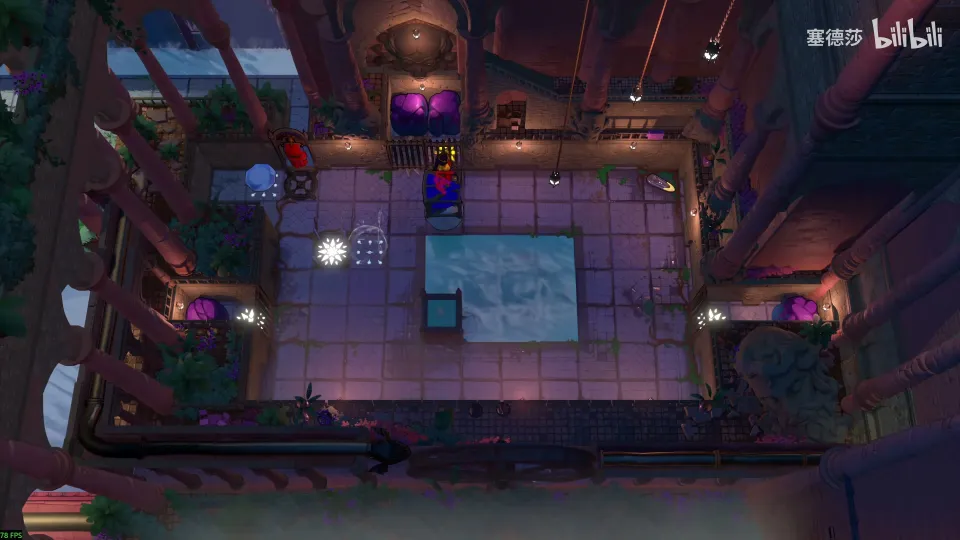
- Two tiles = 180 degrees. Change the facing first, then push down. (11:14)
Puzzle 18
Key idea: the purple beam must end facing up so the Cleric can teleport down to its end. Almost every lane is a multiple of four long and changes nothing; the column you can push up and down (five tiles per push) is where you adjust the facing. (塞德莎 P35 11:35)
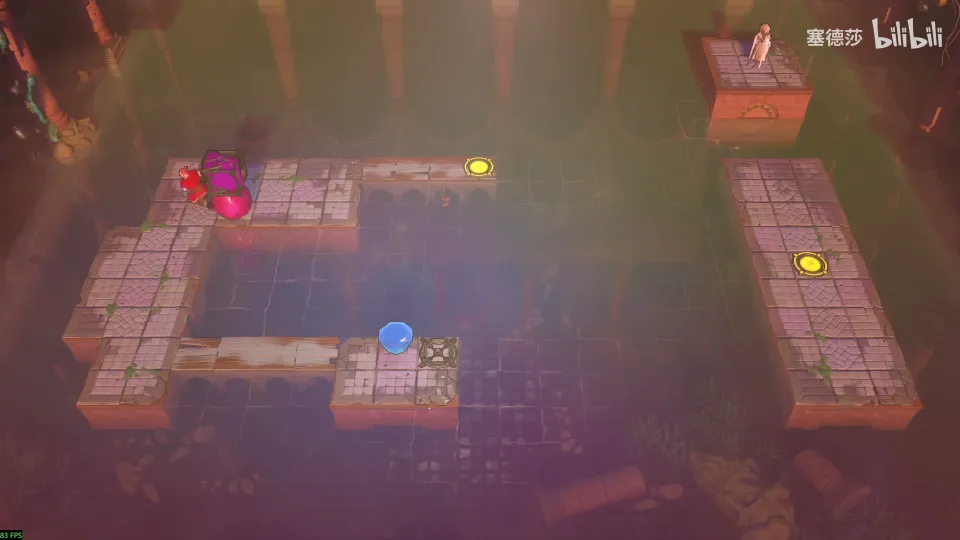
- The rows are 8, 12 and 16 tiles long; only two rows of 9 turn it once, which turns right into down, not up. (11:52)
- Push the gem out first; you’ll need to loop round later to recover the stone. (13:20)
- Push down (now facing down), push down again (now left). (13:31)
- Push right from here: one more clockwise quarter turn gives up. (13:41)
Puzzle 19
Key idea: the red beam on a skipping stone must sink facing left so it reaches the red door. Count the lanes: right-and-back cancels out, sinking in a five-tile lane faces it up or down, so the sink must happen in the one six-tile lane, and the column on the left supplies the half turn you need first. (塞德莎 P35 14:14)
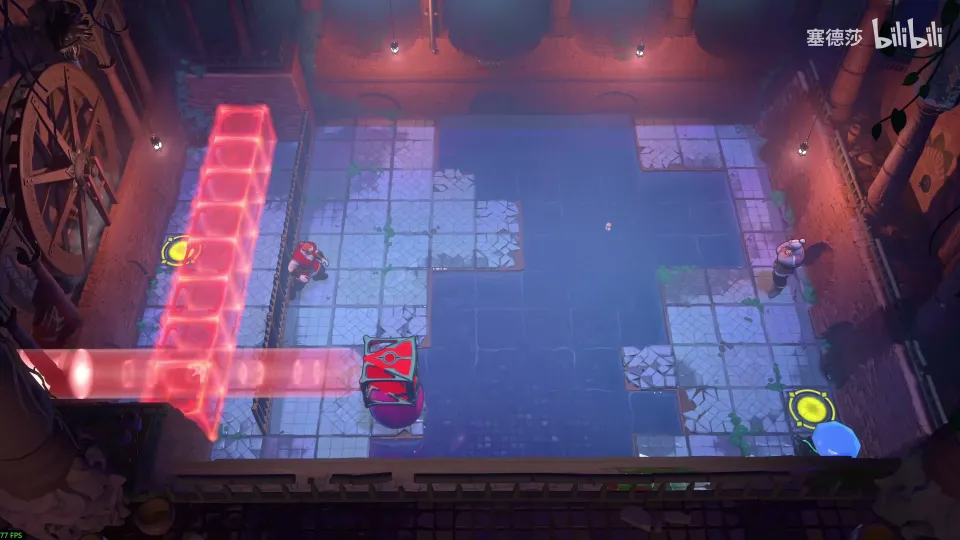
- 塞德莎 counts every lane and shows why the only sink point is this one, pushed right, with the beam facing right beforehand. (14:43)
- Push it right, then back. (17:15)
- Push it down here: it now faces right. Recover it by pushing from here. (17:25)
- Block this row and stand in the beam on the right with your body. (17:36)
Puzzle 20
Stacking and Skipping (堆叠与飞跃)
Key idea: stack skipping stones down to the bottom of the pool. Each one must sink where you can still push the next out. (塞德莎 P35 18:24)
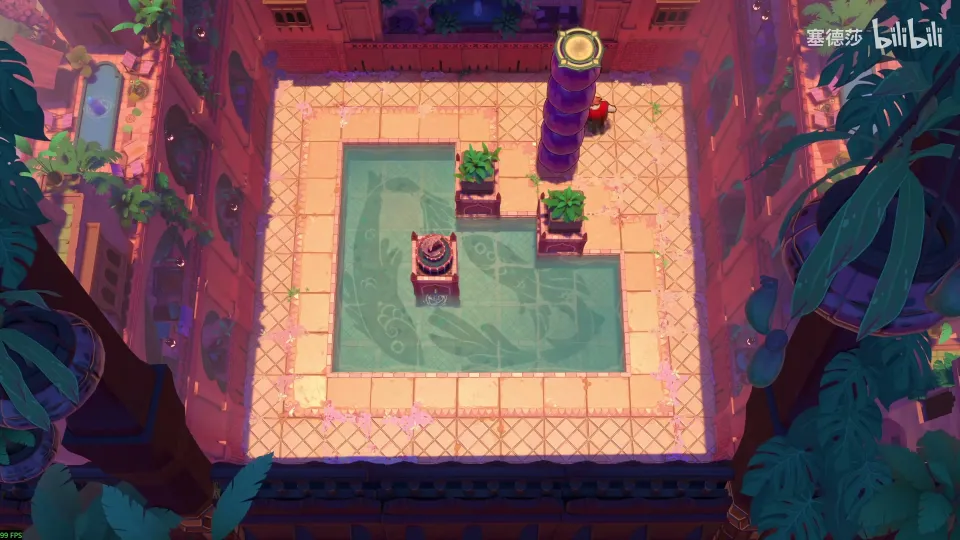
Getting there: after Rotating Beams, come in and use the stone at the start to pave a path. (17:58)
- First stone: the only spot where it can sink and still be pushed out is here. (18:24)
- Second next to it, third one further on (here down, then right). (18:43)
- Last: here up, then left. (18:53)
Puzzle 21
Key idea: a triple kill. The three-high goblin in the middle must sink, so it needs something to stop against, and the moment it sinks a two-high goblin must stand next to it. (塞德莎 P35 18:53)
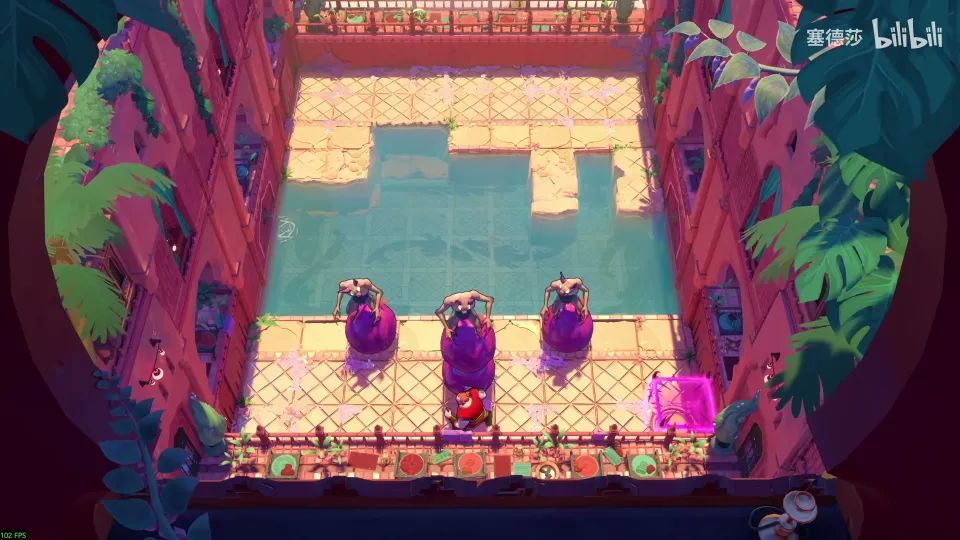
- Two skipping stones unlock; go to the bottom-left room. (18:53)
- Push a two-high goblin across to the far bank, ram the three-high one against it so it sinks; one spot works. Push the other two-high one over, then the next. (19:41)
Puzzle 22
Key idea: the same triple kill with a flat far bank and an extra stone. You can only push to every other tile there, so swap roles: a two-high goblin goes in the middle, and the three-high one sinks first and becomes one of the sides. (塞德莎 P35 20:50)
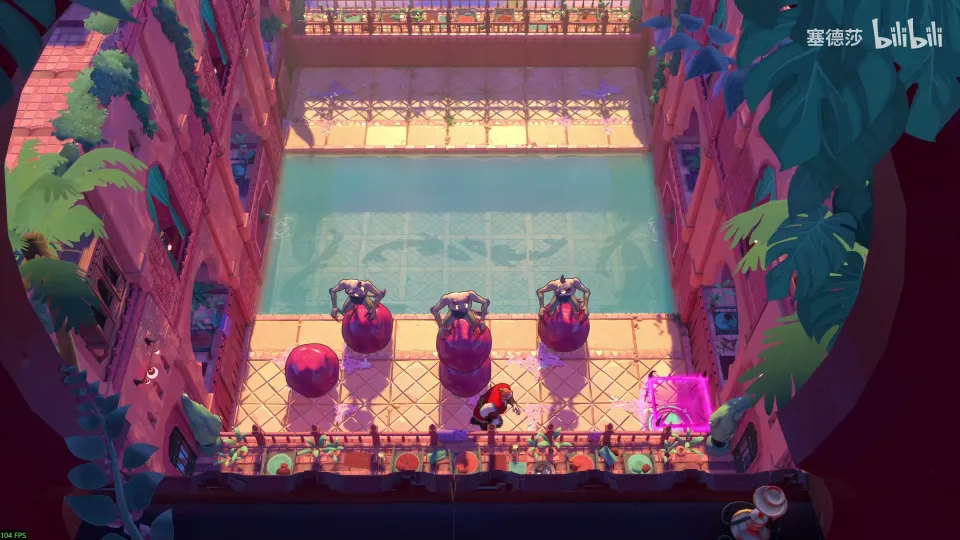
Getting there: reset, push right, then down, to the bottom-right room. (19:41)
- Push the three-high goblin across, push the lone stone next to it and ram it against the stone so it sinks. (20:50)
- Push the last goblin between the other two: they meet just before it sinks. (21:41)
Puzzle 23
Key idea: the two-high Thief can’t pull the crystal straight onto the button: the skipping stone he’d need would sink in the corner and trap him. Instead let the piston gate push the crystal onto a skipping stone, then pull it up from the other side. (塞德莎 P35 22:27)
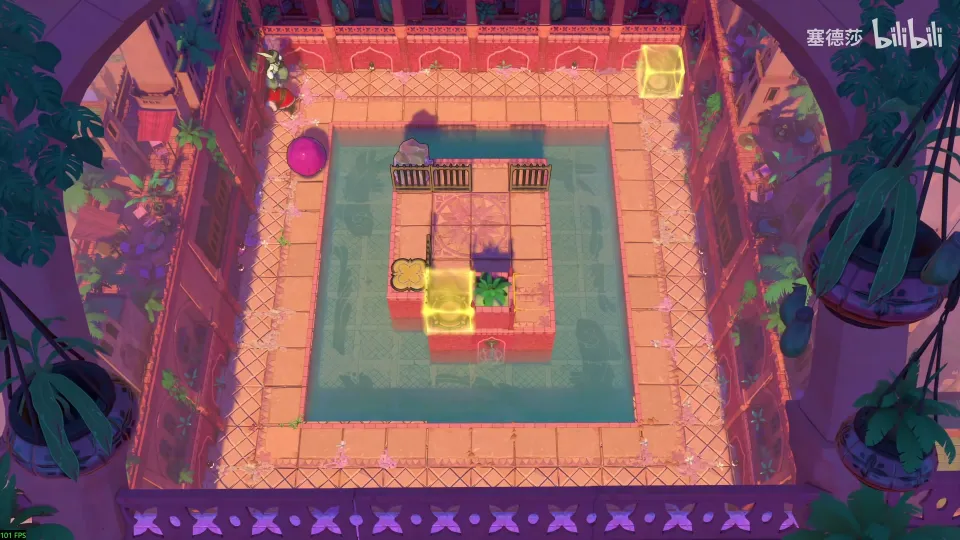
Getting there: with three stones you can go up: push right, pad one here, push up, then go round right and push the third. (21:41)
- Get the Thief onto the island and pull the stone over; climb on from the side, not from below, or you pull the stone. (22:37)
- Why the direct pull fails, and the piston plan. (23:21)
- Pull the background stone to the right edge, then down; push the stone sideways and drop the Thief: the crystal reaches the edge. (25:13)
- Get the Thief back up without pressing the button, push the skipping stone and press the button at the right moment so the crystal lands on it. (25:34)
- With the Thief on the button, push up, then pull up. (25:59)
Puzzle 24
Key idea: a big star puzzle. Two goblins can go into the water, but the caged one can only die by meeting another goblin. The Bard’s song makes goblins follow only while the Bard himself moves, so carry him on stones. (塞德莎 P35 26:22)
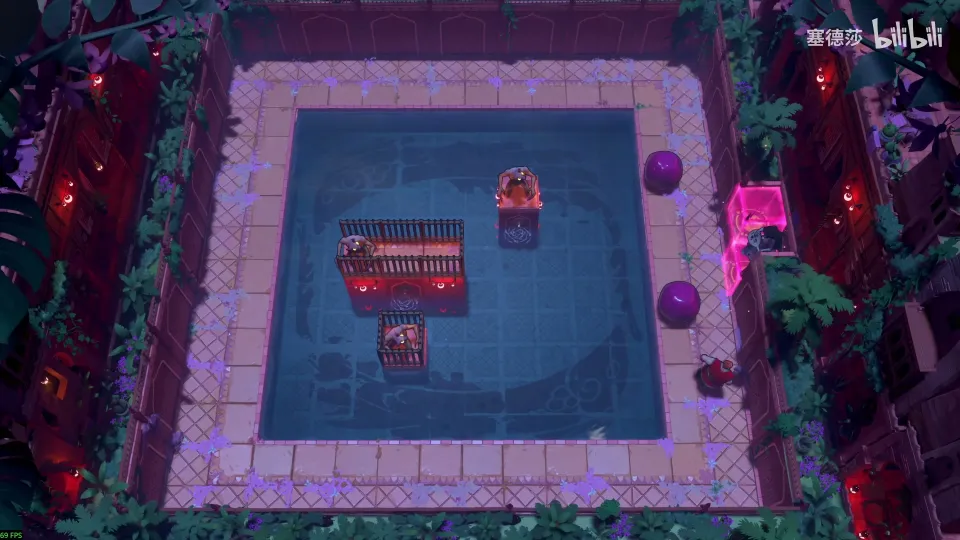
- The Bard rides a skipping stone; pad the middle with the Warrior or he can’t get up. (26:22)
- Just switching to the Bard makes goblins dance but not move. He has to move. (27:32)
- Opening: Bard here, a stone here, push it up; as the Bard reaches the stone, pull left: the leftmost goblin falls in. (28:05)
- Take the Bard to that goblin’s platform, prepare a stone and time the goblin onto it. (28:23)
- Push the stone up; next to the caged goblin, pull the goblin over onto it: both die. (28:54)
- Bring the Bard home and push back to the right. (29:17)
Puzzle 25
Key idea: dragon fire makes the Cleric float, and a hero in the row he protects floats with him. Stage 1 lifts the Trader to the platform; stage 2 stacks Trader and Cleric three high so the Cleric floats under the dragon and the Trader steps to the second level. (塞德莎 P35 30:30)
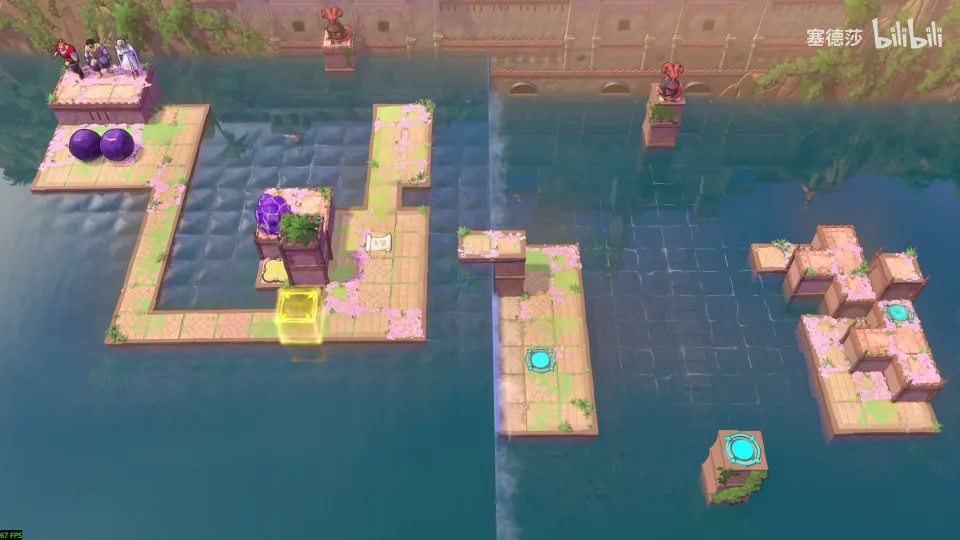
Getting there: reset the three stones and push down, left, down to the lower area, where a button drives skipping stones; ride one to the bottom left. (29:27)
- The Trader goes up; the Warrior stays below because only he can push the skipping stone. Put the Cleric and Trader on it. (30:40)
- Push the Cleric over: hit by fire, he floats. Push the Trader into the row above him; protected, he floats too, and his push brings the stone down. (30:59)
- Go right with the two-stone stacking trick (pad a stone here) down to the lower level. (31:43)
- The Cleric (three high) must reach the spot under the dragon, the Trader (two high) the second level on the right. Build the three-high stack and push it right along this row; both reach their exits. (32:03)
Puzzle 26
Key idea: the Cleric has to end at the top right in the dragon’s row, and the only thing that can float there is the goblin. So the goblin carries the floating Cleric all the way right. (塞德莎 P35 33:07)
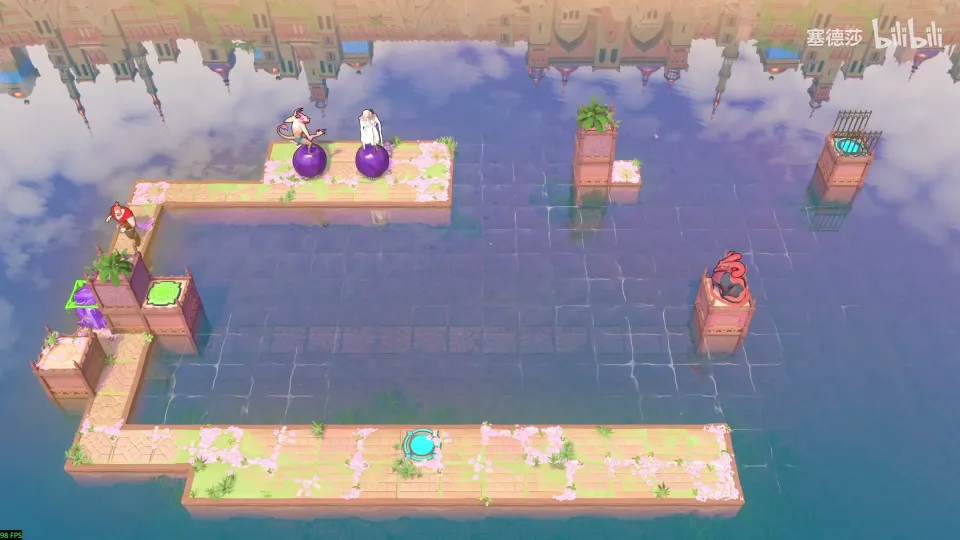
Getting there: move the stone here to reach the top-left corner. (32:40)
- Stage 1: push the Cleric’s skipping stone down (he floats), step on the green button to crush the stone and come down. (33:16)
- Plan the goblin’s route along the edge to the right. (33:36)
- Bring the Cleric back and push him to the top-right space; make him take a step onto the stone. (34:07)
- In the middle, by the dragon, make him step again or he stops. (34:31)
- Hold Ctrl and press right at a steady pace; the Cleric follows to the exit. (34:51)
Puzzle 27
Key idea: place the three goblins, then walk the Cleric over. The Warrior carries a stone only to stop the Cleric cheating by standing on his head. (塞德莎 P35 35:38)
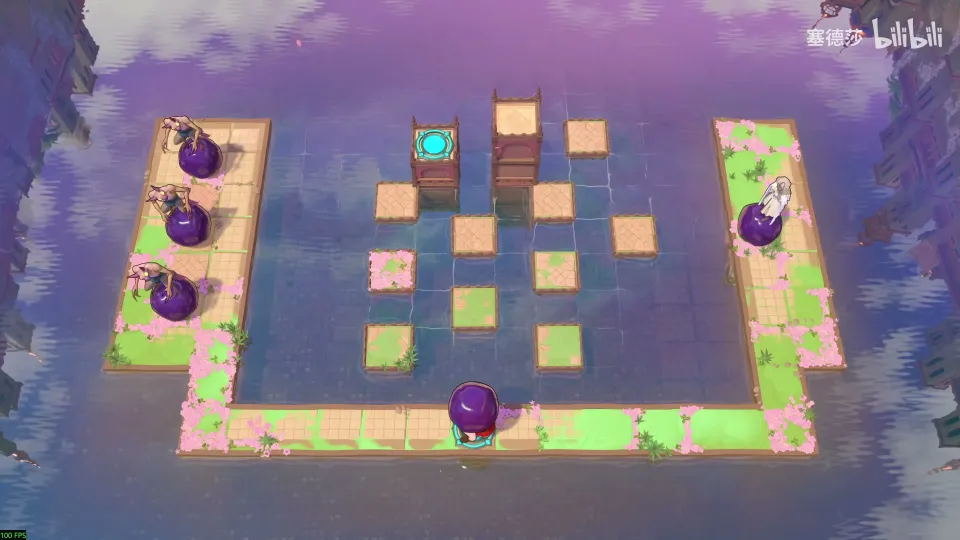
Getting there: from puzzle 26 move over to the bottom right. (35:01)
- Push this goblin first, or it meets another goblin and both die; then the next two. (35:48)
- Push the Cleric into place and walk up to the exit. (36:13)
That finishes the big star puzzles of the south. On the way back a stone pushed up gives a shortcut, and there is another red sign. Last comes the Skipping Road (飞跃之路): two lily pads move in sync, so hit the upper one right as it arrives to put them out of step, then jump across. Press the button and the three stones start rolling; it is a pure dodging run, made easy by slow motion, and it ends at the area 塞德莎’s game calls 对映之地:高处 (Antipode: High). (37:45)
The third-stage counterpart is Low Skipping Stones.