Spoilers: these rooms only open in the second stage, after the first ending. This page sticks to puzzle solutions, but how you get there gives away late-game content. If you haven’t finished the Endgame yet, see the Antipode walkthrough first.
Mirrors in Mirrors (our working name; in-game Chinese 镜中之镜, English name not confirmed yet) is a small extra part of the East world, just past the Mirror Isles. It adds one new object: the crystal mirror, a mirror that the Trader’s own mirror can reflect. Move it, turn it, clone it, and use it to throw yourself onto the exit. This page solves all 10 puzzles and the overworld puzzle between them.
Where it is: on the ground level, past the right-hand (east) edge of the Mirror Isles, on the tiles 塞德莎 labels E3 and E4. It is locked on a first run. 塞德莎 comes back in the second stage (see how to ascend), drops down from the level above and walks over (0:11). It counts as plain East, not a crossover, so it has no big star room.
How to use this page: we found no English video of this area, so the puzzle numbers are ours and follow the order of 塞德莎’s narrated walkthrough. Each heading has the key idea and a link to the moment the room starts, and the numbered steps link to the same video. Puzzles 1–4 are the tutorial rooms; the title card appears after them, at 4:00.
Rules that matter here
- Mirrors. As in the Mirror Isles, reflect (塞德莎 presses X) and whatever stands on one beam of a mirror moves to the tile at the same distance on the other beam. A reflected object lands on the same diagonal through the mirror, so drawing that diagonal tells you where things can go.
- Crystal mirrors can be reflected. Stand so the crystal mirror is on your mirror’s beam (塞德莎 shoots it from behind) and it moves like a crate. This is the only way to put a mirror on a tile you can’t push it onto.
- Reflecting turns it. A crystal mirror that has been reflected faces the mirrored direction. If a mirror faces the wrong way, route it through one extra reflection to flip it (puzzles 5–7).
- Clone and merge. Two mirrors on the same crystal mirror split it into two copies, or merge two copies back into one, just like heroes and crystals elsewhere. Puzzle 9 needs five mirrors and gives you three.
- Mirrors get in the way. A mirror standing on a beam gets reflected too. A mirror you no longer need can block the reflection you want, or send your crystal mirror into the water, so plan where each one ends up.
Puzzle 1
Key idea: the same layout as an early Mirror Isles room, with the two stones replaced by a crystal mirror. Get a mirror onto the middle island by reflecting the crystal mirror there, then follow it. (塞德莎 P33 0:28)
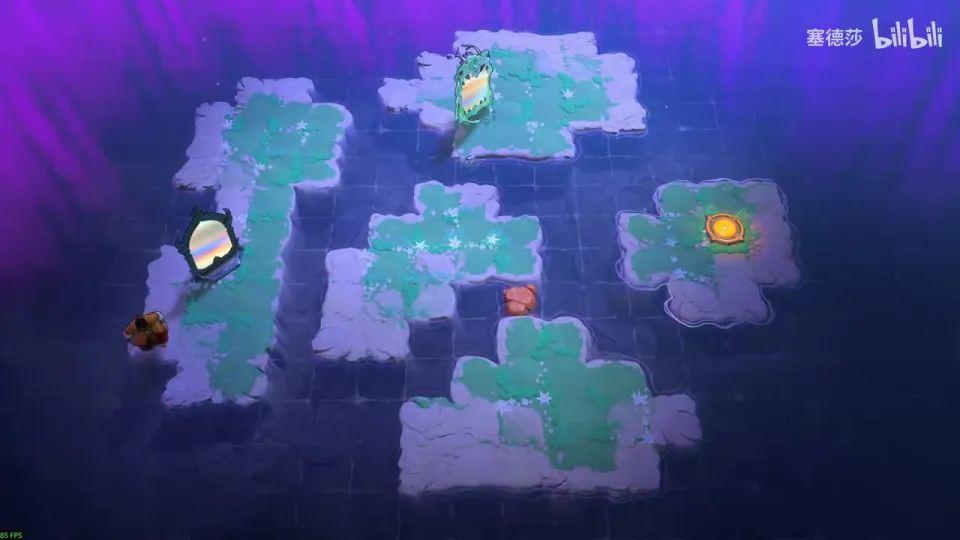
- Shoot the crystal mirror from behind with your mirror: it moves, so it can be reflected like anything else. (0:40)
- The goal is the same as in the original room: a mirror on the middle island. Reflect the crystal mirror over there. (1:00)
- Cross after it and use it to reach the exit. (1:15)
Puzzle 2
Key idea: the exit needs a mirror on one particular tile, with you to its right. Pushing it there always leaves you on the wrong side, so reflect it into place instead. (塞德莎 P33 1:22)
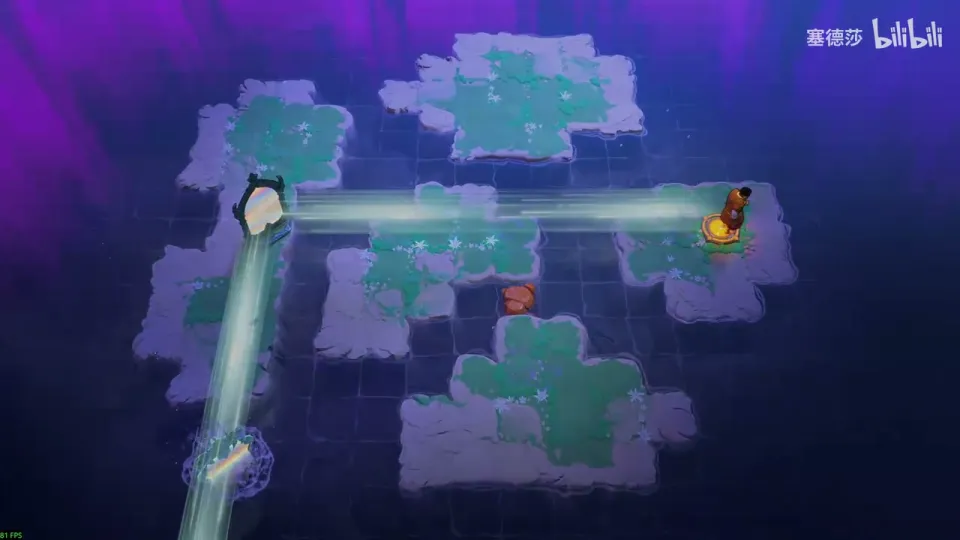
- Take your mirror out and use it to reflect the crystal mirror in the bottom-left corner, so it is no longer stuck against the edge. (1:27)
- Check the target: one mirror on the tile 塞德莎 marks. If you push it there, you end up to its left. (1:40)
- Reflect the mirror so it lands on your left, then reflect yourself onto the exit. (1:50)
Puzzle 3
Key idea: the crystal mirror always stays along the top edge. All you need is the crystal mirror on the upper small island while you stand on the lower one; one reflection with the top mirror does both at once. (塞德莎 P33 2:00)
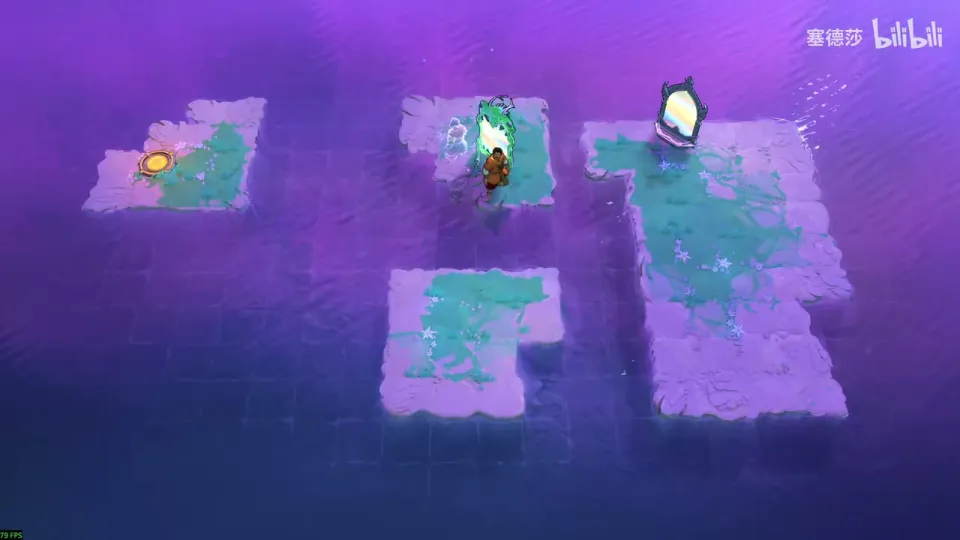
- Go to the left side first. (2:05)
- Reflect back and take your mirror down. With it you can reach the lower small island. (2:15)
- Use the top mirror so that it carries you to the lower island and sends the crystal mirror to the upper island in the same reflection. 塞德莎 rates this one slightly hard. (2:25)
Puzzle 4
Key idea: draw the diagonal: a mirror where the crystal mirror starts, plus you on the bottom tile, gets you to the right. The mirror that sends you down then blocks the top mirror, so swap the two mirrors and let the one that moves you also throw itself into the water. (塞德莎 P33 2:40)
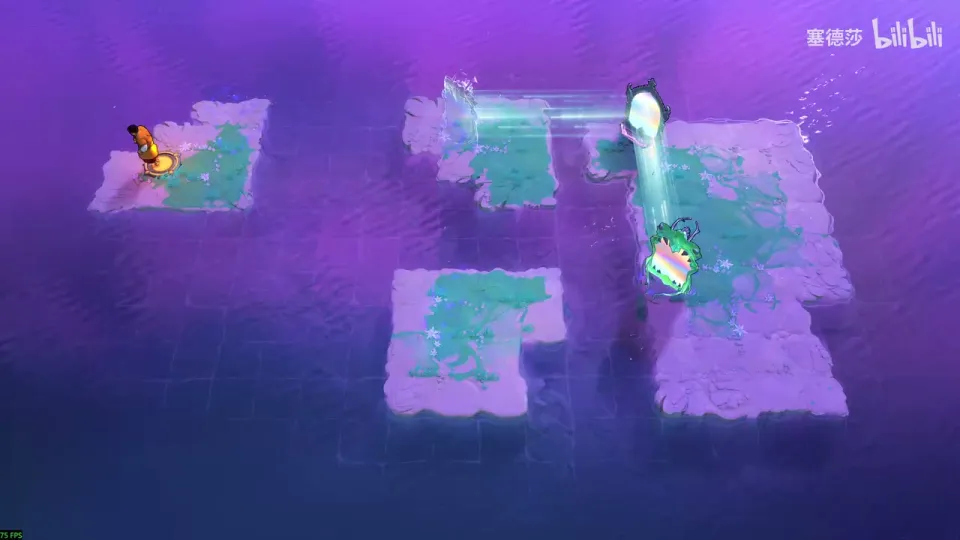
- Follow the diagonal: you need a mirror on the crystal mirror’s starting tile and you on the bottom tile, then one reflection takes you right. (2:45)
- Getting down takes a mirror placed here and a reflection across. (3:05)
- Problem: the mirror that sent you down now stands in front of the top mirror and blocks it. (3:15)
- Swap the two mirrors’ places. Now when it reflects you down, it reflects itself into the water too, and the way is clear. (3:28)
- Reflect to the right to finish. Back on the map, reflect the crystal mirror across and walk on. (3:40)
Puzzle 5
Key idea: reflecting a mirror changes the way it faces. Turn the crystal mirror so it points under the stone, pull the stone out into the pit, then turn the mirror back to throw yourself to the top right. (塞德莎 P33 4:08)
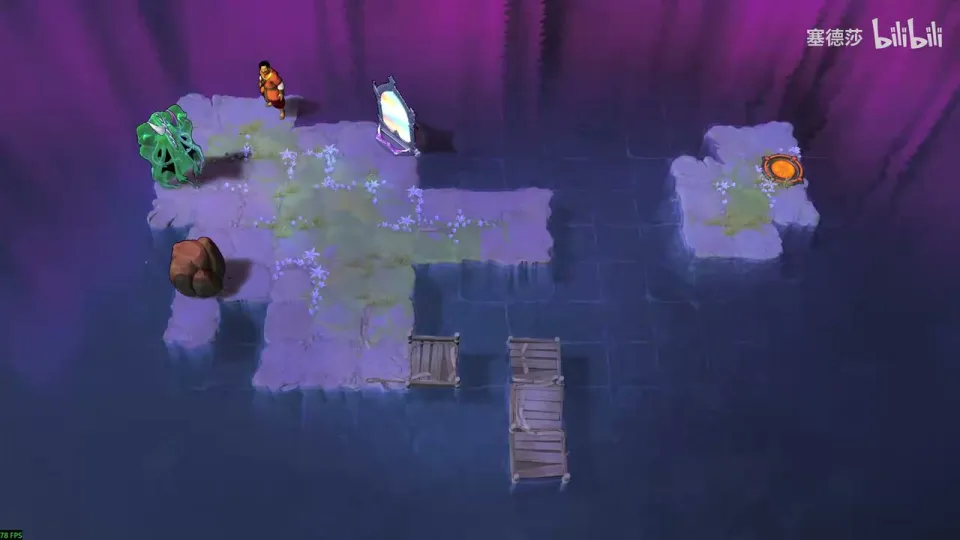
- The only opening move: push the crystal mirror up one tile, then reflect it. Now you can take your own mirror out. (4:10)
- Notice that the reflected mirror now faces the other way. Reflect it back from a closer spot so it points under the stone. (4:20)
- Take the stone out and push it into the pit. That gives you the tile you need to stand on to reach the top right. (4:35)
- Turn the mirror back the other way, stand on the filled pit and reflect. (4:45)
Puzzle 6
Key idea: the finish is the lower crystal mirror on the bottom plank bridge, facing up-left, with you above it. Mirrors can’t be pushed between the two halves of the room, and its facing is wrong, so turn it by bouncing it through the upside-down L island at the top right. (塞德莎 P33 4:50)
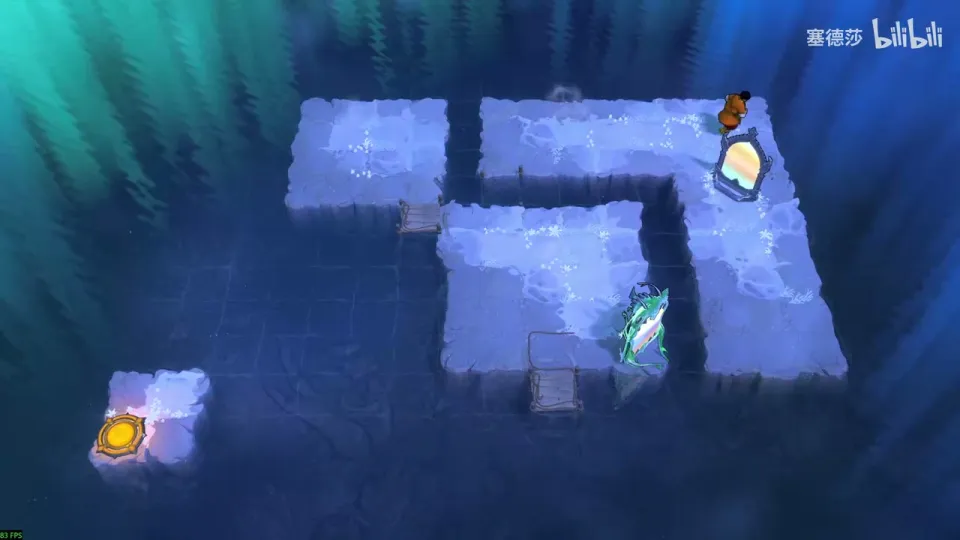
- Turn the mirror once and go down. Pick your spot so the mirror reflects back to where you can work on it. (4:55)
- The middle of the room blocks any push between the bottom right and the top left, so only reflections can move the mirror across, and that is also how you turn it. (5:25)
- Go back, lift the mirror up one tile, return, and reflect it onto the L island, then reflect it down again. The detour has turned it to face up-left. (5:45)
- Come round, set it on the bottom plank bridge, go back up and reflect yourself to the exit at the bottom left. (6:30)
Puzzle 7
Key idea: the crystal mirror has to end up on the plank directly to your right, and only from the top-right corner can it be reflected down there. It starts facing down-right, so move it to the corner and fix its facing on the way. (塞德莎 P33 6:50)
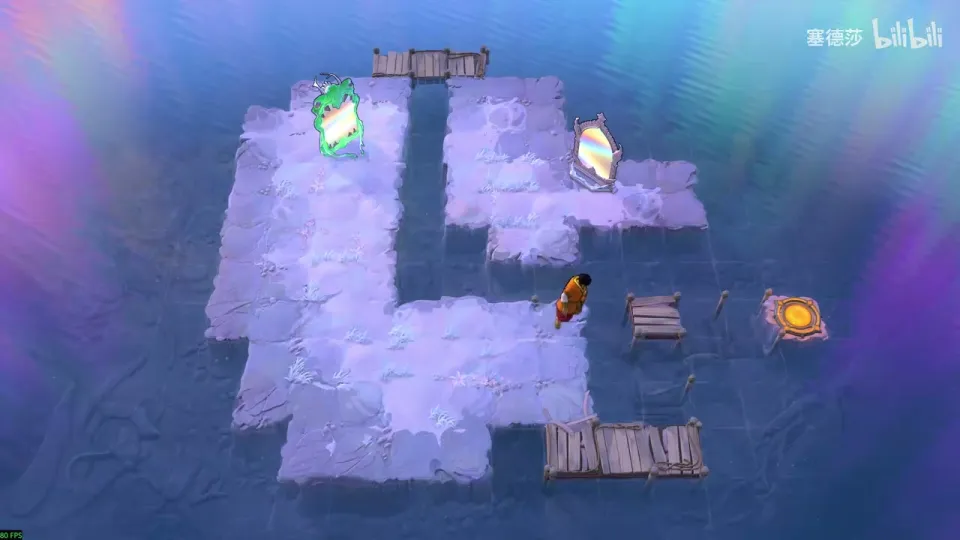
- Take your mirror out and reflect once; otherwise you can’t send the crystal mirror straight to the top right later. (6:55)
- Change where the mirror sits relative to it (a bit higher), and reflect the crystal mirror onto the island at the right. (7:20)
- Fix its facing, put your mirror in place and go down. (7:30)
- Mirror yourself across, then mirror again onto the exit. (7:45)
Solving these three rooms opens a cage on the area map. (7:52)
Puzzle 8
Key idea: put the crystal mirror anywhere in this column and get yourself onto the bottom island. The mirror at the top looks useless, but it reflects your crystal mirror into the water. Block it with the stone. (塞德莎 P33 7:57)
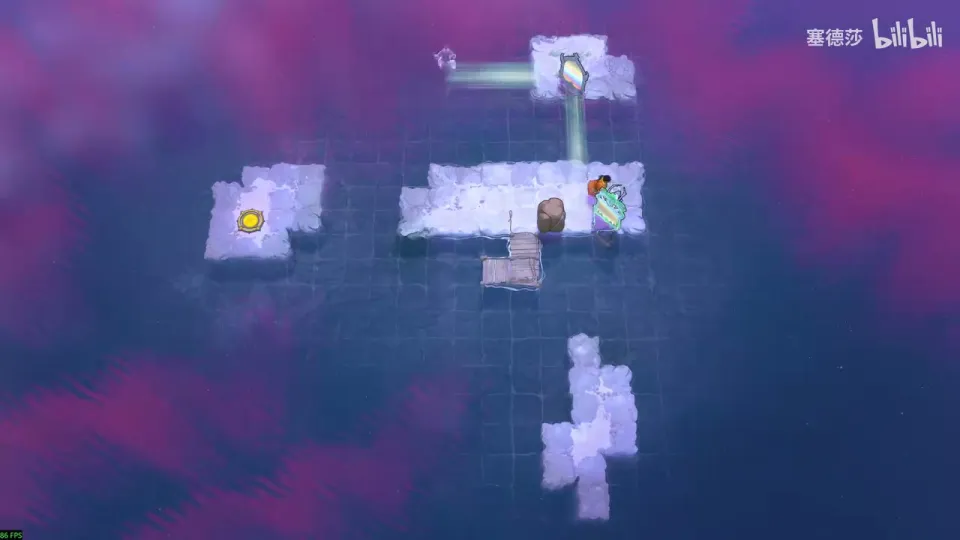
- Push the stone in the middle out of the way and go down. You’ll see the problem: the top mirror throws the crystal mirror into the water, so it can never send you to the exit. (8:10)
- Instead, push the stone left, put the normal mirror here and the crystal mirror there, then take it out. (8:35)
- Reflect the crystal mirror to the spot that lets you pull the stone out. (8:45)
- Put the stone in front of the top mirror to block it. (8:55)
- Place the crystal mirror in the column and reflect. The exact tiles are easiest to follow in the clip from 8:35 to 9:12. (9:05)
Puzzle 9
Key idea: the very long strip is a hint: you go to the top left with one long chain of reflections. The chain needs five mirrors and you have three, so clone the crystal mirrors to make up the difference. (塞德莎 P33 9:25)
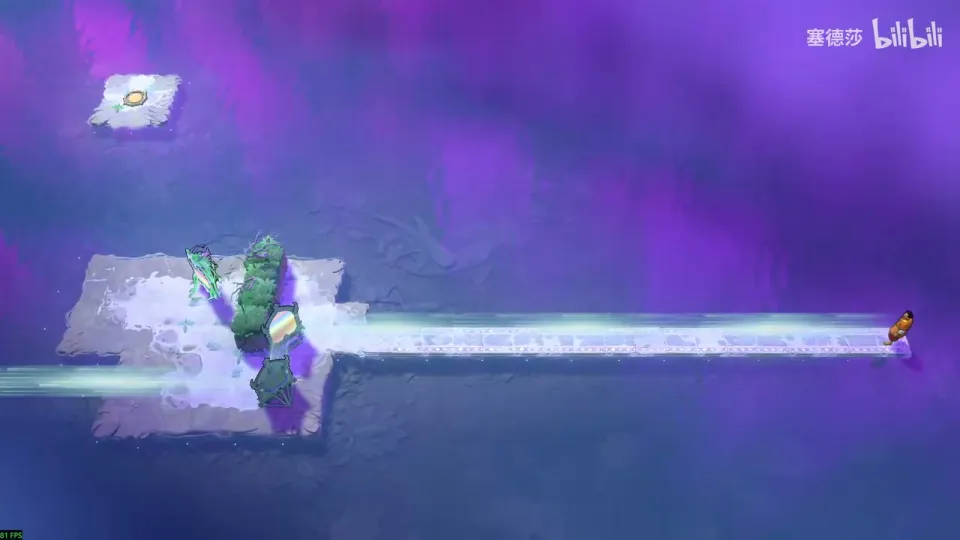
- The chain, starting from the far right end: a mirror facing down-right here, one facing up-left a tile higher, then one facing up-right, one facing down-left and one more facing up-right. (9:53)
- Crystal mirrors can be cloned. Line two mirrors up on one as 塞德莎 shows to get a copy, then do it once more: five mirrors. (10:05)
- One copy faces the wrong way and needs one more reflection. Move it aside first, because reflecting in the current position merges two of them back together. (10:35)
- Put all five in place: up-right here, up-left there, then the rest. (11:00)
- Go to the far right end and reflect. The longest reflection carries you along the chain to the top left. (11:35)
Overworld puzzle 1
Key idea: on the area map, use the mirrors to get down to the bottom right, where the last room is. (塞德莎 P33 11:46)
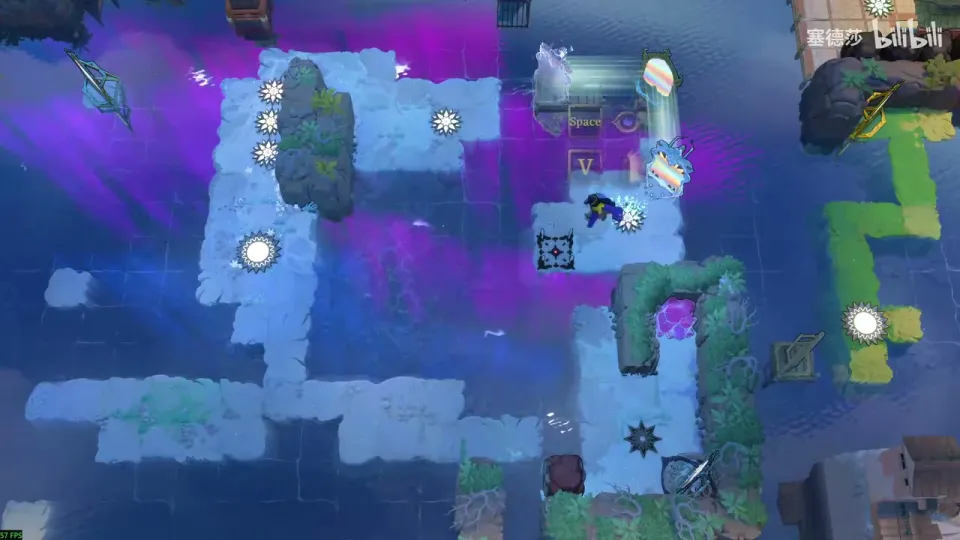
- Reflect the mirror over and come back. (11:50)
- Push the right-hand mirror once, reflect, and go back. (12:00)
- Reflect it back and use the longest distance: it takes you down. (12:04)
Puzzle 10
Key idea: a short shuffle with two crystal mirrors. Free both, move them to the bigger island on the right, then leave one on the right tile and reflect yourself from the small island at the bottom right at the longest distance. (塞德莎 P33 12:10)
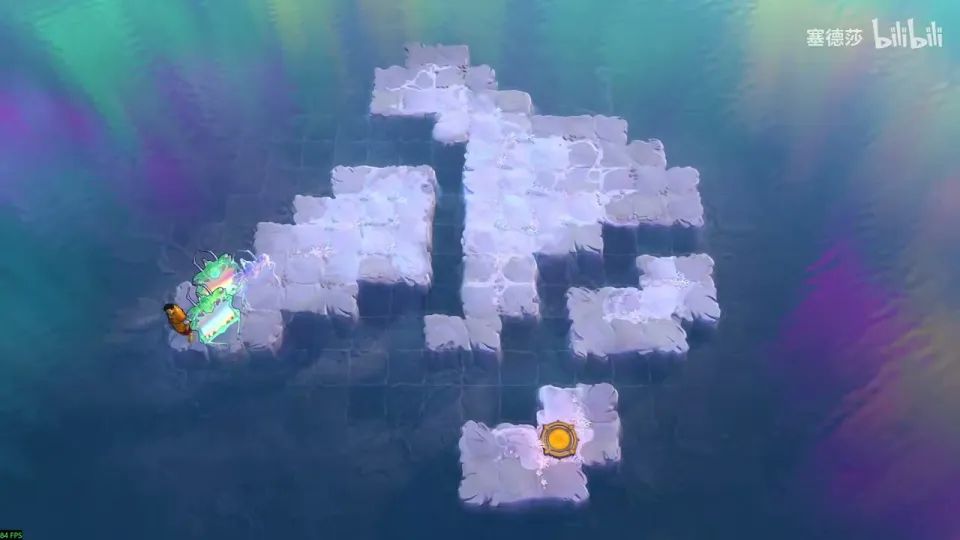
- Reflect the first mirror over; nothing else is possible until you do. (12:15)
- Move this one up and that one right, then reflect. Take the mirror at the edge out (left, then right) and reflect again. Both crystal mirrors are now free. (12:20)
- Move both to the bigger island on the right: place one, reflect it over, go across, and reflect the other over from above. (12:40)
- Set one mirror on the spot 塞德莎 shows, go to the small island at the bottom right, and reflect at the longest distance. (12:55)
That finishes the crystal-mirror rooms. Back on the map, push the crystal down to open the path in this direction. (13:32) In the same video 塞德莎 then drops into a block of extra rooms south of here; those belong to Mirrors and Stones and are on the Mirrors and Stones page.