Mirrors and Stones (MxS) is the crossover area where the Trader’s mirrors from the Mirror Isles (East) meet the Sailor’s skipping stones from Skipping Stones to Lonely Homes (South). Mirrors now move stones while they skip, lily pads carry mirrors across the water, and in the last rooms stones bend the currents. This page solves all 49 puzzles and the 11 overworld puzzles between them.
Where it is: the south-east of the map, through the MxS gold room (its solution is on the Gold Rooms page); Postmode’s first video starts directly south of it. 塞德莎’s walkthrough labels the map tiles S2E1, S3E1, S3E2, S2E2, S3E3 and S3E4 (his part 13) and S4E4, S4E1, S4E2 and S4E3 (his part 14).
How to use this page: puzzles 1 to 31 follow Postmode’s six solution videos (MxS 1, 2, 3, 4, 5, 6), counted straight through: MxS 2 starts at puzzle 7, MxS 3 at 11, MxS 4 at 17, MxS 5 at 21 and MxS 6 at 28. Postmode stops after the big room in the middle, but 塞德莎 goes on to a bonus room and a block of current rooms in the lower part of the area. Those are puzzles 32 to 43, in 塞德莎’s order, with only his links. Puzzles 44 to 49 are six extra rooms that only open in the second stage, also with only his links. No chaptered no-commentary video covers this area yet. Each heading has the key idea and two links: the moment in Postmode’s video (no commentary) and the moment in 塞德莎’s narrated walkthrough where the room starts. The numbered steps link to 塞德莎’s video, because the steps follow his explanation. For puzzles 1 to 31 his order is the same as Postmode’s.
Rules that matter here
- Mirrors move things across. A mirror sends out two beams at a right angle. Reflect and whatever stands on one beam lands on the other beam, the same distance from the mirror. Here that means the Trader, the Sailor and the crystal stones (the clear, glassy ones). Puzzle 7 introduces the crystal skipping stone as the kind of skipping stone a mirror can move.
- The diagonal rule. A reflected object lands on the same diagonal line through the mirror. 塞德莎 draws these diagonals to find the right tile in puzzles 6, 13, 14, 15 and 16, and puzzle 13 even shows them as faint net lines in the water.
- Stones skip until something stops them. A kicked stone skips across open water. If something stops it over water (another stone, a hero, a mirror’s tile) it sinks there and becomes a tile you can walk on. Standing in a stone’s path to stop it is a common finish in this area.
- Reflecting a moving stone keeps its speed. From puzzle 8 on you can reflect a crystal skipping stone while it is still skipping. It keeps its momentum, but its direction turns with the mirror (a stone going up can come out going left). Most of the area is built on this.
- Lily pads stretch a mirror’s reach. A mirror, a stone or a hero riding a drifting lily pad moves the reflection point with it, so you can reach tiles far out in the water by reflecting at the right moment. Pads drift the way they are hit and stop when they bump into something.
- U-shaped reflection. Two mirrors facing each other bounce a moving stone back and shift it sideways. The gap between the mirrors decides how far it shifts (puzzle 25 measures it).
- Two mirrors: clone and merge. With two mirrors on one object you can split it into two copies or put the copies back together (puzzles 20 and 27).
- Currents (puzzles 33 to 43). A stone or crystal stopped in a current makes the current turn. It turns right by default and only turns left when the tile to its right is already blocked, so for a left turn place that blocking stone first. A mirror standing in the current works as a block too.
- Time. 塞德莎 holds the slow-motion key (Ctrl) for most of the timed reflections. Do the same.
Puzzle 1
Key idea: a crystal has to end up in the water gap, and only a reflection can carry it there. Put it on the lily pad, set the pad drifting, and pull it off with the mirror on the way past. (YouTube 0:05 · 塞德莎 3:49)
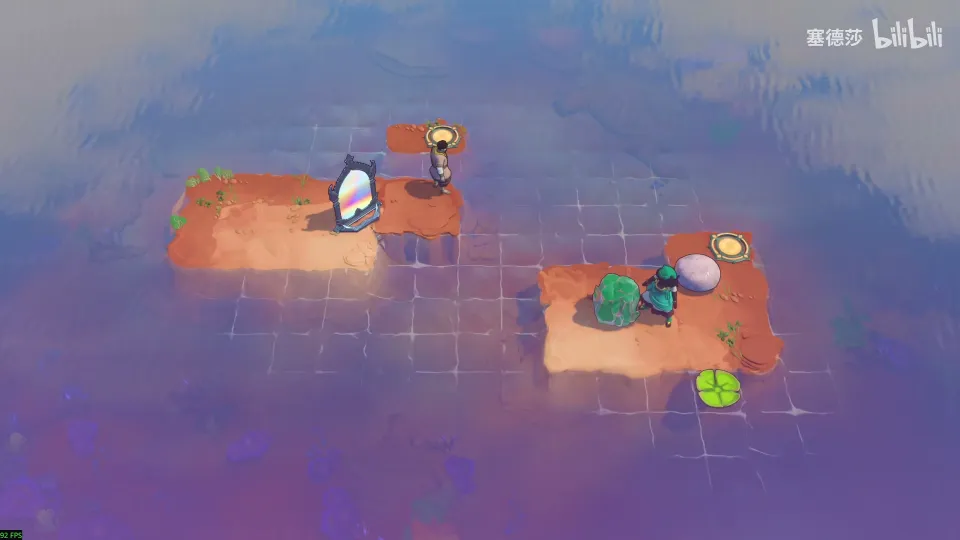
- The Trader and the Sailor start together. The target is the tile of water 塞德莎 marks; only the crystal can be moved over there. (3:53)
- Put the crystal on the lily pad and kick the skipping stone into the pad to start it drifting. (4:03)
- Pull the mirror to the left, wait for the crystal to come round to the left, then reflect it off the pad. (4:09)
- Push the crystal into the water. That opens the cage on the area map. (4:18)
Overworld puzzle 1
Key idea: two rings of lily pads go round at the same speed. Board the pad that sits opposite your own pad across the mirror, at the moment yours is in the mirror’s beam. (YouTube 0:33 · 塞德莎 4:30)
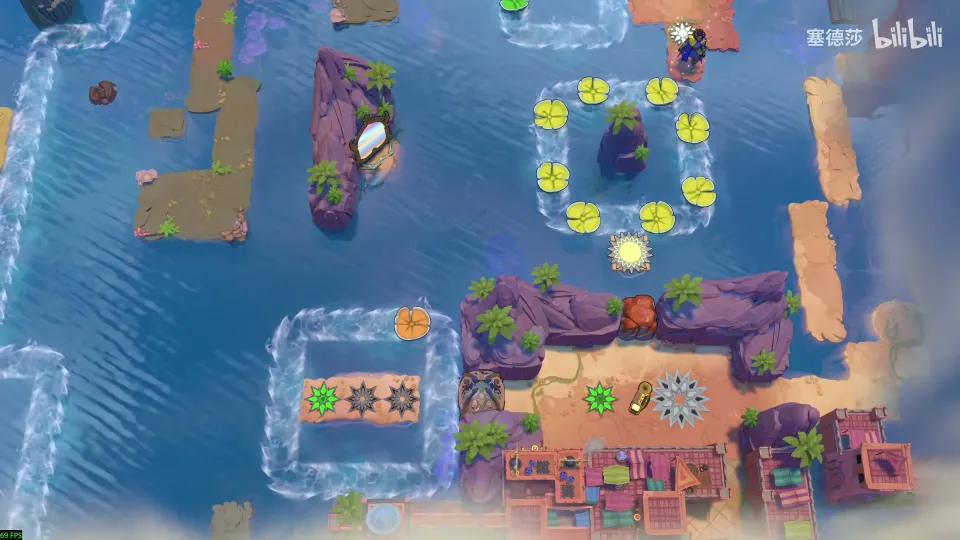
- The goal is the orange lily pad at the bottom left. (4:34)
- Wait until your pad is in the mirror’s range. The pad straight across on the other beam is your landing spot. (4:40)
- 塞德莎 first picks the wrong pad and corrects it: the right one is the pad above the teleport pad. Reflect onto it and ride it into the next room. (5:02)
Puzzle 2
Key idea: the Sailor is alone and the exit island is out of reach. The diagonal you would need lands in the water, right where the lily pad drifts. Reflect onto the moving pad, then use the right-hand mirror to finish. (YouTube 0:51 · 塞德莎 5:19)
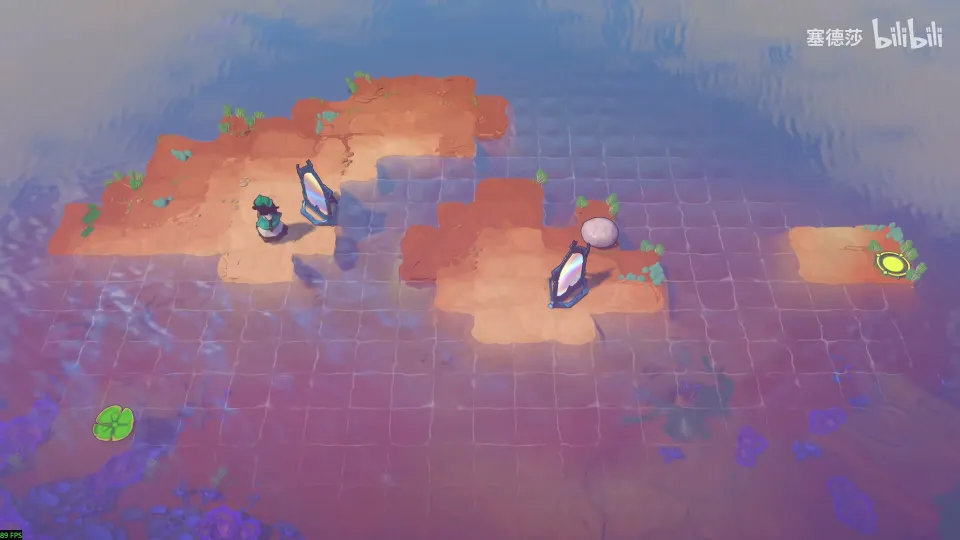
- Take the skipping stone out and push it to the left, ready to start the lily pad. (5:54)
- Place the right-hand mirror where it can later send you onto the exit island. (6:04)
- Set the left mirror so its beam can reach the pad’s path. (6:13)
- Start the pad, reflect onto it at the right moment, then reflect again with the right-hand mirror to reach the exit. (6:26)
Puzzle 3
Key idea: the lily pad has to be knocked to the right, so a stone must hit it from the left, from the water. Reflect the two crystals into the water to build a two-tile platform beside the pad and kick from there. (YouTube 4:38 · 塞德莎 6:42)
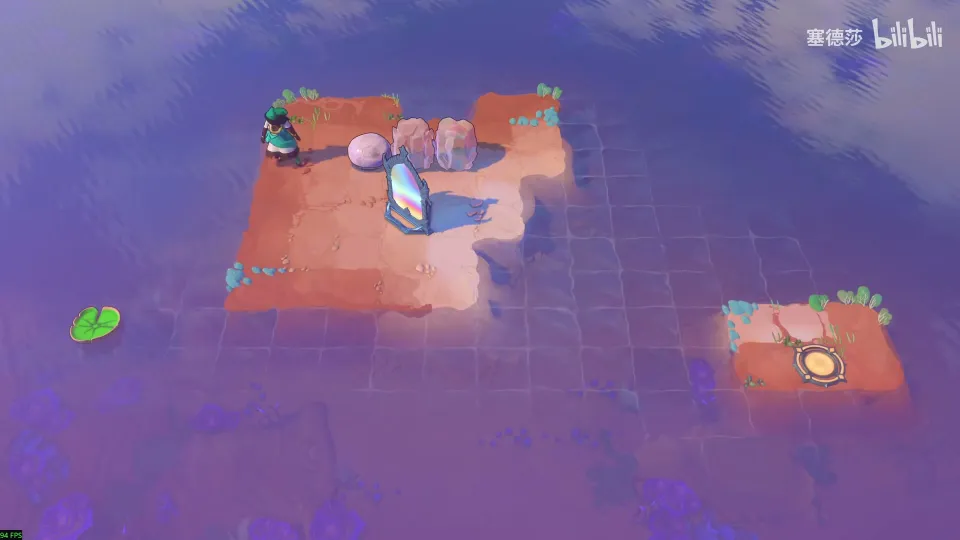
- To kick a stone over water you need something to stand on. The trick is the same as an earlier Mirror Isles room: a two-tile platform in the water. (6:51)
- Move a crystal to the bottom, then reflect both crystals into the water so they make a vertical pair of tiles just left of the pad. (7:11)
- Push the skipping stone over, stand on the upper crystal tile and kick, then hurry back to ride the pad to the exit. The order of these last moves is easiest to follow in the clip at 7:22.
Puzzle 4
Key idea: you leave on the lily pad, which has to go up and then turn right onto the middle island. Make it stop in the right row by reflecting a crystal into the water there first. (YouTube 6:10 · 塞德莎 7:37)
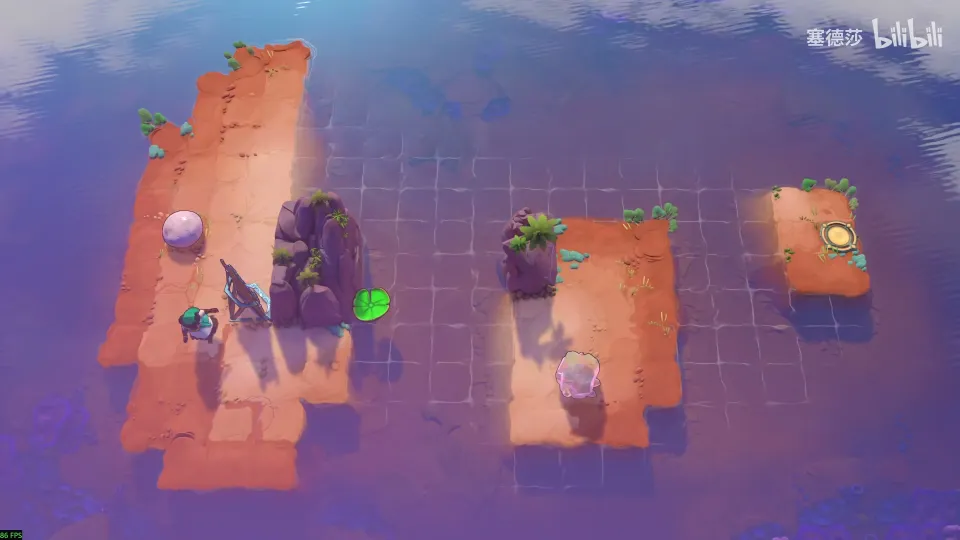
- Plan the pad’s route: up from where it starts, then right along the row that meets the top of the middle island. (8:03)
- Take the crystal out and reflect it into the water in that row. When the pad drifts up, it stops against it. (8:51)
- Start the pad, then fetch the skipping stone back; you still need it. (9:00)
- Kick the stone right to send the pad onto the middle island’s top edge, jump on and ride to the exit. (9:12)
Puzzle 5
Key idea: the stone only needs to stop on the tile above the exit, and nothing can be pushed there to stop it except you. Kick it left from the bottom right, then use two quick mirror jumps to get ahead of it. (YouTube 8:42 · 塞德莎 9:39)
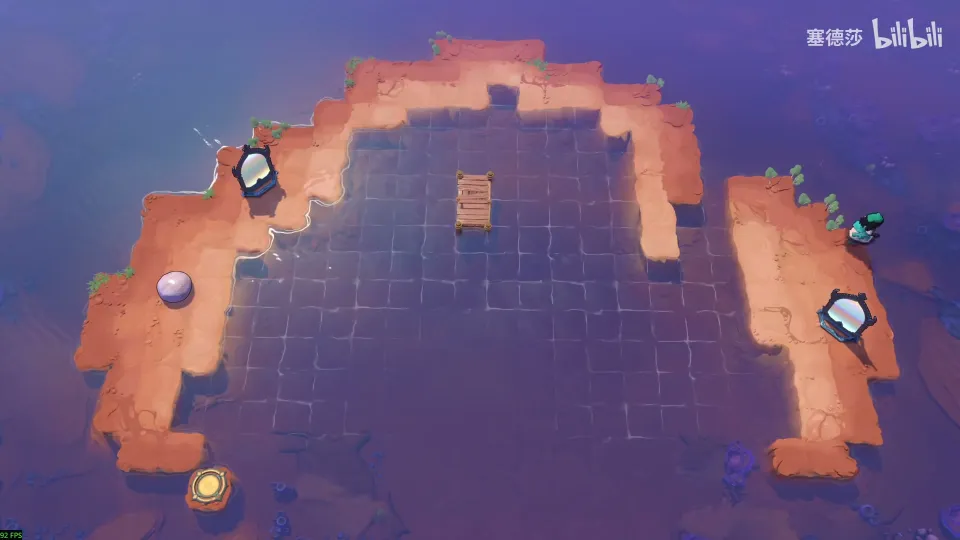
- A mirror can’t be pushed to the tile above-left of the exit, so you have to be the blocker. (9:59)
- Build a teleport route: the right-hand mirror can send you to the two-plank bridge in the middle, which works as a stepping stone. (10:28)
- Move the left mirror to the spot 塞德莎 marks; from there it reflects you on to the left side. (10:47)
- Kick the stone left and immediately reflect twice. You arrive first and the stone stops against you. (11:08)
Puzzle 6
Key idea: the exit is fenced in, so you can only reflect into it. Draw the diagonal down-left from the exit: of the two tiles on it, only the top-right one can hold a mirror, so a crystal has to be reflected into the water there to make that tile. (YouTube 10:52 · 塞德莎 11:18)
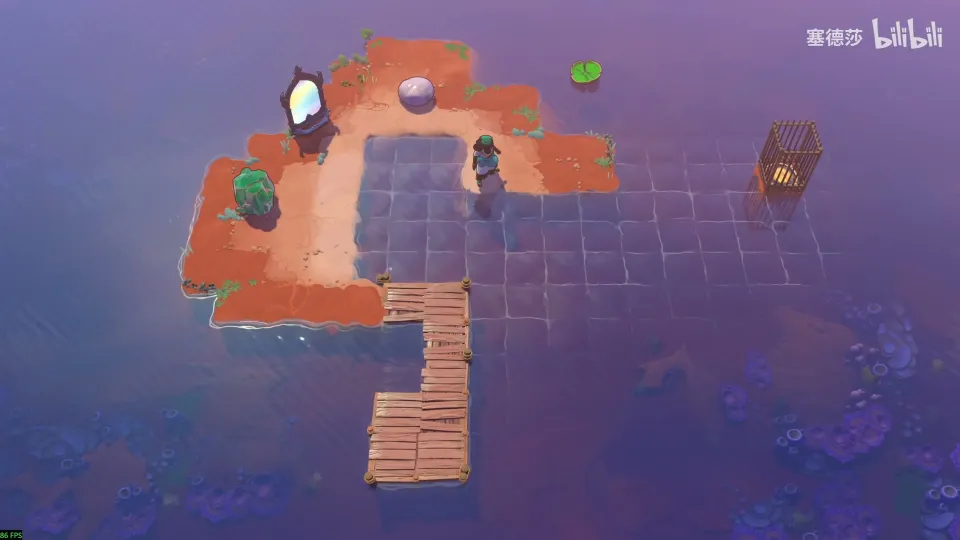
- Work out the tile with the diagonal rule. (11:40)
- The crystal can’t be pushed there. Move the mirror to the marked spot first. (12:31)
- Put the crystal on the vertical line 塞德莎 draws in red. It is several tiles from the lily pad, too far to reflect straight on. (12:45)
- Start the pad drifting right. When it reaches the reflection point, reflect: the pad has stretched the distance, and the crystal lands where you need it. (13:00)
- Put the mirror on the tile you worked out and reflect yourself into the exit. (13:16)
Puzzle 7
First room of Mirrors and Stones 2.
Key idea: this room introduces the crystal skipping stone. It skips like any stone, and a mirror can also reflect it. Kick it, reflect it, and you have a path. (YouTube 0:05 · 塞德莎 13:41)
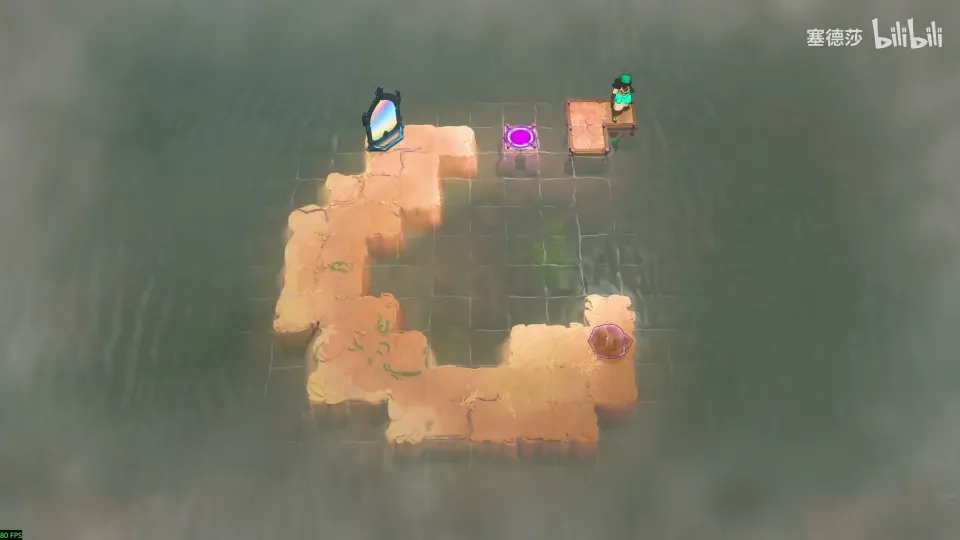
- Kick the crystal skipping stone up. It stops, and now the mirror can move it. (14:00)
- Reflect it, kick it up again, and reflect once more to lay a path across. (14:03)
Puzzle 8
Key idea: you can reflect the stone while it is still skipping. Use the little platform at the top right to stop it on the middle tile, then reflect it back so it drops into the water as a bridge. (YouTube 0:22 · 塞德莎 14:10)
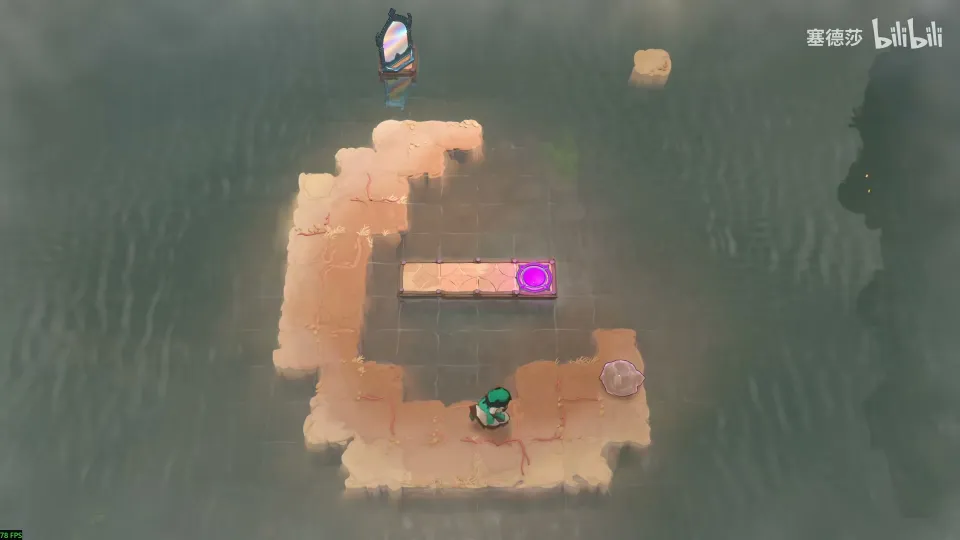
- Kick the stone up, slow time and reflect while it is in the air. The reflection works mid-skip. (14:15)
- Push the stone down to the spot 塞德莎 shows first. (14:48)
- Kick it up and reflect at once. It stops on the small platform at the top right. (14:50)
- Reflect it back. It drops into the water on the middle tile and you can cross. (14:56)
Puzzle 9
Key idea: a stone reflected mid-skip keeps going, in the mirror’s new direction (up becomes left). Kick it up from the right column and reflect immediately: it comes back towards the mirror from the right and sinks just right of it. (YouTube 1:01 · 塞德莎 15:01)
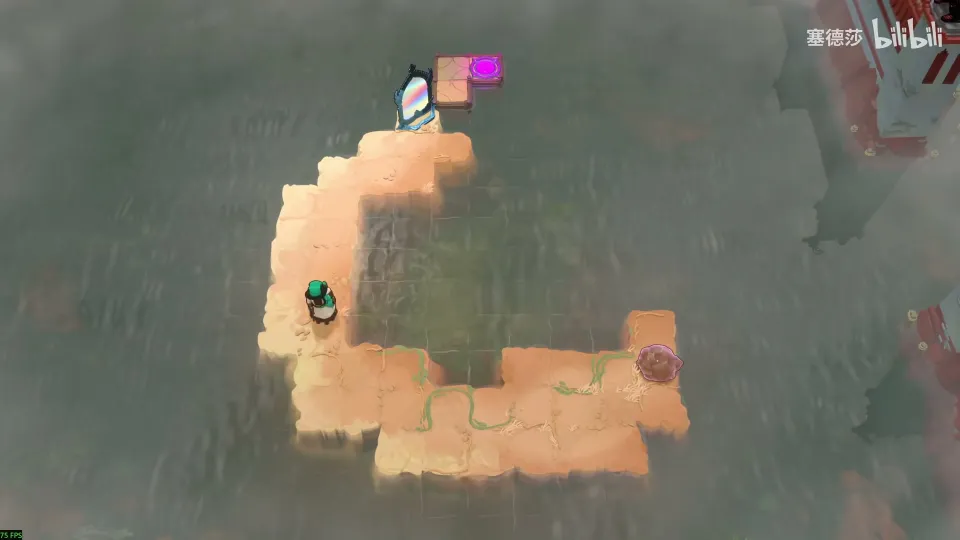
- At first you can only kick the stone up. Reflect it mid-skip and watch it turn left and keep moving. (15:07)
- The target is the water tile right of the mirror. You get there by kicking up from that column and reflecting at once. (15:46)
- You can’t push the stone into that column directly, so use the same trick in reverse: kick it right, reflect it down, and it lands where you can reach it. (16:13)
- Push it left into the column, kick it up and reflect immediately. (16:32)
Overworld puzzle 2
Key idea: lay a path to the right on the area map. A mirror sits in that row, so kick the crystal stone down past it and step out of its range: the reflection turns the stone right, and it stops against the wall. (YouTube 1:49 · 塞德莎 16:53)
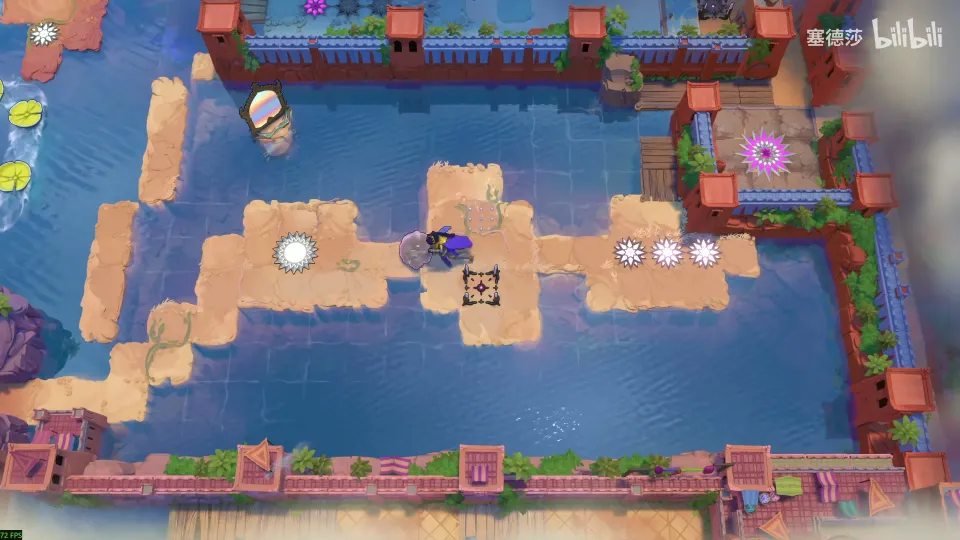
- Kick the crystal stone down from above, then step out of the mirror’s range straight away. (17:07)
- The stone turns right and hits the wall, finishing the path to the next room. (17:15)
Puzzle 10
Key idea: the stone belongs in the gap right of the mirror. Kicked left from the mirror’s side and reflected, it would stop on the small platform under the mirror, but it starts in a spot where it can’t be pushed right. Reposition it with two bounces first. (YouTube 2:55 · 塞德莎 17:29)
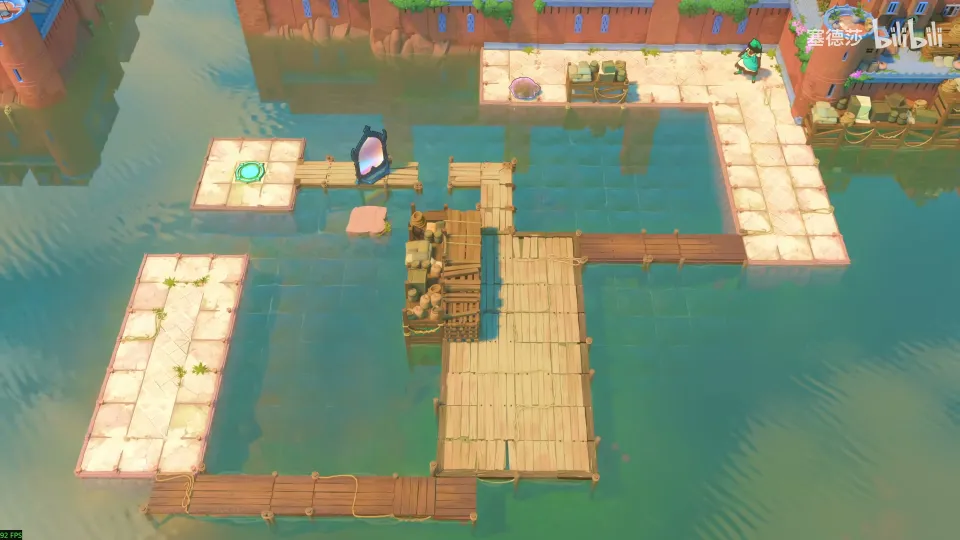
- Kick the stone down and do not reflect: a reflection here would send it into the crates in the middle and sink it. (18:25)
- Kick it back up and into the wall. It turns left onto the left platform. (18:35)
- Move the crystal to the bottom and kick it right without reflecting (the reflection would point the wrong way), then left. It ends up at the top right. (19:01)
- Take it out, kick it left along that row and reflect at once. It stops on the small platform, filling the gap. (19:15)
Puzzle 11
First room of Mirrors and Stones 3.
Key idea: knock all four lily pads left into the current and the Trader can ride to the exit. The pad with a stone on its right must go last, because after it goes you can’t get the crystal stone back. (YouTube 0:10 · 塞德莎 19:37)
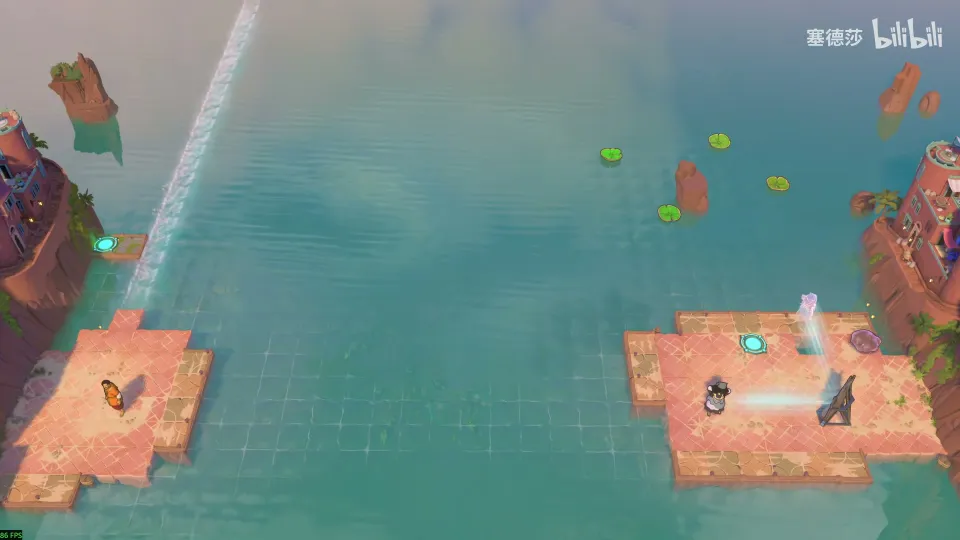
- Rightmost pad first: knock it over, then reflect the crystal stone back with the mirror and have the Trader push it home. (20:11)
- Second pad: a hole blocks the column below it, so kick left instead and reflect the stone upward into the pad, then reflect it back. (20:28)
- Leftmost pad: kicking straight up would start the lower pad too early and the wrong way. Have the Trader kick from left to right, reflect immediately and reflect back so the stone misses the upper pad and hits the leftmost one. (21:01)
- Finally kick the stone up into the last pad. (21:47)
Puzzle 12
Key idea: the Sailor on the right has to kick the crystal stone left into the lily pad. Getting the stone to him means passing the pad, so reflect it just before it touches the pad and reflect it back once it is past. (YouTube 4:08 · 塞德莎 22:12)
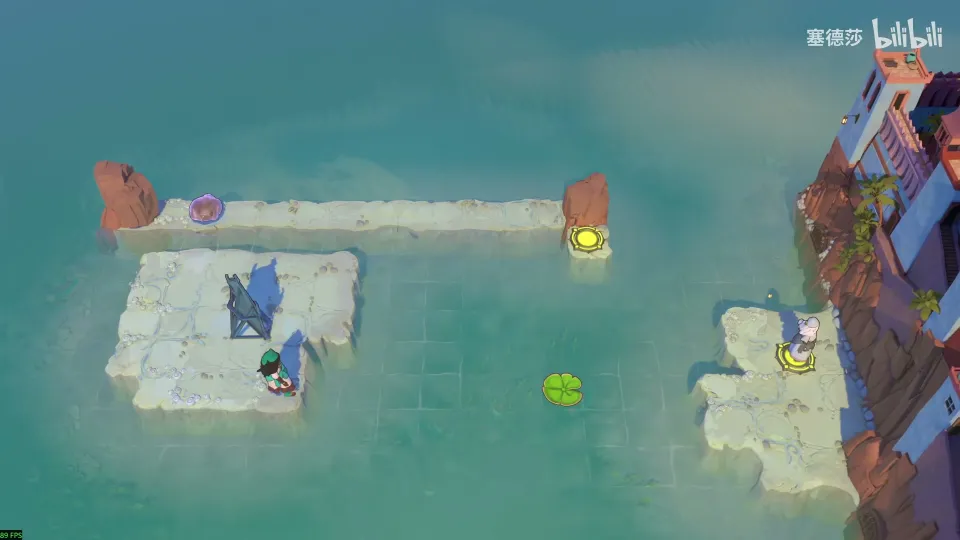
- The stone has to reach the bottom right. Only one starting spot lets you get it back out afterwards. (22:41)
- From there a plain kick right would knock the pad down. Kick it right, slow time, reflect just before it reaches the pad and reflect back once it has passed. (23:03)
- Knock the pad up, then reflect up to the long walkway at the top and walk out. (23:15)
Overworld puzzle 3
Key idea: the cage on the map is open now. Use the freed crystal skipping stone to send the lily pad to the teleport, then stop the stone on the little platform above the mirror without hitting the pad. (YouTube 7:13 · 塞德莎 23:28)
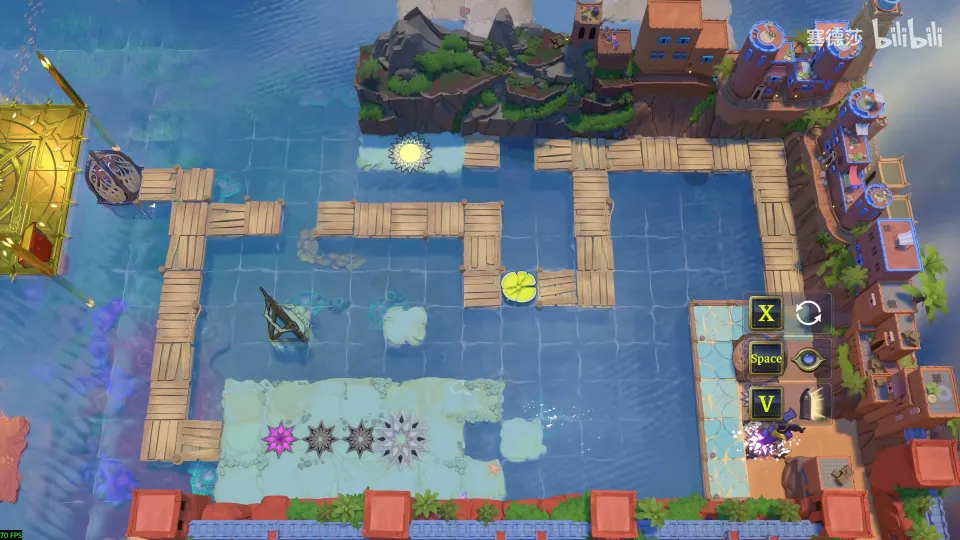
- Kick the crystal stone into the lily pad to send it up to the teleport. (23:31)
- 塞德莎 points out that the teleport is not much use: resetting the area puts the pad back. (23:41)
- Stop the stone on the small platform over the gap above the mirror. Reflect mid-skip so it doesn’t hit the pad on the way. (24:00)
- Don’t reflect again; walk across to the left. (24:22)
Puzzle 13
Key idea: a tutorial for the diagonal rule. The net lines in the water mark the diagonals, so you can read off which pit each crystal stone will drop into. The stone for the pit nearest the Trader goes last, or you lose the mirror. (YouTube 7:41 · 塞德莎 24:30)
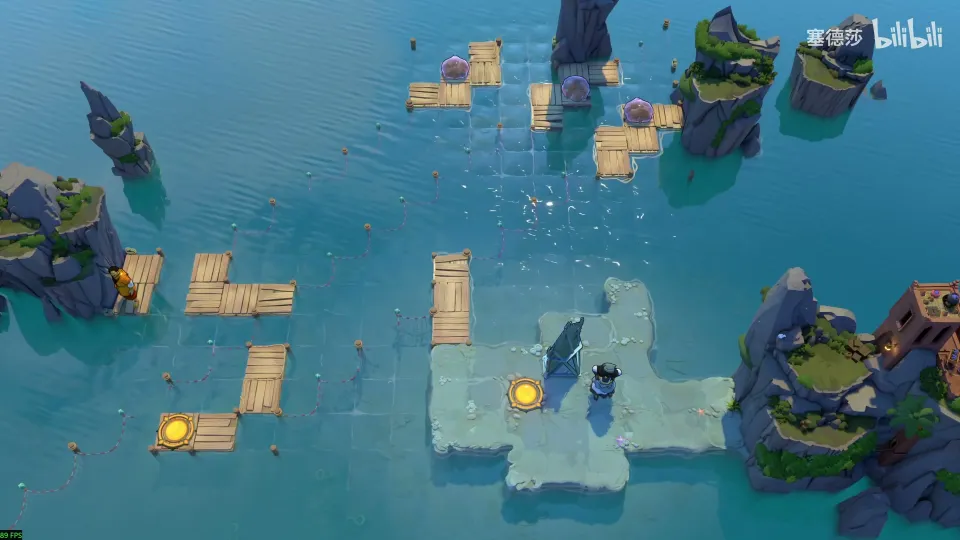
- Follow the net lines: the leftmost stone goes into the pit closest to the Trader, but if you send it now you can’t take the mirror back out. (24:59)
- Send the middle stone along its diagonal first, then use the small pit to get the mirror out. (25:24)
- The rightmost stone goes to its own pit. (25:32)
- Send the last stone; you don’t need the mirror after that. (25:39)
Puzzle 14
Key idea: kick the crystal stone up to the right height, then reflect it down-left into each pit. The last pit’s diagonal starts one tile above where a kick can reach, so catch the stone with a reflection while it is moving. (YouTube 8:25 · 塞德莎 25:48)
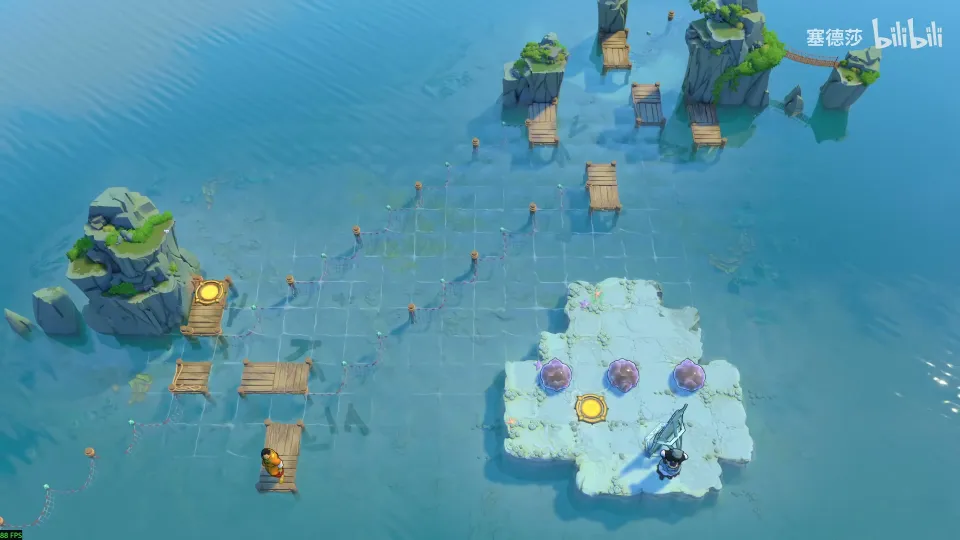
- First pit (nearest the Trader): kick the stone to the point the diagonal gives you and reflect. (26:03)
- Second pit: draw its diagonal and do the same. (26:16)
- Last pit: its diagonal starts on the tile above the top platform, one higher than a kick stops. (26:23)
- Put the mirror on the spot 塞德莎 shows and kick the stone left. When it reaches the right point, reflect, then reflect straight back. (26:48)
Puzzle 15
Key idea: three pits but only two crystal stones, so one pit has to be skipped by moving the Trader instead, and the last pit can’t be reached directly because a boulder blocks its mirror. (YouTube 9:23 · 塞德莎 27:11)
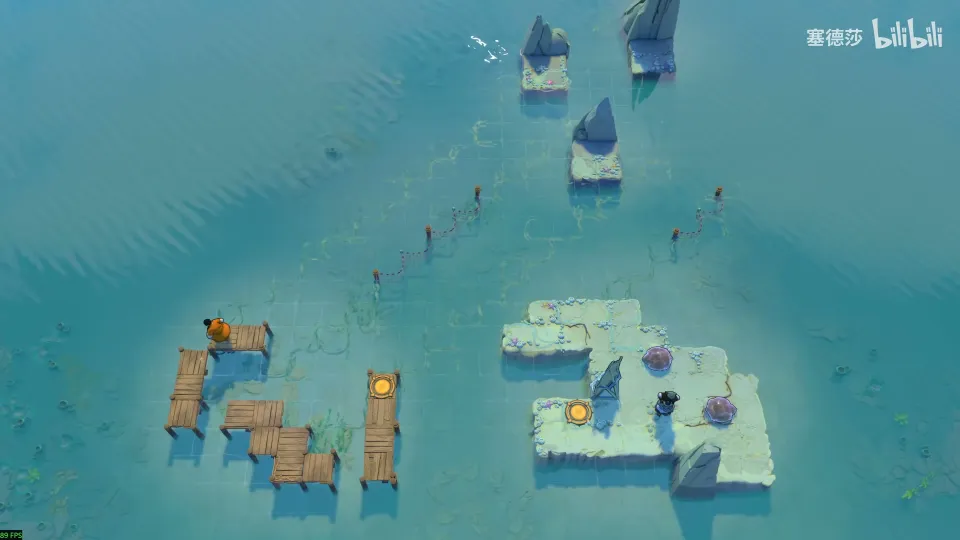
- First pit, left of the Trader: move the Trader up out of the beam, send the stone along the diagonal, then bring the Trader back. (27:29)
- The lower pit is the one you skip: send the Trader to the spot 塞德莎 shows, walk two tiles to the bottom right and move the mirror. (28:02)
- The last pit’s mirror is blocked by a boulder, so use the diagonal of the exit’s tile instead and stop the stone beside the Trader. (28:33)
- 塞德莎 gets the direction wrong at first and corrects it: the final reflection goes left from the exit’s position. Watch 29:27 to 29:59 for the exact moves.
Puzzle 16
Key idea: three tiles to fill on the left and no platforms to help. Stop the first two stones against the Trader’s body; for the third, use the diagonal to build a small platform the Trader can step onto. (YouTube 11:10 · 塞德莎 30:11)
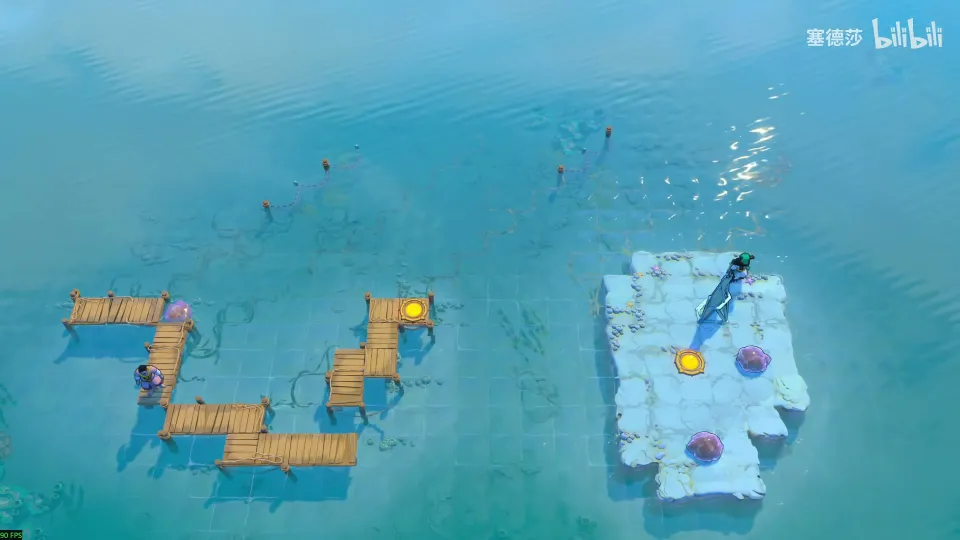
- First stone: reflect it straight across and let it drift into the Trader, who stops it. (30:31)
- Second stone: kick it up and reflect; it stops right of the Trader. (30:46)
- Third: the target is the plank above the Trader. Its diagonal tile is where the Trader was standing, so send a stone there first, then hit it back to make a small platform. (31:04)
- Step the Trader up and adjust the mirror to finish. (31:42)
Puzzle 17
First room of Mirrors and Stones 4.
Key idea: nothing can knock the lily pad over to the right-hand island. Instead ride the pad out into the water so the mirror’s reflection point moves with you, then reflect across. (YouTube 0:03 · 塞德莎 32:33)
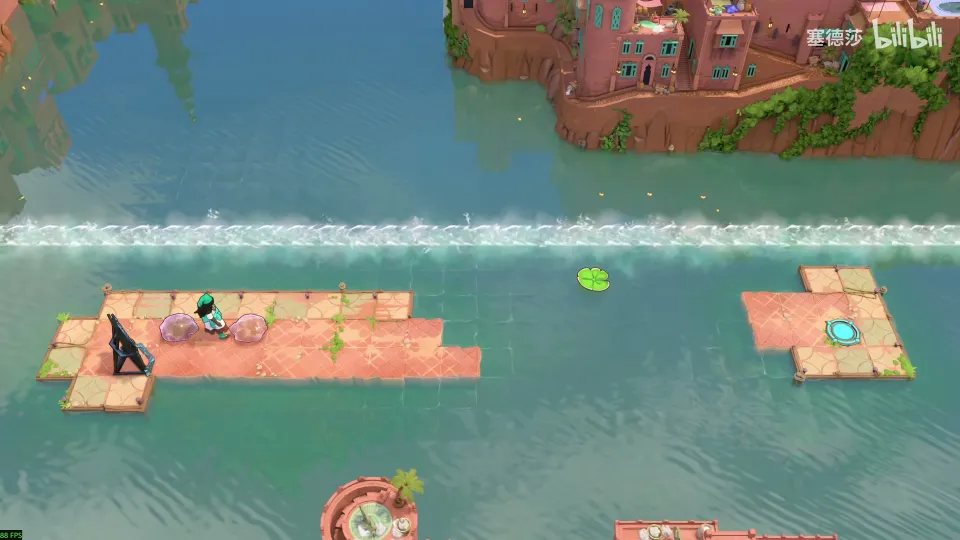
- Knock the lily pad into the current. (33:20)
- Line the other skipping stone up with the pad’s column and, when the pad comes by, knock it up. (33:27)
- Rush over, clear the way and step onto the pad. (33:41)
- Let the pad drift away from the island; once it is far enough out, reflect onto the exit island. (33:47)
Overworld puzzle 4
Key idea: the room you just cleared frees a skipping stone. Skip it upwards to reach the next room by kicking it left and reflecting it. (YouTube 0:58 · 塞德莎 33:57)
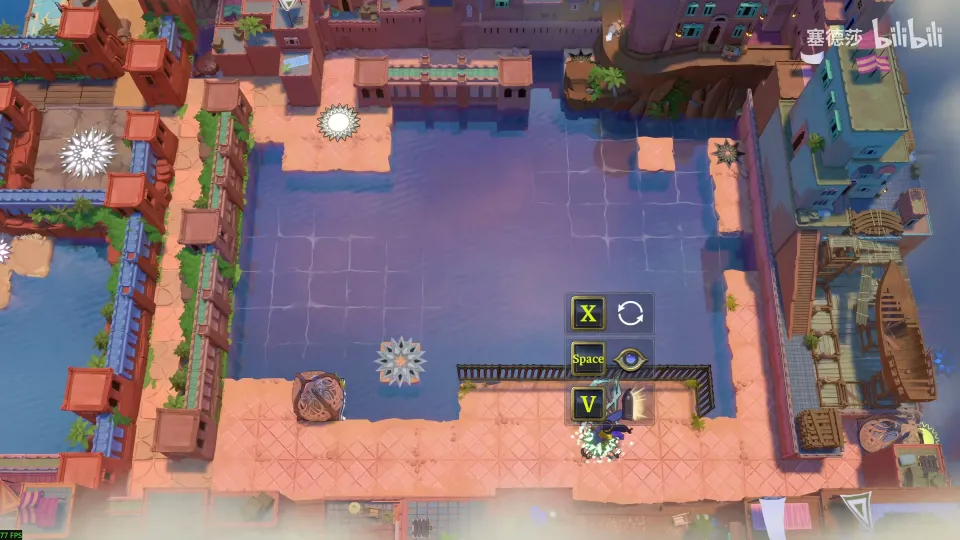
- Kick the stone left from the spot 塞德莎 uses and step aside at once. (34:12)
- Reflect: the stone skips upward and opens the way to the room above. (34:16)
Puzzle 18
Key idea: a crystal stone has to land in the column just right of the Sailor’s lily pad. The mirror rides on a pad, so its beam travels; reflect, let the pad carry the column across, and reflect back at the right moment. (YouTube 1:45 · 塞德莎 34:25)
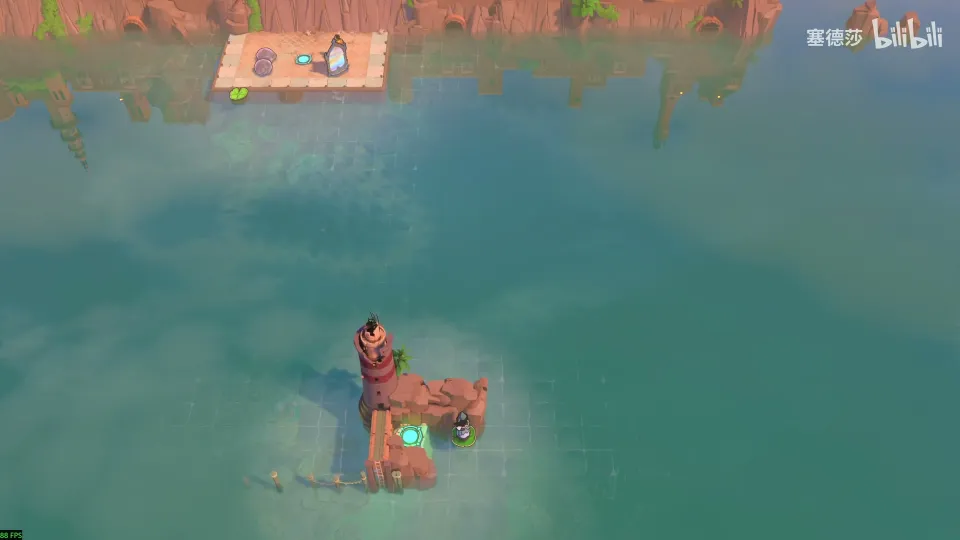
- Shift the crystal stone a little to the right and start the pad moving. (35:06)
- Just before the pad arrives, kick the stone down without changing the pad’s direction. (35:14)
- Reflect. The stone’s column now follows the moving pad. (35:22)
- When the column reaches the one you want, reflect back. (35:29)
Overworld puzzle 5
Key idea: to enter the next room you need the skipping stone back, stopped in the pit in front. Kick it at right angles to the mirror so the reflection turns it from “down” into “right”. (YouTube 2:30 · 塞德莎 35:49)
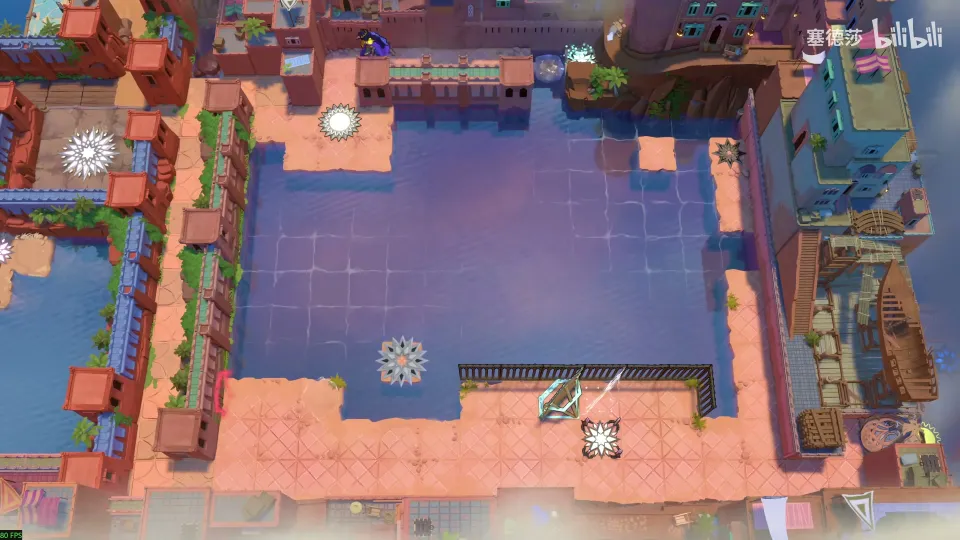
- Push the stone up into position, then kick it down. (36:29)
- Reflect just before it reaches the shore. It turns right and stops in the pit. (36:34)
Puzzle 19
Key idea: the exit sits on a lily pad. Knock that pad back left to the shore by hitting its right-hand column with a stone, which means getting a mirror to the pad’s bottom right first. (YouTube 3:59 · 塞德莎 36:46)
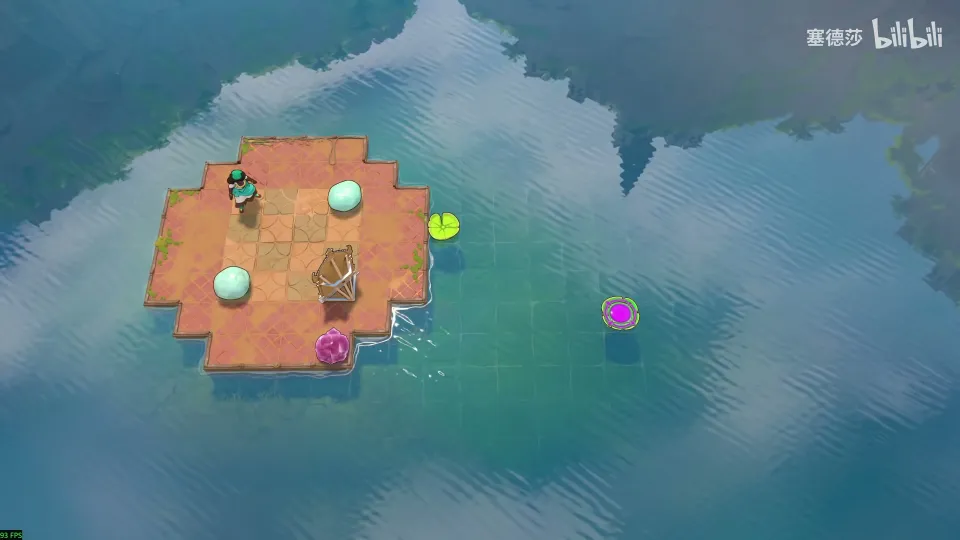
- The plan: a stone travelling up or down the exit pad’s right-hand column knocks it left. (37:15)
- Move the mirror there with the other lily pad: place the stones as 塞德莎 does, start the pad and switch it to drift right at the right moment. (37:45)
- When the mirror reaches that column, kick the stone out and reflect: left-to-right becomes top-to-bottom, and it hits the pad’s right column. (37:55)
- 塞德莎 mentions a second, harder route (sending the mirror over remotely and reflecting onto the exit pad as it moves up) but doesn’t show it. (38:09)
Overworld puzzle 6
Key idea: stop the stone on the tile that lines up with the upper platform when the mirror is in place. (YouTube 5:24 · 塞德莎 38:36)
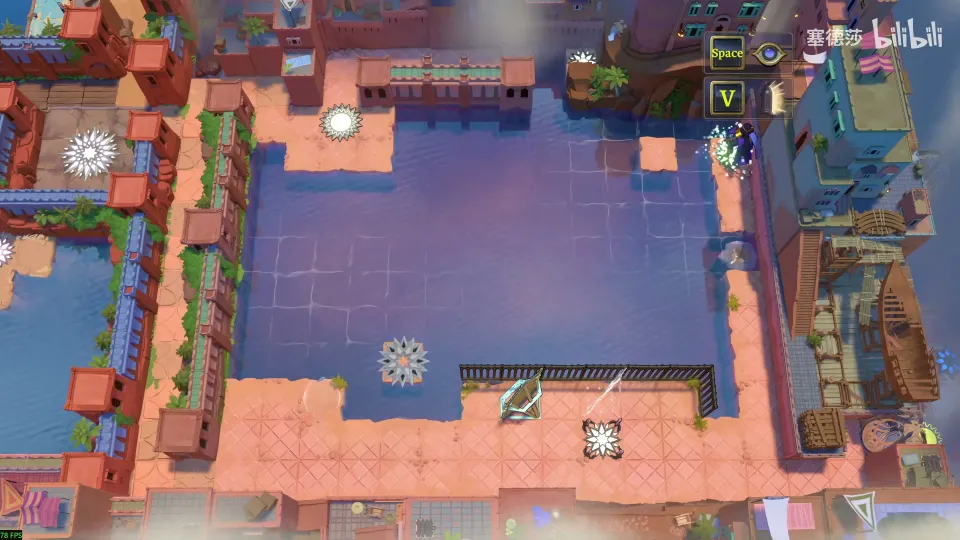
- Take the stone back first. (38:43)
- With the mirror in its spot, the target lines up with the upper platform. Stop the stone on that platform, then come back. (38:49)
Puzzle 20
Key idea: two mirrors clone the skipping stone. The two copies travel along the same row towards each other, collide, and stop right under the Sailor. (YouTube 5:51 · 塞德莎 39:11)
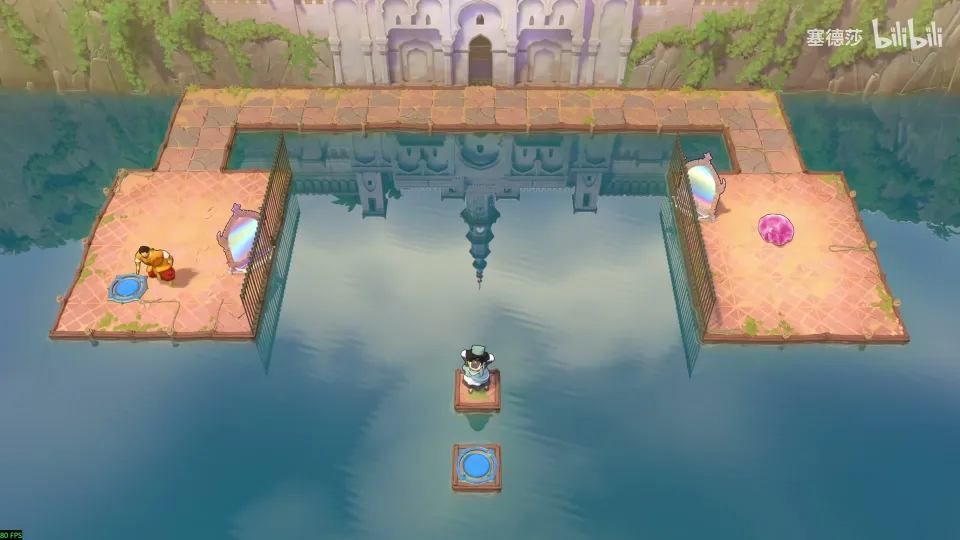
- Clone the stone with the two mirrors. The copies sit in the same row. (39:25)
- Kick them towards each other. They collide and stop below the Sailor; go down to the exit. (39:36)
- If the two copies start an even number of tiles apart, one pushes the other half a tile further. 塞德莎 says you don’t need to worry: the rooms avoid relying on it. (39:55)
Puzzle 21
First room of Mirrors and Stones 5.
Key idea: a stone kicked out from the left bounces down to the lower mirror and then right. Move the starting row up or down one and the landing row moves the same way, so you can aim by trial. (YouTube 0:05 · 塞德莎 40:56)
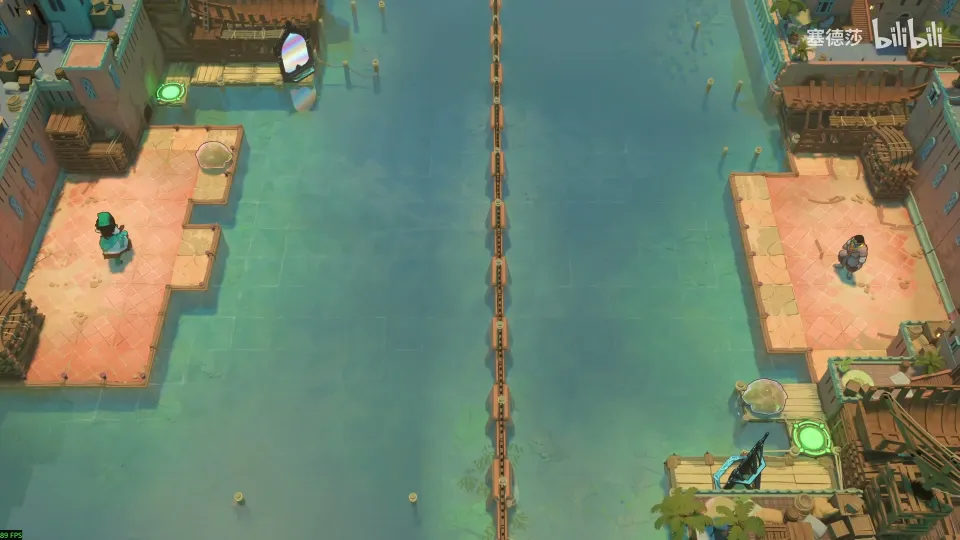
- Stage one: the stone has to fill the gap left of the Trader. Kick it out and reflect to see the path: down to the lower mirror, then right. (41:11)
- The start row and end row move together, so you need to kick from the row 塞德莎 marks. Send the stone back through the gap to take it out. (42:11)
- Put it in place, have the Trader stand ready to block, and kick right. (42:31)
- Stage two: reflect the stone into the water below the exit at the top left. Push the mirror one tile left first, test the path, then move one row up and reflect back. (42:56)
Puzzle 22
Key idea: the lily pad at the top is a one-way trip, and it has to drift down and then left. You only have one crystal stone, so build a loop with two mirrors that brings the same stone back round to hit the pad again. (YouTube 2:09 · 塞德莎 43:47)
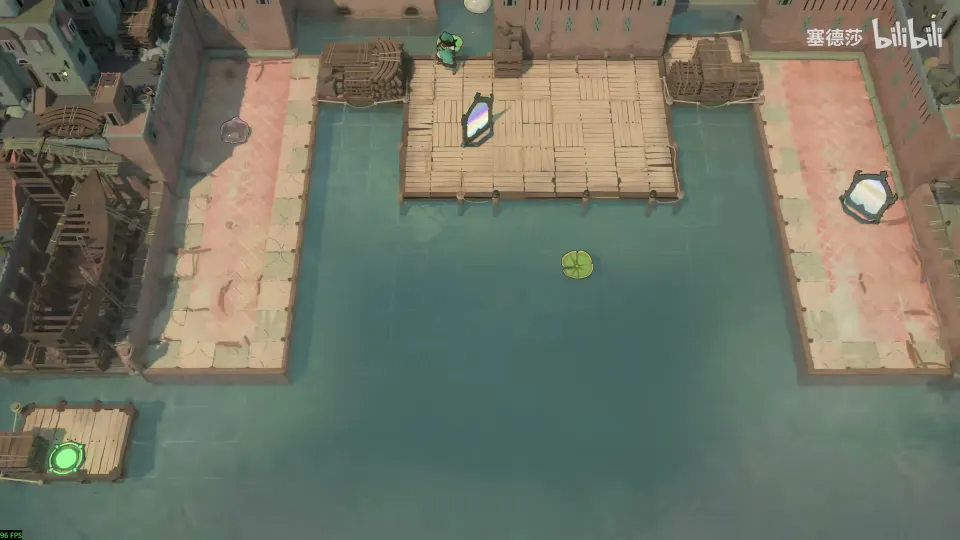
- The plan: start the pad moving down, then knock it left in the right row and board it there. (44:23)
- Place one mirror and then the second as 塞德莎 draws, so the stone reflects round and comes back towards the pad from the right. (45:02)
- Start the pad and go to the left. (46:04)
- Kick, reflect twice, and the stone knocks the pad left. His timing is tight; 塞德莎 thinks the mirror spots can be adjusted to give more room. (46:09)
Puzzle 23
Key idea: every extra bounce between the mirrors pushes the stone further left or down, and the step depends on where the mirrors stand. You can calculate a setup, but 塞德莎 just finds one that works. (YouTube 3:31 · 塞德莎 46:31)
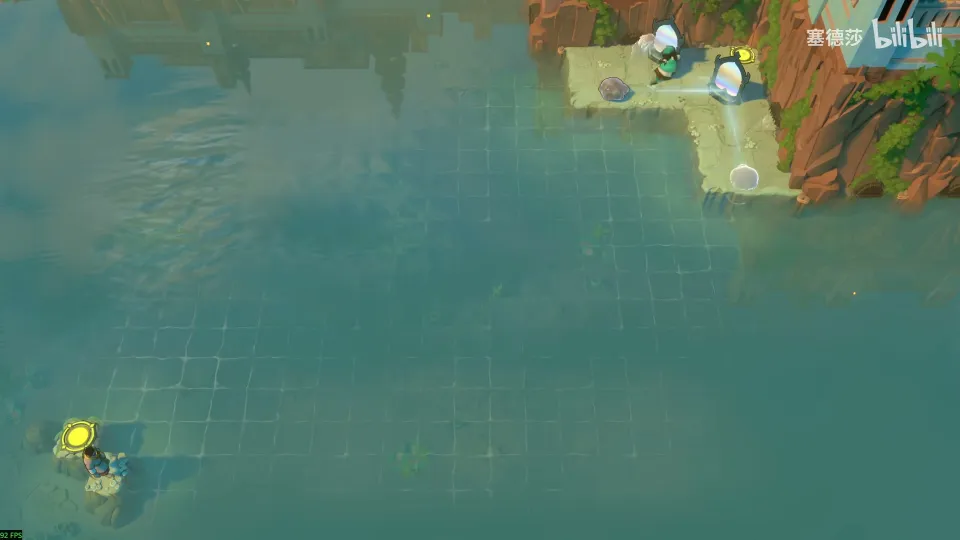
- Put a mirror anywhere and kick: with each reflection the stone ends up further out. (46:38)
- His setup: one mirror in the top-left corner, the stone and the other mirror where he places them. Watch the placement at 47:16, then kick and let the bounces carry it to the target. (47:25)
Overworld puzzle 7
Key idea: clearing the last room opens a gap on the map. Use the right-hand mirror to get up, and the two facing mirrors (a U-shaped reflector) to reach the middle island. (YouTube 6:03 · 塞德莎 47:41)
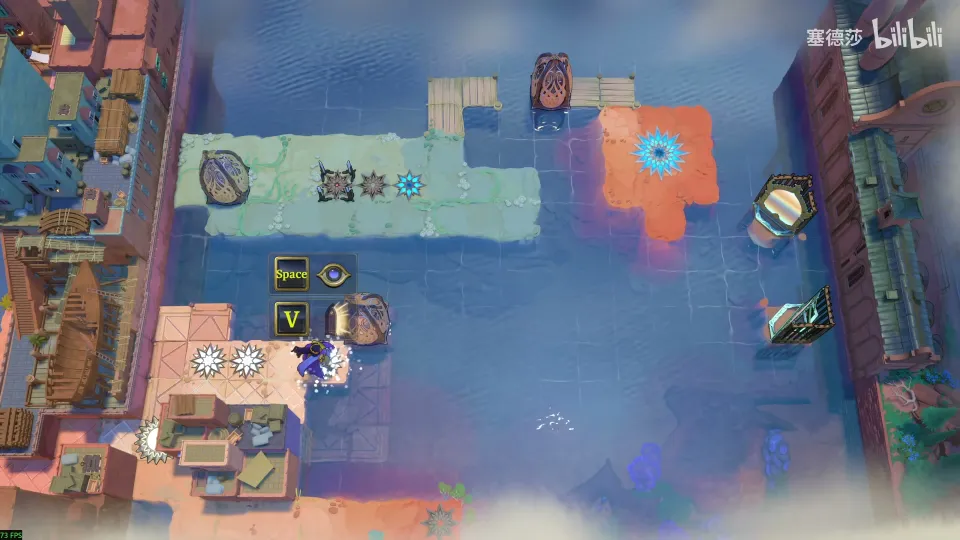
- Reflect up with the right-hand mirror, then use the U-shaped pair to reach the small island in the middle. (47:43)
Puzzle 24
Key idea: send the crystal stone from left to right into your own body. Two quick reflections keep bouncing it so it stays skipping on the water until you are in place. (YouTube 6:41 · 塞德莎 47:54)
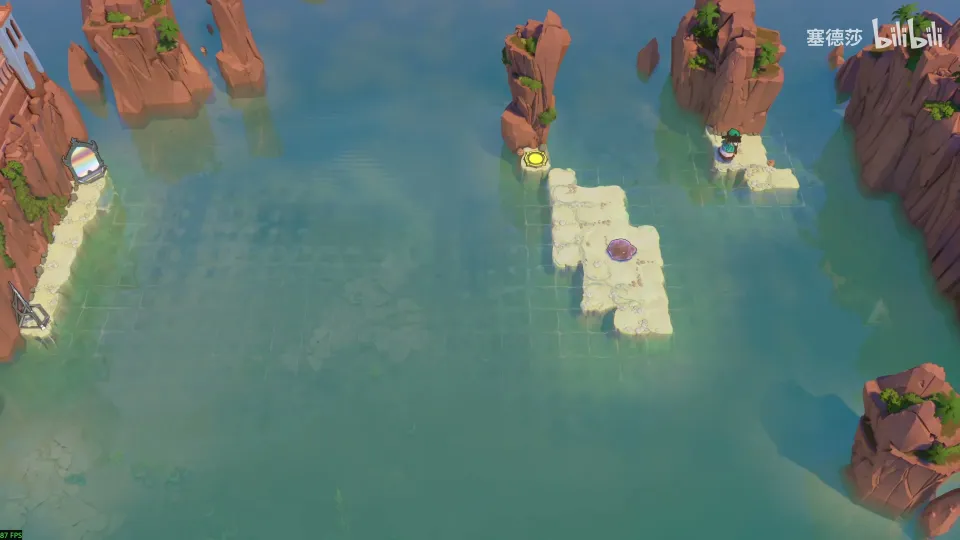
- The only starting point is the spot 塞德莎 shows. Kick right. (48:15)
- In slow motion, reflect and reflect again. The stone keeps going back and forth on the water. (48:22)
- Stand in its path and let it hit you. (48:47)
Puzzle 25
Key idea: with two mirrors in a U shape, a stone kicked between them comes back shifted sideways by the gap between the mirrors. Set the gap to the number of tiles you need and walk the stone to the top right step by step. (YouTube 7:17 · 塞德莎 48:52)
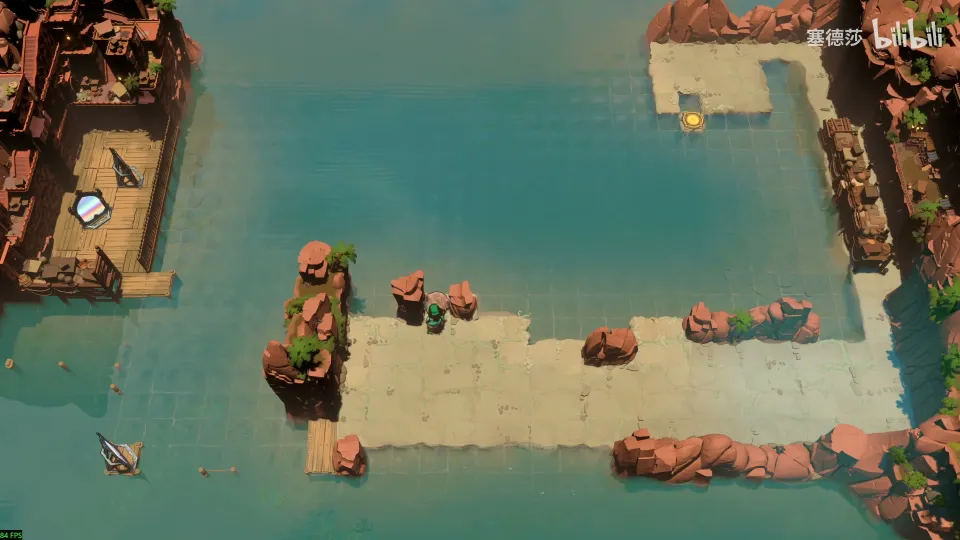
- Test: with a gap of three, one reflection pulls the stone three tiles left. (49:25)
- To take it out you need two tiles, so set the gap to two, then push it right. (49:40)
- The next column needs a gap of four. (49:51)
- A straight push up gets stuck, so put the mirrors side by side (gap one) and reflect twice on the way up: two tiles left, and up. (50:18)
- Keep the gap at one, reflect once on the way down and wait on the left to stop the stone next to the exit. (50:42)
Puzzle 26
Key idea: you ride the lily pad up the current, but the exit is missing a step. Push the crystal up to fill it, and slow it down with a symmetric ring of mirrors so you get there first and stop it. (YouTube 10:26 · 塞德莎 50:56)
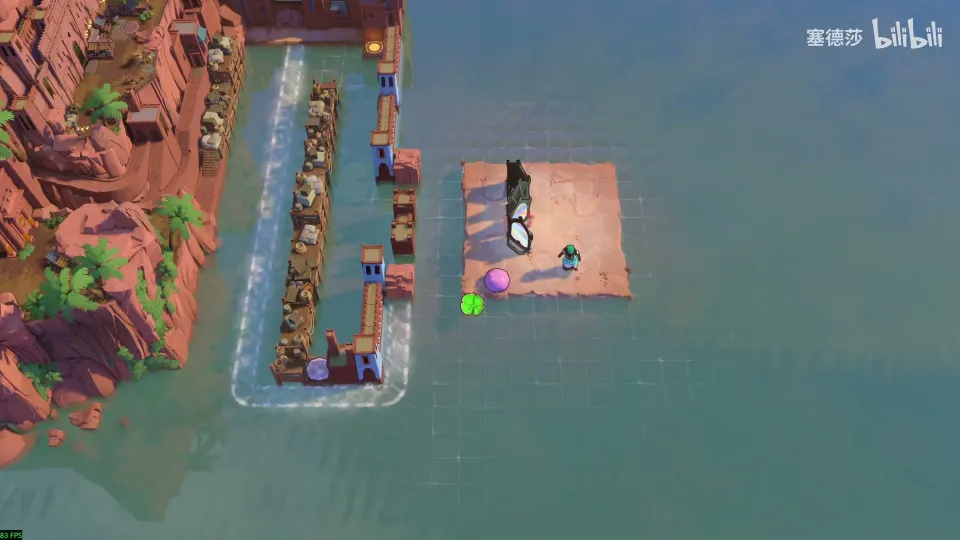
- The plan: ride the pad up the current; the crystal has to arrive at the top after you, so you can block it. (51:10)
- Set up the mirrors. Any layout works as long as it is symmetric; 塞德莎 tries one, fixes a wrong mirror and explains the loop. (51:33)
- Kick the crystal out and keep reflecting in slow motion to hold it in the loop. (53:09)
- Hurry up the current and stand where it will stop against you. (53:49)
Overworld puzzle 8
Key idea: the crystal you just freed opens the way to the last room of this part: combine the U-shaped reflector with the stone and reflect into the water. (YouTube 13:01 · 塞德莎 53:59)
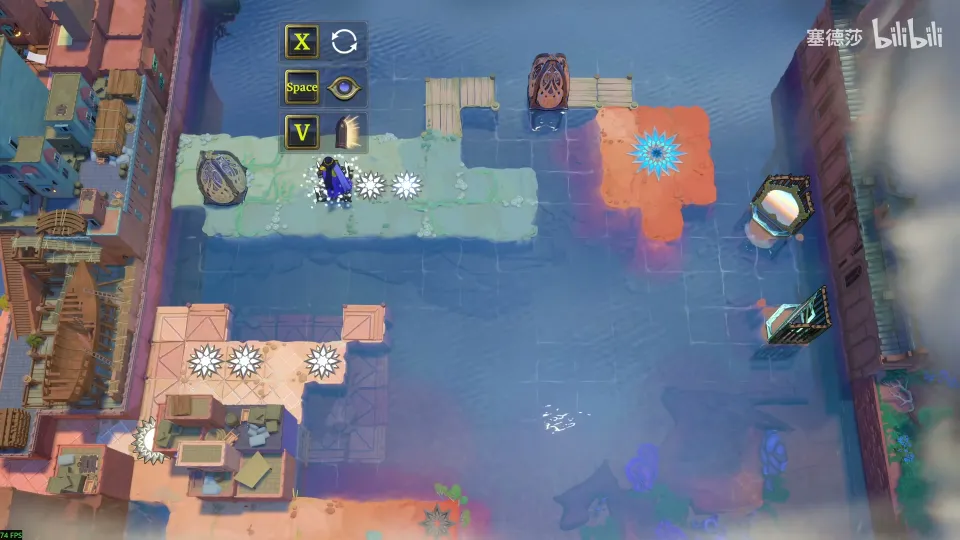
- Place the stone where 塞德莎 does and reflect it into the water with the U-shaped pair. That reaches the next room. (54:03)
Puzzle 27
Key idea: the room seems built around cloning yourself with the mirrors. Several solutions work; 塞德莎 shows one that uses a clone, and then a simpler one he stumbled on that needs only one hero and leaves a mirror unused. (YouTube 13:51 · 塞德莎 54:15)
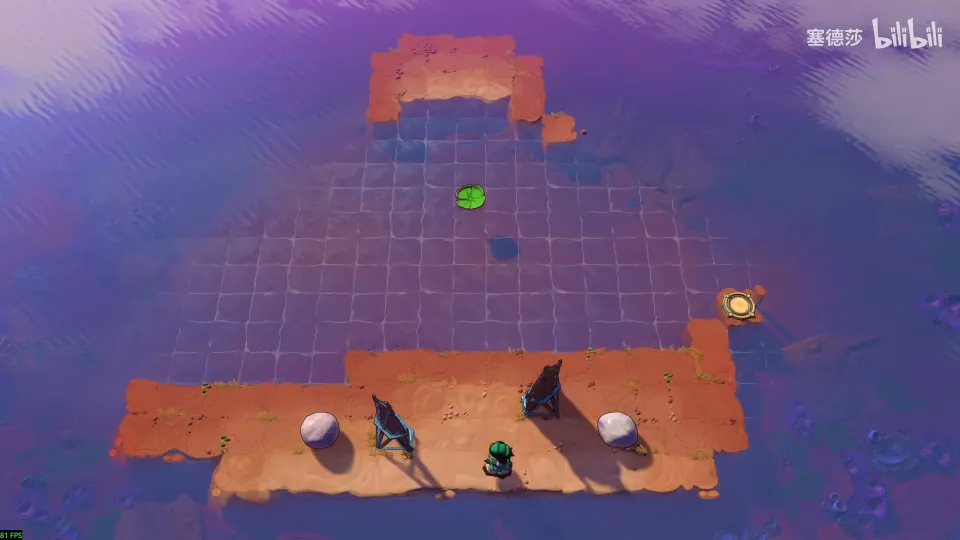
- His goal: get both stones onto the edge of the upper island, so one can knock the lily pad down and the other turns it right, next to the exit. (55:19)
- Clone version: put the two stones either side of the pads, split into two heroes and push both stones up at once. The pad gets two equal pushes in opposite directions, so it doesn’t move. Merge back and finish. (56:45)
- One-hero version: skip that mirror, push the stone to the spot he shows, go up, and send the other stone up the same way; it builds the same setup. (57:46)
- 塞德莎 expects this room to be patched. If neither route works in your version, Postmode’s clip shows another quick finish. (58:48)
Puzzle 28
First room of Mirrors and Stones 6.
Key idea: from here on lily pads carry mirrors. Put the mirror on the pad: as the pad drifts away, the mirror’s beam reaches tiles you could never reflect to from land. (YouTube 0:03 · 塞德莎 P14 0:15)
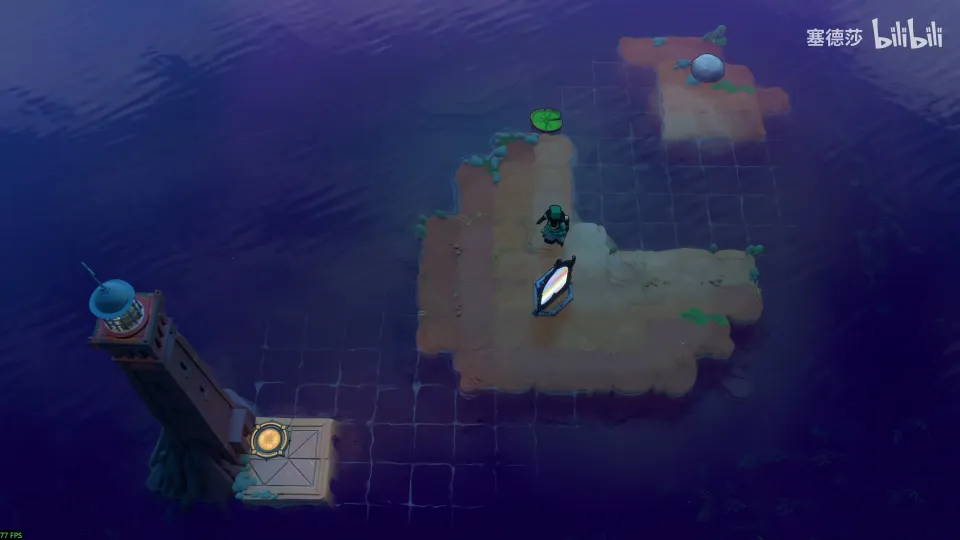
- Put the mirror on the lily pad first; without it you can’t get to the top right. (0:26)
- Fetch the stone back and use it to start the pad. (0:32)
- Go to the top right. The pad keeps drifting further away, and at some point the mirror can reflect you down to the bottom left. (0:39)
Puzzle 29
Key idea: the same trick, but this time you reflect a stone, not yourself: it has to land on the tile directly above the exit. Draw the diagonal, reflect the stone once onto a waiting spot, and reflect it again when the pad brings the mirror down to the right place. (YouTube 1:18 · 塞德莎 P14 0:47)
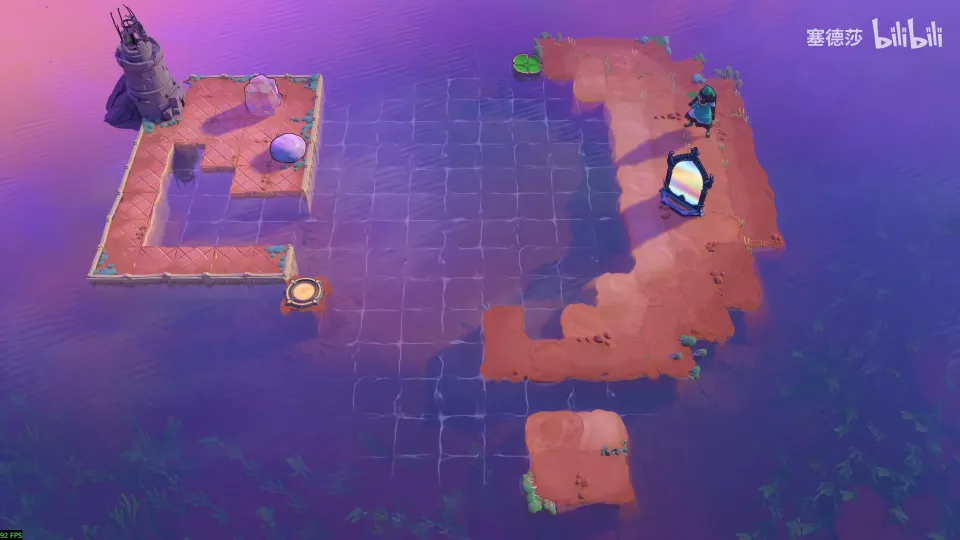
- The target is the tile right above the exit. 塞德莎 draws the diagonals (and redraws them once) to find where the stone and mirror must be. (1:06)
- The plan: the pad ends up drifting down. With the mirror on it, push the stone to the first point, reflect it to a holding spot, and when the pad comes down, reflect again onto the target. (1:30)
- Cross over first; if you put the mirror on the pad straight away you can’t get across. Place the stone, then carry the skipping stone to the right to start the pad. Teleport immediately after pushing, or the stone ends up blocking the teleport tile. (2:03)
- Push the mirror onto the pad and start it. Reflect at the first point, wait for the second, reflect back, then take the mirror out. (2:27)
- If the pad hasn’t gone far enough, the reflection falls short; 塞德莎 has to retry once. (2:46)
Puzzle 30
Key idea: a race. The pad has to be knocked down into one row, turned right by a stone pushed up in that row, and boarded on the way. The walk round is far too long, so use a mirror as a shortcut. (YouTube 4:16 · 塞德莎 P14 2:54)
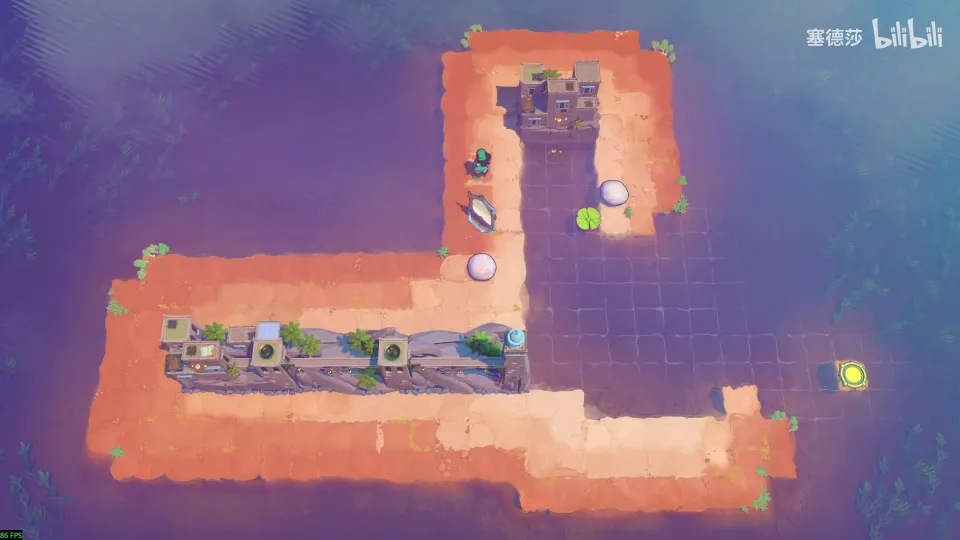
- The route: knock the pad down into the marked row, push a stone up in that row so the pad turns right, board it at the point 塞德莎 marks and ride to the exit. Walking there in time is impossible. (3:06)
- Bring the lower stone over and move the mirror to the right. (3:54)
- Nudge the stone up one and set it so you will kick it from left to right. (4:07)
- Kick it right and reflect straight down, so you reach the pad’s row in time. (4:17)
- When the pad arrives, push the mirror out of the way and ride on. (4:33)
Overworld puzzle 9
Key idea: the last room freed a stone. The mirror below also stands on a lily pad: start that pad, go to the bottom right and let it carry you towards the middle. (YouTube 5:31 · 塞德莎 P14 4:48)
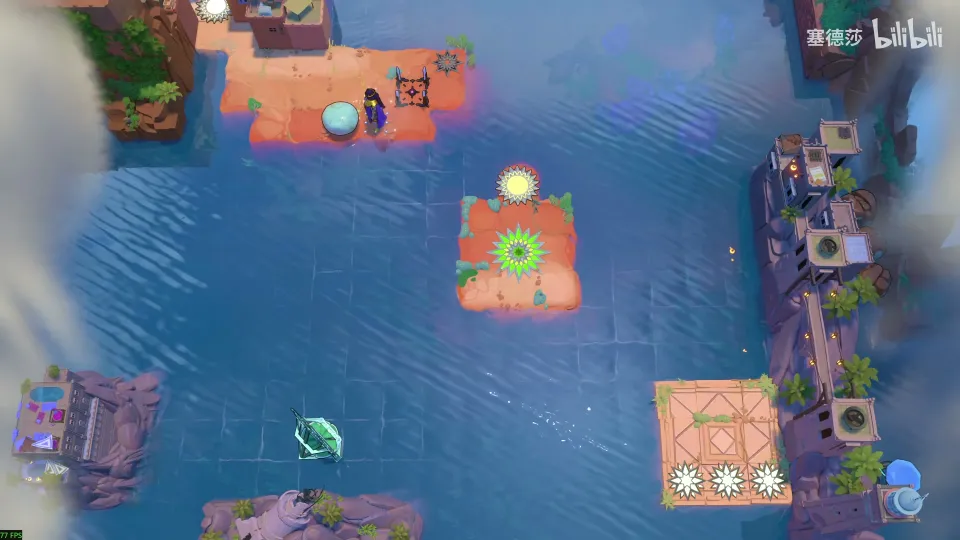
- Start the pad under the lower mirror. (4:50)
- Go to the bottom right first; the pad slowly moves right, and you reach the middle. (4:54)
Puzzle 31
Key idea: the reflection that reaches the exit starts on the lower lily pad, so you have to be on it. Knock the lower pad left until it lines up under the upper pad, send both right together with the mirror on top, reflect onto the lower pad, and reflect again once they have drifted into place. (YouTube 6:18 · 塞德莎 P14 5:04)
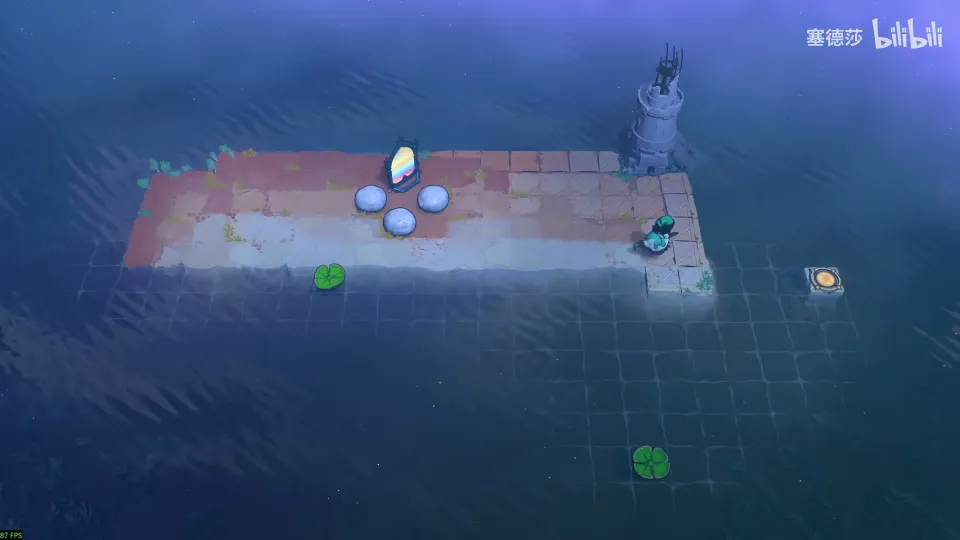
- The plan: the mirror’s landing point is on the lower pad. Line the two pads up vertically, put the mirror on the upper one, reflect onto the lower one and ride both right. (5:16)
- The idea is clear but the timing is fiddly. Set the pieces up as 塞德莎 does and send the upper pad left. (He names one piece unclearly here; watch 5:50.)
- Use a separate stone to knock the lower pad back right. One stone for both pads leaves a time gap; it can work, but it is unreliable. (6:01)
- Line them up, push, and the pads move in step. Reflect down, wait, then reflect across to the exit. This is the area’s last big room and gives the seal Postmode collects at 8:00. (6:28)
Puzzle 32
From here on Postmode’s videos stop; puzzles 32 to 43 follow 塞德莎 only.
Key idea: a bonus room. Two lily pads must meet: one knocked up, one knocked left. Get the timing right and you can hop between them with the two mirrors, ending on a far tile that reflects you up to the exit. (塞德莎 P14 6:48)
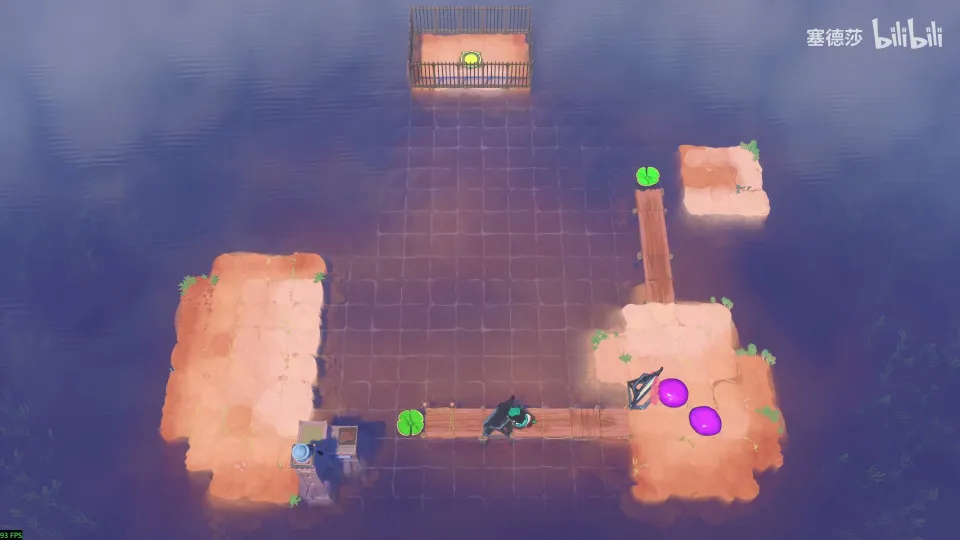
- The two mirrors only fit in one place each; push them there. (6:58)
- The plan: the lower pad goes up, the other goes left. With the right timing they arrive together, you reflect onto one, then from the far tile reflect up. (7:06)
- 塞德莎’s timing: put the two stones in place, start the first pad, come straight back, wait a moment, then start the second. (8:14)
- Reflect right, reflect down when the two pads meet, stand on the right tile and reflect up. (8:23)
Puzzle 33
Key idea: the first of the current rooms in the lower part of the area. A stone stopped in a current changes where the current flows; here a mirror does the cutting for you. (塞德莎 P14 8:59)
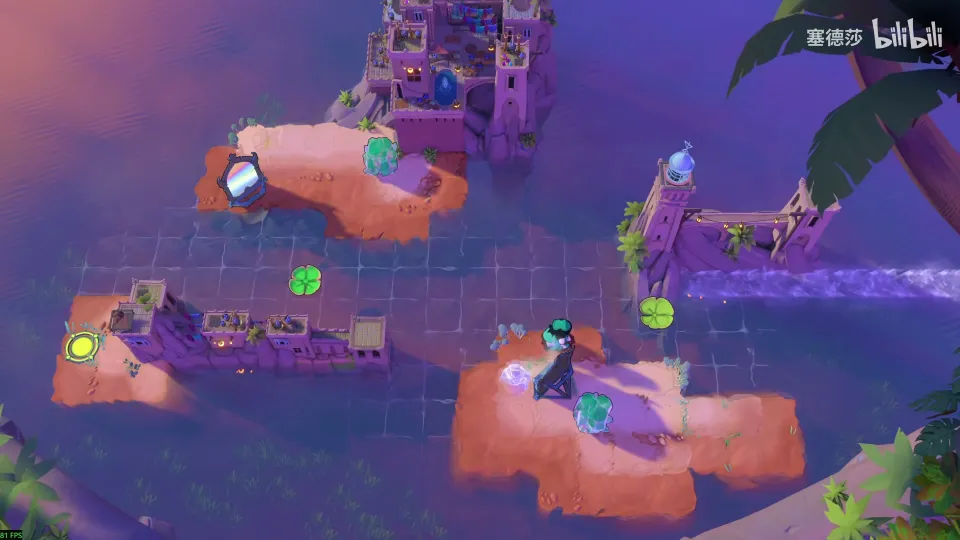
- Reflect to cut the current and turn it. (9:03)
- A wall blocks the way, so reflect up instead. (9:12)
- Cut the current again, one tile further right this time, or the lily pad can’t drift left. (9:15)
- Get on the lily pad, or you won’t make it across. (9:27)
Overworld puzzle 10
Key idea: a teleport opens. Cut the current on the map with the stone to reach the room at the bottom right. (塞德莎 P14 9:35)
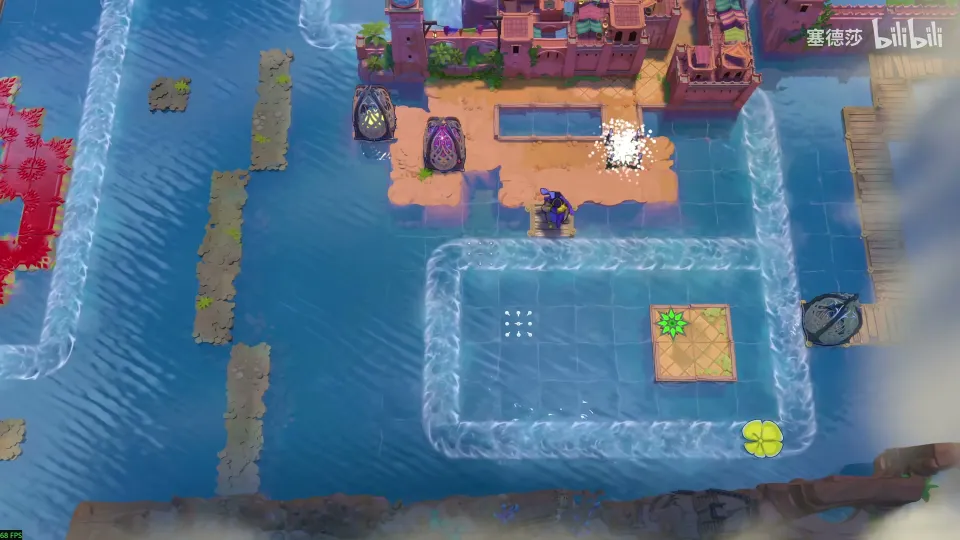
- Drop the stone into the current where 塞德莎 does. The current turns, and you can reach the bottom-right room. (9:42)
Puzzle 34
Key idea: a series of short stages that teaches how currents bend. A blocked current turns; by default it turns right, and it only turns left when the tile to its right is blocked. (塞德莎 P14 9:55)
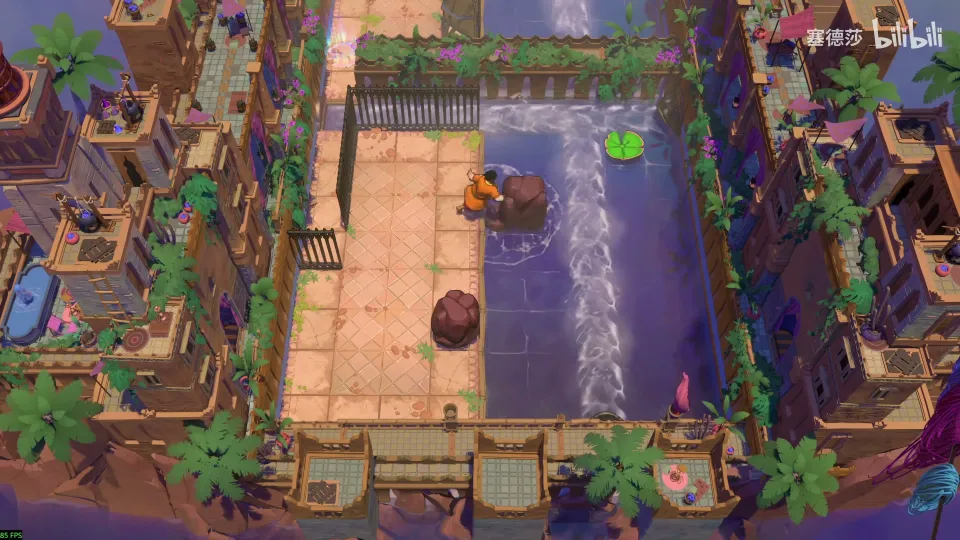
- Stage one: block the current with three stones. With the left side blocked, it turns right. (10:03)
- Stage two: drop a stone into the current. It turns right by default. (10:13)
- If the right side is already blocked (the tile right of the stone, set diagonally), it turns left instead; in some spots it just stops. (10:43)
- Last stage: you need a left turn, so place one stone first and the second one after it. (11:46)
- Order matters: once a current has turned right, adding a block afterwards doesn’t flip it left; it just stops. (11:56)
Puzzle 35
Key idea: cut the current at the very top by reflecting a crystal there. That is far from the mirror, so put the mirror and a crystal on the lily pad and let the pad stretch the distance. (塞德莎 P14 13:04)
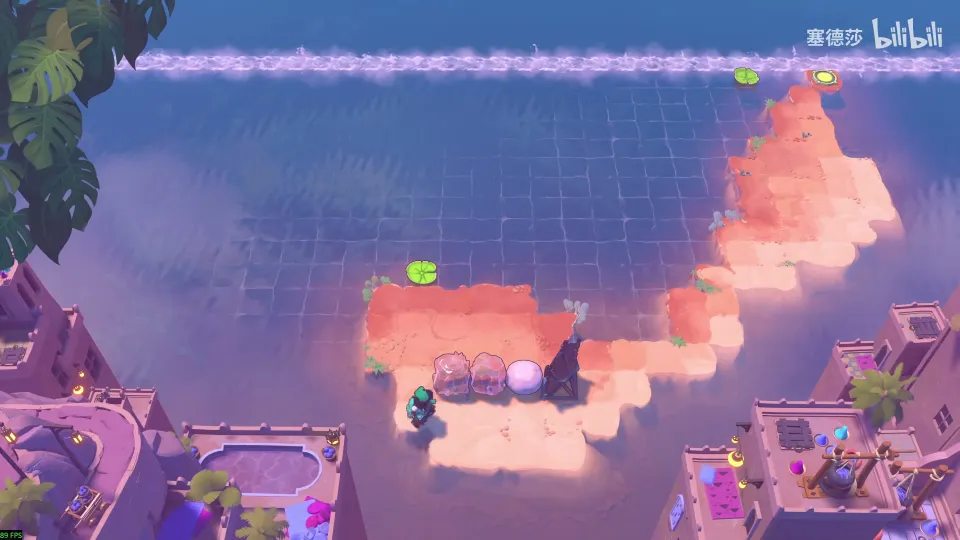
- Getting there: wait for the lily pad on the map, ride it right, then reflect up with the mirror. (12:41)
- The intended route is a current cut; 塞德莎 mentions an unintended one that saves a lily pad but doesn’t show it. (13:04)
- Knock the pad left. Put one crystal on the pad and sink the other in the water as a support, then put the mirror in place. (13:28)
- Start the pad. Once it is far enough away, reflect: the crystal lands in the top current and cuts it. (13:40)
Puzzle 36
Key idea: cutting on the left would be blocked by the wall below, so the cut has to happen at the bottom right, by pushing a crystal into the water by hand. Get there by riding two lily pads side by side. (塞德莎 P14 14:04)
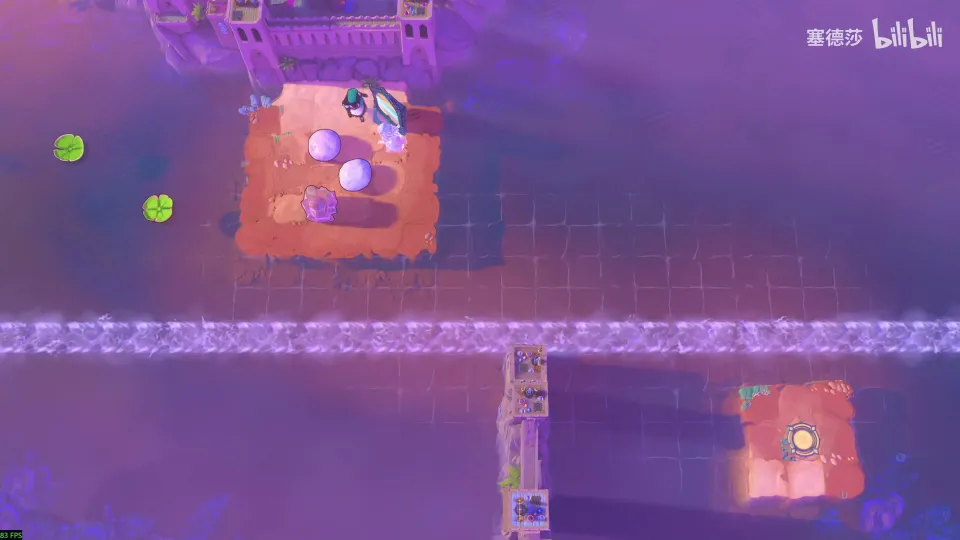
- Start the two lily pads one after the other so they drift side by side. 塞德莎’s first try is a little late. (14:23)
- Send the crystal onto the front pad and step onto the back one. (14:56)
- At the bottom right, push the crystal right into the water. That cuts the current. (15:02)
Puzzle 37
Key idea: if you simply cut the current downwards, the new branch flows into the older current and joins it; the older one always wins. Cut only a short piece: lead the current to the lily pad’s column, then cut it off again. (塞德莎 P14 15:10)
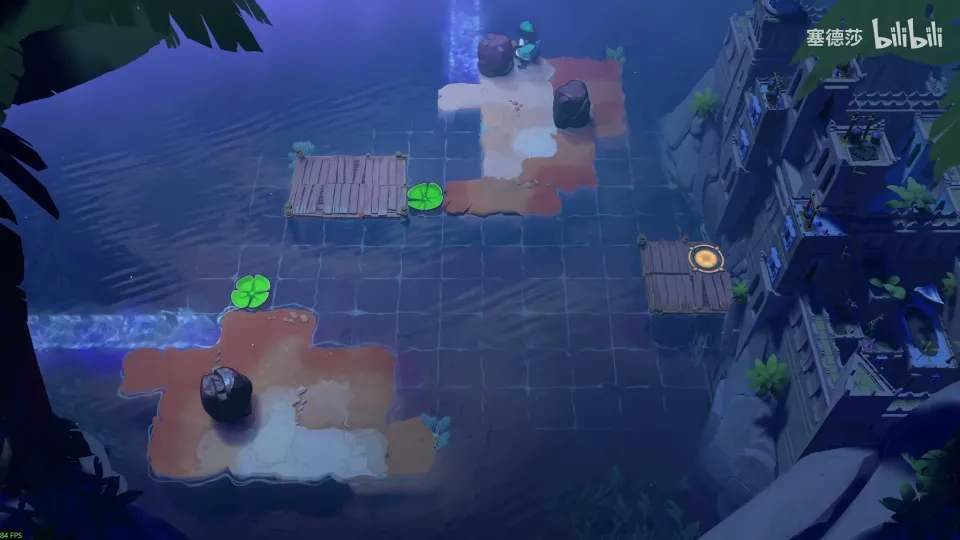
- See what goes wrong: cut straight down and the new flow merges into the first current. (15:20)
- Instead, guide the current into the lily pad’s column, then cut it again so only a short stretch is left. (15:48)
- Get on the lily pad quickly; the rest is easy. (16:08)
Puzzle 38
Key idea: follow the layout’s hint. The stone gets kicked left from one spot, and three lily pads come by in turn. Load the first two pads with stones and stand on the third: at one moment both stones can be dropped left into the same spot. (塞德莎 P14 16:25)
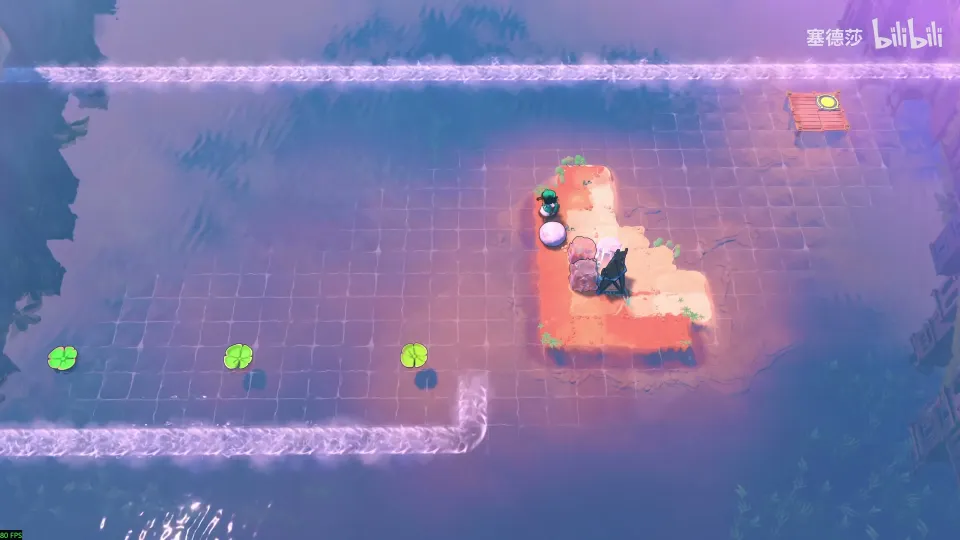
- Set up as 塞德莎 does: a stone on the first pad, a stone on the second, the Sailor on the third. (16:56)
- When the moment comes, drop the stones to the left; both land in the same spot and cut the current. (17:07)
Overworld puzzle 11
Key idea: cut the map’s current much like puzzle 38: a stone rides a lily pad round to the mirror, and the cut comes once the pad has passed. (塞德莎 P14 17:28)
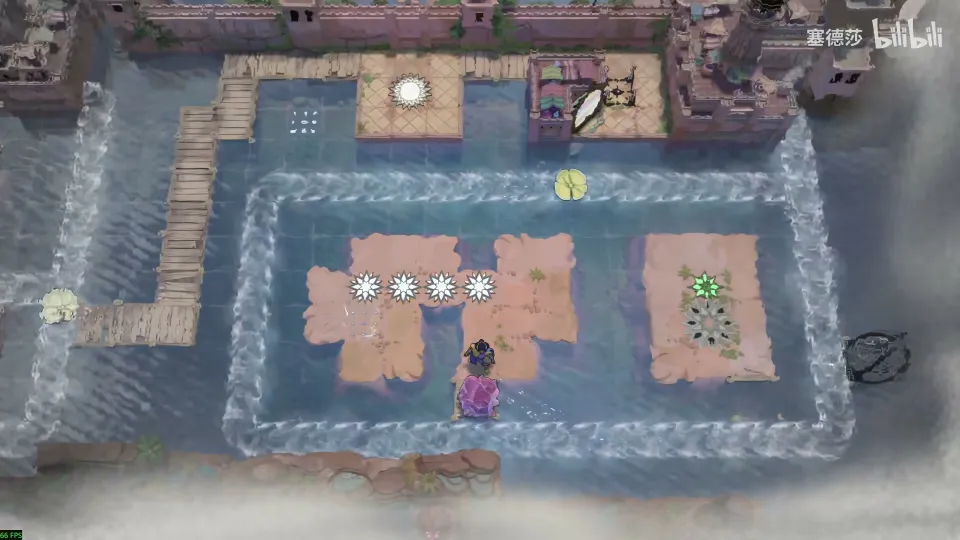
- Push the stone onto the lily pad and wait for the pad to come round to the mirror. (17:33)
- Reflect, and cut the current once the pad has left. (17:40)
- Wait one more lap, board the pad and ride to the bottom right. (17:48)
Puzzle 39
Key idea: a sandbag-like block shuts the exit, so a skipping stone has to stop right above (or below) it. A stone only stops there if something blocks it at that exact moment: reflect another stone into its way just as it arrives. A reflected object is in the air for an instant, and that is enough. (塞德莎 P14 17:59)
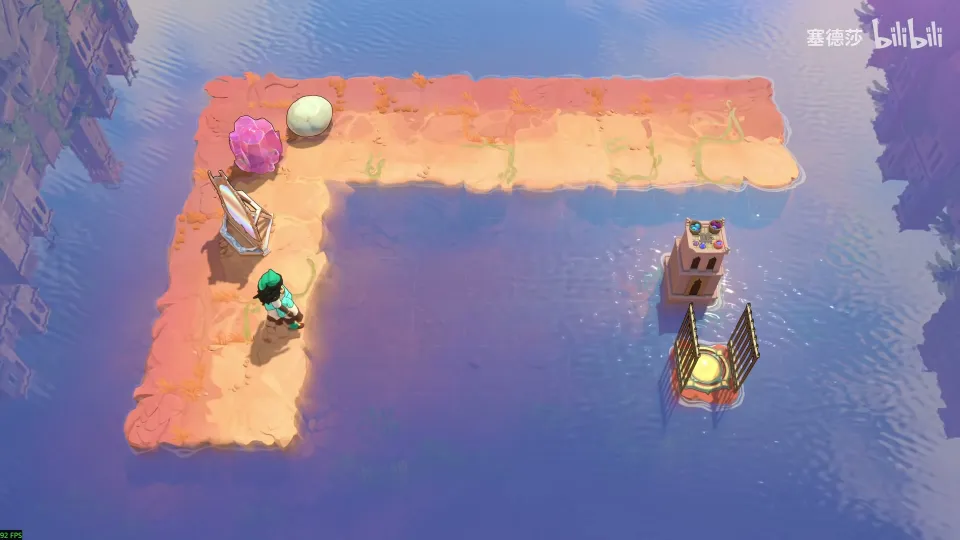
- Place a stone and the mirror where 塞德莎 does, so the reflection point is on the tile you need. (18:48)
- Kick the other stone right. The instant it reaches that tile, reflect: the reflected stone blocks it and it stops. (18:59)
Puzzle 40
Key idea: the Trader has to walk left past several currents. Stop each current so it is diverted onto the round ruin in the middle, two at a time. (塞德莎 P14 19:14)
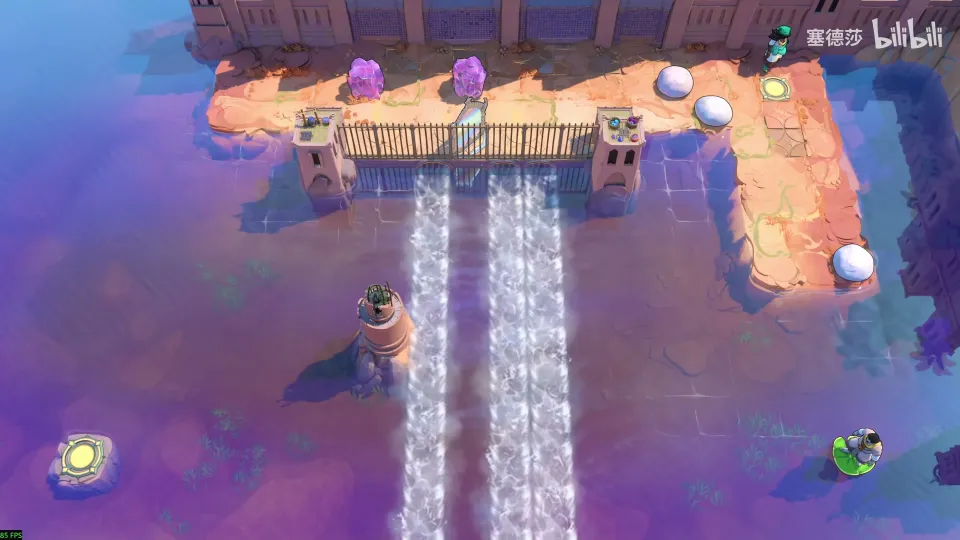
- Put a stone where 塞德莎 does and reflect it into place, then kick another stone in and stop it. The first two currents now flow left. (19:50)
- Do the same one row along and kick left from that row. Every current now drains onto the ruin. (20:05)
- Walk the Trader to the exit. (20:22)
Puzzle 41
Key idea: one reflection cuts the current at the top left completely, and the leftover piece slowly drains away to the right. Ride it on the lily pad, and before it is gone push it down five rows with your five stones, exactly the gap to the exit’s row. (塞德莎 P14 20:44)
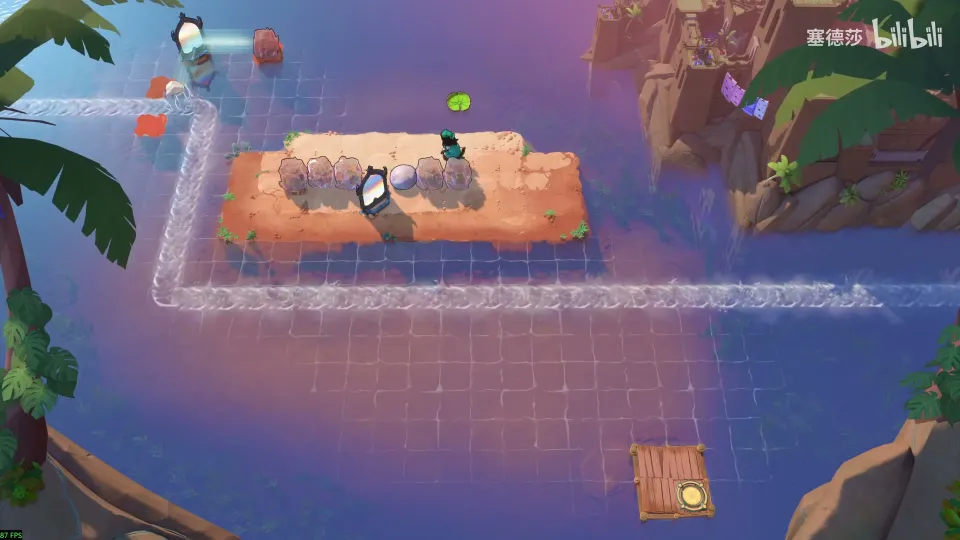
- Start the lily pad so it drifts onto the current, then cut the current. You can reach the pad with the mirror. (21:02)
- The current is five rows from the exit and you hold five stones. All five have to go in before the current runs out. (21:27)
- 塞德莎’s layout, for reference: place the stones as shown. (21:59)
- Start the pad; once it is on the current, press reflect. Push the stones down and stop them to the right so they form one long diagonal. (22:23)
- Push the mirror left, board the pad and ride to the exit. (22:40)
Puzzle 42
Key idea: a big wall stands in the current’s way. Make the current drop two rows to pass under it, then turn back up. Remember the default turn is right, so the left turns need a stone placed first. (塞德莎 P14 22:56)
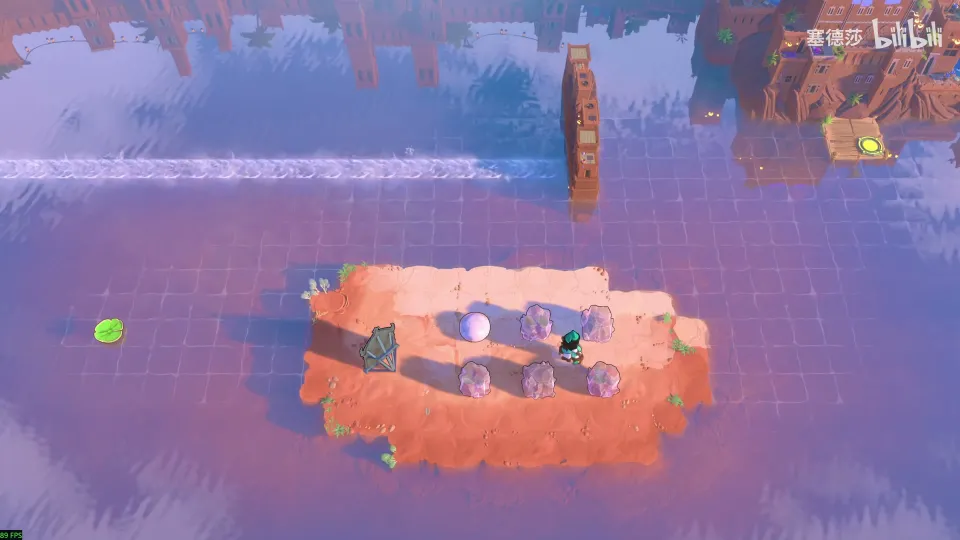
- Place a stone and a mirror (塞德莎’s word for the second piece is unclear) to stop the current on this side. (23:20)
- Add a stone here; it now stops on the next side. (23:30)
- The next turn has to go left: drop a stone on the first tile, then a second one beside it. (23:39)
- Put the last stone in place, start the lily pad and ride to the exit. (23:57)
Puzzle 43
Key idea: a pinball-like series of four stages in the same room. Bend the current so the lily pad you ride ends between the two stones next to the exit. A current keeps turning the way it last turned, which saves stones; in the last stage the mirror itself does the final cut. (塞德莎 P14 24:25)
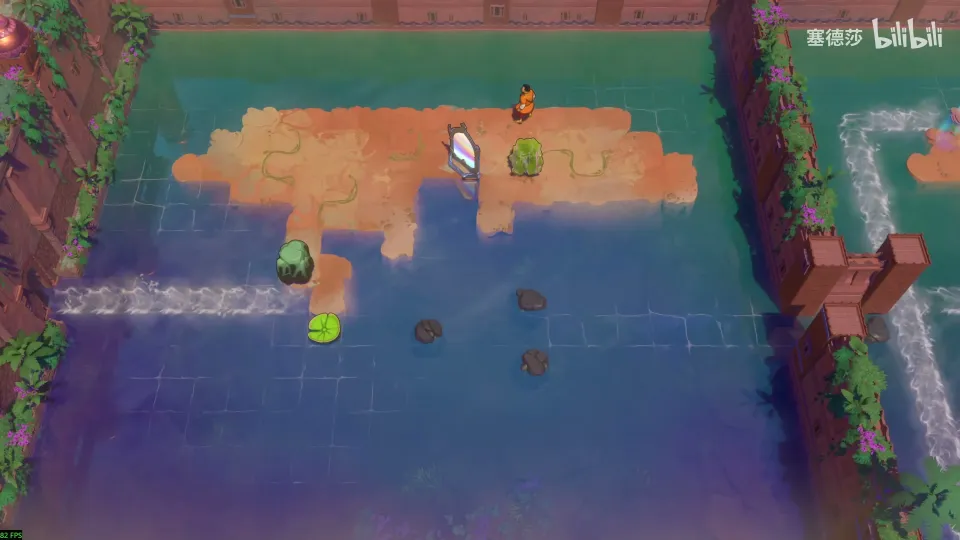
- Stage one: start the cut and board the pad. Left alone, the pad drifts all the way right, so drop a stone on the spot 塞德莎 shows to make it turn left there. (24:44)
- Stage two: the current has to go left all the way, and you have one crystal. Cut the first tile; once a current turns left, its later turns default to left too. (25:19)
- Stage three: turn right once at the start and let the two later turns go left on their own. (25:52)
- Stage four: cut at the start as before, but the last turn must go right and you have no crystal left. Push the mirror into that spot; it stops the current just as well. (26:19)
That completes the south-east. 塞德莎 checks the map and finds nothing left in this corner. (27:06)
Puzzle 44
Puzzles 44 to 49 are six extra rooms north of the main area, between Mirrors and Stones and the Mirror Isles (塞德莎’s tile S2E3). They only open in the second stage, after the first ending: 塞德莎 drops in from the level above in his part 33. He calls the block 水中镜像 (“mirror images in the water”; the English in-game name is unconfirmed), because every room uses one rule: a stone lying in the water can still be reflected.
Key idea: the stone has to land one tile further than any normal reflection can send it. This room introduces the rule that a stone in the water can still be reflected, so reflect it a second time from where it sank. (塞德莎 P33 14:25)
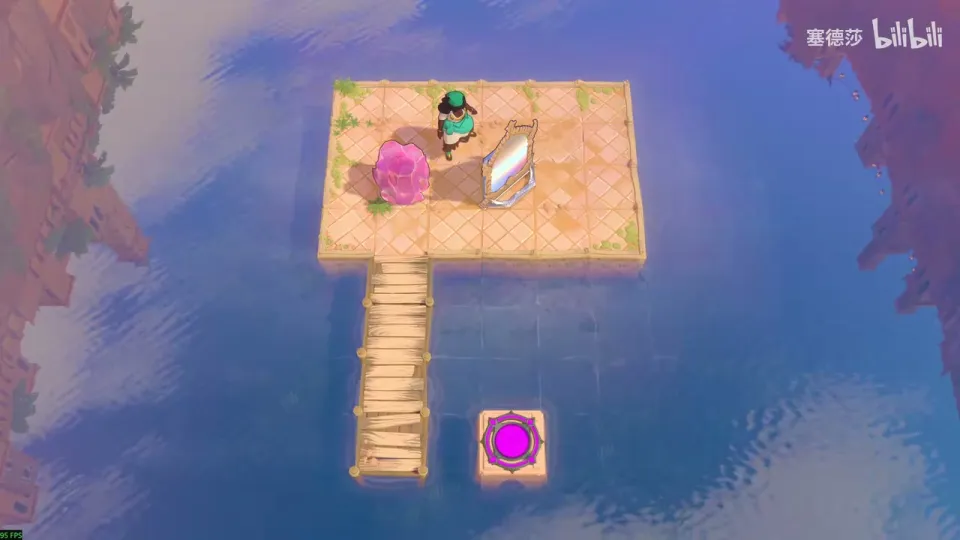
- Try the longest reflection from the platform: the stone ends up one tile short of the target. (14:35)
- The stone is now in the water, but it can still be reflected. Reflect it again from there to cover the last tile; the order is easiest to follow in the clip up to 14:52. (14:40)
Puzzle 45
Key idea: pure diagonal drawing. Draw the diagonal down-left from the target to find where the stone must start; send the stone into the water first, then move the mirror so one reflection lands it on the target. (塞德莎 P33 15:15)
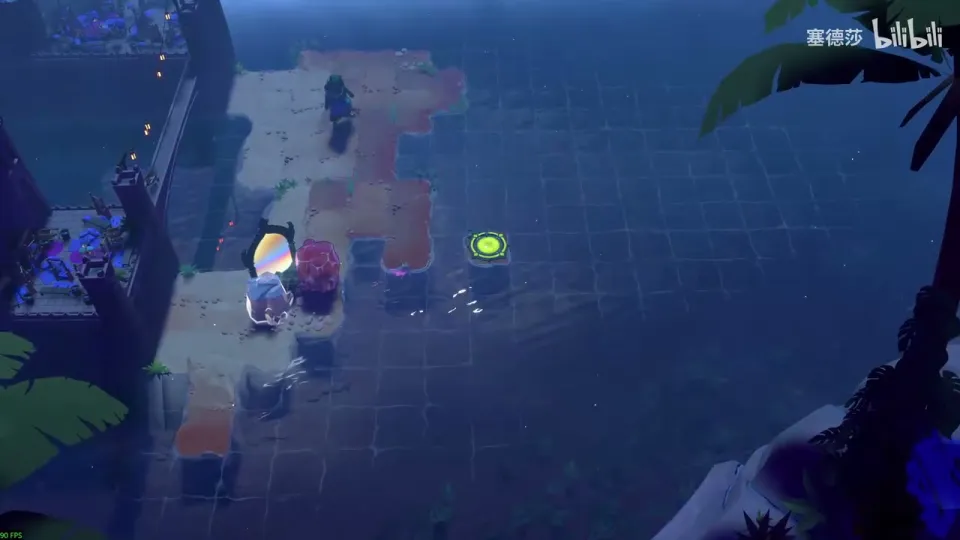
- The stone has to end up on the target. Follow the diagonal down-left from it: that tile is where the reflection must start. (15:21)
- Push the stone to that tile, put the mirror somewhere handy and reflect the stone into the water first; where it lands at the top right doesn’t matter. (15:40)
- Move the mirror to the spot 塞德莎 shows and reflect: the stone lands on the target. (15:55)
- Send the mirror into the water and walk across. (16:05)
Puzzle 46
Key idea: another diagonal, but this time two mirrors share the job: one on land throws the stone into the water, one standing in the water throws it on to the target. (塞德莎 P33 16:20)
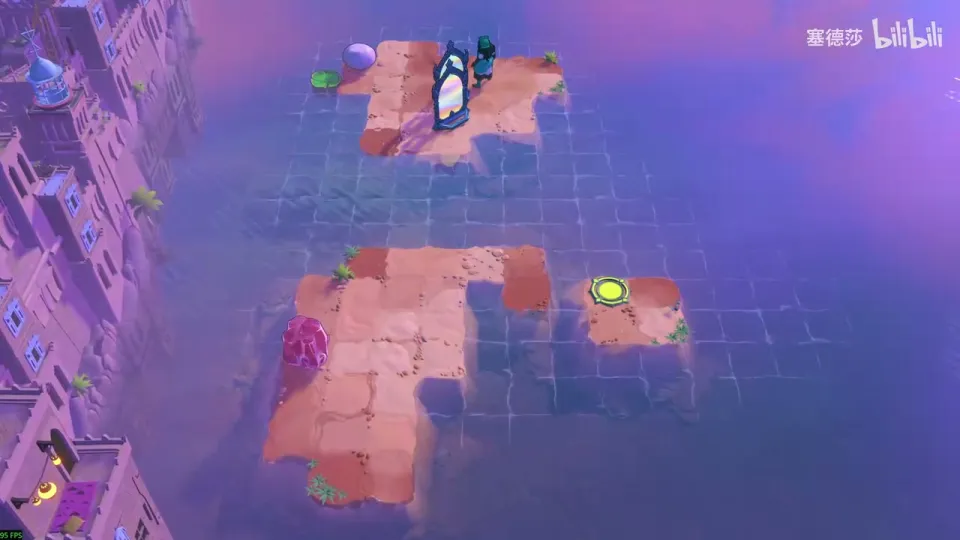
- Draw the diagonal down-left from the target. Either of the two tiles on it works as a starting point; 塞德莎 picks one. (16:24)
- The plan: a mirror above reflects the stone into the water, and a second mirror in the water reflects it onto the target. (16:40)
- Put both mirrors in place. They are one row apart, so they don’t interfere with each other. (17:00)
- Ride the lily pad down, push the stone out on the way, and set it on the starting tile. (17:10)
- Reflect twice. (17:20)
Puzzle 47
Key idea: lay a path over the hole the Tab map points out. Finding the reflection point is easy (eight tiles down-right along the diagonal); the hard part is getting the mirror into the water there without a stone stuck on its beam. (塞德莎 P33 17:25)
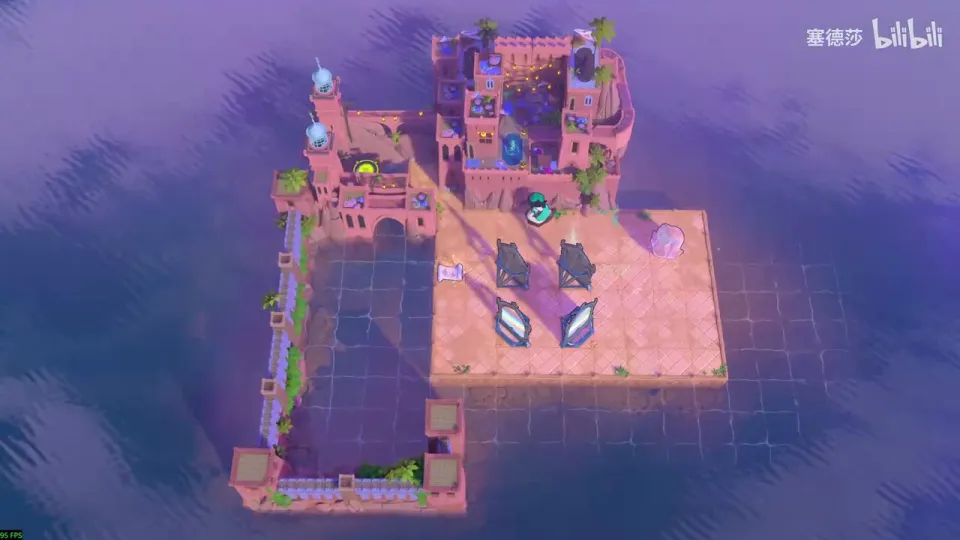
- Press Tab: the map shows a hole here, and that is where the path goes. (17:30)
- The mirror’s final tile is fixed. Count eight tiles down-right along the diagonal from it to find the stone’s starting tile. (17:38)
- You need far more stones than you have, so build a small stone-copying setup with the mirrors and lay four stones along the bottom towards the lower-left corner. (18:00)
- The trap: don’t push the mirror into the water yet. The stone nearest it would sit on its beam for good and always get reflected instead of the stone you want. (19:35)
- Instead put one more crystal here and the mirror there, so nothing stands on its face. Now three mirrors can move the three stones in the way (the one you stand on, these two and the one under the mirror) all at once. (20:00)
- Push one mirror down, set the other, put a stone on the diagonal spot, and press reflect: all three stones leave the path and the mirror sinks into place. (20:55)
- Drop a stone onto the mirror to break it, and cross. The exact tiles are easiest to follow in the clip from 18:00. (21:20)
Puzzle 48
Key idea: before this room, copy a stone in the hub. Then it is a diagonal again: from the target up-left everything is water except one tile at the shore. A stone there and a mirror in the water put the stone on the target, and a mirror already in the room reflects you at the same time. (塞德莎 P33 21:45)
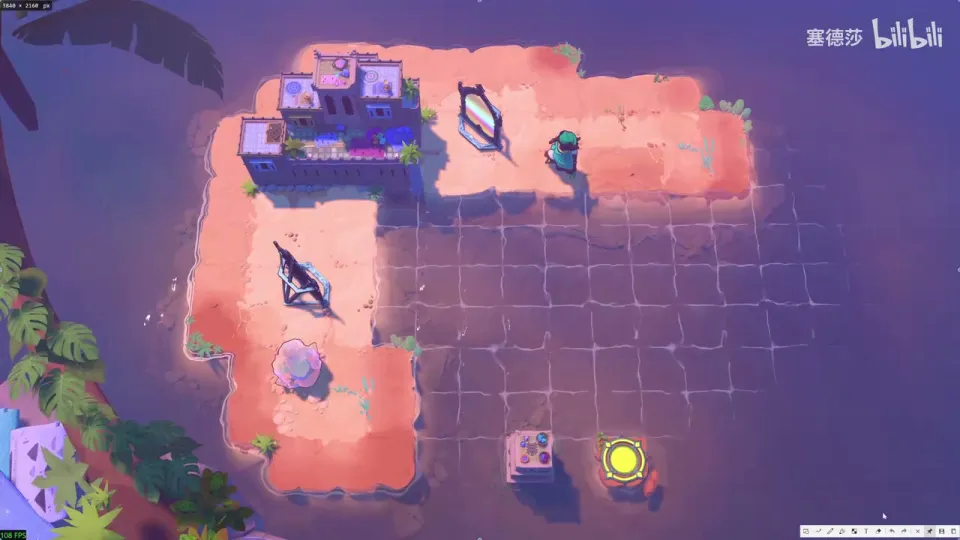
- In the hub just before, copy a stone. (21:43)
- Pick the target tile and draw the diagonal up-left. It runs over water, except for one tile right at the shore. (21:50)
- Put the stone on that shore tile and a mirror in the water: it reflects the stone onto the target. (22:15)
- A mirror already stands where it can reflect you at the same moment. (22:35)
- Afterwards push the mirror into the water. The path above looks blocked but you can walk it; 塞德莎 notes many players miss this. (22:50)
Puzzle 49
Key idea: the bonus star room for this corner. Build a road to the exit across at least three water tiles with only two stones: a mirror standing in the water lets one stone switch between two tiles, so stand on it there, then reflect it to the far tile. (塞德莎 P33 23:08)
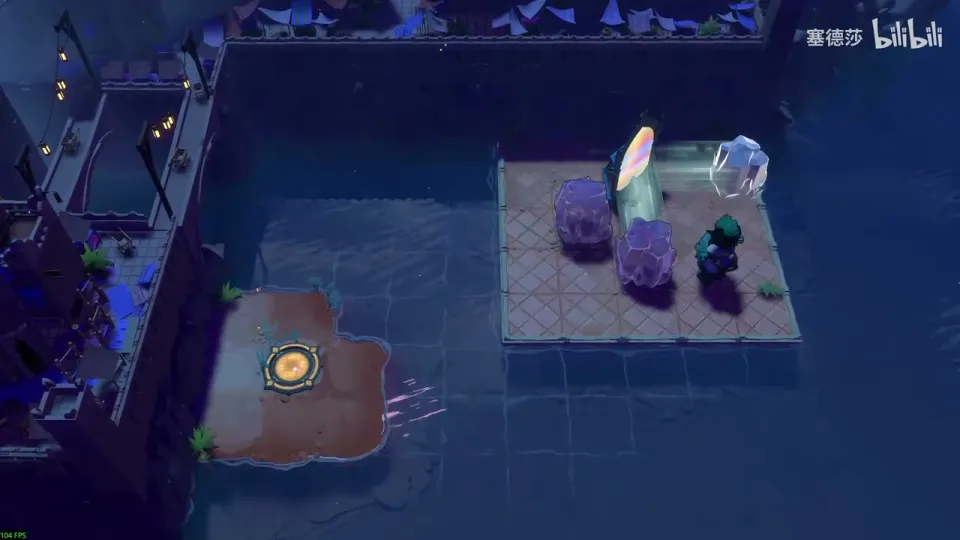
- Count: the exit is at least three water tiles away. With a mirror in the water here, a stone on this tile can be reflected to that one and back. (23:20)
- So with the stone on the near tile you step onto it, reflect it to the far tile, and cross. Two stones do the work of more than three. (23:55)
- Build it: push the crystal into the water and put the mirror just above it. (24:18)
- Throw the stone onto the right tile with a directed throw, then drop the mirror into the water. (24:33)
- Walk onto the stone and reflect. (24:40)
This is the extra star room for the south-east. Afterwards 塞德莎 opens the path and reflects up, back below Mirrors in Mirrors. (24:47)