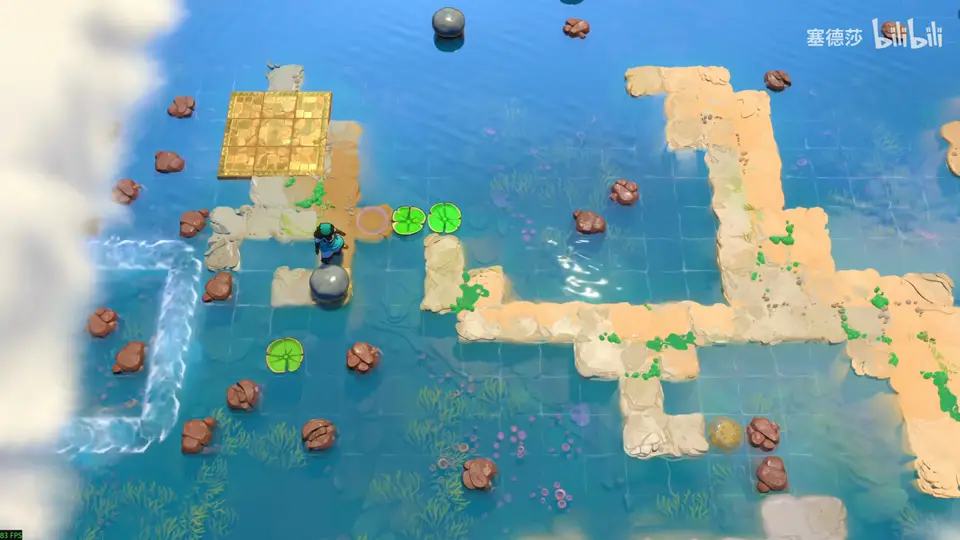
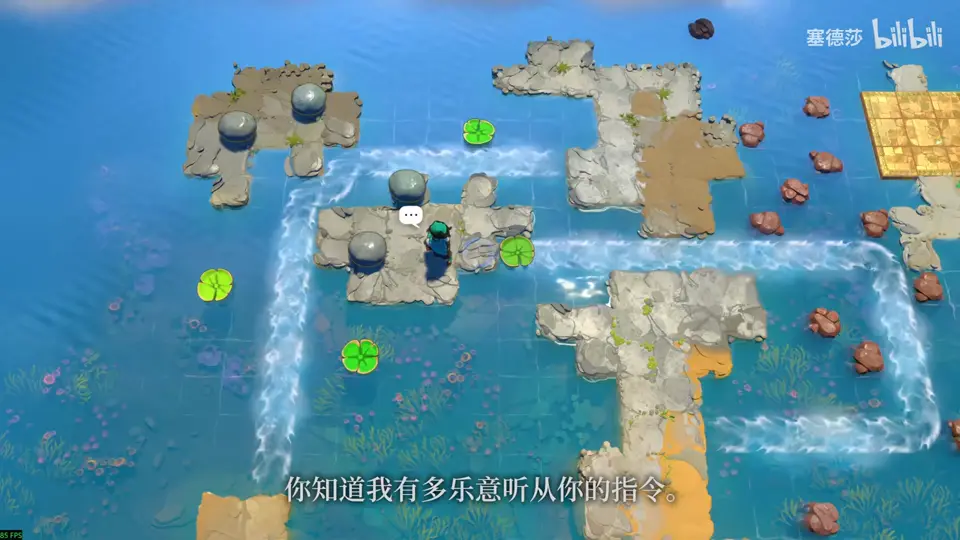
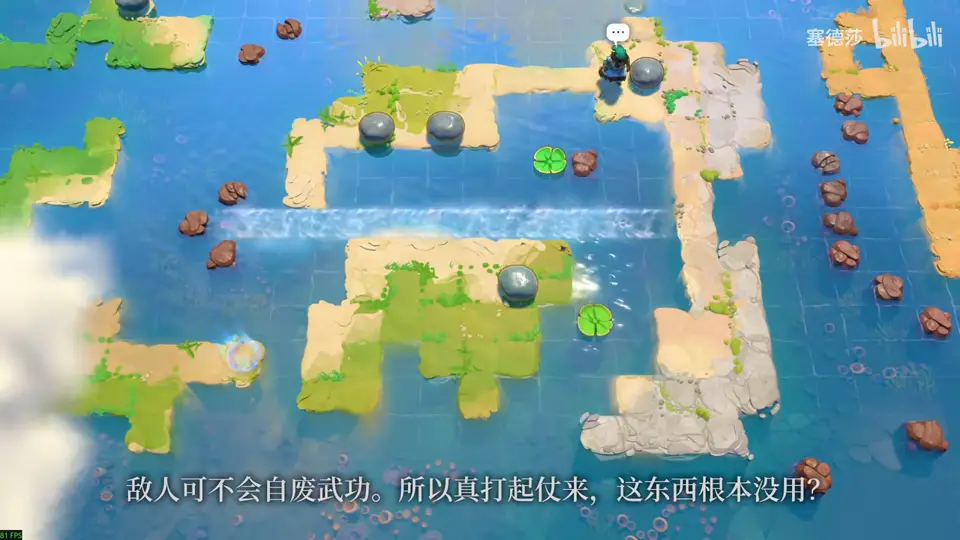
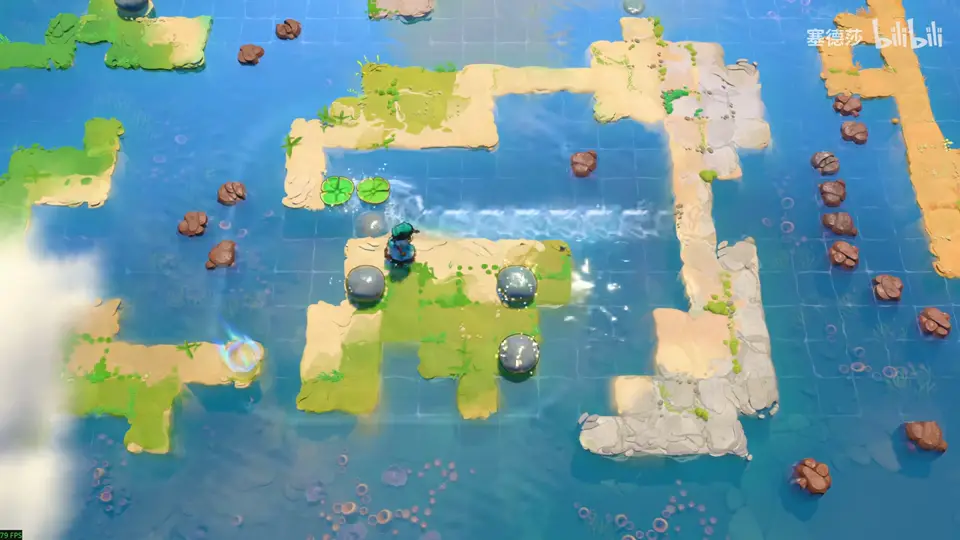
Skipping Stones to Lonely Homes is the South world, played as the Sailor. It is made of island levels hidden in fog. This page covers the South’s own levels in the full release:
- South 1, the big tutorial level: 14 linked island areas, including all 6 hidden treasures.
- South 2: a short current tutorial, then a large level with two Sailors.
- South 4: the cage level at the bottom of the South, a chain of five platform-building stages.
South 3 and South 5 are not on this page yet. In the South’s own column, South 3 is only a red platform with a sign that you walk past. The puzzles placed in South 3 and South 5 are combination puzzles that mix in other worlds, and we have not covered them here. The South labels (South 1, South 2…) follow 塞德莎’s video series; the game does not show them.
Puzzles 1 to 5 of South 1 are also solved in Alan Malloy’s video (South 1 starts at 17:33). Everything after that, and all the treasures, follows 塞德莎’s two narrated videos (South 1, South 2 and 4). The puzzle numbers below are ours, in the order the videos play them.
Rules that matter in this world
- Stones skip over water. Kick a stone into the water and it skips in a straight line across the open water in front of it.
- Where a skipping stone stops decides everything. It keeps going until something stops it. If it runs onto land, it ends up on the shore as a normal stone. If something stops it while it is still over water (another stone, or later the other Sailor), it sinks and becomes a tile you can walk on.
- Two-stone paving. Send one stone across first; it stops at the far side. Skip a second stone along the same line and it hits the first and sinks right in front of it. This is the basic move of the whole South.
- On land, stones move one tile. Pushing a stone along the ground moves it one tile. The Sailor can only push one stone at a time, never a row of two.
- Pads move the way they are hit. A lily pad hit from the side drifts sideways. A pad hit head-on keeps going in the stone’s direction.
- Currents carry pads, not stones. The white streaks are currents. Pads ride them; stones do not. A stone that skips onto a pad stays on it and travels with it; a stone pushed onto a pad from land does not.
- Pads stop at pads, and at corners for good. A drifting pad stops when it bumps into another pad. A pad that gets wedged into a corner, with land on two neighbouring sides, can never drift out again.
- Sunk stones cut currents. A stone sunk in a current cuts it there. Later in South 1 you use this to make a current turn a different way.
- Pads pause before they start. When you knock a pad into motion it waits a moment before drifting. You can use that moment to step onto it.
- Time controls. Hold Ctrl to slow time (you can still run) for tight timing, and hold Alt to speed up long waits. Undo dims the screen; pressing R resets you to the area’s checkpoint, but it does not bring back stones you lost earlier.
- The map. Press Tab to see the map. The South map wraps from bottom to top.
Hidden treasures (all 6)
South 1 hides six treasures, a nod to the original game Skipping Stones to Lonely Homes. They are optional: nothing is unlocked and no achievement is tied to them. Your companion’s lines at the end change with how many you found, and the ones you found are put on display.
Two setups have to happen early, or the last treasure is lost:
- In puzzle 1, do not use the lily pads. Take the stone route to the map and kick the spare stone to the far left. That stone is needed for treasure 6.
- In puzzle 7, push the stone north onto the dark island before you leave the golden platform area. It is also needed for treasure 6.
| Treasure | Where | What it takes |
|---|---|---|
| 1 | Small pink islet at the top right of puzzle 2 | Sink one stepping stone toward it with two stones |
| 2 | Separate islet off the far left of puzzle 3 | Jump onto a lily pad during its start-up pause |
| 3 | Islet below the golden platform area in puzzle 7 | Two-stone paving off the bottom tip |
| 4 | Red island across the vertical current in puzzle 11 | Ride two pads with a time gap |
| 5 | Top-left corner of the last area, puzzle 14 | Bring two stones over and pave one tile |
| 6 | Islet near the dark island, reached at the end of puzzle 14 | Both early setups above, then a timed pad ride |
South 1
The whole of South 1 is one level. You walk from one island area to the next once you have built a way across, and stones you move stay where you left them.
Puzzle 1
Key idea: reach the map on the ledge across the waterfall current. The intended way uses two lily pads; the treasure way uses one sunk stone and saves a stone. (Bilibili 0:56, YouTube 17:33)
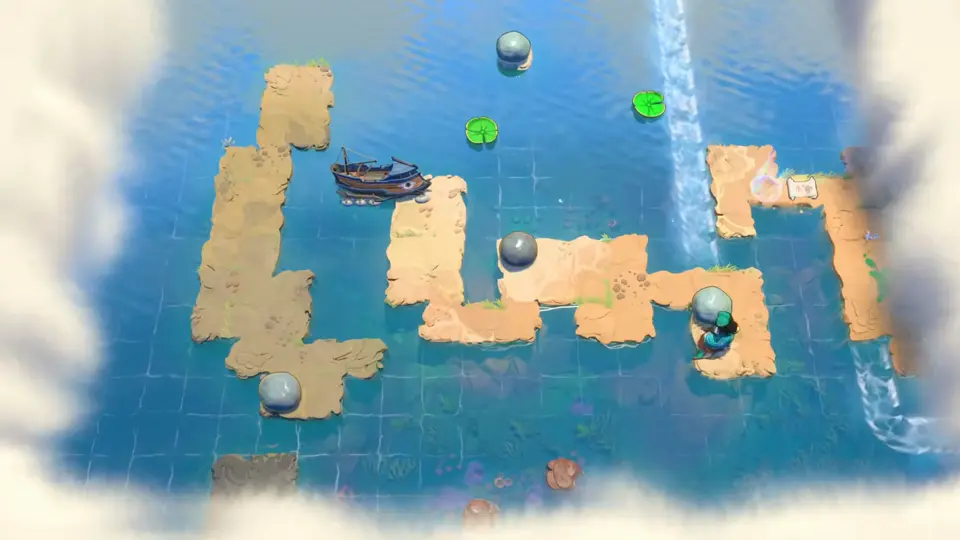
Your companion is stuck by the wrecked boat and asks you to fetch a map. The map sits on a small ledge at the top right, on the far side of the waterfall current.
Intended route (costs treasure 6):
- Push a stone up beside the boat to the top of the left part of the island and kick it north. It knocks the lily pads east toward the waterfall. (YouTube 23:25, Bilibili 1:06)
- Use a stone from the side to knock the second pad east as well. Both pads have to go into the current; one alone is not enough. (YouTube 23:35)
- The current carries them down and they stop together in the gap next to the ledge. Walk over and take the map. (YouTube 23:46)
Treasure route (use this one):
- Kick a stone east from beside the boat. It skips across and stops against the map ledge. This is your stopper. (2:52)
- From the right part of the island, push the other stone north into the gap below the ledge. It hits the stopper and sinks there as a stepping tile. (3:00)
- Walk over, take the map, then kick the stopper back west. It skips all the way to the far left of the area. Leave it there; treasure 6 needs it. (3:07)
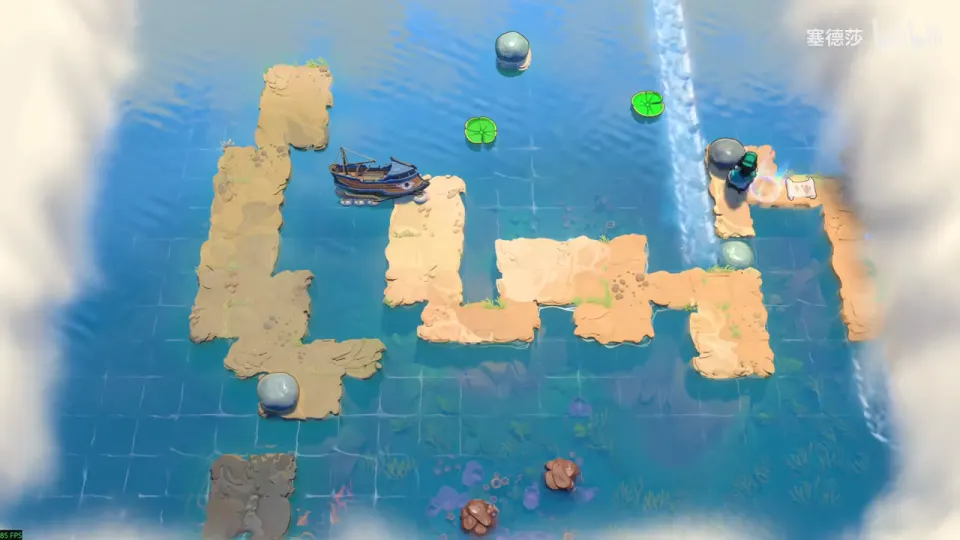
The map (Tab) shows the goal far to the south. Head east to the next area.
Puzzle 2
Key idea: one stone can send both lily pads into the U-shaped current, then two pads in the short east current take you south. (Bilibili 3:30, YouTube 24:15)
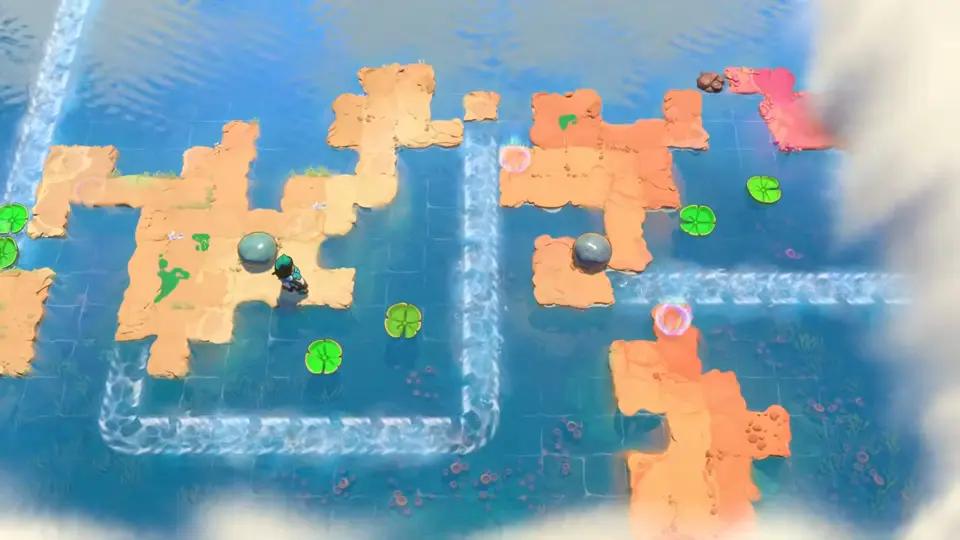
- On the left island, kick the stone east into the pads inside the U-shaped current. The pad hit from the side drifts down, the pad hit head-on carries on, and both end up in the current. In Alan Malloy’s run the stone also lands on a pad and rides along. (Bilibili 3:44, YouTube 26:52)
- The current carries the pads to the top. Cross there onto the north part of the red island. (YouTube 27:04)
- Intended finish: bring a stone up to the top of the red island and knock the two pads on the right down into the short east current by the pink ring. They line up as a two-tile bridge south. (Bilibili 4:36, YouTube 28:10)
Treasure 1: a small pink islet sits off the top right of the red island, one water tile away.
- Kick one stone east along the top so it stops on the islet as a stopper. Bring a second stone round the same way and kick it east too; it hits the stopper and sinks in the gap. (5:12)
- Cross and pick up treasure 1 (a sealed box; inside is a blank roll of parchment). (5:33)
- You now have one stone left for two pads. Kick it west first to knock one pad into place; the stone stays where you can reach it again. Then use it to knock the other pad down. Both pads end up in the east current. (5:48)
- Walk over the pads onto the island to the south. (YouTube 28:22)
Puzzle 3
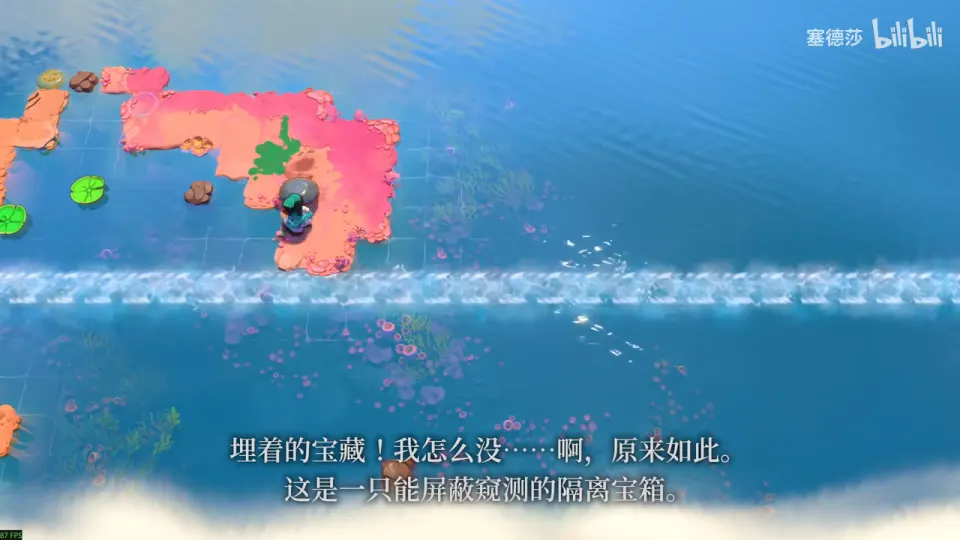
Key idea: two stones, two pads into the long current. The order matters: knock the top-left pad sideways first, then the bottom-right pad straight down. (Bilibili 6:00, YouTube 28:27)
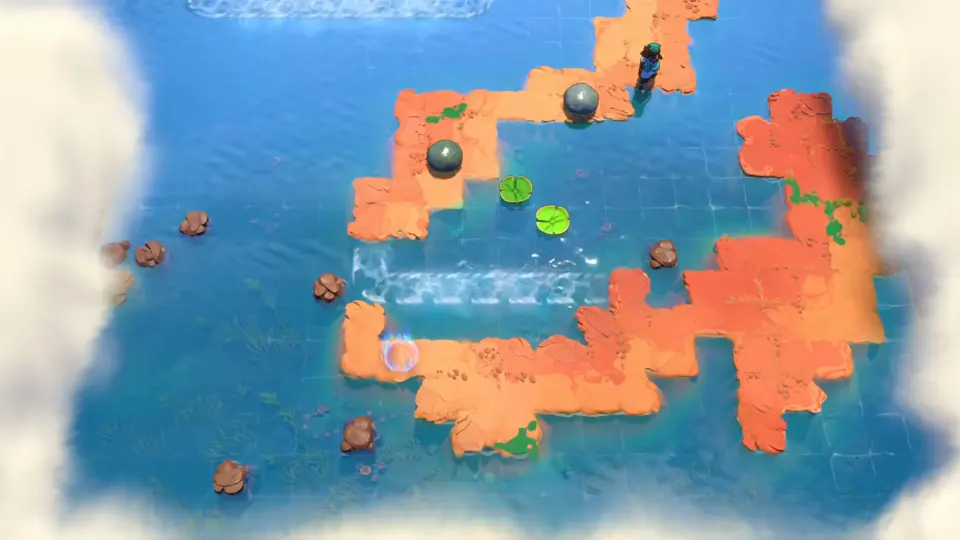
- Walk along the top ledge. Another piece of the map is revealed up here. (YouTube 29:15)
- Kick a stone so it knocks the top-left pad sideways into the current. (6:07)
- Only then kick the other stone to knock the bottom-right pad straight down. If you do this one first, that pad gets stuck in the corner and can never leave. (6:20)
- The current carries both pads west, where they stop together. Cross onto the southern shore and walk east. (YouTube 30:29)
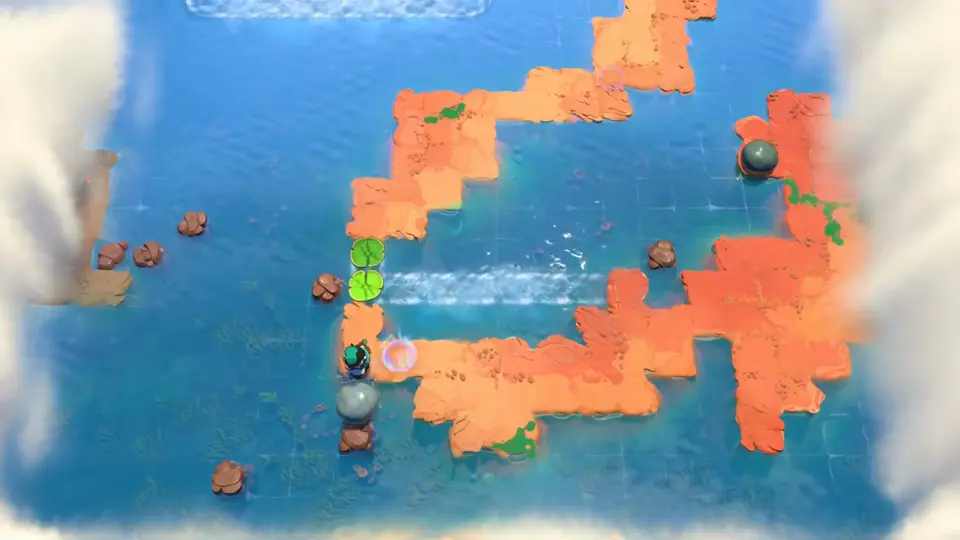
Treasure 2: the far left edge of this area looks like you could step off it, and you can.
- Push the stone there down. That starts the pad next to it drifting west. (7:28)
- The pad pauses for a moment before it moves. Run onto it during that pause (hold Ctrl to slow time if needed). It carries you to a separate islet. (7:45)
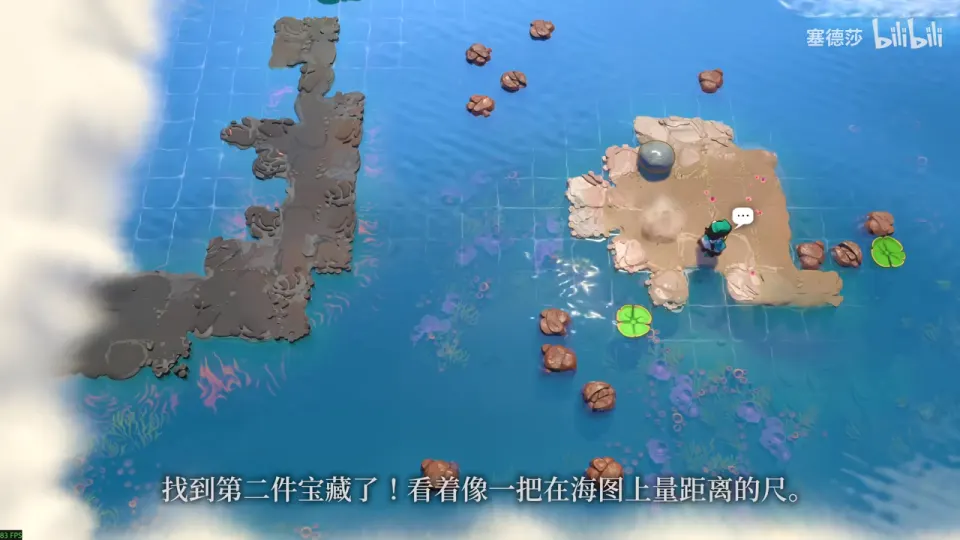
- Pick up treasure 2 (a ruler for measuring distances on charts) and come back the same way. (8:06)
Puzzle 4
Key idea: three stones lay two pads, then the first stone on the right island acts as a stopper so the second sinks into a stepping tile. (Bilibili 8:23, YouTube 30:48)
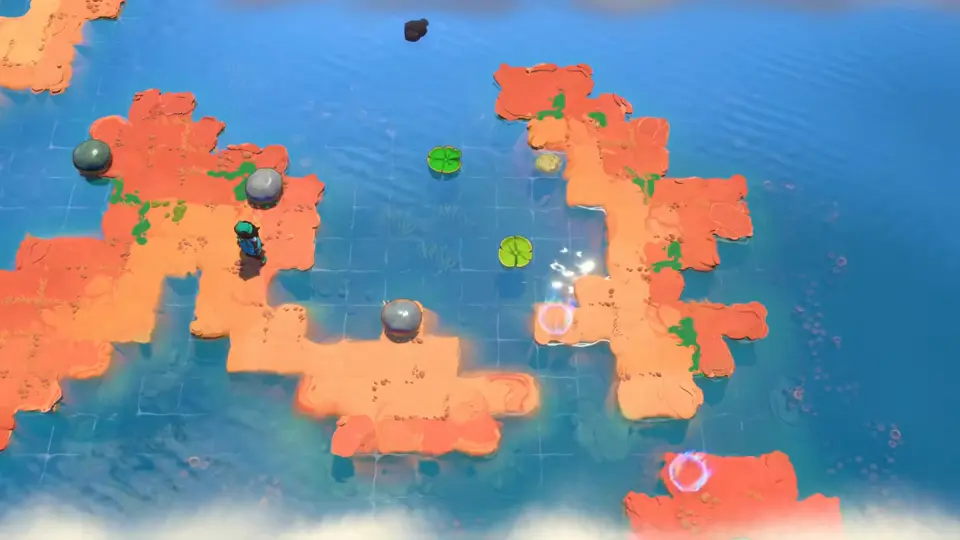
- From the left island, kick stones east across the channel. The lower pad has to be knocked straight down; the upper pad goes right first, then down. (Bilibili 8:35, YouTube 34:51)
- The two pads now sit together near the bottom of the channel. Walk across them to the right island. (YouTube 34:56)
- On the right island, send one stone south. It skips down to the pink ring at the bottom and stops there. (Bilibili 8:51, YouTube 35:18)
- Send a second stone south. It hits the first, sinks next to the ring and becomes a stepping tile. Walk down, kick the first stone off the ring and continue south. (YouTube 35:27)
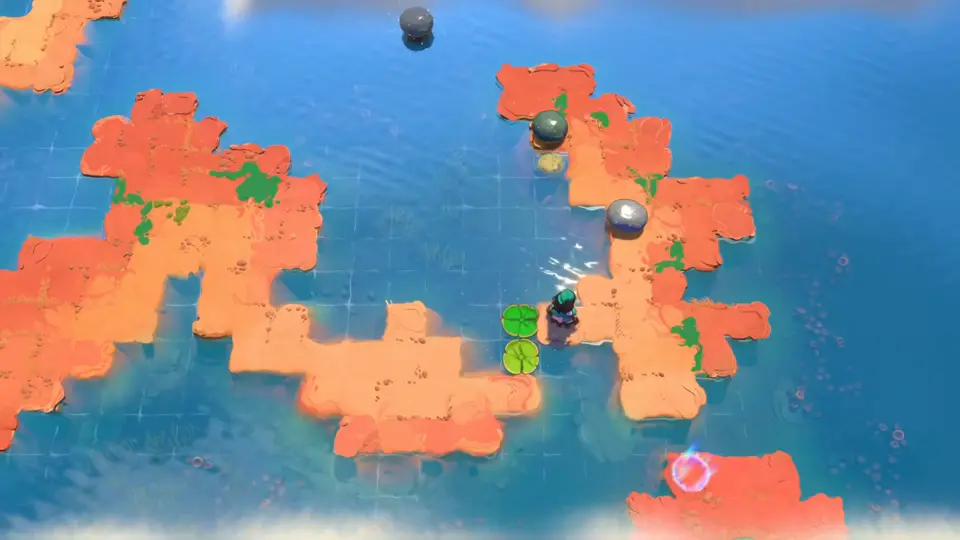
Puzzle 5
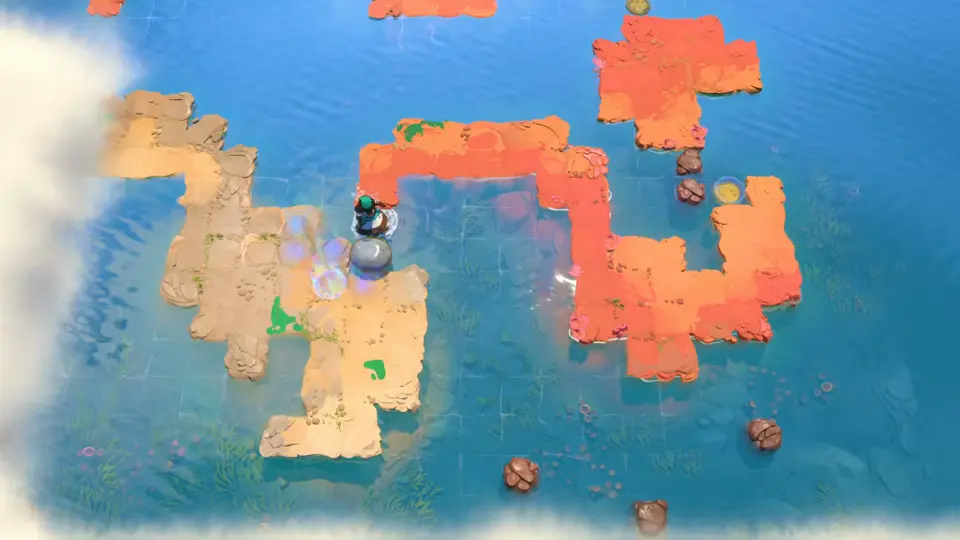
Key idea: you need one stepping tile directly east of the sand island, so the first stone is only there to stop the second exactly there. (Bilibili 9:07, YouTube 35:33)
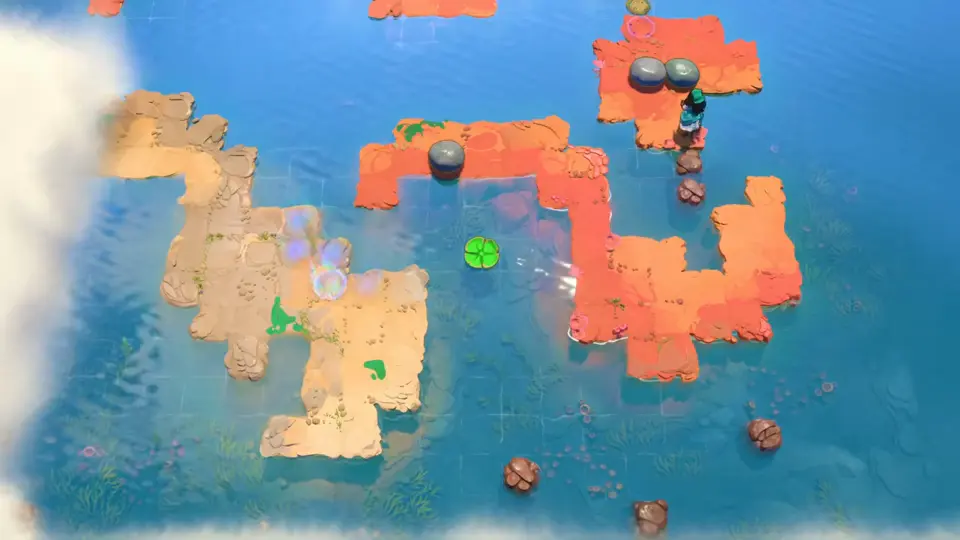
- You come in from the top. Use the same two-stone paving to build your way down onto the red island. (Bilibili 9:07)
- From the right-hand side of the red island, kick the stone there west. It skips across and stops at the edge of the sand island. This is your stopper. (YouTube 38:44)
- Go up to the stone near the west end of the red island and kick it west too. It hits the stopper and sinks beside the sand island. (YouTube 39:04)
- Step onto the sand island and walk on to the next area. (YouTube 39:12)
塞德莎’s run sets up the same two-stone spot with a small twist: one stone first knocks the lily pad into position, and the pad then helps form the stopping point. (Bilibili 9:16)
Puzzle 6
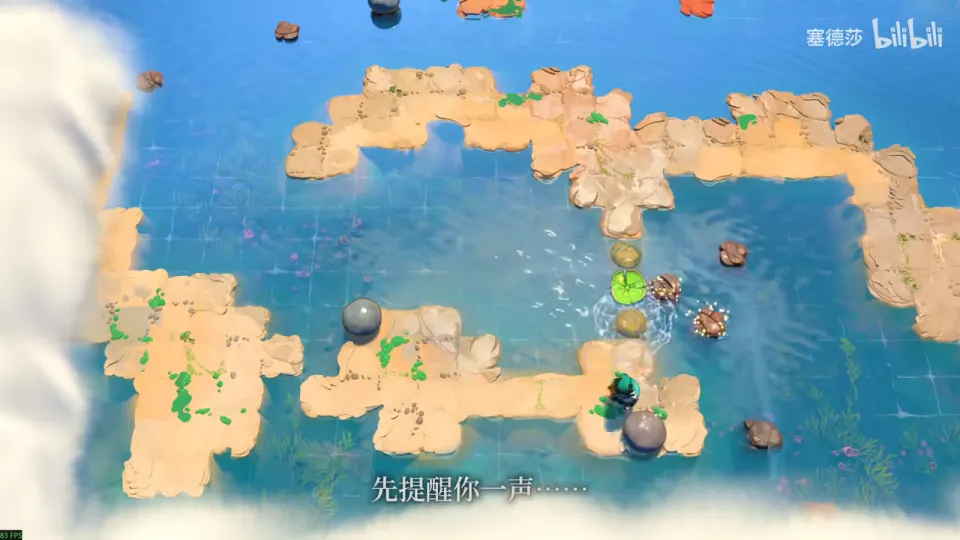
Key idea: the gap needs three tiles, so do two-stone paving twice: sunk stone, lily pad, sunk stone. Alan Malloy’s video leaves this area unsolved; 塞德莎’s video solves it. (Bilibili 9:48)
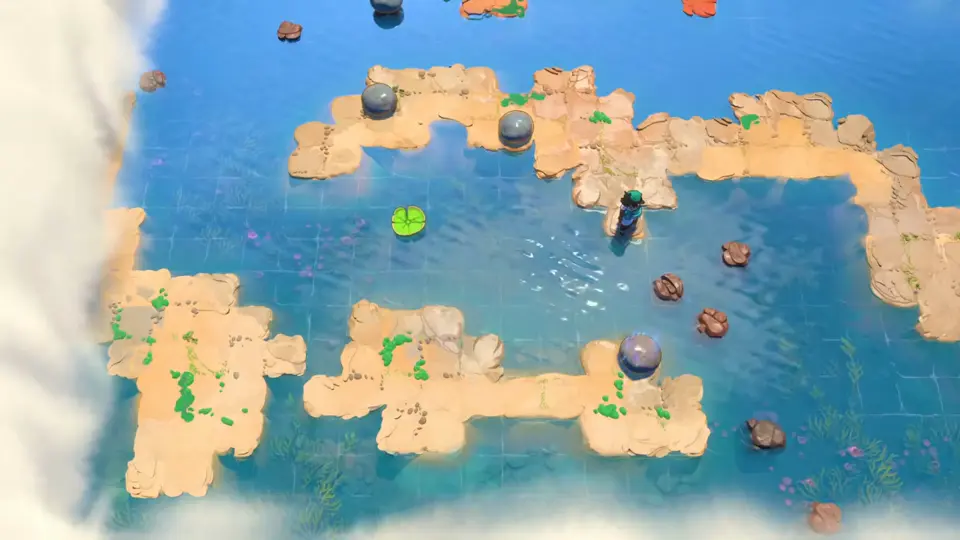
The layout: a long top island with stones and a point sticking down into the water, an L-shaped island on the left, a strip of islands along the bottom with one stone, and a single lily pad in the open water. You need a three-tile path from the top island’s point down to the bottom-right island.
- Knock the lily pad south so it drifts to the far (south) shore. Then knock it east so it drifts along and stops in the middle tile of the gap, below the top island’s point. In the video a stone ends up sitting on the pad. (10:02)
- From the top island’s point, push a stone south. It stops against the pad and sinks in the top tile of the gap. (10:19)
- Push the stone that is sitting on the pad south. The stone on the bottom island stops it, so it sinks in the bottom tile. You now have stone, pad, stone. Walk down. (10:22)
- To reach the left island, you need a two-stone paving spot facing west, but the stone you need cannot be pushed straight down. Go round by the small island opposite: push the stone up first, then down from there, and kick both stones west. (10:50)
Detours like this (up, then down, then up again to get a stone out) come up a lot in the South.
Puzzle 7
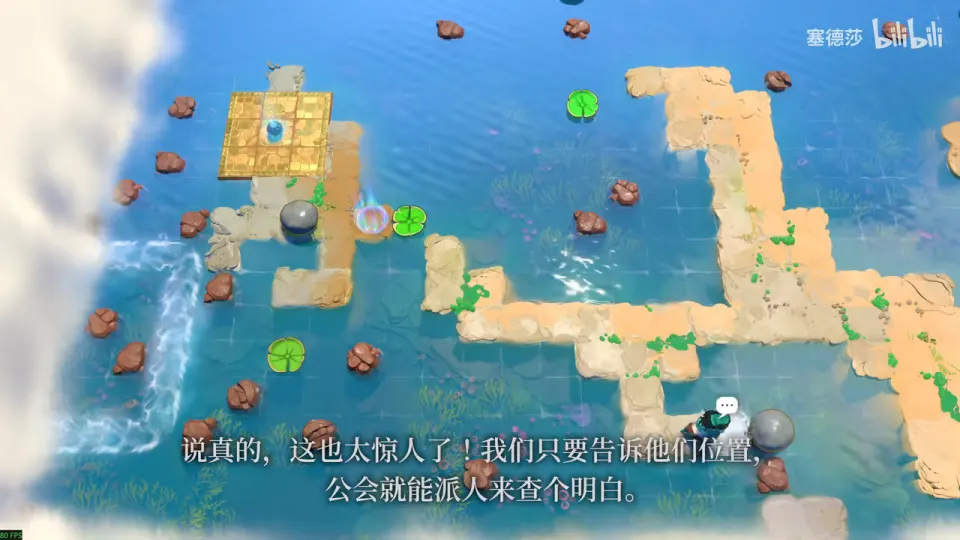
Key idea: the golden platform. Grab treasure 3 below, then use a timed kick to stop a drifting lily pad in the one missing tile. (Bilibili 11:43)
Treasure 3: a bonus islet sits below this area.
- Use two-stone paving off the bottom tip: kick one stone across first, then kick the other into the tile just left of it. (11:58)
- Pick up treasure 3 (a bag of pins), then push that stone back up so you still have two stones. (12:25)
Reaching the golden platform:
- One tile is missing on the way left, and a stone in the water blocks the two-stone trick. The lily pad has to fill that tile: it must drift west, then be knocked south partway. (12:39)
- Put one stone in place, bring the other stone into position, then start the pad drifting west. (13:21)
- Hold Ctrl and kick the second stone west at the right moment, so it knocks the drifting pad south into the gap. If the timing is off, undo and try a little earlier or later. (13:37)
- On the platform, the blue orb is story related and optional. (14:00)
- Treasure 6 setup: push the stone here north, onto the tile of the dark island above. Without it treasure 6 cannot be reached. (14:07)
Puzzle 8
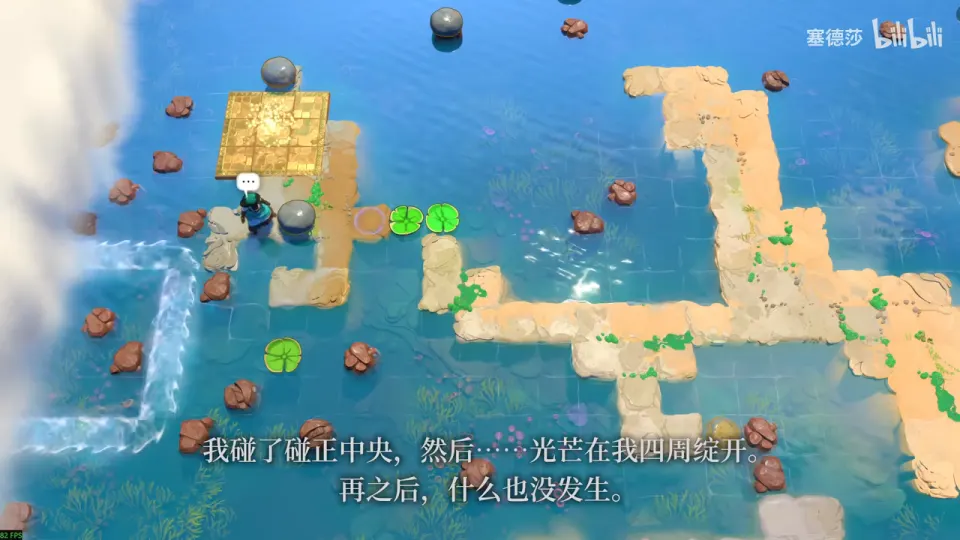
Key idea: follow the pad. Knock the lily pad into the left-hand current, ride it, and go to the checkpoint on the left. (14:26)
There are other paths here, but one gets you stuck and the other leads somewhere you cannot do anything yet because a stone is missing.
Puzzle 9
Key idea: carry one stone across to the bottom-right of this area. (14:53)
- Start by pushing the stone down to set the pad going, and ride to the top-left. (15:17)
- Use the two stones up here to start the two pads, one each, and step on as one comes past. (15:30)
- Key move: while that pad is next to the stone, push the stone down. Miss this and the stone can never be taken out again. (15:39)
- Pave one tile with the two-stone trick, then push the extra stone down. A stone sitting in the water also cuts the current here. (15:51)
- Use the extra stone to knock the pad down and ride on. (16:10)
- One tile is still missing before the checkpoint. The lower pad has to be knocked east into it, which needs a stone pushed down this column. One pad is not enough ground to push a stone across, but two pads side by side are. Get the two pads next to each other, push a stone onto the first pad, then push it down. (16:46)
- Start a pad and ride it to the bottom-right. (17:15)
Puzzle 10
Key idea: the rune circle below is the interdict, the final target. Following the current from here only drags you into a whirlpool, so cut the current to make it turn. (17:20)
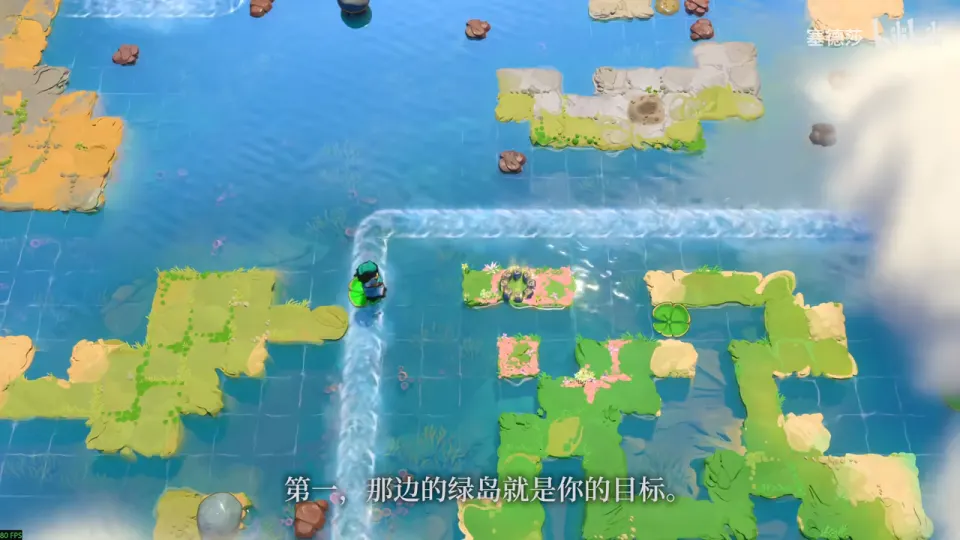
- If you ride the current as it is, you end up spinning in a whirlpool. Undo back to the checkpoint. (17:32)
- Sink a stone in the current above. The current is cut there and turns instead. (18:18)
- Start the bottom-left pad and ride the new route to the right. (18:37)
Puzzle 11
Key idea: two stones down to continue, but treasure 4 across the vertical current needs two pads timed one after the other. (18:52)
- Normal route: push the two stones down here. (18:57)
- Treasure 4 is on the red island to the right. Two-stone paving does not work: the Sailor cannot push two stones in a row. A two-pad bridge does not stay either, because the current carries the pads up. (19:19)
- Use the time gap instead: push the first pad into the current and cross on it to the right, take treasure 4 (a portable sundial), then come back on the second pad when it arrives. (20:09)
- Push the two stones here the only way they go; they land in a two-stone paving spot. Continue down. (20:23)
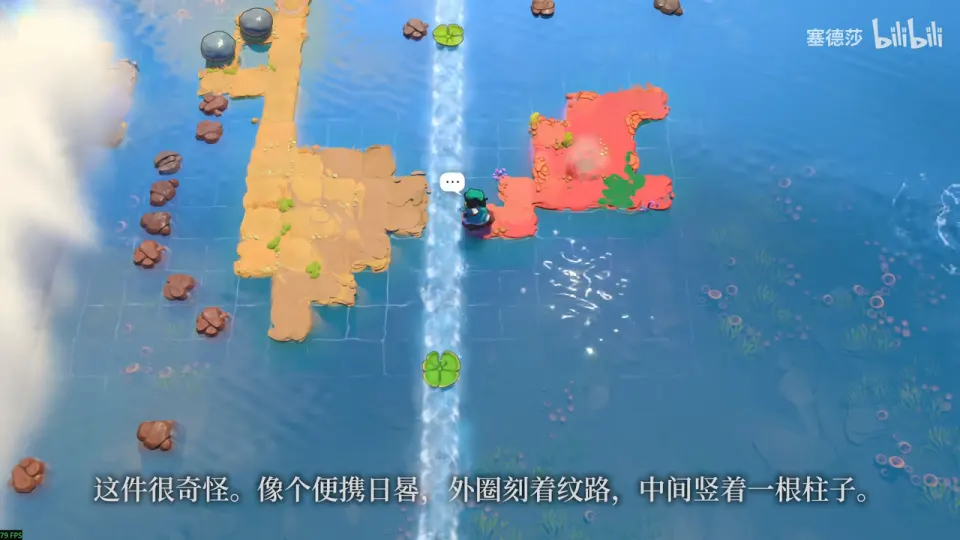
Puzzle 12
Key idea: you need three tiles down to the small island below. Turn the current upward first, then two pads fill the gap. (20:36)
- As it is, a pad knocked into this current drifts to its left end. Cut the current with a stone so it turns upward. (21:12)
- With the remaining stone, knock the two pads over. Hit the first one first: that way you can get the stone back for the second. (21:27)
Puzzle 13
Key idea: one two-stone paving tile, but first fill the water tile that blocks the push. (21:45)
- The stone cannot be pushed left because you cannot stand in the water tile to its right. Fill that tile first. (22:02)
- Get the stone back: push it right, then up, then left. Look at the shape of the middle island to see why this works. (22:09)
- Kick both stones left to pave the tile. (22:25)
Puzzle 14
Key idea: the last area. Touch the interdict while riding a pad, and change the current so it carries you back north. This area also holds treasures 5 and 6. (22:31)
Normal route (skips treasures 5 and 6):
- Cut the current first. Pave a tile off the tile that sticks out at the right end of the left island: push up, one stone left, then up and two stones left, and keep the last stone to start a pad. (22:47)
- Pushing down starts the pad; it pauses before moving, so step on then (Ctrl helps). (23:18)
- Knock the pad left. When it reaches the interdict, hop off, touch the interdict, and hop back on before it leaves. (23:50)
- The current carries you all the way north, back to the dark island by the start, and the level is done. (24:20)
Treasure 5: undo back to the start of this area. The top-left corner clearly looks reachable.
- You need two stones there for one paving tile. One is pushed left from here. For the other, sink a stone, step up, take it back, kick it left, then left again into the tile you will later reach by pad. (25:10)
- Pave the tile and take treasure 5 (a bottle of ink). (25:49)
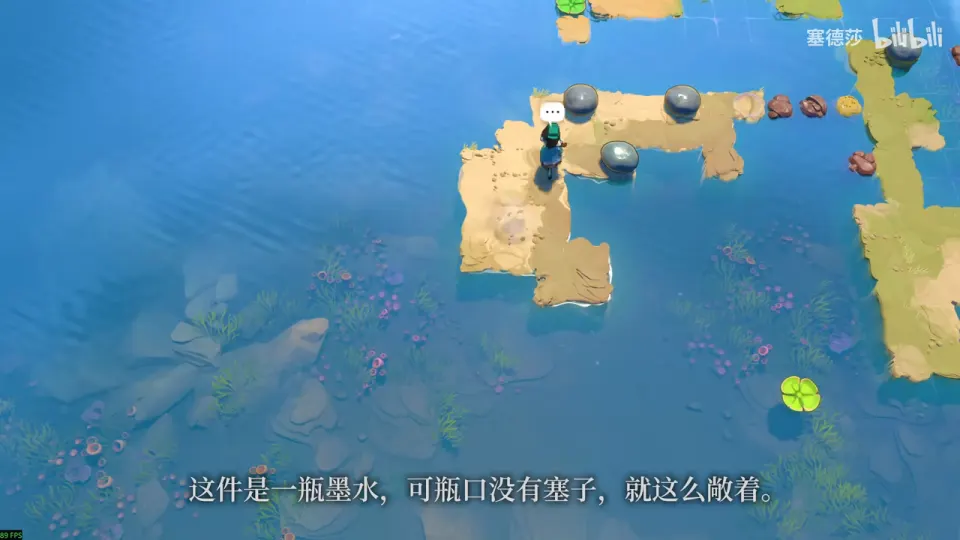
Back to the interdict: you still have to reach the island at the top right, and the current still ends in the big whirlpool.
- Push the stone you sent down from the island above much earlier over to the right. It is saved for changing the current later. (26:29)
- Push two stones right to pave a tile, start the pad and ride back (Alt speeds this up). (26:41)
- Use the extra stone to change the current. Then do the same as the normal route: start the pad, kick the stone when the pad reaches the interdict, and go on up. (27:03)
Treasure 6: this only works if you did both setups (the stone kicked left in puzzle 1, and the stone pushed onto the dark island in puzzle 7).
- Push those two stones down (south). (27:57)
- From the crescent-shaped island, the lily pad has to go up first and then, at the right moment, left along the edge to the treasure islet. Bring the two stones over and start the pad. (28:08)
- With time slowed, push the second stone up at the right moment and run on. The window is tight, so keep Ctrl held the whole time. (28:41)
- Take treasure 6 (a pen whose nib changes when you turn it). Going back is simple: start the pad and get on quickly. (28:52)
- From there you reach a pink island with three stones. Use them to get back to the right: pave a tile with two stones to turn the current, then start the pad and ride it. (29:16)
- Back at the start, press X to finish the level. With all 6 treasures you get a special line from your companion and the treasures are shown. (29:47)
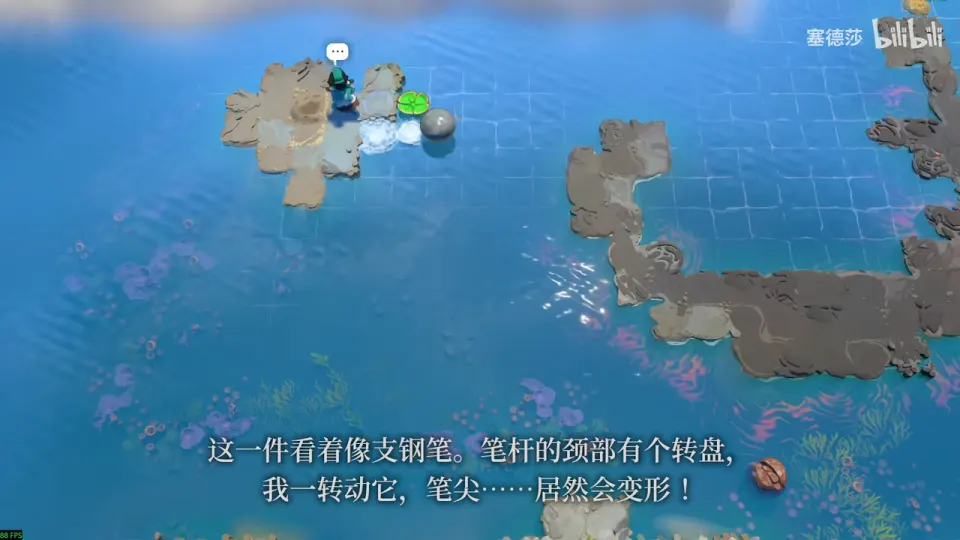
South 2
After South 1, a newly unlocked stone can only be pushed down. Use it to start the lily pad into the loop current, which takes you to a platform with a gold stone on the right; you can leave that for now. Go down from there for South 2. (0:00)
Current rings tutorial
Key idea: put the three pads on the inner, middle and outer rings, and work out which pad you can step onto by colouring the grid like a chessboard. (0:33)
This short level teaches Alt (speed up) and Ctrl (slow down while running).
- All three pads start on the outer ring. Knock two of them onto the middle ring at the right moment. (1:17)
- Colour the board like a chessboard. Both loops have an even length, so a pad’s colour stays the same as it goes round. Two tiles of the same colour are never next to each other, so you can only step from your tile onto a pad of the other colour. (1:40)
- Send that pad (the front one) to the inner ring by knocking it right, then wait and ride it in. (3:22)
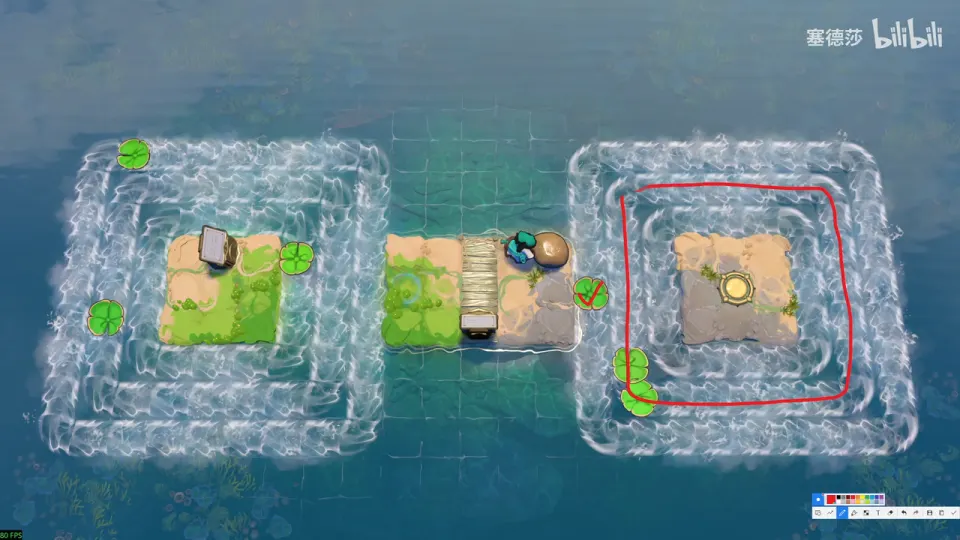
The teleporter beyond leads to the large two-Sailor level. (4:00)
Two-Sailor level
Key idea: you control two Sailors, and a Sailor’s body can stop a skipping stone just like a stone can. The level is linear and has two interdicts, one near the middle and one at the bottom left. (4:11)
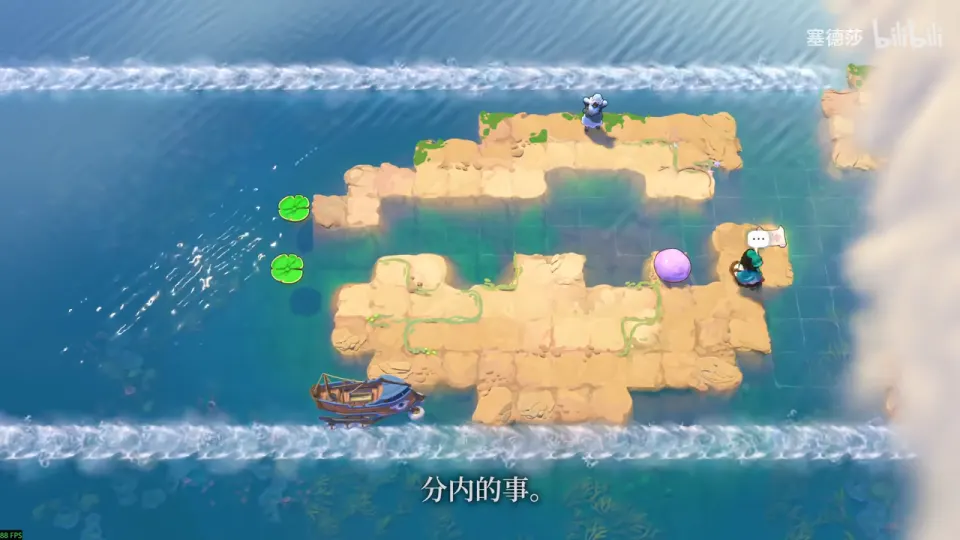
- First checkpoint: the stone has to reach a spot where it can be kicked left into the two pads. Push it there step by step. Before the last push up, put your partner inside, or the stone cannot be pushed back out. Then push it down out of the corner, kick it left, and get on a pad. (4:25)
- Knock the lower pad right and the horizontal pad to the bottom right. You cannot do it from above (a water hole is in the way), so push from below. Do not start the pad too early, and do not ride off to the right with it. (5:02)
- The upper Sailor needs to reach the islet at the top right: knock the pad up, then right; each has only one possible push. (5:42)
- The broken bridge: a stone cannot stop in the gap, so the pad must go right, then up. Push the stone up early, then have the upper Sailor push it down so it stays below. The lower Sailor then times a push right that changes the pad’s direction. (6:21)
- To bring the upper Sailor down on the right-hand pad, first knock that pad to the shore by pushing a stone down and then up. (7:23)
- Body blocking: stand one Sailor in the water path (on a tile beyond the gap) and skip a stone into them. The stone sinks in front of them. The next few spots are all solved this way, often after leaving a partner in a nook so a stone can be pushed back out. (7:54, 8:18, 8:49)
- The walled pool: the goal is to kick one stone left from the left half, starting both pads so each Sailor can ride one down. Free a stone from the wall with body blocking, then get the leftward push from the pad in the pool: stand a Sailor on the pad and knock the pad left against the wall. (9:28)
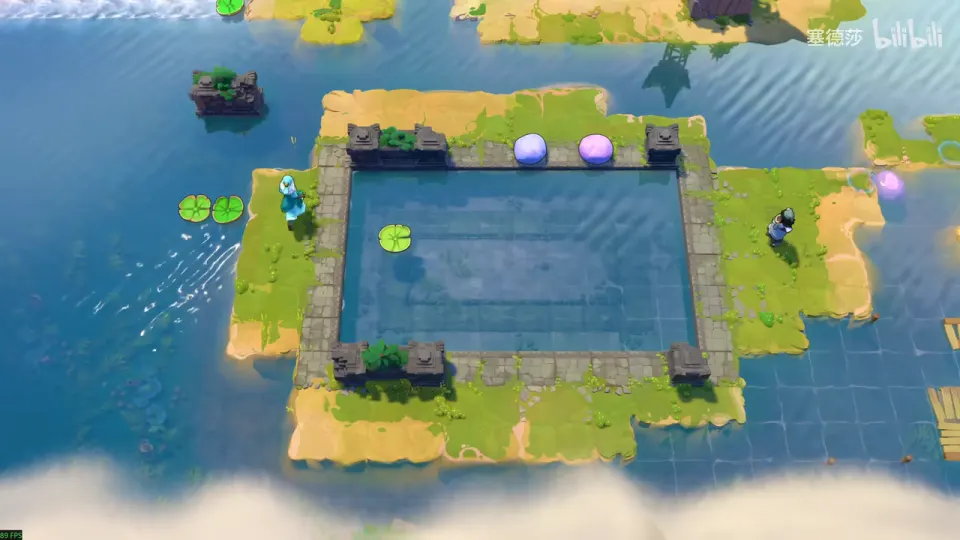
- Back-and-forth pads: a pad you need to go right can only be hit left at first, so hit it left, then right. One Sailor waits on each side. (11:34)
- Next, get a stone inland so it can start the pad that leads to the bridges at the bottom right and bottom left. The upper pad does the work, left first, then right: push a stone left to free it, have a Sailor wait above, then push the stone onto the pad as it comes back, which carries the stone to the middle. (11:58)
- After the first interdict: the right Sailor must reach the checkpoint at the top right using the pad nearest the bridge. Hit it down, then up. The left stone is far away, so push it first and push the right one straight after. (13:04)
- Bring the left Sailor across on the lower pad, again by knocking it left first and waiting for it to come back. (14:36)
- Start the pad and use body blocking to build a tile below, without disturbing the pad, so both Sailors can ride it right. At the top a gap stops you: stand one Sailor there, float a stone over on a pad, then time a push left into them. Bring the other back by pushing the spare stone right into them. (15:12)
- Touch the interdict here. To go right, the Sailors ride a pad, and to start the two pads a stone has to be pushed down out of the exact middle. You only get a downward push there when the right pad drifting left meets the left pad drifting right: the Sailor on the upper pad can then step down and push. (16:35)
- Get one Sailor to the right by knocking the pad up. The left Sailor must reach the top left: the pad has to be knocked up out of the lower current halfway along it. First bring the pad back left by pushing a stone right along the row above it. Then push a stone left from the right side to start the pad up, and while the left Sailor rides the current, push a stone left again to knock the pad up into the top current. (17:44)
- Two stones that stop each other: one tile has to be paved where body blocking cannot reach. Kick a stone from each side at the right moment so they collide in the middle and stop there. The right one has further to go, so push it first. One Sailor is now home. (19:38)
- For the other Sailor, start the pad, get on, and change the current by pushing a stone right into the waiting Sailor. The current then carries them home and the level is done. (21:06)
South 4
After South 2, two newly unlocked stones can simply be pushed down. Further down you pass South 3, a red platform with a sign and nothing else to do in the South-only route. The cage level is at the very bottom. (22:39)
This is a chain of five stages with two Sailors. Every stage is about building a platform so you can get a stone out, or onto a specific tile.
Stage 1
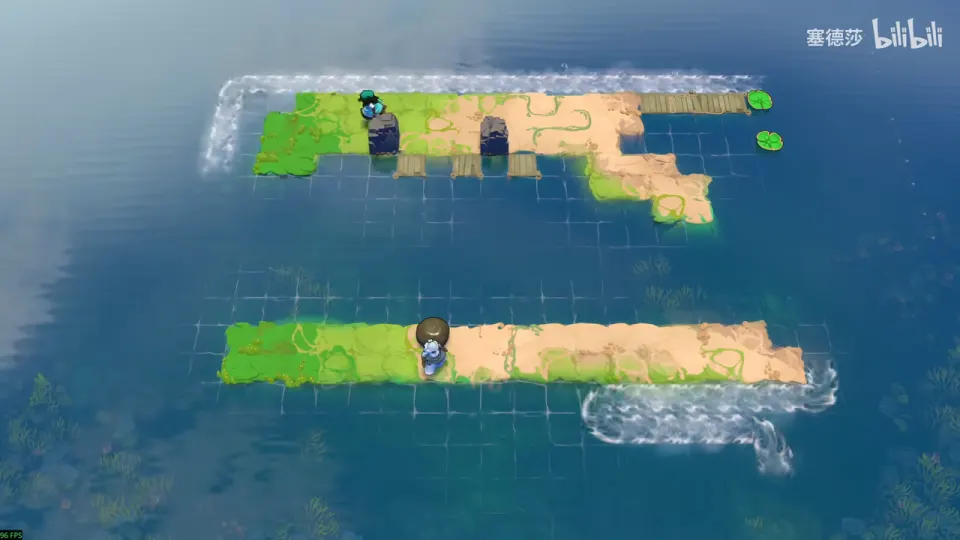
Key idea: start the two pads on the right, then carry a stone to the bottom right. (23:08)
- Push the stone up from below to start the pads, then step on: the two Sailors drift down together. (23:15)
- The left side has a spare stone for its pad; the bottom right does not. To carry one over, build two tiles side by side so you can push the stone right. Put a stone in place first to stop it on the right, and another above it so you can push it down. (23:37)
Stage 2
Key idea: five stones. Get the stone on the left to the middle, then use the rest to start the pad one tile off the shore to the right, and ride it to the pier. (24:25)
- Build a platform with a bump so you can push the left stone out. (24:52)
- Lay three of the remaining stones so you can walk to the pad, and put the last one in the column where it can be pushed up or down to start the pad later. (25:08)
Stage 3
Key idea: one stone pushed right starts the two pads, so take a stone over from the left. (25:42)
- Skip a stone over, then use body blocking to sink two stones in the water so you can get it back out. (26:08)
Stage 4
Key idea: push a stone down the exact middle to start the two pads below. (26:30)
- Build a plain 2×3 platform of sunk stones (six tiles), then push the stone down the middle. (26:40)
Stage 5
Key idea: six stones: five for a platform in the water and one to push down and start the two middle pads. Five is one short of a 2×3 platform, so use the mid-water collision to hold two stones. (27:12)
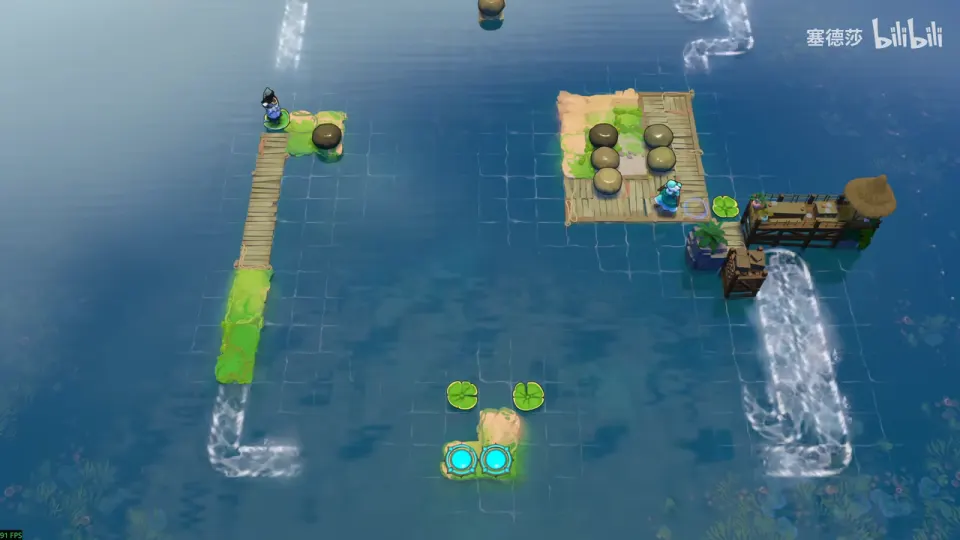
- Push one stone across first and keep another ready on the other side. The left one has further to travel, so push it first, then the other when it is nearly there. They collide and stop in mid-water. (27:50)
- Add three more tiles with body blocking. (28:14)
- Push the last stone down to start the pads, and the cage level is done. (28:31)
This opens the path down. Because the map wraps, it comes out at the very top of the South. What lies there is a combination puzzle, left for later. (29:05)