Spoilers: these rooms only open in the second stage, after the first ending. This page sticks to puzzle solutions, but how you get there gives away late-game content. If you haven’t finished the Endgame yet, see the Antipode walkthrough first.
Heroes, Doubled (our working name; in-game Chinese 英雄,成双, English name not confirmed yet) is a small extra part of the north-east crossover, where the Hauling Heroes (North) meet the Trader’s mirrors (East). Every room is about clones: two mirrors split a hero into copies that move in sync, and the puzzle is to get the copies the right distance apart. This page solves all 10 puzzles, including the big star room at the end.
Where it is: on the ground level in the north-east, on the tiles 塞德莎 labels N4E3 and N4E4, just below the Bard rooms of Heroes and Water. It is locked on a first run. 塞德莎 comes back in the second stage (see how to ascend) and drops down from the level above; he had already switched on the teleporter here (0:10). The title card appears after puzzle 2, at 2:55.
How to use this page: we found no English video of this area, so the puzzle numbers are ours and follow the order of 塞德莎’s narrated walkthrough. Each heading has the key idea and a link to the moment the room starts, and the numbered steps link to the same video. Puzzles 1 and 2 use only the Trader; puzzles 3–10 bring in the other heroes.
Rules that matter here
- Clones. With two mirrors on the same hero you split it into two copies, and two copies can be merged back into one the same way (see Heroes and Mirrors). A single reflection moves just one copy, which is one way to change the gap between them.
- Copies move in sync. Every input moves all copies at once. Several rooms here also start you with different heroes, or four small rooms, that move together. The gap between them only changes when one copy can move and another can’t: it walks into a wall, a stone, or a push it isn’t strong enough for.
- No edges to lean on. Some rooms float in the air with no walls and no water. Walk off the edge and you fall, so the edge can’t be used to line copies up (puzzle 1).
- Never sync two copies by accident. If two copies, or two of the small rooms, end up in exactly the same state, they stay identical for good, and anything that needs them to differ becomes impossible (puzzle 7).
- Hero abilities still apply. The Trader pushes one thing; the Warrior pushes a whole row, so the same push can stop one twin and not the other (puzzle 9). The Thief pulls, the Bard’s song moves crystals in a 5×5 area, and the Wizard swaps.
- Two quirks you only see here. When two synced Thieves stand side by side and walk away, one pulls the other instead of its stone (puzzle 5). And when one synced Cleric copy is attacked, every copy gets the shield, however far away it is (puzzle 6).
Puzzle 1
Key idea: only the Trader and two mirrors, on a floating platform with no walls or water. Split into two Traders and open a seven-tile gap between them: single reflections push one copy away, and a second set of reflections with the other mirror fixes the gap in the other direction. (塞德莎 P29 0:30)
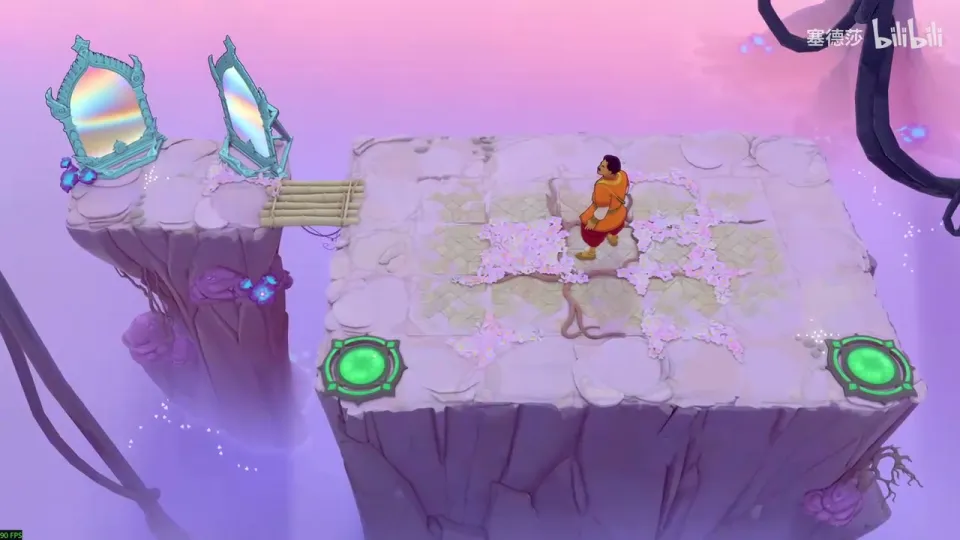
- Two exits need two Traders, so split first. (0:42)
- The platform has no walls and no water, so you can’t line the copies up against the edge; stepping off means falling. The real problem is getting them seven tiles apart. (0:52)
- Besides cloning, a mirror can reflect just one copy. Do that to pull them further apart. (1:13)
- That also pushes them apart vertically. Fix it by reflecting back with the left mirror. (1:34)
- From that spot the right mirror would clone again, so push it off first. Full order: split, reflect twice with one mirror, push the right mirror away, then reflect twice at the other. (1:55)
Puzzle 2
Key idea: pure walking. The copies move together, so you change their gap by bumping one into the stone while the other walks on. (塞德莎 P29 2:08)
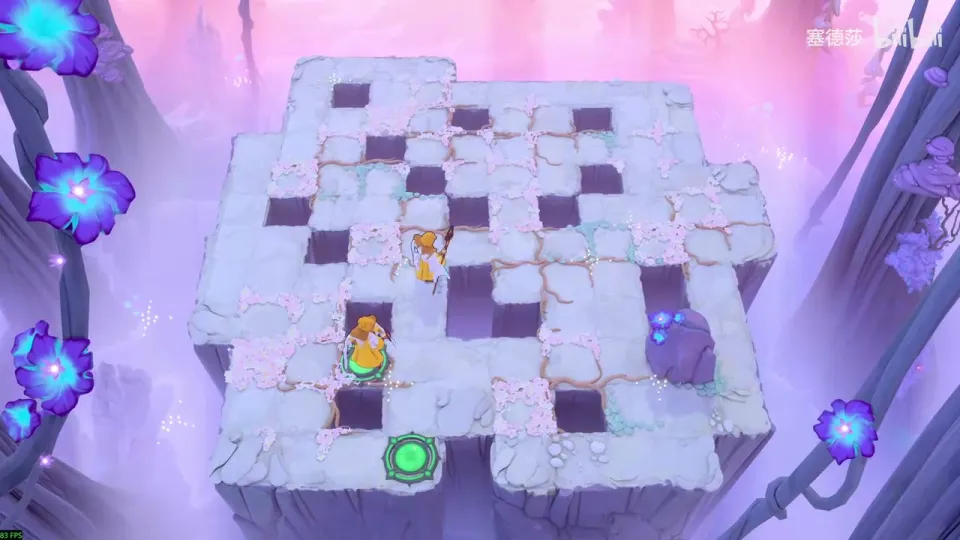
- Walk to the bottom right and bump against the stone to set the right offset between the copies. (2:11)
- Come down this way and take the top route. Go round, and bump into it again at the angle 塞德莎 shows. (2:23)
- Come back up, then down, onto the exits. (2:34)
Back on the map, there is a small shortcut at the top left you can push open, and a split over to the right picks up the area map. (2:40)
Puzzle 3
Key idea: two different heroes move in sync. Only the Trader can push, so the stone stops one of them and not the other: that is how you shift their positions apart. (塞德莎 P29 2:58)
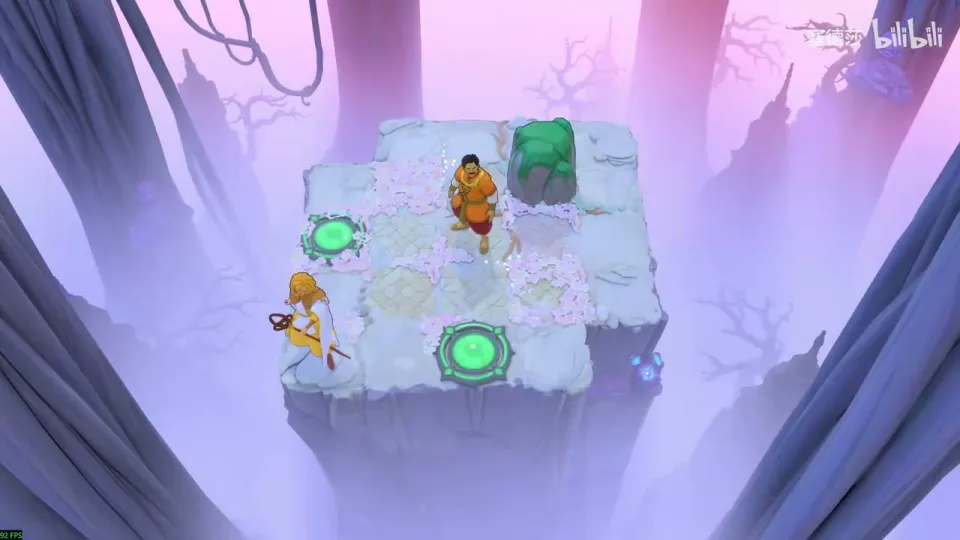
- The two heroes move together, so you have to offset them. The other hero can’t push, which makes the stone a blocker for it. (3:04)
- Have the Trader push the stone one tile left. (3:17)
- Shuffle against it to change the gap, then have the Trader push it right once and shuffle one more tile. Both reach their pads. (3:26)
Puzzle 4
Key idea: the same idea with two stones. The Trader can’t push two at once, so stacked stones act as a wall for one copy. Set the vertical gap with the stones in a column, then the horizontal gap with them in a row against the edge. (塞德莎 P29 3:42)
- Fix the vertical gap first; the horizontal one comes later because it has to be very long. (3:49)
- Put the two stones one behind the other. The Trader can’t push both, so one copy stops while the other moves, until the vertical gap is right. (4:00)
- Switch the stones to a side-by-side stack. (4:10)
- Make sure that stack sits against the edge, since the horizontal gap has to be the widest possible. Then finish. (4:17)
Puzzle 5
Key idea: two synced Thieves. When they stand side by side and walk away, the second Thief gets pulled by the first instead of pulling its own stone. That quirk is what lets you leave a stone where a single Thief would always drag it along. (塞德莎 P29 4:32)
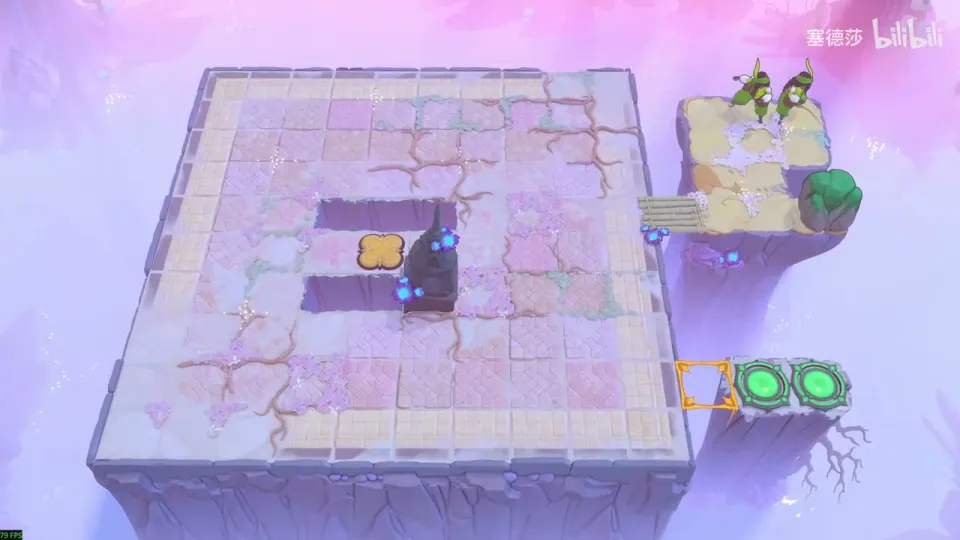
- Walk left from this spot. You’d expect both Thieves to pull and the stone behind to come along, but the right Thief is pulled by the left one, so its hand isn’t free and the stone stays put. The room teaches this straight away. (4:43)
- Use the only stone you can shuffle against to adjust the gap, then pull the right-hand stone out with one Thief. (5:18)
- Bring that stone towards the middle, one tile right of centre, then down and in. (5:35)
- A single Thief can never leave it there, because each step forces another pull. You need the two Thieves side by side so the stone is let go. (6:09)
- Nothing on that side can change the gap, so take them to the left and use a stone to put the other Thief in the right-hand column. 塞德莎 backs up a few times here; follow the clip from 7:11 to 8:16. (7:11)
- Line up, step down, and pull right. (8:05)
Puzzle 6
Key idea: clone the Cleric with the mirror at the bottom left. Protected by two Clerics, the Thief can safely pull the goblins so they attack each other. (塞德莎 P29 8:33)
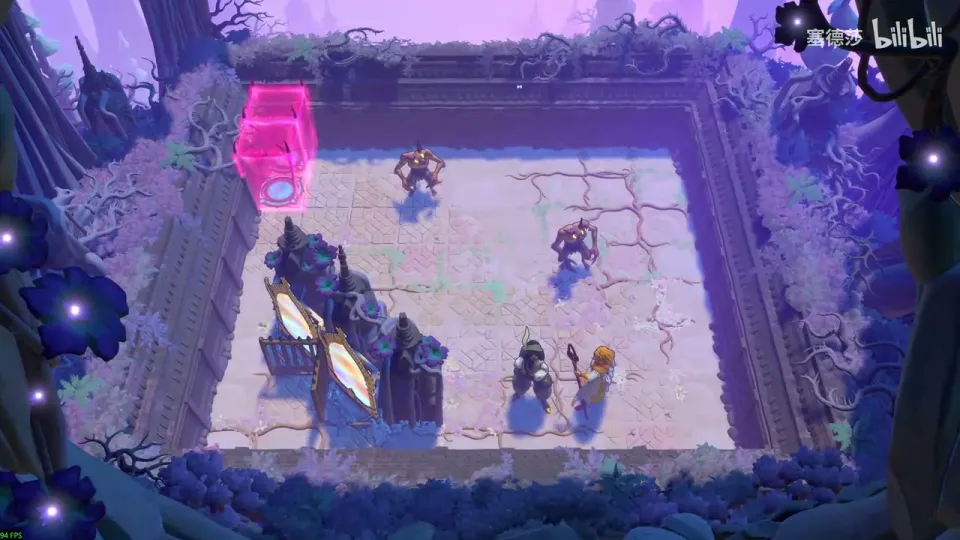
- The one to clone is obviously the Cleric. (8:36)
- With two Clerics guarding, the Thief pulls the goblins until they take each other out. (8:46)
- A hidden rule shows up here: when one synced Cleric copy is attacked, the other also gets a shield, even far away. This room doesn’t need it. (9:06)
- Pull the goblin left, shuffle left, pull one more tile, then let go. Switch to the other side and pull up. (9:49)
- Come in from this spot, bring the Cleric over and pull up twice. The Cleric copies merge back into one on the way out. (10:08)
Puzzle 7
Key idea: four small rooms in one, all moving in sync. The heroes start in the same spot in each, but the stones and buttons differ. Never push the stones of two small rooms into the same state, or those two rooms stay identical and can’t both press their buttons. (塞德莎 P29 10:33)
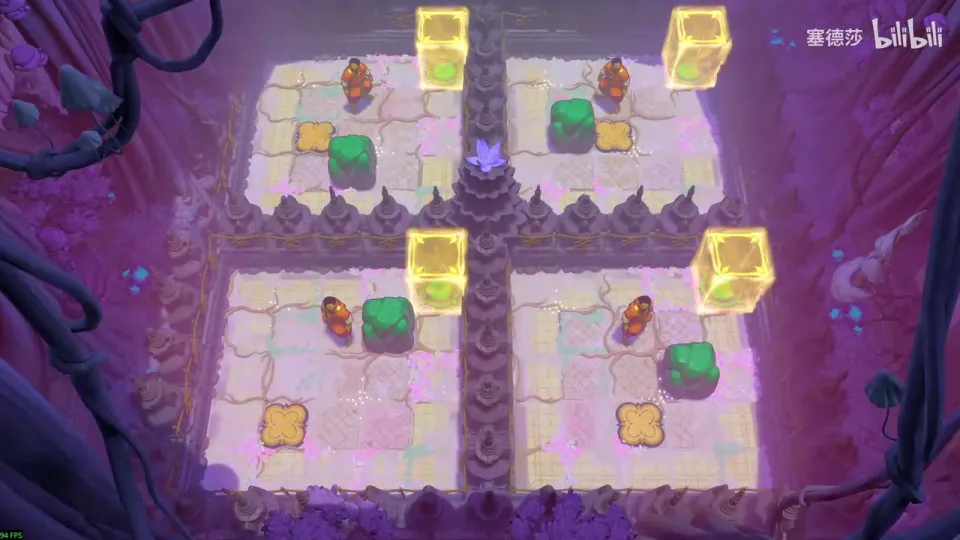
- The warning: push the bottom-left stone down one tile now and it matches the bottom-right one. From then on those two rooms are synced forever, and you can’t hold both buttons. (10:47)
- 塞德莎’s order: bottom-left stone left one tile, then down into the middle. (11:52)
- Top-right stone up to this spot, then the top-left stone left into its spot. He syncs two by mistake once and undoes it. (12:14)
- Bottom-left stone to its spot, then bottom-right. (12:23)
- Last, the top-right one onto its target. (12:34)
Puzzle 8
Key idea: four different heroes in sync. The Bard and the Trader are easy; the two Wizards start identical, with identical crystals. Desync them with the Bard: her 5×5 range just reaches the bottom row of the top-right room. (塞德莎 P29 12:48)
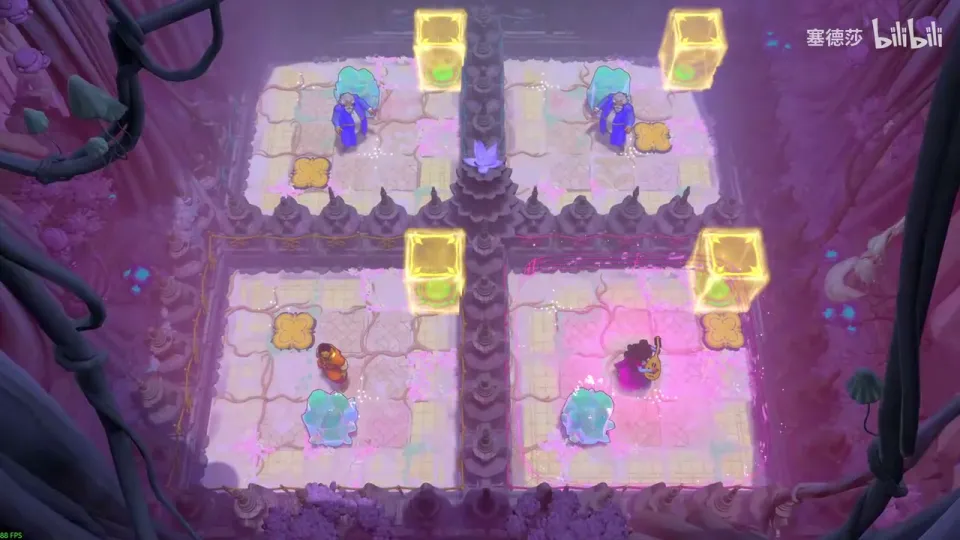
- Bard: shift the stone one tile left so she can stand on the button; when she walks up at the end, the stone presses the button again and she survives. (13:02)
- Trader: just push. (13:13)
- The two Wizards and their crystals start in exactly the same places, so they’d always move together. (13:24)
- The outside force is the Bard. Swap the right-hand crystal into the bottom row of its room, where the Bard’s song reaches, and let her nudge it. Now they differ. (13:43)
- Swap the two stones into place and finish. (14:05)
Puzzle 9
Key idea: four heroes in sync again. Two rooms are only there to restrict you; the real work is the top-left Trader and the bottom-right Warrior, whose stones start in the same state. The Warrior can push two things and the Trader can’t, and that difference desyncs them. (塞德莎 P29 14:20)
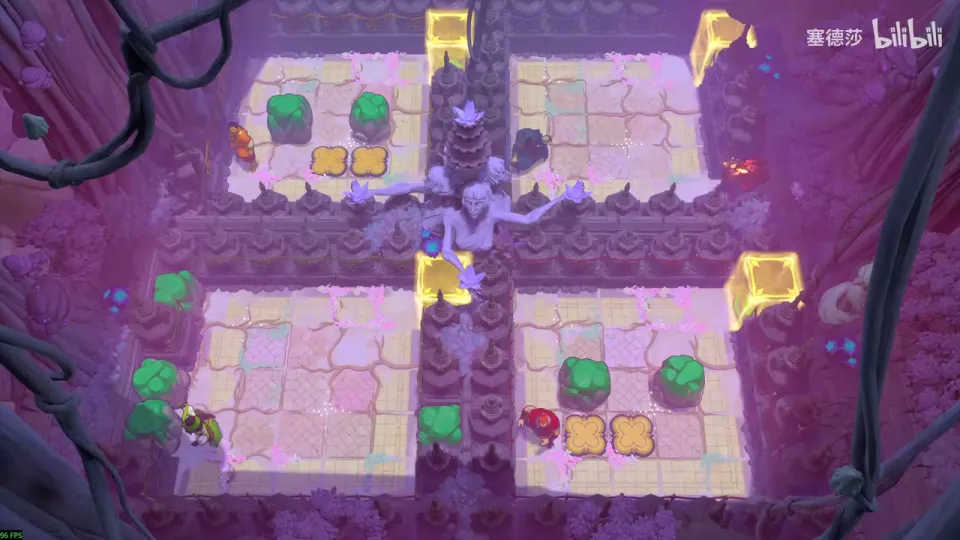
- The restrictions: the Druid (top right) can’t enter the bottom row. (14:34)
- The Thief (bottom left) can’t move right along the three rows with stones, or it pulls one out that can never go back; on the bottom row it can’t move left. (14:40)
- From the middle, go down to the second row, push the stones up, then push the whole group right from here. (15:47)
- Go round by the top right and push left. The Warrior pushes through; the Trader can’t and gets stuck. They are now out of sync. (15:57)
- Push both stones down to finish. (16:16)
Puzzle 10
Key idea: the big star room, reached by reflecting from a mirror on the map. Three buttons must be held to open the exit. Make two Trader clones; one holds a button while the other fetches the stone for the third, using a wall to keep the first one in place. (塞德莎 P29 16:28)
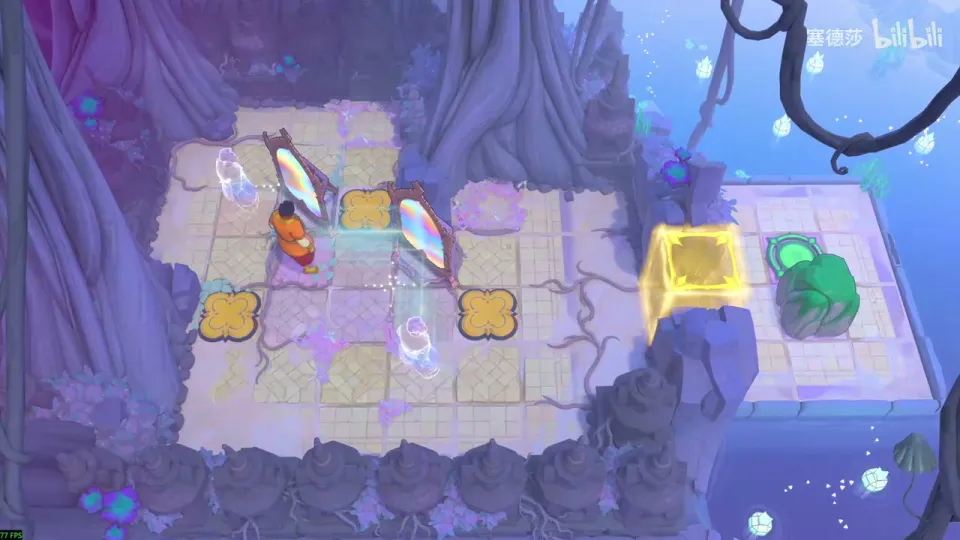
- The only way in is clones: make two copies and take the lower mirror out. (16:45)
- Put the mirror on a button. The plan: one copy holds a button, the other walks right, takes the stone out and presses the third. (16:56)
- Move the top mirror to the leftmost button instead. (17:18)
- The middle button has a wall to its right, so hold Right: the upper-left Trader stays pressed on its button while the other walks across. (17:28)
- Coming back works the same way, but from the leftmost spot, since holding Left doesn’t work here. Bring the stone back, merge the copies, and push the stone onto the third button. (17:38)
A star appears on the area’s sign. 塞德莎 checks what it is for: nothing except the all-puzzles achievement (see the achievement list); neither the main route nor the second stage needs it. (28:00) In the same video he also plays the Bard bonus rooms next door; those belong to Heroes and Water and are on the Heroes and Water page.