Stones Illuminated is the crossover area where the Explorer’s beams from Vault of the Beamcasters (West) meet the Sailor’s skipping stones and lily pads from Skipping Stones to Lonely Homes (South). The beams don’t just act on you any more: plain stones block them, crystal stones carry their power, and lily pads drag them around. This page solves all 26 puzzles and the 8 overworld puzzles between them: the 23 rooms and 6 overworld puzzles you can reach on the first visit, plus 3 post-game rooms and 2 overworld puzzles on the ground layer.
Where it is: from the central hub, head for the south-west entrance. Push the first stone left to open a path, ride the golden lily pad up, and use the green beam you lit in the West to walk through the wall onto the golden path. The gold room there is covered on its own page. 塞德莎’s walkthrough labels the area’s map tiles S2W1, S3W1, S4W1, S3W2 and S3W3 (his part 18) and S2W2, S2W3 and S3W4 (his part 19).
How to use this page: there is no complete, chaptered English video of this area yet, so the puzzle numbers are ours and follow the order of 塞德莎’s narrated walkthrough. Each heading has the key idea and a link to the moment the room starts; the numbered steps link to 塞德莎’s video too, because they follow his explanation. Three English single-puzzle videos match rooms here, and they are linked where they fit: Joric’s clips for puzzle 5 (one underground screen) and puzzle 15, and McNikola’s alternate solution for puzzle 8. The first three rooms (green beams) come before the area’s title card, which only appears at 9:09 when 塞德莎 takes the right-hand path; his part titles and Joric’s map both count them as part of this area. Puzzles 24–26 and overworld puzzles 7–8 open only after the first ending: you drop down to them from Double Beam Falling in Antipode High, and their links go to 塞德莎’s part 41. The three drop-down rooms he plays earlier in that part are on the High Beamcasters page (puzzles 56–58).
Rules that matter here
- Beams, as in the West. Gems power the emitters. Standing in a beam gives you its power: green walks through walls, yellow breaks stones, cyan lets you push, red opens red doors, orange makes you jump two tiles, and purple carries you to the far end of the beam. The emitters themselves can be pushed, and in this area they also ride lily pads, so a beam can move.
- Plain stones block light, crystal stones don’t. A normal skipping stone stops a beam, which is how you switch a beam off or decide where it ends. A crystal skipping stone lets light through and counts as alive, so it picks up the beam’s power: in green it slides into walls, in yellow it breaks the stone it stops against, in red it opens red doors.
- Purple end-teleports. Step into a purple beam and you travel to the tile before whatever blocks it. Plan that end point: a stone, a gem or a lily pad. The landing tile needs floor directly above or below it, or you can’t leave the beam again (puzzle 5 keeps coming back to this). Being pushed along by a current also counts as stepping in, so a current can teleport you when you don’t want it to.
- Skipping stones, as in the South. A stone kicked into water skips until something stops it; stopped over water, it sinks and becomes a tile. The stopper can be another stone, a character standing in the way (塞德莎 calls it body blocking), or a second stone kicked from the other side at the right moment. The Sailor can only push one stone at a time, and the Explorer can’t push at all unless it stands in cyan.
- Robots and the wand. In part 19, robots patrol back and forth, push stones and keep going even in water, so they can carry a stone or a character. The wand moves the thing in front of you one tile instantly: a stone moved that way has no momentum and drops straight into the water, but a stone already skipping keeps its momentum when you wand it over a wall.
- Blocks switch beams off. A beam only stays lit inside the block (map screen) whose gem powers it. Carry an emitter into another block on a lily pad and it goes dark, which puzzle 5 uses on purpose.
- Orange over shallow water (puzzles 24–26). An orange beam also drops you two tiles. Where the water is one tile deep, the floor under it is exactly two tiles down, so in orange you (or a stone) stay up on the water. A crystal skipping stone skimming across such water stops dead the moment it enters an orange beam, whatever its momentum; all three rooms build on that.
Puzzle 1
Key idea: put the green beam on a lily pad and travel with it. Wherever the moving beam is, you can walk through walls, so the route is a chase. (塞德莎 3:43)
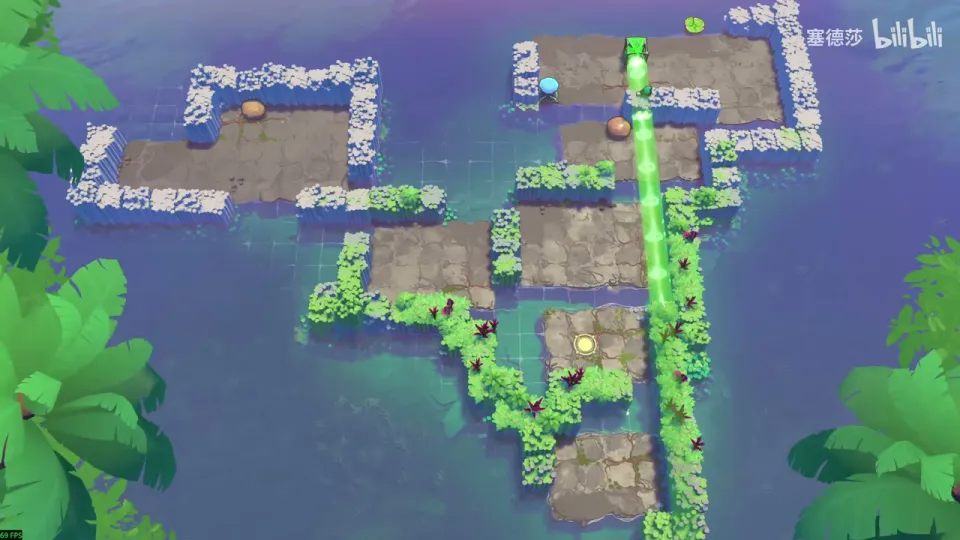
- Take the stone at the bottom out first: go down through the wall on the green beam, then push it up. (3:58)
- Get the green beam onto the lily pad and set the pad moving. From now on keep up with the beam. (4:11)
- You can’t reach the exit yet, so go left, then through the wall to the top left. A stone sits there: pull it out while the beam still covers you, run left and push it up to knock the pad back the other way. (4:25)
- Follow the beam back to the bottom right, pass the wall and wait below. (4:45)
- The gem at the start blocks the beam on the last stretch, so you can’t walk straight up. Wait for the beam, go through the wall and hurry up to the exit. (4:56)
Puzzle 2
Key idea: the first crystal skipping stone. It lets the green beam through and takes on its power, so a crystal pushed along a green beam ends up inside a wall. Use the plain stone wherever a stone has to stop or block the light. (塞德莎 5:10)
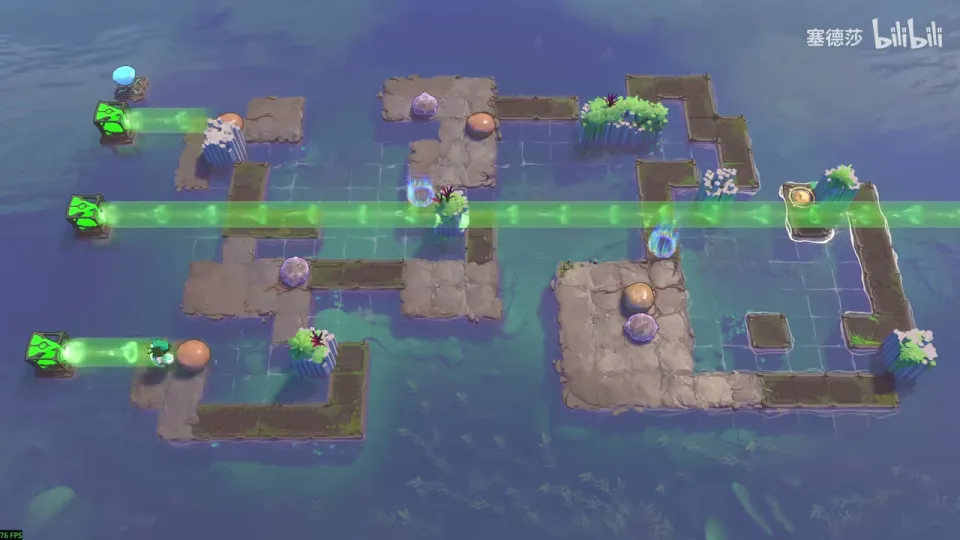
- Push the first stone into place. (5:12)
- Pushing the crystal straight right doesn’t work: it picks up the green beam’s power and slides into the wall. Move it right, then left, then up into the gap instead, and bring the plain stone down to fill the tile below. (5:36)
- Two holes next: one you can fill by pushing straight; the other is directly to your right. First push the crystal into that row so it stops inside the wall, then push the plain stone right: it carries the crystal across to the right tile. (5:55)
- The last two holes. The first can be filled by a straight push, but only with a stone the green beam doesn’t affect, so block the light first. The top-right hole must get the plain stone, because you can’t block the beam there. So: block the beam with the plain stone, push the crystal across to fill the first hole, then push the plain stone up into the top hole. (6:30)
Puzzle 3
Key idea: with two green beams you can park the skipping stone inside a wall and take it out again from another side, which lets you move it where pushing alone can’t. (塞德莎 7:17)
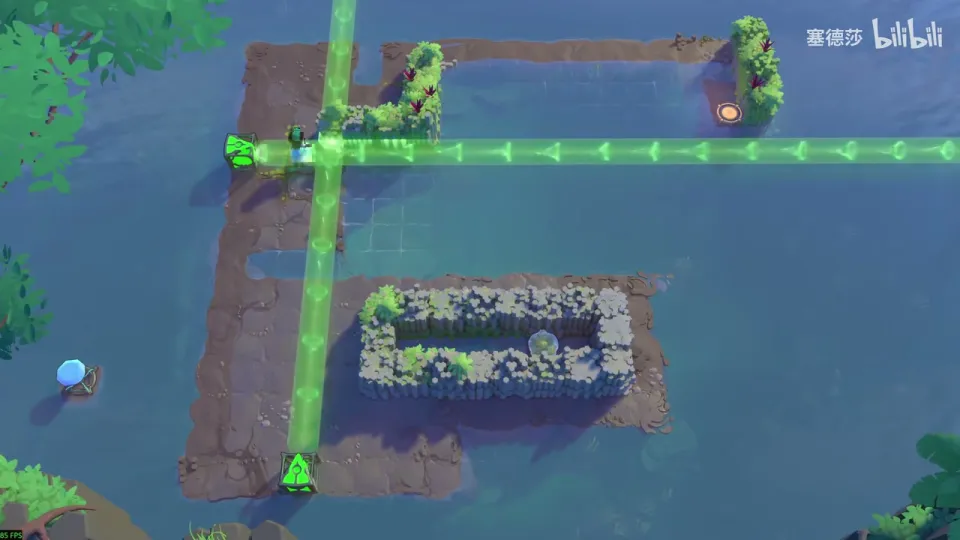
- Use both green beams to get the skipping stone out from below. Push it from the right towards the four water tiles on its left: because of the beam it slides into the wall. Take it out again. (7:18)
- Now bring it up. Straight up it gets stuck at the edge, and from the leftmost column you can’t push it right later, so only one column works: push it through the wall in that column. (7:36)
- Go up and take it out of the wall with the horizontal beam. Move that beam one tile right first, or you can’t get in. (7:51)
- It has to be pushed right along the target row. Put it back in the wall, move the vertical beam one tile right and the horizontal beam to the marked tile, step into the wall, push it up, come out and push it right along that row. (8:08)
- Watch out: left alone, it keeps phasing and skips straight through the far wall. As soon as it’s on its way, switch the left beam off. (8:37)
After this room, push the shortcut stone, note the teleporter, and take the right-hand path: the area’s title card appears here. (8:57)
Puzzle 4
Key idea: the purple beam takes you to wherever it ends, so the puzzle is choosing what blocks it. Here a stone has to end the beam right at the exit. (塞德莎 9:12)
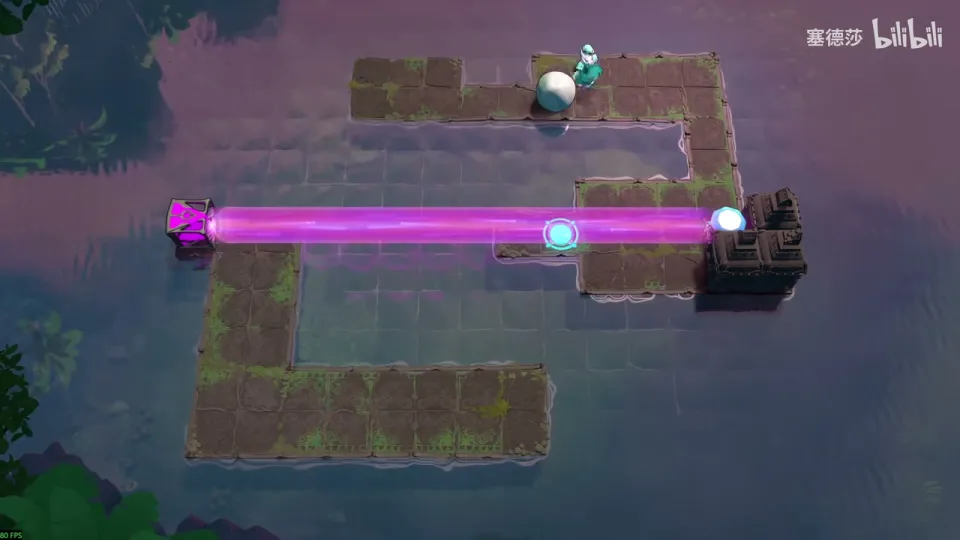
- Power the purple beam and ride it across. (9:22)
- To make it end at the exit, block it with the stone. Push the stone up from this exact tile (from anywhere else you can’t get it out), go back, and park it on the marked tile. Ride the beam to the exit. (9:27)
Overworld puzzle 1
Key idea: block the purple beam on the right with a plain skipping stone, or you can’t reach the big room to the right. (塞德莎 9:47)
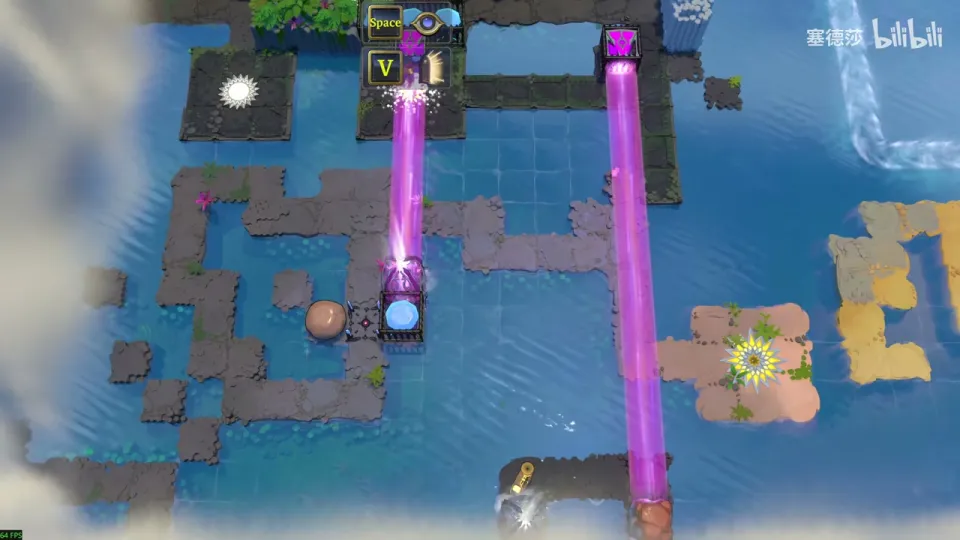
- The cage below opens after puzzle 4. Jump down. (9:47)
- Push the stone left, up and right. It won’t go further right from there, so push it up first, walk the long way round, push it right, come back, push it down, follow it down and push it right again. It now blocks the beam. (9:59)
Puzzle 5
Key idea: one huge room (16 tiles on the upper level plus 8 underground) built entirely around purple end-teleports. You make end points with stones, gems and lily pads, and every landing tile needs floor above or below it so you can step off. The goal is the elevator at the top left, then a long way round underground to the elevator back up. (塞德莎 10:27)
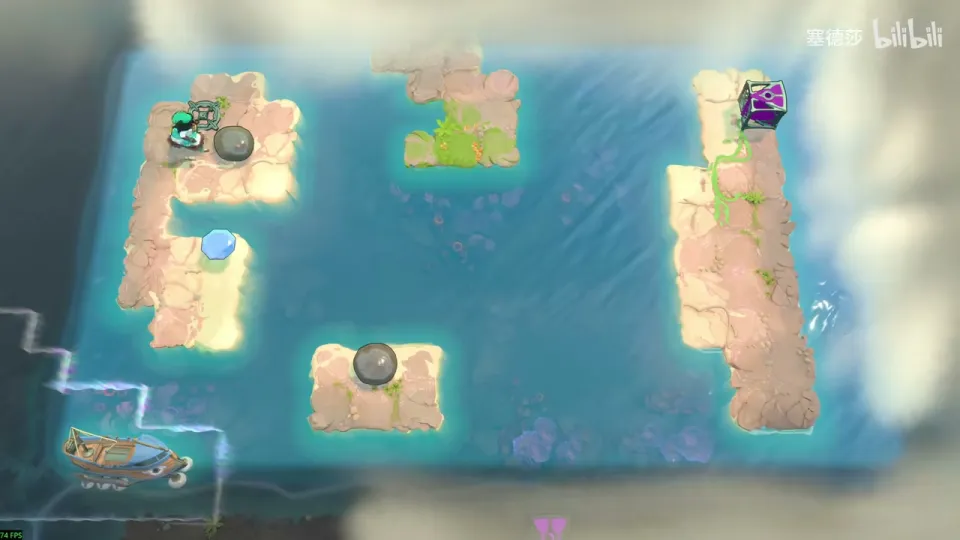
Upper level
- A beam activator is hidden under the first stone. Fill the gap with a stone and push the gem up to power the purple beam. Ride right, ride back (the plain stone blocks the light), push the stone up, cross to the islet and pick up the map. (10:53)
- The exit is on the left, but you reach it from below. First target: the elevator at the top left. (11:21)
- To get right, build an end point in the only place that works, and push the emitter up. Remember the floor rule for the landing tile. (11:44)
- Push the stone right as far as it goes; the gem stops it, so you ride to the right end. Keep the beam on and go right. (12:10)
- You need the bottom-left path of the middle island. Move the stone out of the way but park it where, after the ride, you can walk straight down: push it right, out, then left and down from here. (12:26)
- Next you need the far right. Push the stone left, beam it right so you can take it out, and use it as a new end point on the one tile you can walk up from. Then push it down until the gem stops it. (12:56)
- A current and a lily pad: the pad carries the stone towards the hole below, and on the way the stone is the beam’s end point. Push it down, light the purple beam and jump when the pad brings the stone to the end. (13:48)
- Same idea next door: aim the beam just above the pad, jump on when the stone is at the top, and cross when the stone at the bottom blocks the light. (14:26)
- To reach the bottom left you need a stone there as the end point and the lower-right lily pad above it as a station. It’s a race: if the pad arrives first, the stone lands on the pad. Push this stone down from below first (it saves a trip), put the beam here, push the pad up from below and immediately push the stone left. (14:45)
- You need to push a stone down here as a new end point. The two edge stones can only nudge pads, so it has to be the inner one, but the purple beam blocks the way in. Send two pads with a gap between them: the first blocks the beam while you go in and push, the second while you come out. (16:18)
- A long run of currents. Being carried into the beam teleports you too, so stay active: walk right here or you leave the map, step up here and drop down when the pad reaches the end, put the stone on a pad to block the light, push the other stone to the end so the timing hands you to the next pad, and walk onto the last pad yourself. The way right is a dead end. (17:12)
- The top right is an end point with no floor above or below, so you’d bounce back. Instead put the beam on a pad moving up: the beam moves away on its own and lets you out. (18:51)
- A beam goes dark once its pad leaves the gem’s block. You need the purple to jump up, but with it on you can’t push the stone in front of you. Take the skipping stone out (push left, light the beam, go left, push it here), push the pad off and also remove the gem from the block below, then go up once the pad has left. (19:35)
- A very long teleport through the gap at the top: put the pad here with the beam on it and start it from the left so you can step on. When it reaches the gap, hurry left. You arrive at the elevator and go underground. (21:09)
Underground
- The elevator out is at the bottom left; go the long way round. Pave with the first stone and push the next one right. Crystal stones let light through, so you can still teleport past one; use that to get over the stone, push it right and start the top-right and right-hand pads. (21:46)
- Push the stone first and light the purple second: once it’s on you can’t push, you just drop. Push left to start the pad, switch the left beam off (its end is blocked by the crystal), push left again to start both pads and ride the two currents with the crystal. (22:46)
- Put the crystal on the pad that turns clockwise. Its downward swing plus the purple beam lands the crystal below, then push it into the hole at the bottom left. (23:37)
- The hardest screen: one of the four stones has to reach your row so you can push it right as a step. Use a pad moving along the purple beam: start the pad, then cut the current twice so an upward current forms that lifts the crystal out. Joric’s short clip solves this screen too. (24:03 · Joric on YouTube)
- Start the pad without letting the stone block the current: push the gem a little closer on the right, start it, and immediately cut the purple beam so the stone is teleported off to nowhere and disappears. (25:25)
- Teleport the crystal into this column: push it right, then push left and at once aim the beam up. Switch rows and teleport across. (26:10)
- Last screen: get a stone into the middle row to push the pad up beside the elevator. Send the stone to the lower right, put the purple on the pad, start it, step down and push the stone up just before the beam arrives, then go up yourself. Start the pad and ride it to the elevator. Take the lower elevator; the upper one takes you back. (26:34)
Puzzle 6
Key idea: the stone has to stop in the water, and the only stopper is you standing on the far side. The purple beam gets you there in an instant. (塞德莎 28:12)
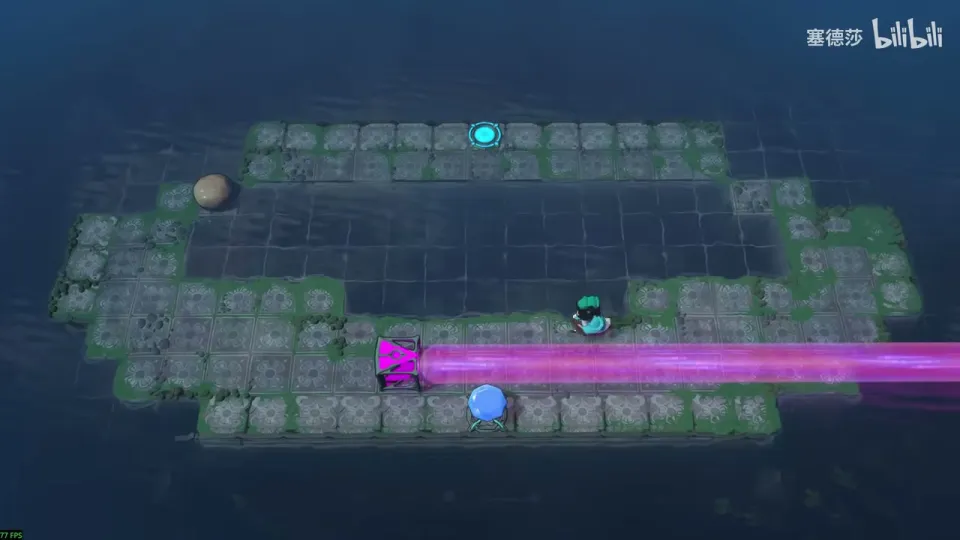
- Push the gem out of the way and set the purple emitter here; it faces right. (28:31)
- Push the stone right and light the beam. (28:36)
- Kick the stone left and immediately ride the purple beam to the other side to block it. (28:42)
Puzzle 7
Key idea: a race. Pushing a stone up makes it the beam’s end point beside the top-right exit for a few turns, and you use the other two beams as instant shortcuts to get to the top left in time. (塞德莎 28:50)
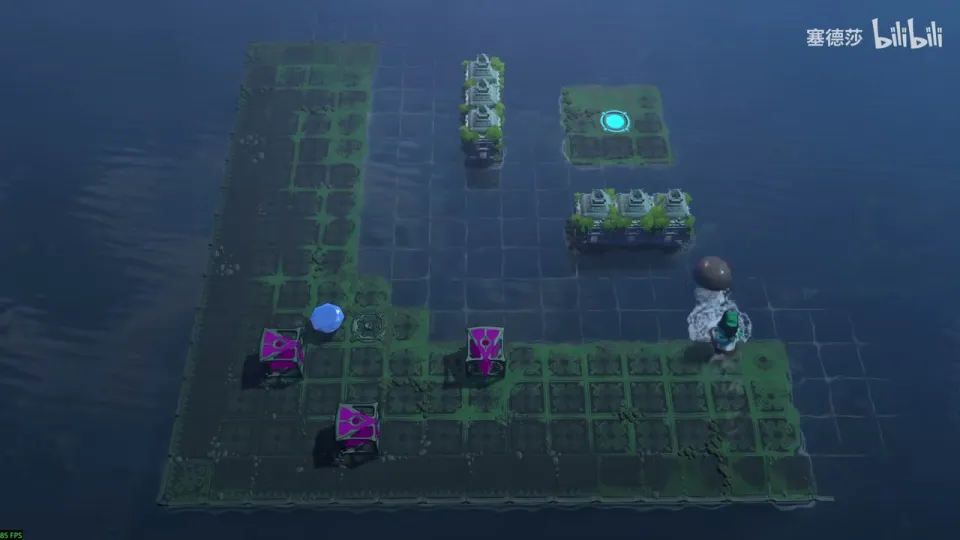
- Switch the beam off first. Pushing the stone up from here gives you a few turns in which it sits right of the exit. (29:00)
- Fire a horizontal beam along the marked row: when the stone reaches the top right, that beam ends beside the exit. (29:12)
- To get to the top left fast, aim the vertical beam and the other horizontal beam at the marked tiles. (29:29)
- Push the stone up, teleport to the top left at once and wait, then ride right. The exact tiles are easiest to follow in the clip. (29:44)
Puzzle 8
Key idea: the Explorer starts caught in the orange beams and can only go back to the left. Kick plain stones into the beams to block them, and use a difference in distance to block two beams at the same moment. (McNikola’s alternate solution · 塞德莎 30:00)
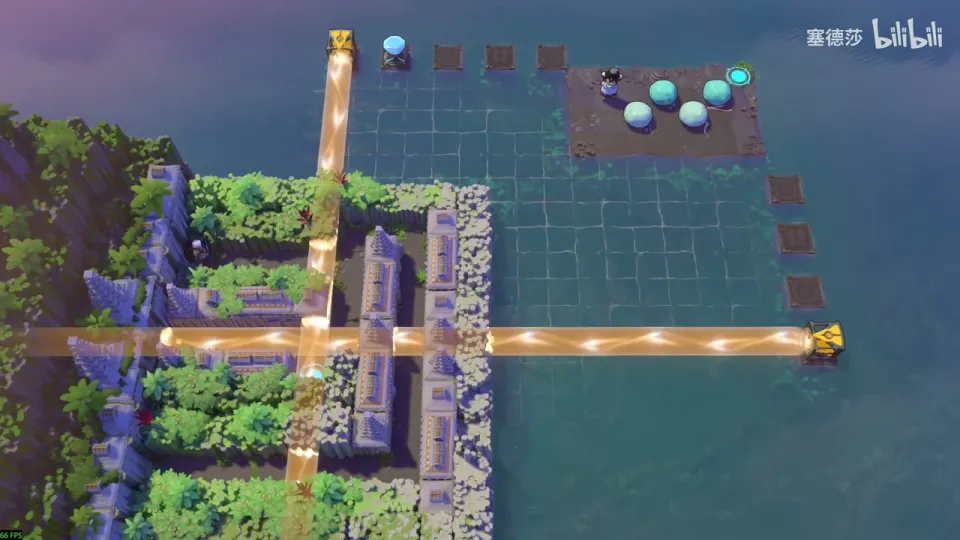
- Kick the stone that blocks light into the first beam. It rolls slowly, so the timing is forgiving. (30:09)
- The next spot is blocked: step one tile left, and block this beam the same way. (30:18)
- Now both beams must be blocked together. Count the water: 9 tiles to the left, 8 tiles down. Kick the upper stone left, then immediately kick the other one down; the one-turn gap makes them block both beams at the same moment. (30:26)
McNikola’s video shows a different route through the same room. The cage near this room can’t be opened yet; 塞德莎 says it opens much later. (31:19)
Puzzle 9
Key idea: red beams open red doors. Open them one at a time, and keep the middle-right door shut for now because it’s the stopper your stone needs. (塞德莎 31:45)
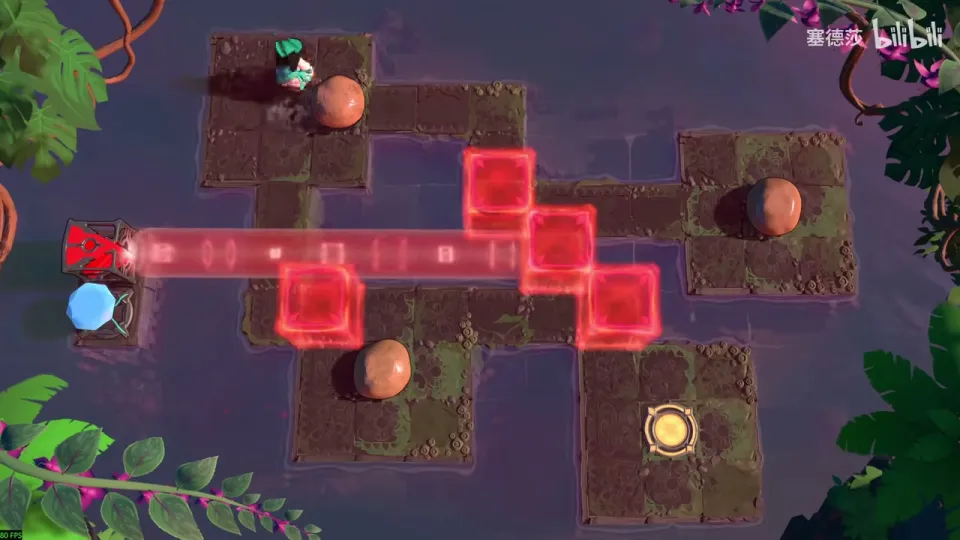
- Push the first stone to the marked tile; that opens this door. (31:50)
- Kick the next stone right as a step; that opens the two doors. Only open the top one, not the right one: the middle door on the right is the stopper, or the stone can’t get to its tile. (31:55)
- Then open the remaining two doors and walk out. (32:12)
Puzzle 10
Key idea: crystal stones count as alive, so a crystal in the red beam opens red doors just like you. The door in front of the exit can only be opened by the crystal, so save it for that. (塞德莎 32:16)
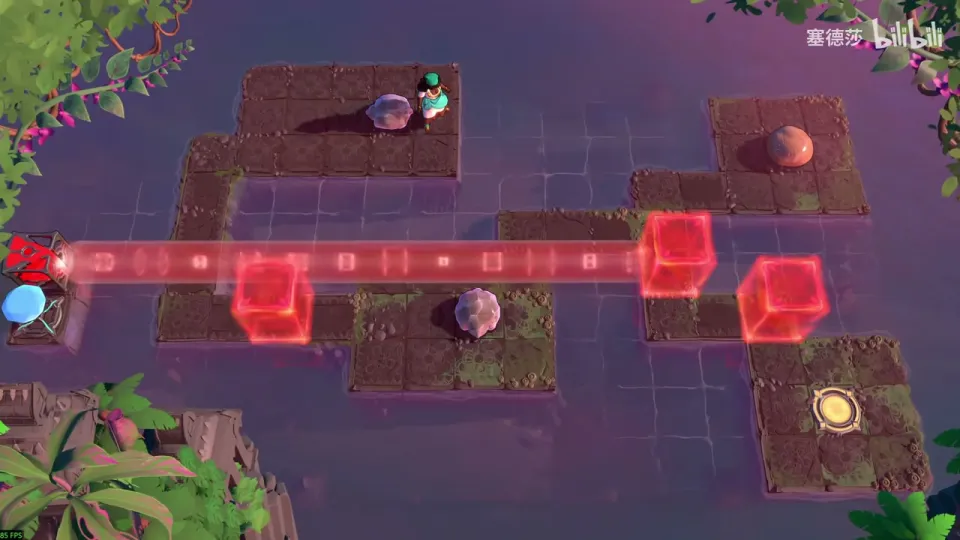
- Kick the crystal down from here to open the first door. (32:36)
- Don’t spend the crystal on the next door. Bring the plain stone from the top right over as a step instead. (32:40)
- Kick the crystal across to the right to open that door, then use it again to open the door below and walk to the exit. (33:10)
Overworld puzzle 2
Key idea: back on the area map, the red beam is now on. Open the door, and use the crystal for the one door you can’t open yourself. (塞德莎 33:26)
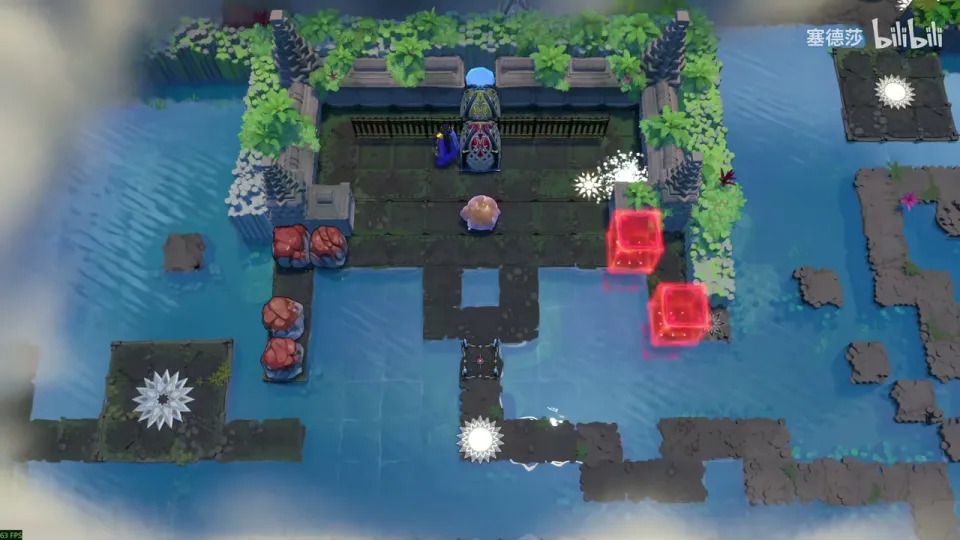
- The red beam opens the door here; push on to the right. (33:27)
- The lower door can only be opened by the crystal stone. (33:33)
Puzzle 11
Key idea: the yellow beam breaks stones, and a crystal kicked through it breaks the stone it hits, so you can clear a stone from a distance. The last step needs one kick that both sinks a stopper and breaks the stone in your way. (塞德莎 33:41)
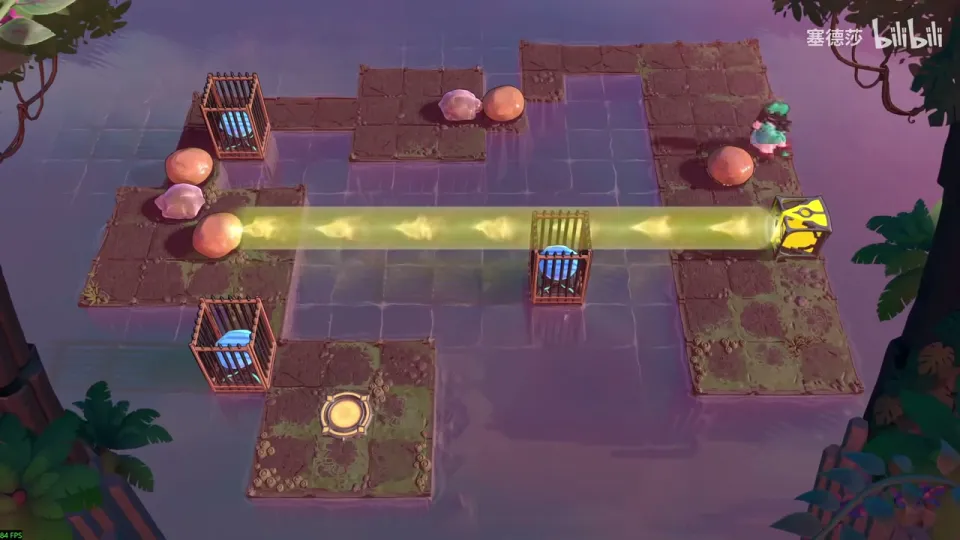
- Pave a path here first; you can’t get round along the edge. (33:42)
- The Sailor isn’t strong enough to push the pair of stones, so stand in the yellow beam and break one of them. (33:48)
- The way down is blocked too, and a gem on the right keeps the yellow beam from reaching you there. Put the crystal on the marked tile and kick it left: it breaks the stone from a distance. (33:59)
- Now you need a stone sunk in the water to your right without blocking your path. Put the plain stone here, push the crystal right, walk round to the right, put the crystal on the marked tile with the yellow beam on it, and kick it left: as it stops it breaks the stone in your way. (34:20)
Overworld puzzle 3
Key idea: the way left is open now. Clear the stones on the path with the yellow beam and the crystal. (塞德莎 35:13)
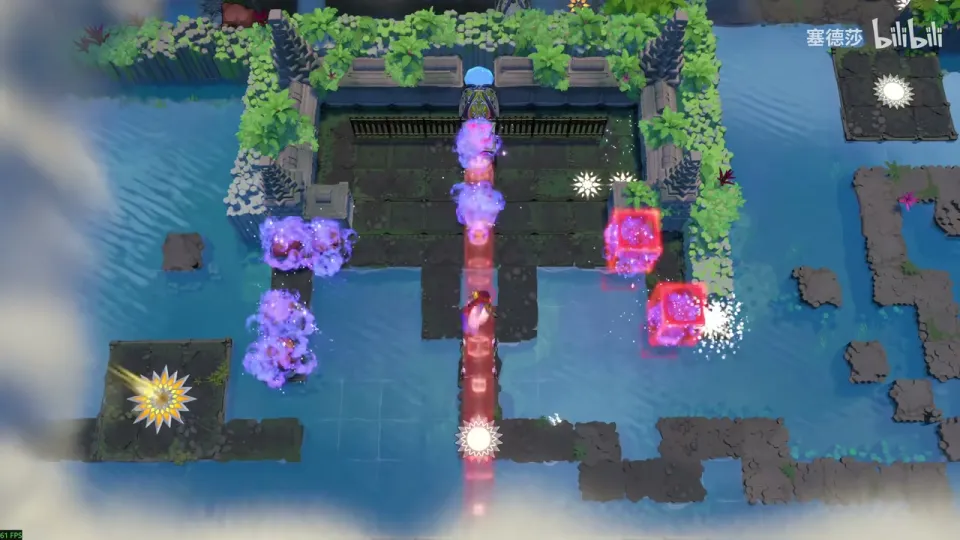
- Reset the area, push the stone to the marked tile and break it. (35:15)
- Go left; this stone can be pushed normally. (35:23)
- Of the double stone below, one must go: kick the crystal left to break it, then push the other stone down and enter the next room. (35:30)
Puzzle 12
Key idea: send the lily pad left, then down at the right moment, into the water column next to the Explorer at the bottom left. The Explorer can’t push stones, so if a stone lands on the pad, break it remotely with the crystal in the yellow beam. (塞德莎 35:41)
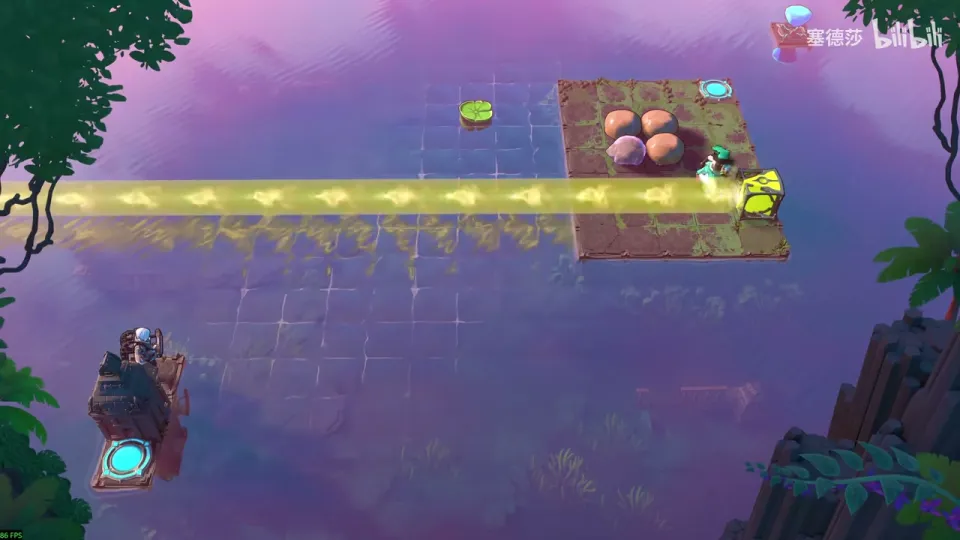
- The four stones are stuck together and can’t be pushed, so break one first. The other three can then be taken out. (35:43)
- Knock the pad left, and at the right moment knock it down so it ends up in the column right of the Explorer. (35:58)
- The stone that knocked the pad rides on it, and the Explorer can’t push it off. At the right moment, kick the crystal left through the yellow beam to break that stone. The stones in this room move fast on purpose. (36:29)
To reach the next room, go left and knock the lily pad right, then wait for it. (36:50)
Puzzle 13
Key idea: a race against a moving cyan beam. Start a lily pad carrying the cyan beam to the right; while it covers you, you can push stones, so you run along with it clearing the way. (塞德莎 37:07)
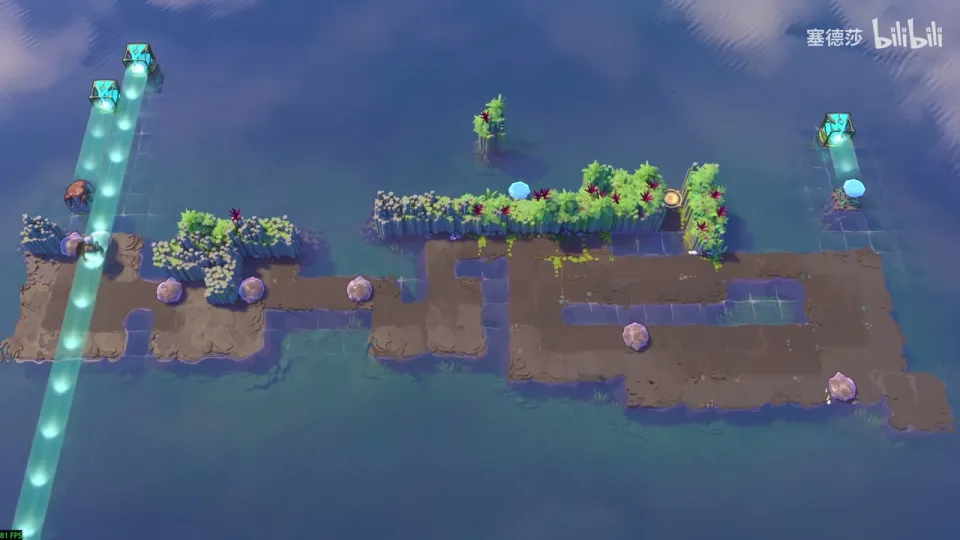
- Use the stone and the cyan beam to push up, start the pad here, and immediately push the pad up. That sends a cyan beam drifting right. (37:12)
- Follow it: push the first two stones straight, and this one deliberately to the left. (37:30)
- Push this stone right three times and up from here; then push the next one three times and up to start the second pad, which drifts left. (37:37)
- Wait for it, push left five times, push up here, then push right to finish. (37:49)
Overworld puzzle 4
Key idea: the cyan beam on the area map lets you push two stones at once, which gets you up to the big platform. (塞德莎 38:03)
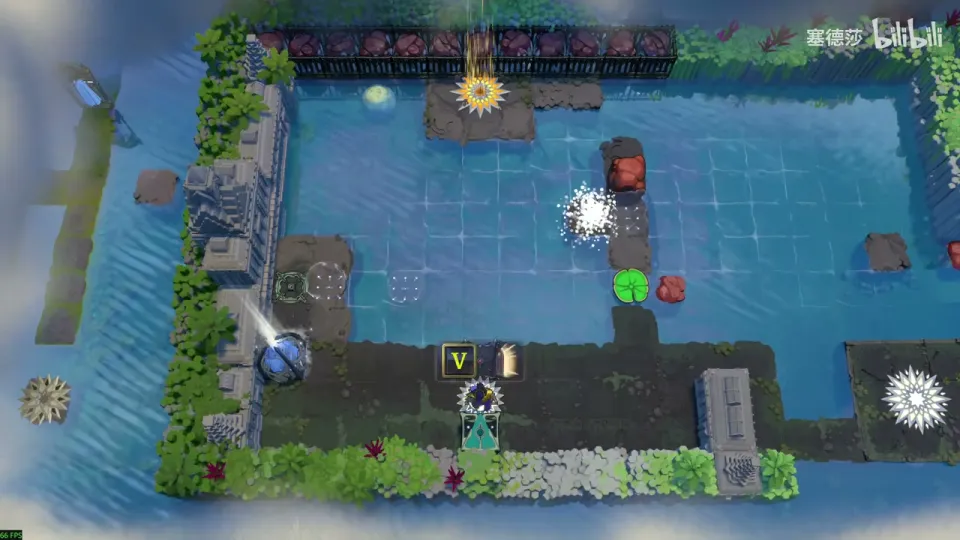
- Reset to bring the stone back, then push it right to start the pad. Earlier this would have stacked two stones you couldn’t move; with cyan you can. (38:15)
- On the far side, push the two stones up. (38:28)
Puzzle 14
Key idea: fill the hole by kicking a stone down its column. Stack three lily pads: the cyan emitter on top, the Explorer standing in it (so it can push), and a stone on the next one. (塞德莎 38:34)
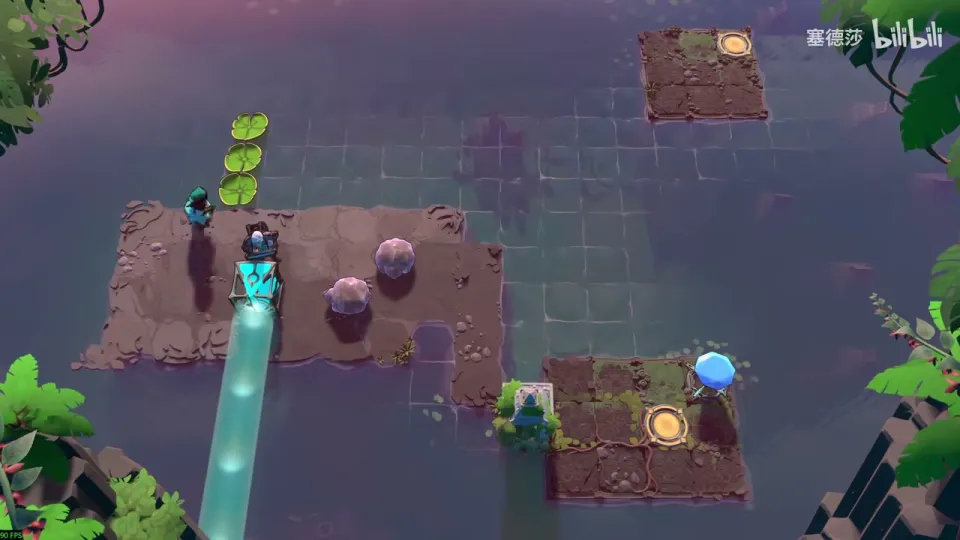
- Put the cyan emitter on the top pad and keep it on, with the Explorer standing in the beam. Now it can push. (38:46)
- Put a skipping stone on the next pad, then start the pads with the other stone. (38:57)
- At the right moment push the stone down into the hole, then step up at the right moment. 塞德莎 notes it’s an easy room to end the part on. (39:02)
Puzzle 15
Key idea: a 3×3 open map that wraps at its edges (塞德莎 switches the view to show it tiled). Collect the four gems, then open the red block over the exit with a crystal stone pushed through the cyan beam. (Joric on YouTube 0:00 · 塞德莎 P19 0:10)
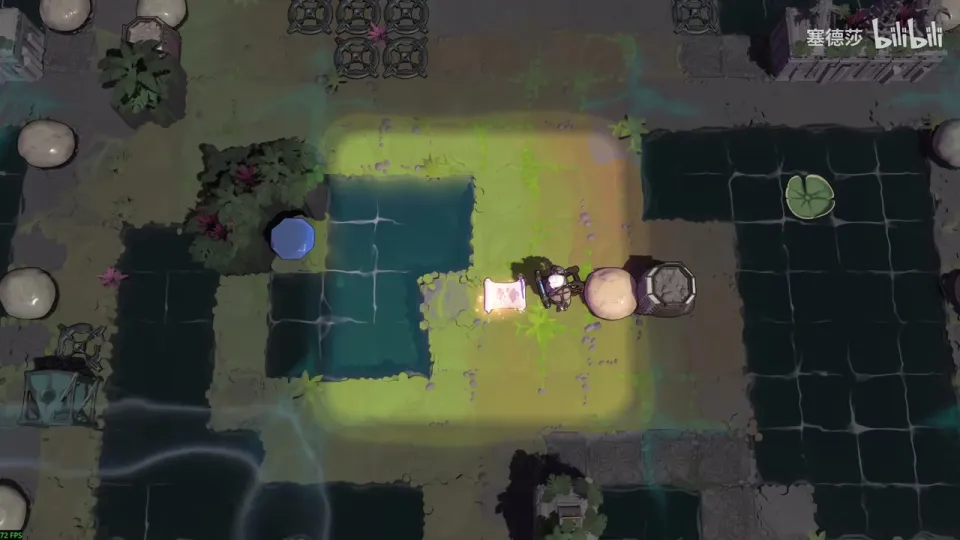
- Gem 1: time it to the left and block the stone with your body. (P19 0:21)
- Gem 2 sits behind a purple beam that turns off once the gem is taken, so you only need a way in. Power the one emitter that helps, then fill the small hole: push the robot out, then the plain stone. Kick the skipping stone right: the map wraps top to bottom, so it comes round below, the robot pushes it back up, and it keeps cycling. Slip through while it blocks the beam. (P19 0:47)
- Gem 3 is on a lily pad. Put a gem here first so the stone you push left stops in the water; without it you’re one tile short. Kick the stone, run to the top spot and knock the pad back down when it arrives. (P19 2:03)
- Gem 4: you need a skipping stone in the same row, but a direct kick stops on land. Get the robot onto the middle lily pad: kick the stone so the robot stops it, then start the pad at the moment the robot comes up, and the robot pushes the stone left. (P19 2:48)
- The exit is under the red block. You need one gem holding the red emitter on and four more for the cyan beam that pushes the crystal into the door, which leaves you one short. So kick the crystal out and immediately carry a gem over and socket it. (P19 3:55)
Puzzle 16
Key idea: a long chain of rooms on a map that wraps left to right (the statue on the left edge is the same one as on the right) and, as you find out at the end, top to bottom too. Stones pushed off one edge come in from the other. (塞德莎 P19 5:06)
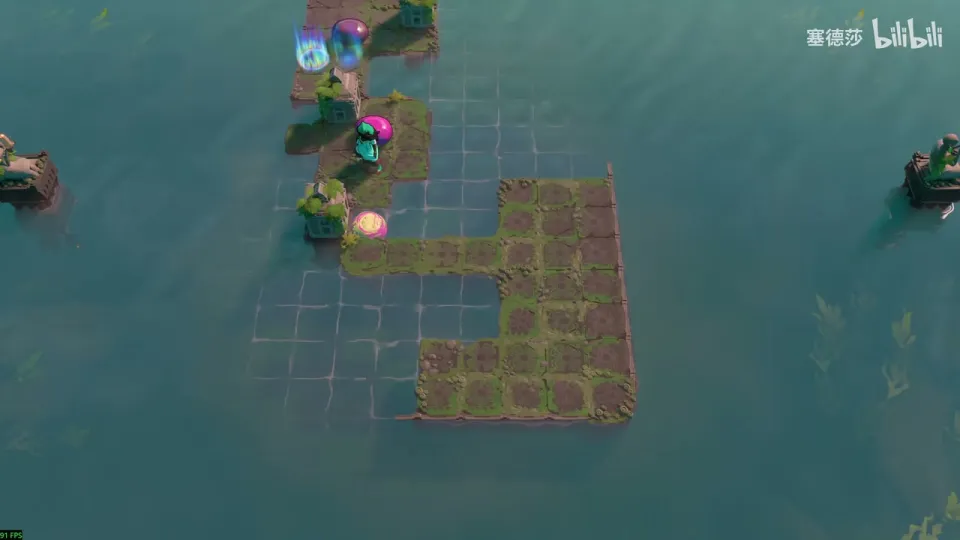
- Push a stone left as a step, then one more, and go up. (P19 5:10)
- The next stone must fill the gutter above. Because the map wraps left to right, kick it right from here: it comes back in from the left and sinks in place. (P19 5:23)
- Kick left and block it with your body. (P19 5:52)
- Body blocking doesn’t work here, so stack two stones. Take one out first: push it right, slip into the bump, push it left and go up at once, then wait below. Push it right and up to pave the way. (P19 6:04)
- Two stones have to stop in the middle, and neither stacking nor body blocking works. Use the wrap: kick them at each other from both sides. The left one has further to go, so kick it first, then the right one at the right moment. (P19 6:38)
- Knock this pad right, not left; it goes round and comes back where you can board it. (P19 7:11)
- The next pad takes a long loop: knock it up, push the stone back, knock the pad left, collect the stone, knock the pad up from here, and finally left from here. (P19 7:21)
- The last gap needs the stone above, but no trick so far works. Walk up and you can see the room’s starting area at the top: the map also wraps top to bottom. Kick the stone straight up from here and wait. (P19 7:58)
Puzzle 17
Key idea: the patrolling robot does the pushing you can’t. The pad has to go up and then left: you knock it up yourself, and the robot knocks it left. (塞德莎 P19 9:04)
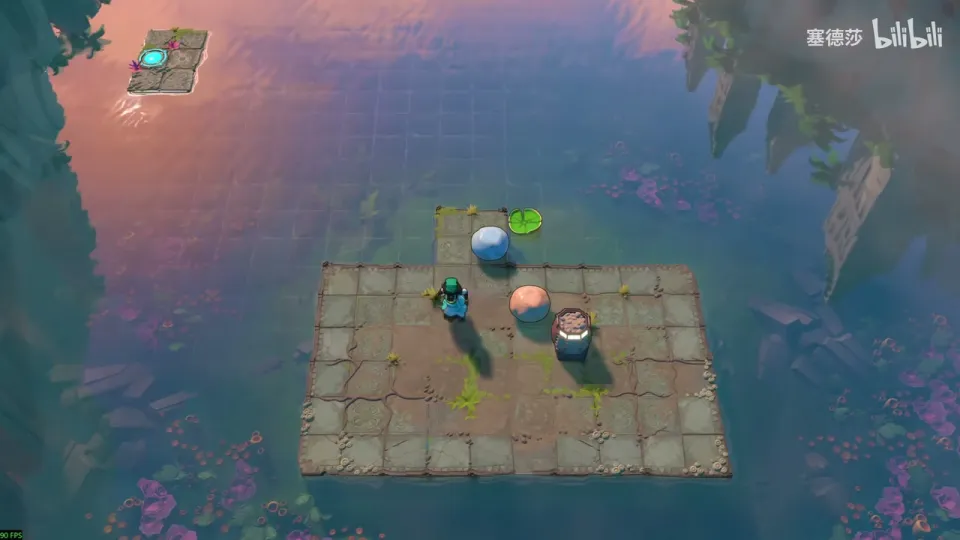
- Set up the stones so the robot will hit the one that sends the pad left. (P19 9:23)
- Wait until the robot is nearly in position, then knock the pad up and board it; the robot sends it left. The timing is easiest to copy from the clip. (P19 9:37)
Overworld puzzle 5
Key idea: the previous room unlocks a stone and a robot on the area map. Let the robot push the stone out of its row to start the lily pad, and ride the pad. (塞德莎 P19 9:56)
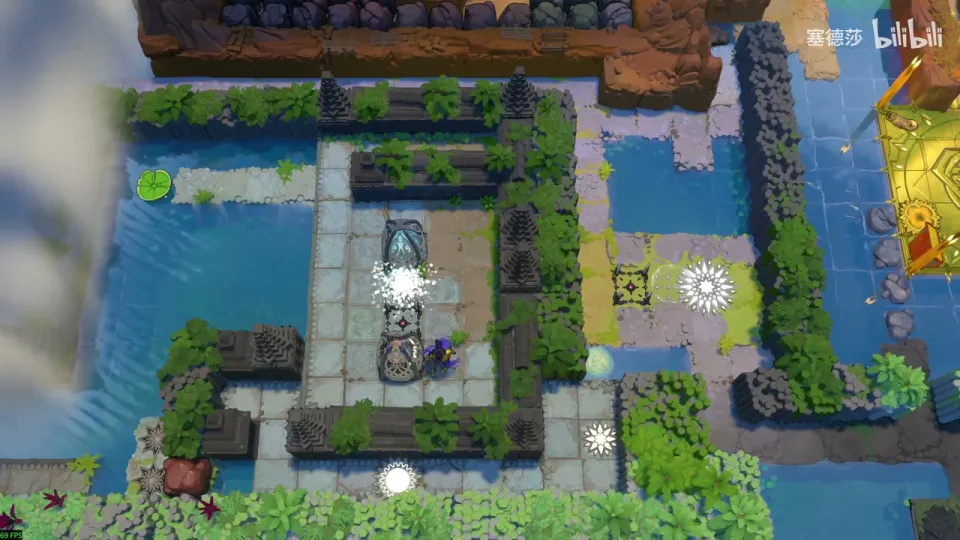
- Use the robot to push the stone out along this row; it starts the lily pad. (P19 10:04)
- Stand on the pad. (P19 10:12)
Puzzle 18
Key idea: stop a stone in mid-water by kicking it into one that the robot pushes from the other side. (塞德莎 P19 10:20)
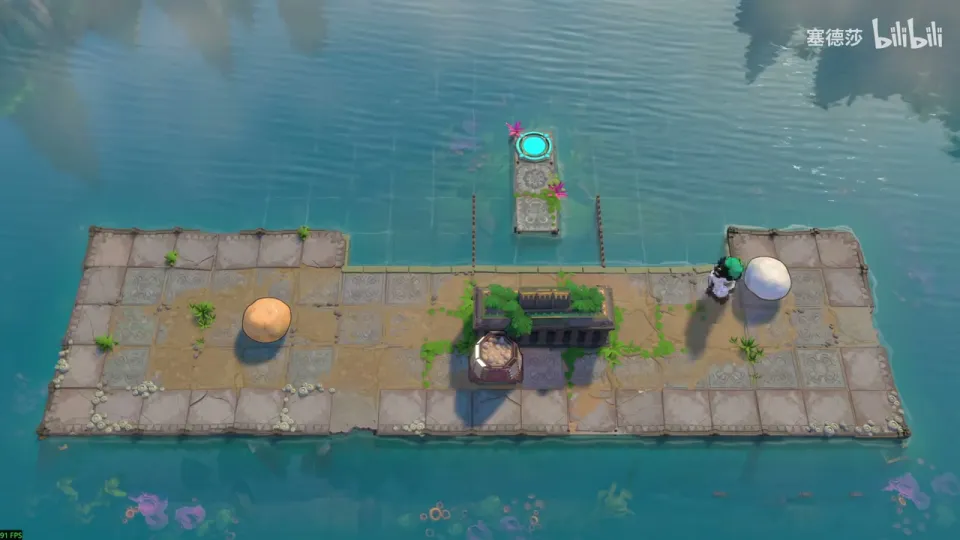
- Wait for the robot, then at the right moment kick your stone hard to the left. The two meet and stop. (P19 10:24)
Puzzle 19
Key idea: the top-left lily pad has to go right, which means something must push up from the small island on the left. That can’t be you (you’d miss the pad), so it has to be the robot, carried over on a lily pad. (塞德莎 P19 10:39)
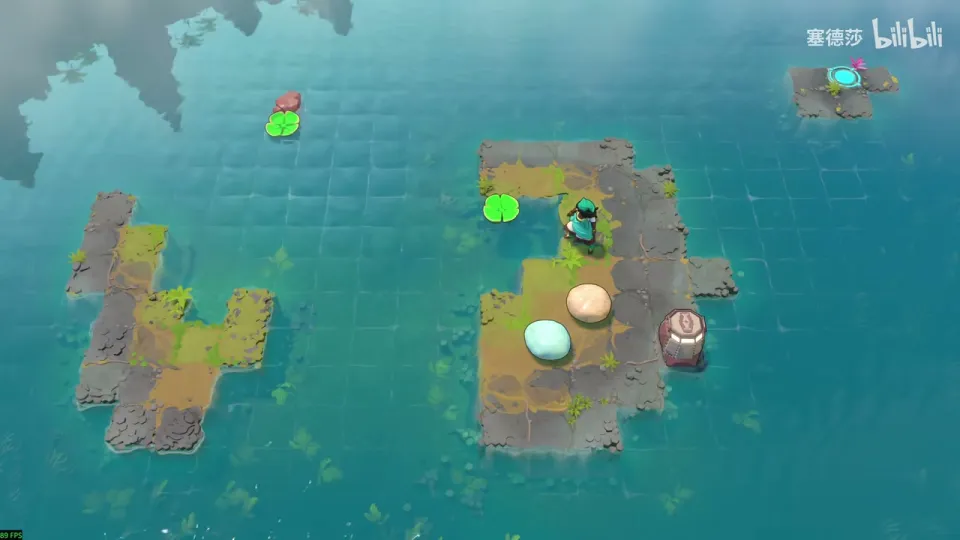
- Get the robot out through the bump on the island and onto the lily pad. (P19 11:02)
- Knock the pad left; it should turn into the column left of the far pad and end in the notch below. Start it after the robot is on, and knock it down at the right moment (塞德莎’s first try is early). (P19 11:22)
- When the robot reaches the bottom, kick the stone across. The pad goes right and you can reach the exit. (P19 12:00)
Puzzle 20
Key idea: robots are waterproof. Push one into the water and it keeps patrolling there, so it can hold a stone up as a stopper. (塞德莎 P19 12:17)
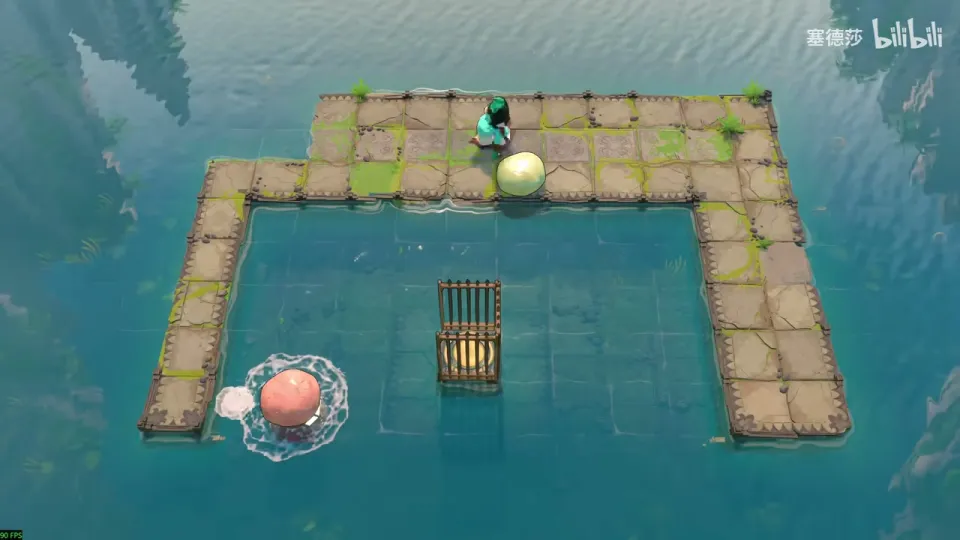
- Push the robot from the bottom into the water. It moves back and forth in it. (P19 12:37)
- Put a stone on it as a stopper, then at the right moment kick another stone so it sinks in front of the exit. (P19 12:44)
- Step onto the robot and walk to the exit. (P19 12:54)
Puzzle 21
Key idea: a skipping stone must end up right of the Explorer at the top left, stopped by the Explorer’s body. Only the Sailor can kick it left along the top row, and the Sailor gets up there by riding the robot in the water. (塞德莎 P19 13:16)
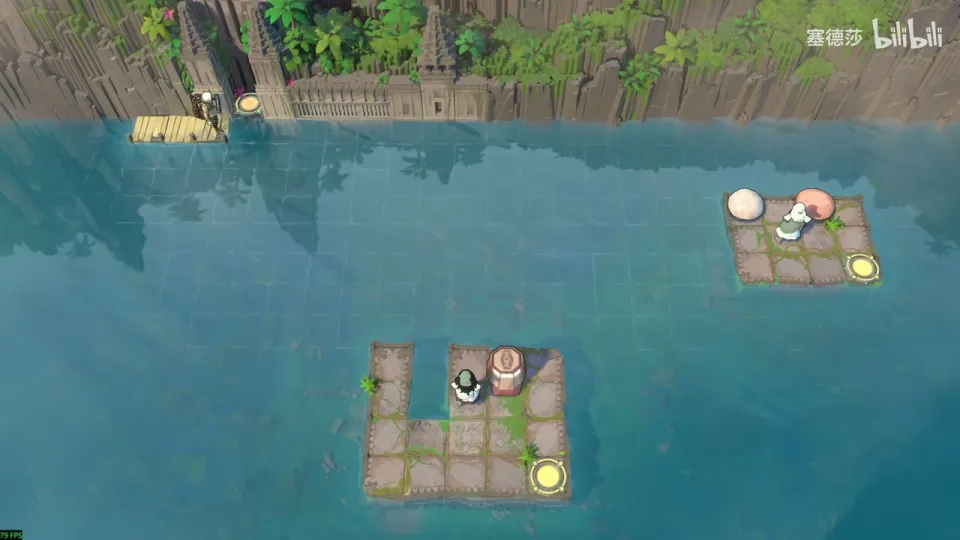
- Park the Explorer on its tile first; it will be the stopper. (P19 13:33)
- Kick the robot into the water. To give the Sailor something to push from at the top, you need two stones stacked at the top of the water column left of the robot. (P19 14:02)
- Kick one stone across at the right moment, push it up after it comes down, bring a second one, and push it left. (P19 14:18)
- Ride up to the top and kick the stone left. (P19 14:32)
On the way to the next room, push the small robot that this room unlocks into the water and follow it left. The path further left is a dead end. (P19 14:49)
Puzzle 22
Key idea: the wand moves a stone one tile instantly. It gets no sideways momentum, so a stone wanded off the edge drops straight into the water and sinks on the spot. Use that to build steps where a kick would skip away. (塞德莎 P19 15:07)
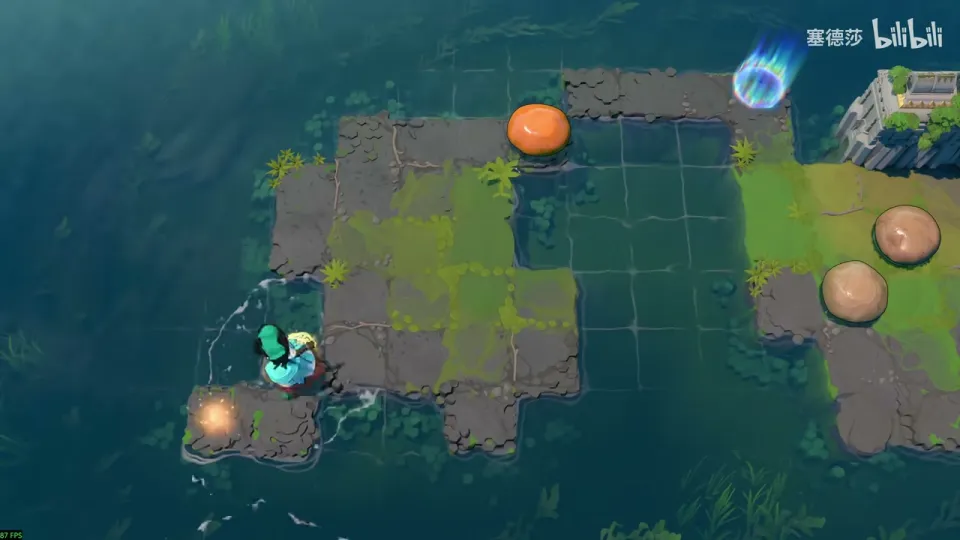
- Get the wand at the bottom left by stacking two stones. (P19 15:17)
- Kick one stone the normal way to sink it on the right, then wand a second stone into the water. (P19 15:39)
- You need a step under the stone here: wand it down. You can’t turn here, so turn on the other tile and wand another stone in. (P19 15:47)
- The wand also goes through walls: use it to take this stone out, then go up through the wall to the next exit. (P19 16:07)
- Last screen: rather than walking a stone right tile by tile along the bottom row, wand a stone in here as an extension platform and kick a stone down from it. (P19 16:19)
Overworld puzzle 6
Key idea: with the wand on the area map, take a stone out and sink it in front of the big room at the bottom right. (塞德莎 P19 16:55)
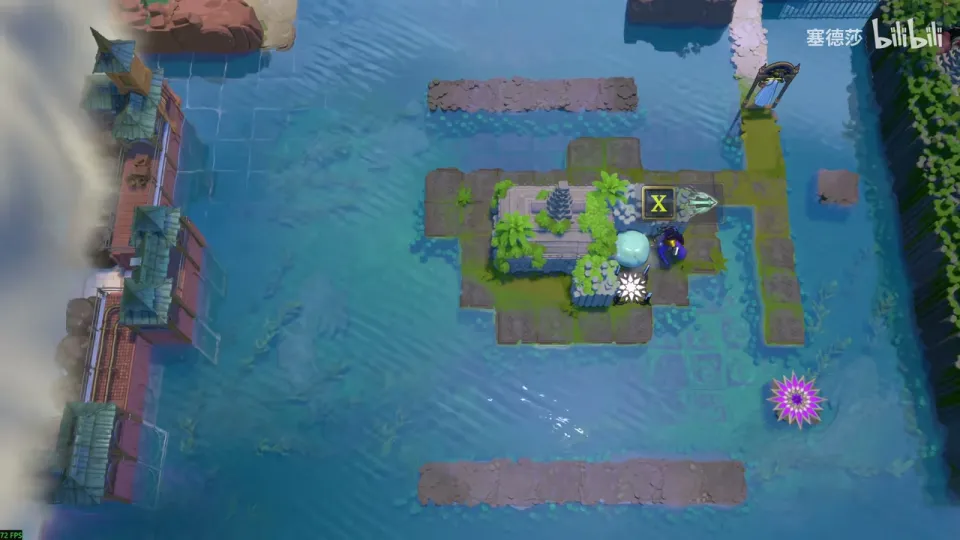
- Go left, then round the big loop up, then right: the wand jump takes you straight to the far right. (P19 17:02)
- Go down, round another loop, and push right. (P19 17:10)
Puzzle 23
Key idea: a chain of screens with both characters. The new trick is wanding a stone that’s already skipping: it jumps the wall and keeps its momentum, so you can send a stone along a row you can never push in. (塞德莎 P19 17:25)
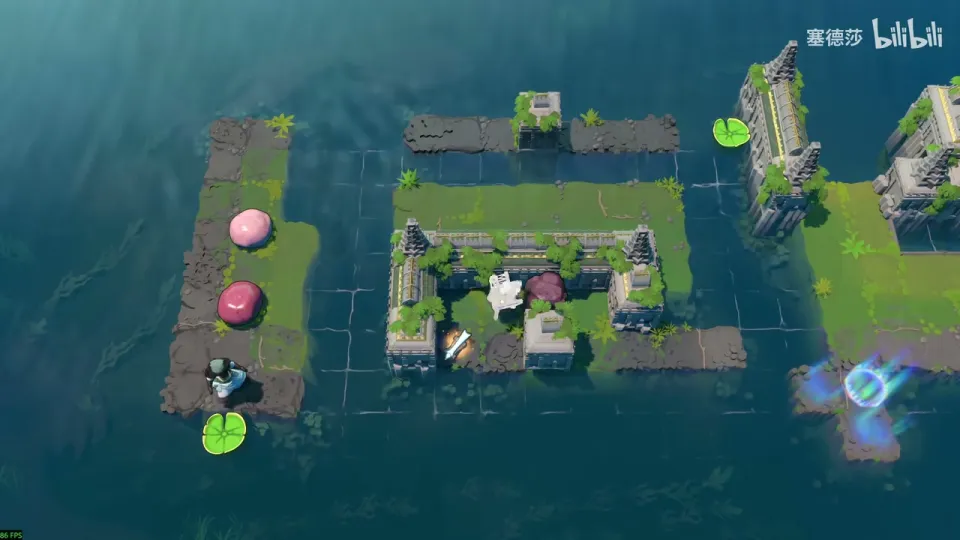
- The Explorer takes the wand. Push the stone right to get out. (P19 17:26)
- Two goals. The bottom-left pad is easy: kick a stone into it from the side. The top-right pad looks impossible because you can’t push anything in the row above it. Kick a stone right, and as it passes, wand it over the wall: it lands in that row still moving right and knocks the pad down. (P19 17:39)
- Pick the column from which the wanded stone, pushed right, lands just above the pad. Then bring both characters to the right. (P19 18:32)
- Light the activator at the top right so a purple beam appears below. Once you pick up the gem you can’t set it down, so push it onto the pad, then wand it onto the activator from below. That needs something in between: a skipping stone, which also starts the pad. Push down, then right at the right moment; the stones here are slow, so launch early. (P19 19:01)
- The exit at the bottom right can’t be walked to. Park the Explorer on its tile, start the skipping stone, rush over and wand at the right moment to put a character through the wall. (P19 20:07)
That clears everything you can reach in this area for now. 塞德莎 points out several spots (left, right, above and below) that stay closed until later; go back and activate the teleporter. (P19 20:47)
Puzzle 24
Key idea: the tutorial for a new trick. Where the water is one tile deep, a crystal skipping stone skimming across it stops dead as soon as it enters an orange beam, whatever its momentum: orange turns its one-tile drop into two, and two down is the floor under the water. Use that to pave a path, from left to right. (塞德莎 P41 16:44)
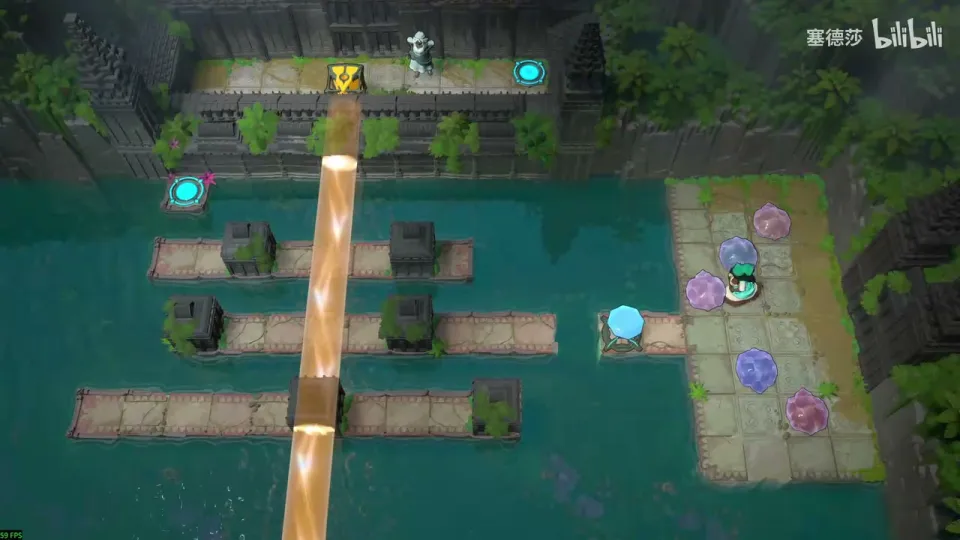
Getting there: this is a post-game room on the ground layer. After the first ending, go back up to Double Beam Falling in Antipode High and take its last drop point; this time jump up from this spot so you land on the right. The Stones Illuminated title card shows as you arrive. Press the yellow button to open the room. (P41 16:13, 16:27)
- Kick a stone across to see the rule: it stops the moment it meets the orange beam. (16:56)
- Pave from left to right. If you lay the right side first, the stones for the left can no longer get across. (17:38)
- Leave the leftmost column for last, because once the beam has been pushed past it, it can’t come back. So lay this column’s stones first, then one more right next to it, then a path into the middle row and one more here. (17:53)
- Finally lay the stone under the goal. Switch the beam off, step on the gem and go left to the goal. (18:25)
Overworld puzzle 7
Key idea: puzzle 24 lights the orange beam above. Use the same trick on the area map: stop the key on the blue button with the orange beam, then push the way open to the next room. (塞德莎 P41 18:36)
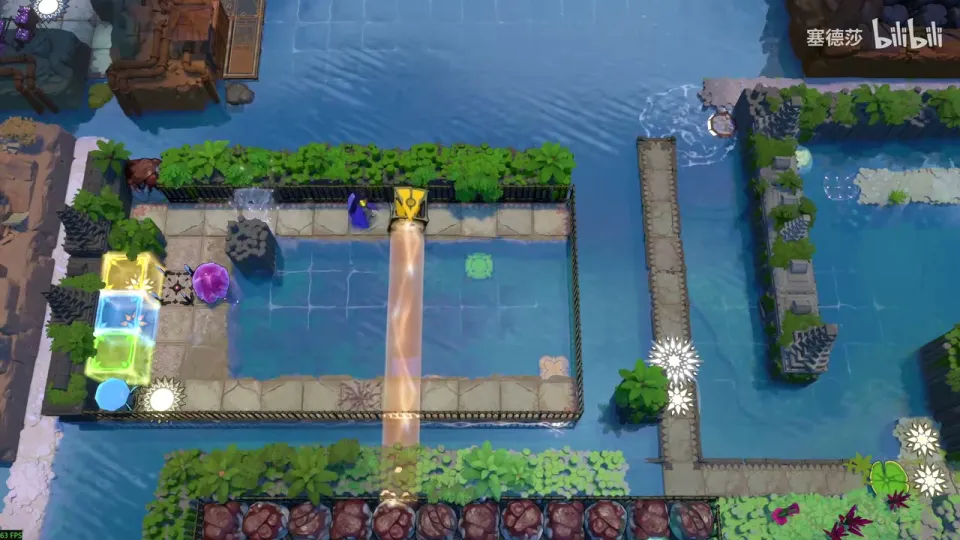
- Kick the key into the orange beam so it stops on the blue button, then push open the way in. (18:36)
Puzzle 25
Key idea: bring something down on the lily pad; the Sailor below then pushes it left into the hole and the room is solved. So you only need to put an object on the pad without starting it, then start the pad with another skipping stone. You don’t need the new orange trick here at all. (塞德莎 P41 18:55)
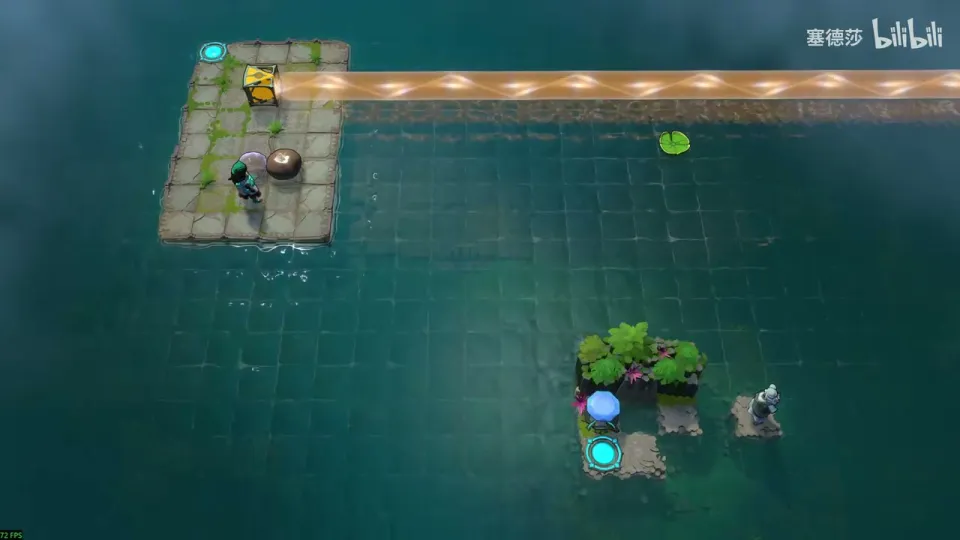
- Push the orange emitter a little left and count the parity: two, two, two… The crystal stone is on the right tile, so push the emitter one more tile left. (19:35)
- Push the stone right all the way onto the lily pad. (19:55)
- Start the pad. Once it moves, the crystal stone on it must not touch the orange beam, or it teleports off the pad. (20:10)
- When the pad has come down, push the stone two tiles left. (20:40)
塞德莎 adds that a crystal stone skimming right into a right-facing orange beam behaves oddly with timing; this room doesn’t need that.
Overworld puzzle 8
Key idea: press the green button with the same trick: send the beam onto the green button, push the stone through the middle and push it up one tile by hand. That opens the last big star room. (塞德莎 P41 20:45)
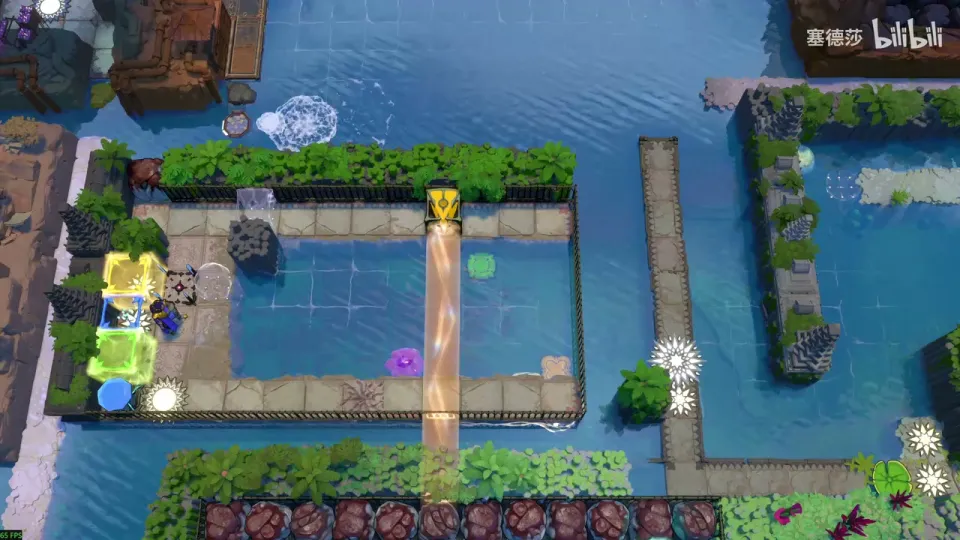
- Hit the green button with the beam, push the stone through the middle, then push it up one tile yourself. (20:45)
Puzzle 26
Key idea: a big star room that looks impossible. The stone has to skim down the middle column from below, but a long wall blocks the middle. Stop the skipping stone at the edge of the lower wall row, in line with the gem’s column, then use orange’s two-tile jump to cross the wall and push it down from the other side. (塞德莎 P41 21:15)
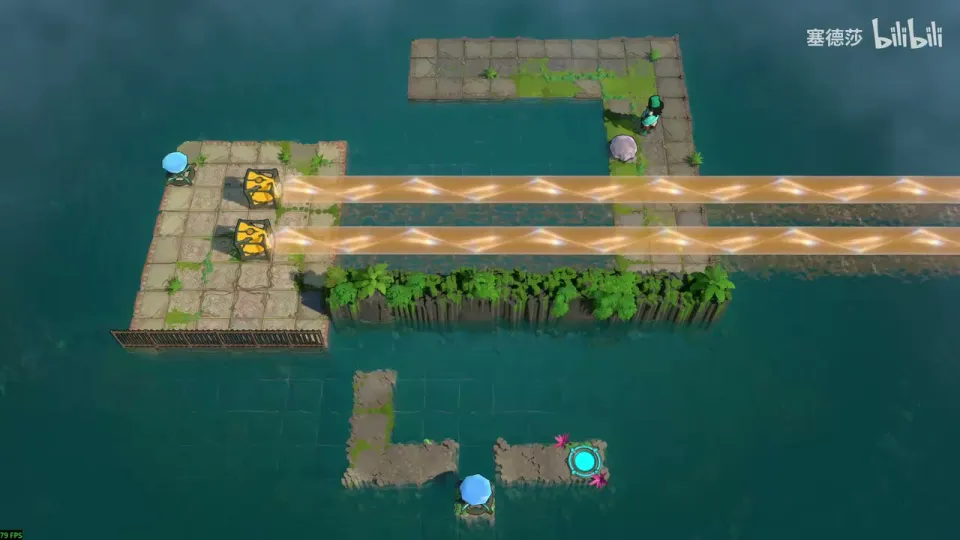
- Push the skipping stone to the left first. (21:45)
- Pull it out from the edge: from the edge its parity doesn’t line up with the gem’s column. Start from here, go round and push left, and the stone comes over. (21:55, 22:15)
- Line the stone up with the right column, and put one emitter here and one here. (22:25)
- Push the stone straight to its spot, cross the wall upward in orange, and push it down from here. (22:35)
- Fix your own parity and step ashore to finish. Push the shortcut open on the way out. (22:45, 22:56)
That finishes the post-game rooms here: 塞德莎 says all the south-west big star rooms are done, and at the end of part 41 he finds the whole ground layer complete. (P41 22:56)