Heroes and Artifacts is the crossover area where the Hearty Heroes of Hauling (North) pick up the wand from Vault of the Beamcasters (West). Each hero keeps its North ability, but whoever holds the wand can also teleport things one tile forward, and the Explorer joins the party in several rooms. This page solves all 12 puzzles and the 3 overworld puzzles between them.
Where it is: the north-west corner of the map. 塞德莎 opens the way from the north side of the West: push the cart robot up the left passage and onto its button, and the energy block shoves the boulder out of the way (a goblin blocks the spot, so the robot has to do it). (0:21) He then does the gold room and some side rooms to the left, and comes back to the middle map, Heroes and Artifacts, at 12:16. He labels its map tiles N2W2, N1W3, N2W3, N2W4 and N2W5.
How to use this page: numbers follow The Flying Chungus’s solution video; his “Overworld Puzzle 2.5” is our overworld puzzle 3. Each heading has the key idea and two links: the matching Chungus chapter (no commentary) and the moment in 塞德莎’s narrated walkthrough where the room starts. The numbered steps link to 塞德莎’s video, because the steps follow his explanation. He plays the rooms in the same order as Chungus. The gold room at the start of his video is on our Gold Rooms page, and the beam rooms he plays before entering this area are not part of it.
Rules that matter here
- The wand. Whoever holds it can teleport the thing directly in front of them one tile forward while staying put. A normal push moves you along with the object; the wand doesn’t. It also works across a wall or an obstacle: the object lands on the far side. With the wand the Thief, who can only pull, can finally push, and walking away from something you just teleported no longer drags it back.
- Facing never changes when you are moved. A hero teleported by the wand, or swapped by the Wizard, keeps facing the way it was facing. Several rooms are about building the right facing first, because the Explorer can’t always turn where you need it to.
- Wizard and wand together. The Wizard swaps places with whatever it faces, so normally it can’t aim the wand at anything. The exception: if two things stand in a row, the Wizard swaps with the first, and the second is now right in front of it, ready for the wand.
- The Wizard’s two-for-one swap. A hero that is carrying a gem, or standing on top of one, is swapped together with the gem. Puzzles 6 and 7 need this.
- Druid plants over water. In puzzle 9 the plants stand in water. As a plant they block you but the wand can jump an object over them; turn one into a block and it sinks and becomes floor, which the wand can’t jump over.
- Cleric and goblins. The Cleric can’t push, and in puzzle 10 the wand does the pushing. A goblin next to the water gives the Cleric a spot to stand on over the water, which 塞德莎 calls a floating step.
- Dragons and goblins. A dragon’s fire line blocks the tiles in front of it until you put a boulder in the way. Goblins block entrances and have to be pushed off or cleared first.
Puzzle 1
Key idea: the Thief with the wand can both pull and push, and the wand push works through walls. Use the gap by the energy gate to slip the boulder all the way to the left. (YouTube 0:00 · 塞德莎 12:16)
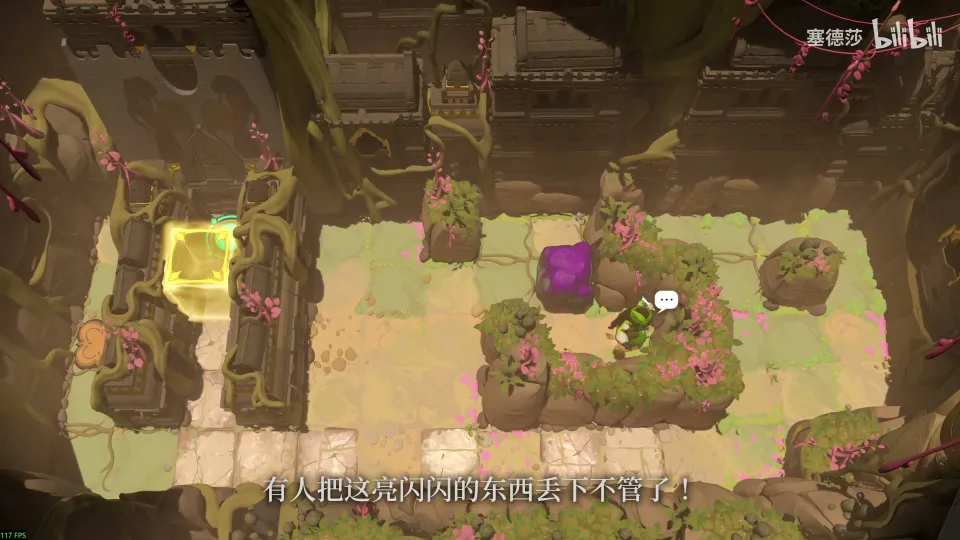
- This room hands you the wand. From now on the Thief can push as well as pull, and the push goes through walls. Start by pushing the boulder to the right. (12:36)
- Pull it back over and use the wand to push it one tile left. Because the wand push leaves you standing still, it is also the way to let go of something the Thief is holding. (12:55)
- Bring the boulder down, then wand it down once and left once. (13:17)
- Use the tile where the energy gate sits to send the boulder straight through to the far left. Pull it down, let the Thief’s pull drag it into place, and use the wand once more to finish. (13:28)
Puzzle 2
Key idea: walk the boulder right to block the dragons, one dragon at a time. A normal push can’t get past each dragon’s fire line, so use the wand to teleport the boulder past it instead. (YouTube 0:32 · 塞德莎 13:50)
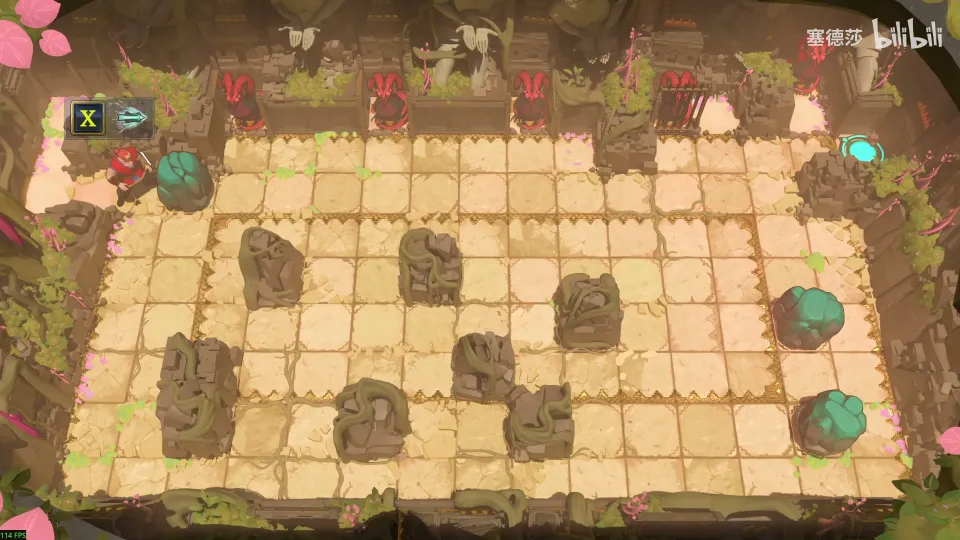
- The inner room is guarded by a goblin, so do this Warrior room first. The point of the room is the difference between a push (you walk with the boulder) and a wand push (you stay put). (13:50)
- The boulder has to go right step by step to block the dragons that close the way. If you only push it right to the first dragon, its fire covers the spot you’d need to push from. (14:22)
- Push it right as far as you can, loop round, push it down and back left. Then use the wand and the walls to teleport it straight to the column second from the right of the first dragon. (14:54)
- Every other dragon works the same way: push the boulder into place and teleport it right. For the third, teleport it down first and then back up. (15:18)
- One more dragon guards the exit, and a second boulder has to be teleported under it. Wand the boulder next to the top-right dragon one tile left, go back to the start and push from the top-left dragon. Leave two boulders lined up beforehand, so the push sends one under the exit dragon. (15:39)
- Pushing the dragon back puts a dragon in a new spot, so leave a boulder in that column first, or its fire cuts off your way back. (16:19)
Puzzle 3
Key idea: in this room nothing lets you shift a boulder sideways, so once you line the boulders up on one side they all stay on that side. Three of the four buttons sit on the left, so line up on the left. (YouTube 1:43 · 塞德莎 17:07)
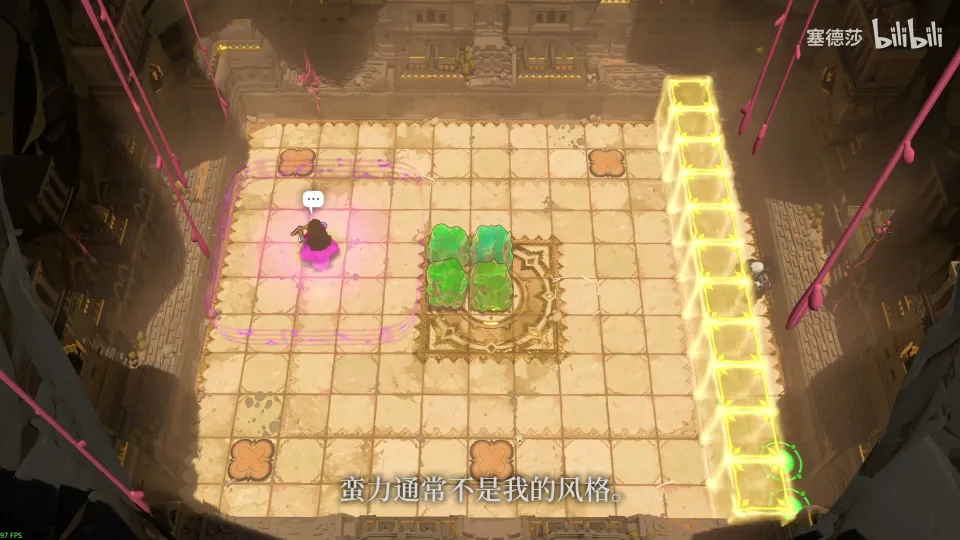
Getting there: a goblin blocks the entrance. Push a boulder in from the spot 塞德莎 shows, teleport it into the right-hand side, pull it up and push it left to knock the goblin off. (16:51)
- This is the Bard with the wand. Whichever side you line a boulder up on, the wand can only send it straight ahead to that side, so every later boulder has to use the same side. (17:16)
- Look at the four buttons: three are on the left, and the middle one can also be reached from right to left. So line up on the left. (18:03)
- Push the boulders up one at a time. 塞德莎 gets the order slightly wrong and fixes it, so watch from 18:32.
- Stand on the marked spot to bring in the Explorer. Use it to break the last boulder free, turn to face a new direction (up or right both work) and push that boulder up to finish. (18:54)
Overworld puzzle 1
Key idea: get a boulder and a goblin onto the two buttons on the left to open the pink energy gate. The boulder is easy; the goblin has to be moved the long way round. (YouTube 2:36 · 塞德莎 19:23)
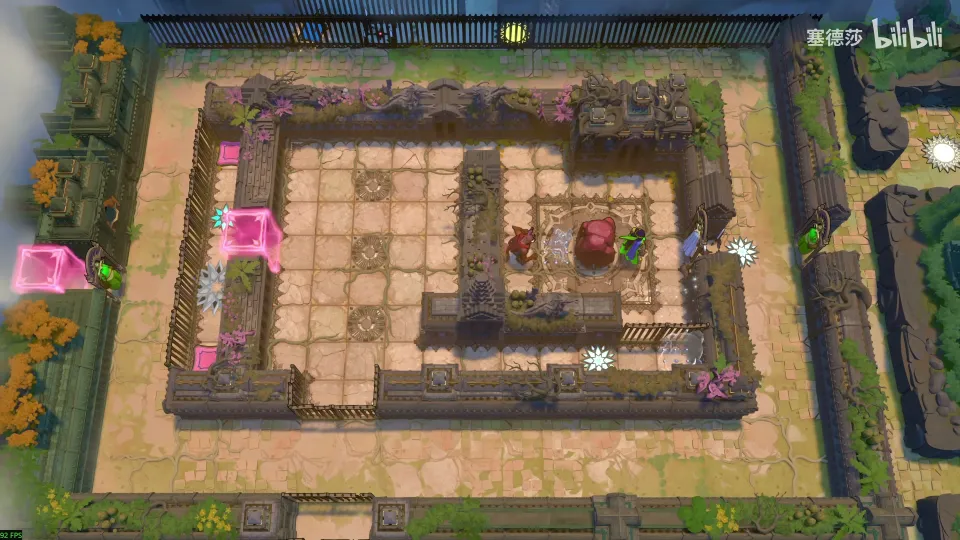
- Don’t move the goblin straight left from where it starts: you’d run out of things to push it further left with. 塞德莎 resets and starts over. (19:44)
- Get the boulder out and push it left to the spot he shows. (20:04)
- Use the corridor that is five tiles wide: from the right, wand the boulder into the goblin to shove it left. (20:24)
- Take the boulder the long way round to the bottom, where the walls let you come back up, and push the goblin up. (20:36)
- Put the goblin on one button (top or bottom, either works), bring the boulder over and park it on the bottom-left button. The gate opens. (20:57)
Puzzle 4
Key idea: the Explorer holds the wand but can’t turn left. The Wizard’s swap doesn’t change the other hero’s facing, so turn the Explorer first and let the Wizard swap it into place. (YouTube 3:42 · 塞德莎 21:05)
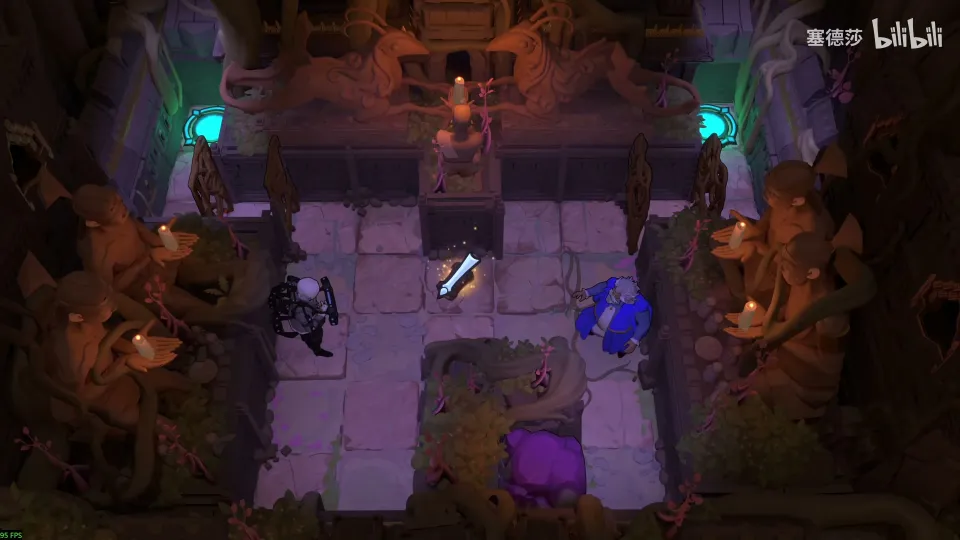
- Give the wand to the Explorer; on the Wizard it doesn’t help. The Wizard can’t swap the boulder out on its own, so the wand has to do it. (21:16)
- Turn the Explorer left on the tile 塞德莎 shows, then have the Wizard swap with it. The Explorer arrives still facing left and wands the boulder out to the left. (21:48)
- Get the boulder into one of the two tunnels (left or right): swap in a hero facing that way and wand it twice to the far end. (22:17)
- Now both heroes have to get in. Swap up a hero that faces right, wand the Wizard in twice, then swap once more. (22:39)
Puzzle 5
Key idea: the Wizard holds the wand, but it swaps with anything it faces. Put a goblin right next to the boulder: swap with the goblin, and the boulder behind it is now in front of you for the wand. (YouTube 4:33 · 塞德莎 23:03)
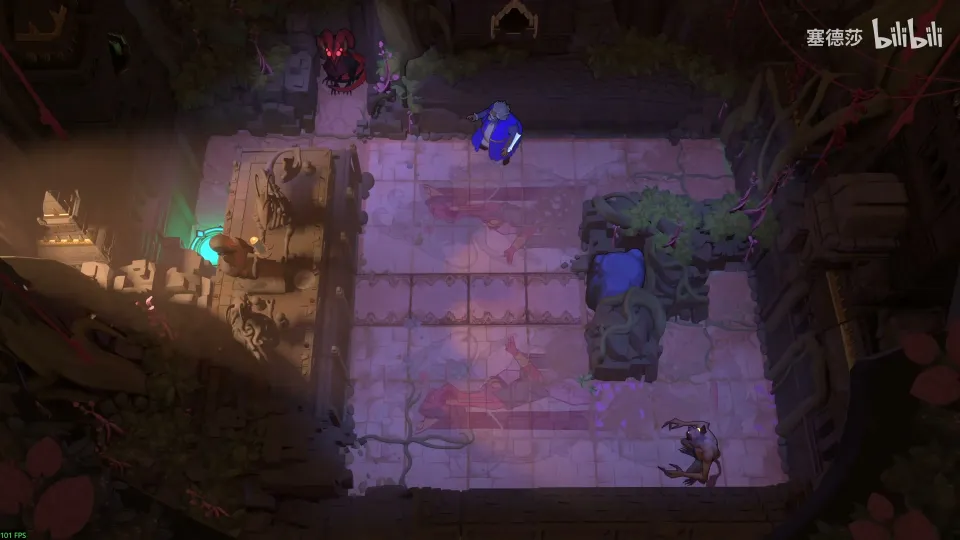
- You need the boulder out to get past the top-left dragon’s line of sight, and only the wand can get it out. (23:31)
- Move the goblin to the tile right next to the boulder. That tile is the key. (23:53)
- Swap with the goblin from left to right. You now face right with the boulder in front of you: wand it to the right. (24:02)
- Repeat to move it up: bring the goblin over, swap, wand. (24:22)
- To go left, put the goblin on the boulder’s right, swap from right to left and wand, twice. (24:44)
Puzzle 6
Key idea: two things have to end up on the bottom-right island, but a Wizard swap normally moves only one. Once the Explorer picks up the gem, swapping with it moves the Explorer and the gem together. (YouTube 5:20 · 塞德莎 25:00)
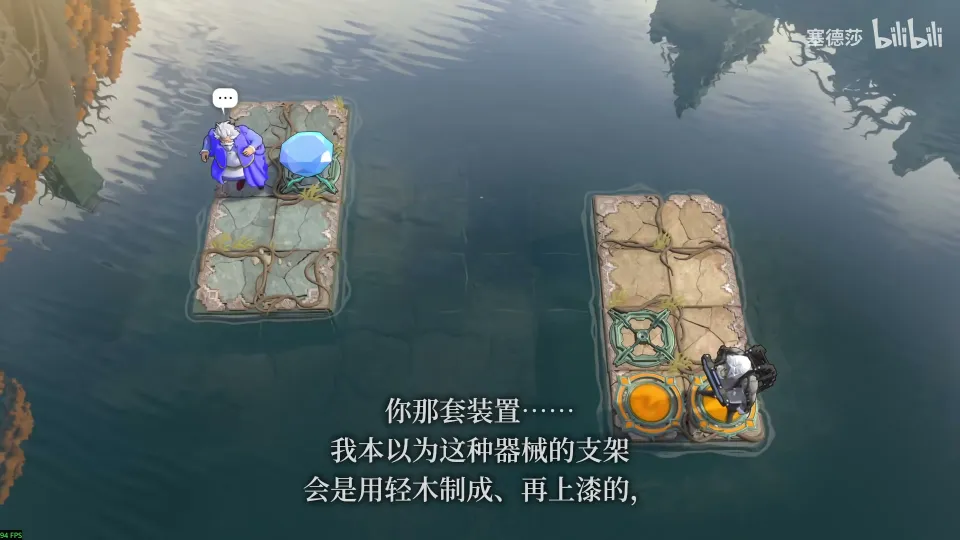
- Bring the Explorer over and let it pick up the gem. (25:05)
- The bottom-right island has a gem socket, so a swap with the gem-carrying Explorer counts as one-for-two. Swap the Wizard across, put the gem on the upper spot, and swap across again to finish. (25:35)
Puzzle 7
Key idea: the same room without the socket. If the Explorer picks up the gem, you can never take it out again, so don’t. Have the Explorer stand on the gem instead: the Wizard swaps them both at once. (YouTube 5:55 · 塞德莎 25:57)
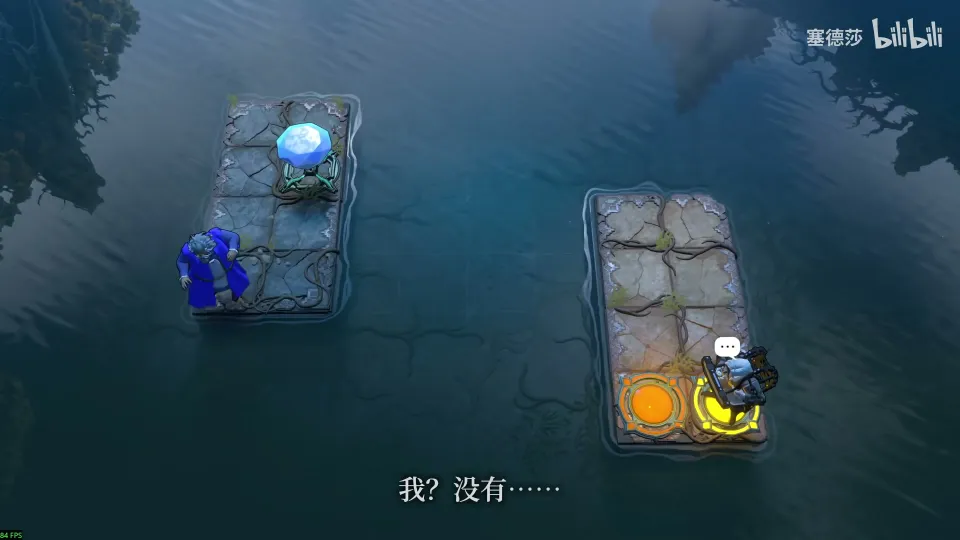
- The gem socket on the bottom-right island is gone. Picking the gem up leaves one thing stuck top-left and one bottom-right forever, so leave it on the floor. (25:57)
- Walk the Explorer onto the gem’s tile; the two share it. A Wizard swap now moves the Explorer and the gem together, and that is the only way through. (26:31)
Puzzle 8
Key idea: two Explorers with wands, and neither can turn where you need it. A teleport keeps facing, so build each facing somewhere you can turn, then teleport the Explorer into place. For the last part, work backwards from the final push. (YouTube 6:21 · 塞德莎 27:22)
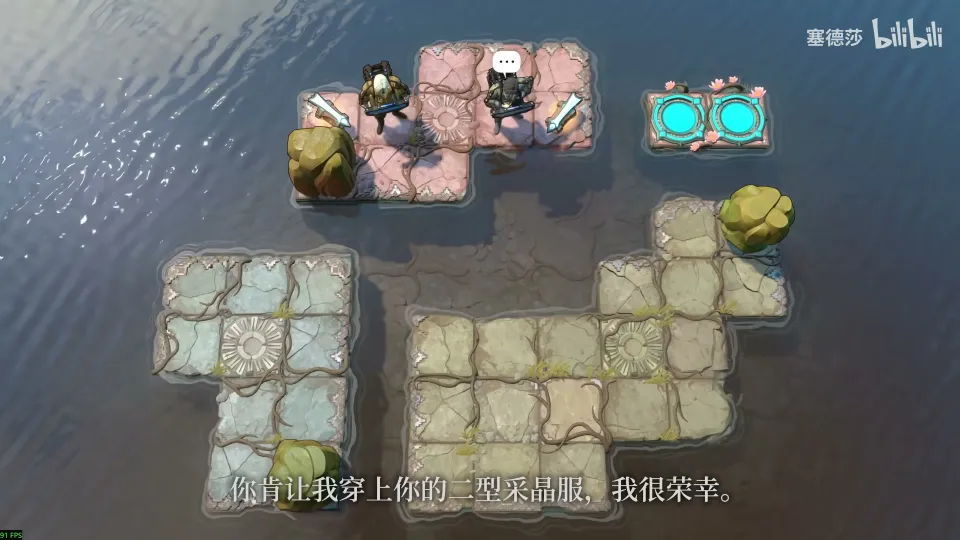
- The first boulder has to go down, but you can’t turn down where it stands. Turn down on the tile before, then get teleported over: you arrive still facing down. (27:33)
- Next you need an Explorer facing right teleported down. Make one face down at the top first, then turn it right there, and teleport it down the column. (27:50)
- The last part ends with a push up. Working backwards: you need one Explorer facing right and one facing up; that comes from an earlier pair facing up and right, which you can set up directly. Then run the chain forwards: face up, face right, teleport, and repeat. (28:24)
Puzzle 9
Key idea: the plants stand in water. As plants they are obstacles the wand can jump over; turned into blocks they sink and become floor. Decide plant by plant when to convert, so the boulder stops on the right tile. (YouTube 7:03 · 塞德莎 29:30)
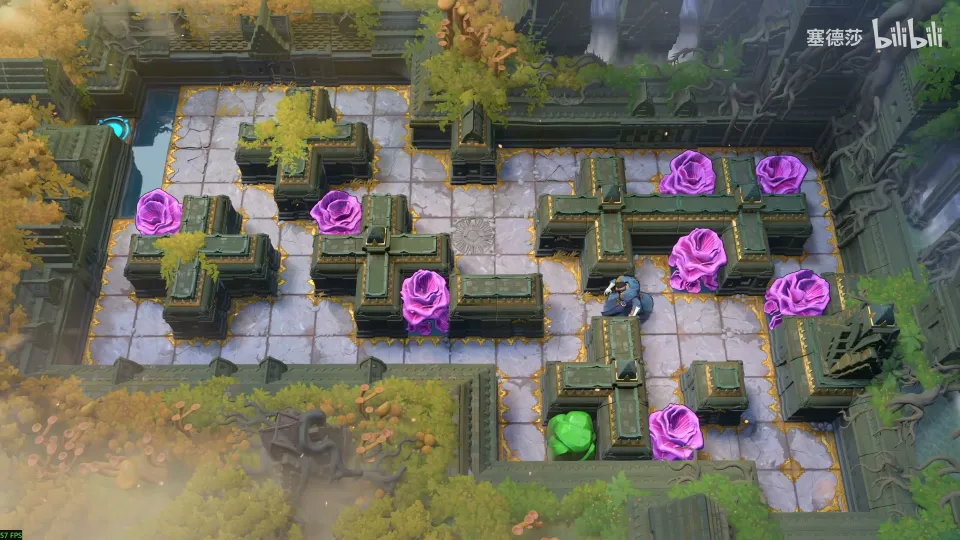
Getting there: teleport a boulder up as a step to climb to this room. (29:11)
- Don’t convert the first plant yet: teleport across it first, then convert it and get the boulder out by pushing it up. Leave the next plant alone, or the boulder gets stuck in the corner. (30:12)
- The hard part is getting the top-right boulder out. The only route is along one row, using a plant to stop the boulder from above. Convert the plants 塞德莎 points at (three of them) and teleport the boulder out. (30:40)
- Convert the plant halfway along so the boulder stops on the goblin’s tile; if you don’t, it ends up next to a corner and gets stuck whichever way you push. (31:17)
- Push it up into the corner and then left, convert the next plant and keep going left. (32:16)
- At the end, don’t go straight left: go down, then left, then up. The boulder ends up in front of the exit. (32:36)
Overworld puzzle 2
Key idea: reach the sun room at the top right by dropping two boulders into the water as stepping stones. (YouTube 8:07 · 塞德莎 32:50)
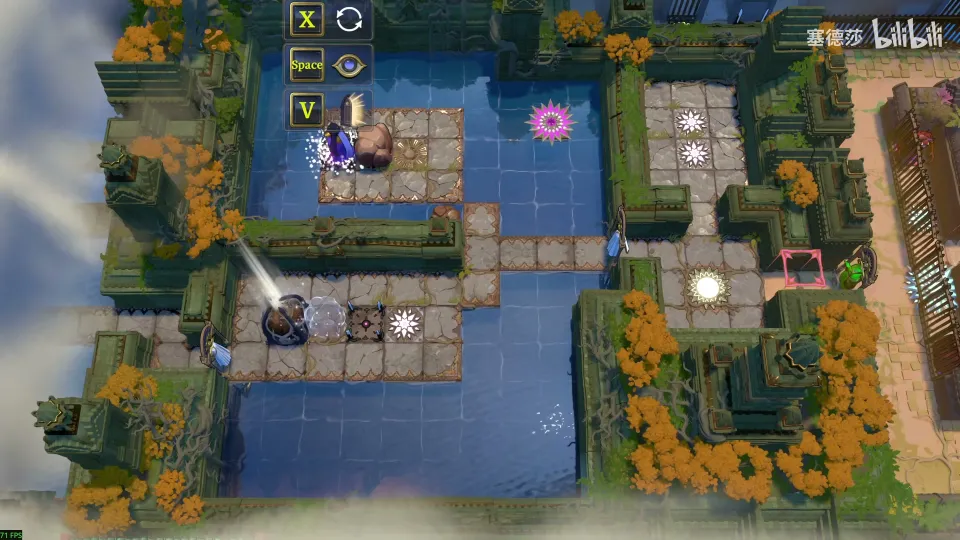
- First lay a path back: you are about to reset the lower part, and without that boulder you couldn’t climb back up. (33:00)
- Reset and move a boulder to the spot he shows. It is the foothold for teleporting the lower boulder up without it falling into the water. (33:10)
- Carry the extra boulder up, reset again, and teleport both boulders into the water as stepping stones to reach the room. (33:29)
Puzzle 10
Key idea: a long chain of small screens with the Cleric, goblins and the wand. Here the wand is simply the Cleric’s push. On each screen, work out where a goblin has to stand so the Cleric can step past it over the water. (YouTube 8:43 · 塞德莎 33:35)
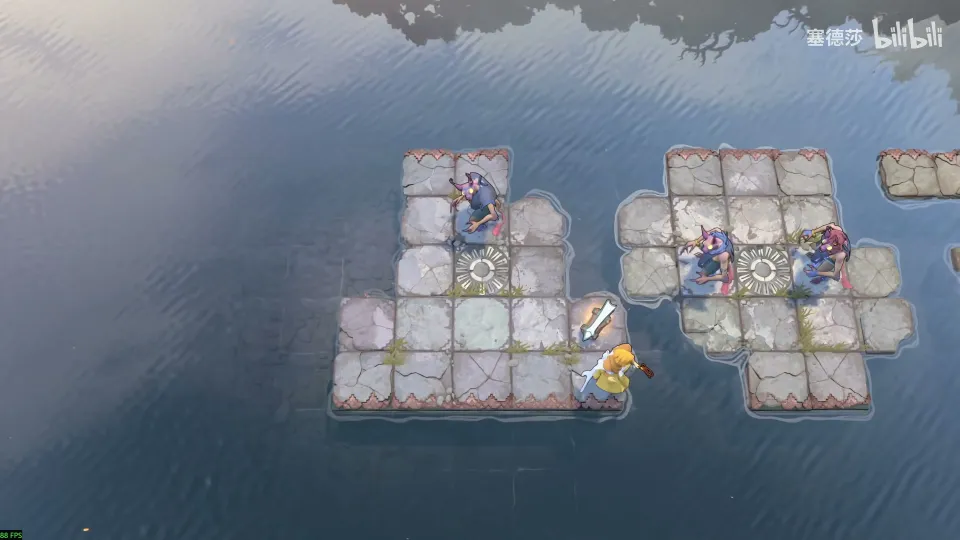
- Screen 1. Put the goblin on the tile 塞德莎 shows and step across. (34:01)
- Screen 2. Two goblins: one on each marked tile. (34:08)
- Screen 3. The goblin needs to reach the tile down and to the right of it, but pushing it down from where you are drops you in the water. Push it left, then up, go round the side and push it down from above. (34:17)
- Screen 4. Only the goblin on your right matters: push it to the top-right corner tile. Clear the others out of the way. (34:46)
- Screen 5. You can only knock the goblin down. One goblin has to reach the marked tile: push it left, put another goblin where you can stand above it, and push it out from there. (35:09)
- Screen 6. The upper goblin has to go down and then right, but the lower goblin is in the way. Move the lower goblin to the bottom-right corner tile to make a floating step, go round, and push the upper goblin up past it. (35:34)
- Screen 7. Two goblins go onto the two waterside tiles in these columns. Push the upper goblin left first so you can get down, then push each goblin two tiles. (36:24)
- Last screen. The top goblin is easy to place; the bottom-right one is stuck in a corner. Use the top goblin as a floating step (塞德莎 picks the middle of three possible tiles), push the stuck goblin to its target, then use the goblin already on the left as a step to bring the last one over. (36:54)
Overworld puzzle 3
Key idea: a boulder blocks the road west. You don’t need a detour: teleport three boulders along the wall into the water on the left to make a path. (YouTube 10:55 · 塞德莎 37:59)
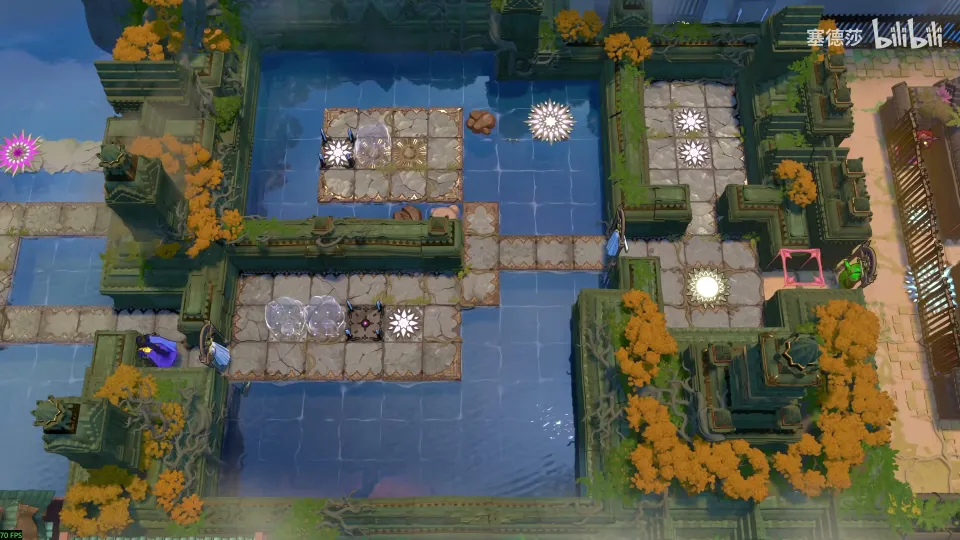
- Reset the boulder on this side and move one boulder to the spot he shows. (38:38)
- 塞德莎 corrects his order here: first move the near boulder into place, then teleport another one across, then teleport the upper boulder down and reset. That gives you three boulders below. (38:58)
- Use the wall along this row to teleport the boulders left into the water: two first, then the third. The path to the left is open. (39:18)
Puzzle 11
Key idea: a pushing order puzzle for the Warrior. The two boulders blocking the light at the top left have to be replaced by crystals, so what matters is which object you push in at each step. (YouTube 11:21 · 塞德莎 39:42)
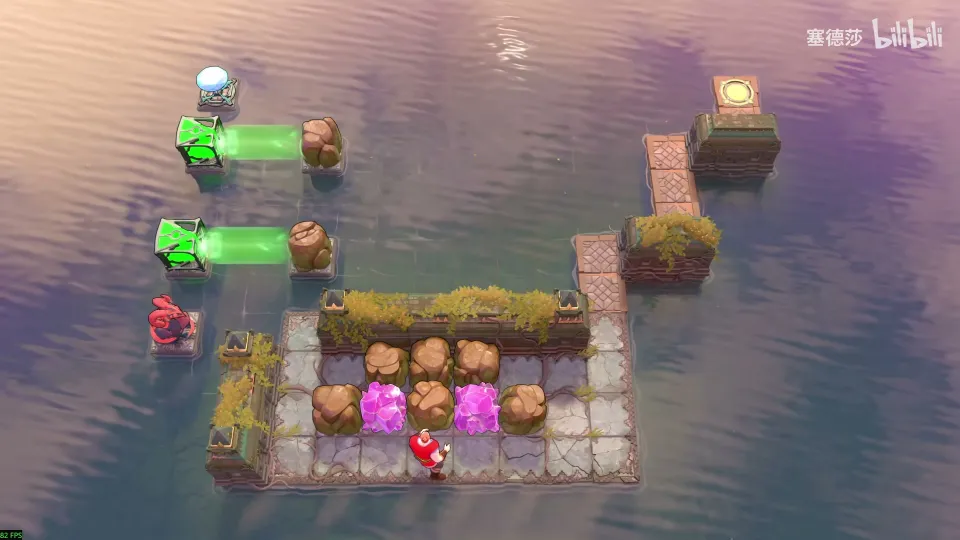
- The goal is crystals instead of boulders in front of the beams at the top left. (39:45)
- 塞德莎’s order: boulder, boulder, crystal, boulder, boulder, crystal, then the last two boulders. Watch the clip for which piece he means by each; he doesn’t explain further. (40:08)
Puzzle 12
Key idea: one big room in several parts. The Thief can’t push, so the little cart robot does the pushing: pull boulders next to the robot and let it shove them into the water to build the path. (YouTube 11:54 · 塞德莎 40:40)
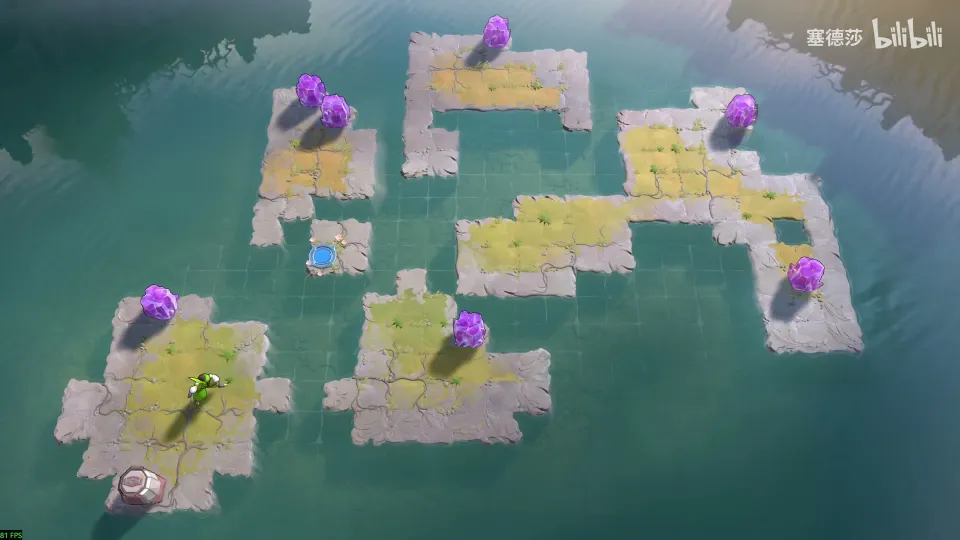
- First gap. Easy: line the boulder up and the robot pushes it into the water. (41:01)
- Second gap. Pull the robot to the spot he shows, pull the boulder up the same way, and let the robot push it right. (41:08)
- Extending the robot’s path. The robot can’t go further up, but it has to reach the top right. Pull a boulder into this row, left and down, so the robot pushes it into the water and gains one more tile. Then take the boulder from the bottom right out, pushing it aside first so it doesn’t fly into the water. (41:28)
- Top middle gap. With that boulder and the robot, fill the gap at the top middle: pull the robot up, wait for it to reach the right, then pull the boulder up. (42:10)
- Bottom path. The boulder must go to the far edge, but you can’t pull it there, so let the robot push it. Pull the robot to the bottom and the boulder next to it. (42:35)
- Last gap. The last boulder can only come down the leftmost column, and the robot needs a boulder on the tile left of the Thief to push from. Get both boulders into the left column, push one into the water, bring the robot up, then pull it down again and pull the last boulder down while the robot is on the left. (43:13)
That clears Heroes and Artifacts. 塞德莎 notes this puts him about a third of the way through the game’s progress bar. (44:24)