Heroes and Light, Advanced is the harder follow-up to Heroes and Light, the crossover area where the Hearty Heroes of Hauling (North) meet the beams of Vault of the Beamcasters (West). Almost every room here is about one hero, the Wizard, and how his swap changes inside purple, orange and green light. This page solves all 13 puzzles.
Where it is: the far north-west corner of the map. At the end of the basic area, push away the stone that blocks the purple beam, clear the other stone at the bottom, and the purple beam runs all the way north so you can ride it up (39:18). 塞德莎 labels the map tiles N4W3, N5W3, N4W2, N5W1, N4W1 and N5W2.
How to use this page: on 2026-10-14 there was no English solution video for this area with chapters (The Flying Chungus says his part 3 is coming soon), so puzzles are numbered in the order 塞德莎 plays them in part 17 of his narrated walkthrough. The area starts at 39:34 of that video, where its name appears on screen; everything before that is the basic Heroes and Light area. Between puzzles 5 and 6 he plays two rooms that belong to the basic area, so they are on that page instead. All links go to the moment in his video. If you prefer English, Mikan Hako has a 90-minute blind playthrough of the area without chapters or commentary on the solutions.
Rules that matter here
- Beam first, then swap. The Wizard still swaps places with whatever he is looking at, but when he stands in a beam, the beam’s power wins. In purple he can’t swap with the purple emitter itself; in orange he jumps instead of swapping.
- Purple end swap. Walking along a purple beam carries you to its far end. If something stands on that last tile, the Wizard swaps with it instead, at any distance. That is how you pull a crystal or a goblin from one end of the room to the other. Moving along the beam never swaps you with a stone that blocks the beam.
- Orange parity sight. In orange light the Wizard only sees every second tile in each direction, the tiles of his own chessboard colour. Things on the other colour don’t exist for him, not even walls. A wall on his own colour still blocks his view. So to swap with something far away, both of you must be on the same colour and every same-colour tile in between must be empty.
- Changing colour. Most orange rooms are solved by changing someone’s colour: swap with the emitter, take a normal step, or let an energy block push a stone one tile.
- Green sight. Standing fully in green light, the Wizard sees through walls, so he can swap with things on the other side of a wall. Energy doors still block his view.
- Trap rows. In the green rooms, some rows let you swap an emitter across but give you no way back in to move it again. 塞德莎 calls them trap routes; look for a detour.
Puzzle 1
Key idea: get the crystal from the left half onto the green button in the right half. The middle wall has a gap, and a few rides along the purple beam get the crystal through it. (塞德莎 P17 39:44)
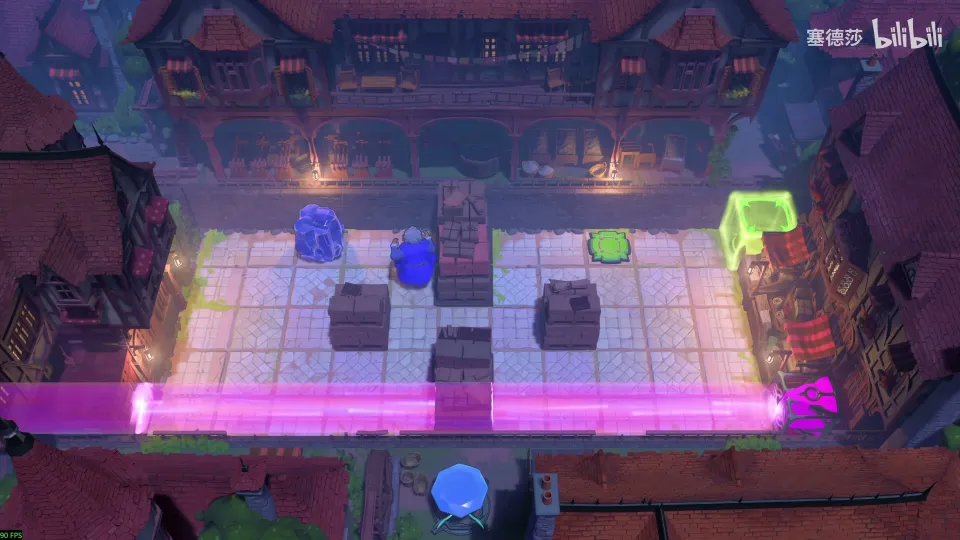
- First the rule: the purple beam acts before the Wizard’s swap, so while you stand in it you can’t swap with the purple emitter. (39:47)
- Ride the beam a few times to carry the crystal through the gap in the middle wall. (40:05)
- Put it on the green button and walk out through the gate. The exact swaps are easiest to follow in the clip from 40:09. (40:09)
Puzzle 2
Key idea: this room teaches the end swap. The crystal sits on the last tile of the purple beam, the middle path can’t reach it, but riding the beam toward that end swaps you with it. (塞德莎 P17 40:19)
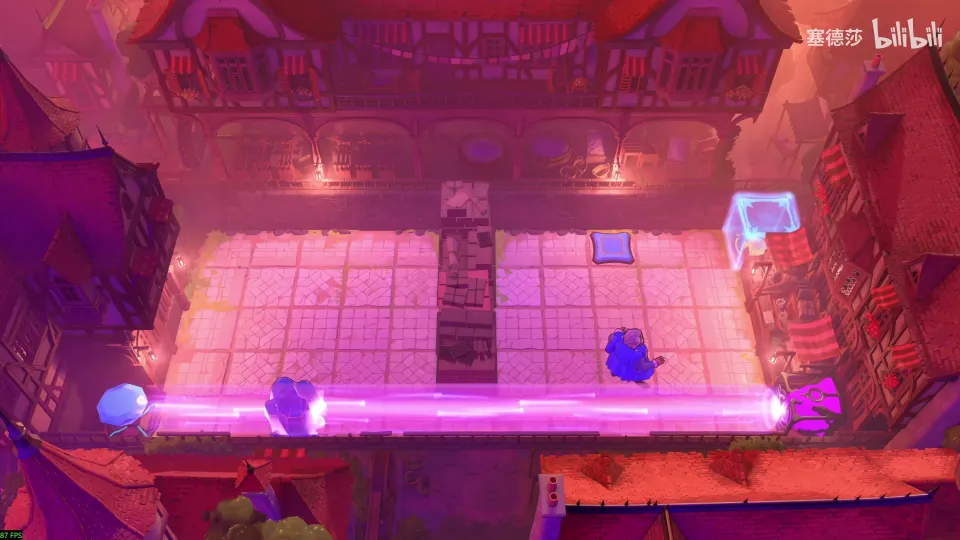
- The lower path is blocked and the middle corridor only lets you walk back and forth, so you can’t swap with the crystal on the left in the usual way. (40:26)
- Stand in the beam on the right and walk left. The Wizard tries to move to the end of the beam, finds the crystal there and swaps with it. (40:50)
- Use the same move to bring the crystal over to the right, then onto the button. (41:06)
Puzzle 3
Key idea: a stone that blocks the beam can’t be pulled in with an end swap. Bring it round the top of the room by hand, park it so it blocks the beam, then walk the other way to send it onto the button. (塞德莎 P17 41:13)
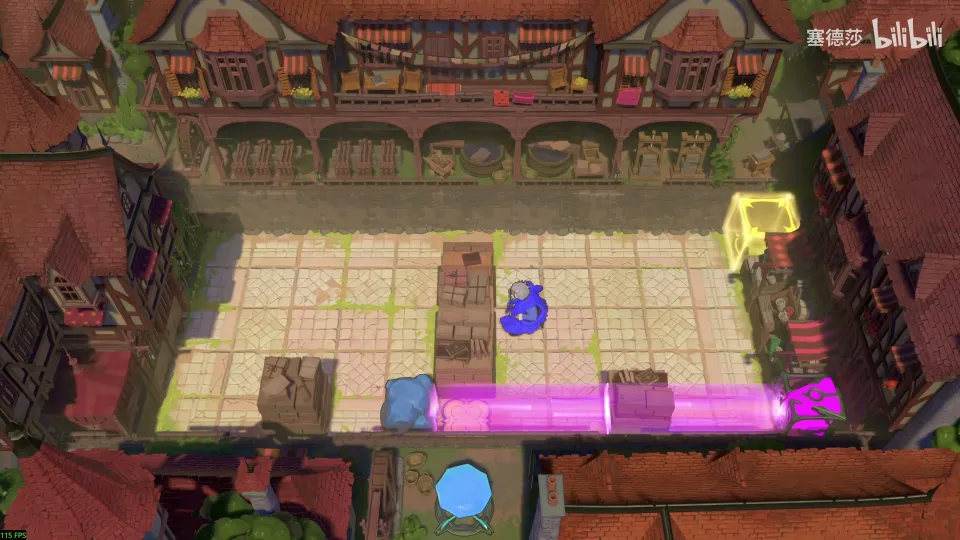
- Riding the beam toward its end never swaps you with the thing that blocks the beam, so the direct route doesn’t work. (41:19)
- Take a long loop over the top of the room to bring the stone across. (41:30)
- Park it on the beam, then walk against the beam’s direction to deliver it onto the button. (41:37)
Puzzle 4
Key idea: two purple beams, one stone that blocks the beam and one crystal that the beam passes through. Park the stone just left of the button, so the button becomes the end of a beam, and then end-swap the crystal onto it. (塞德莎 P17 41:46)
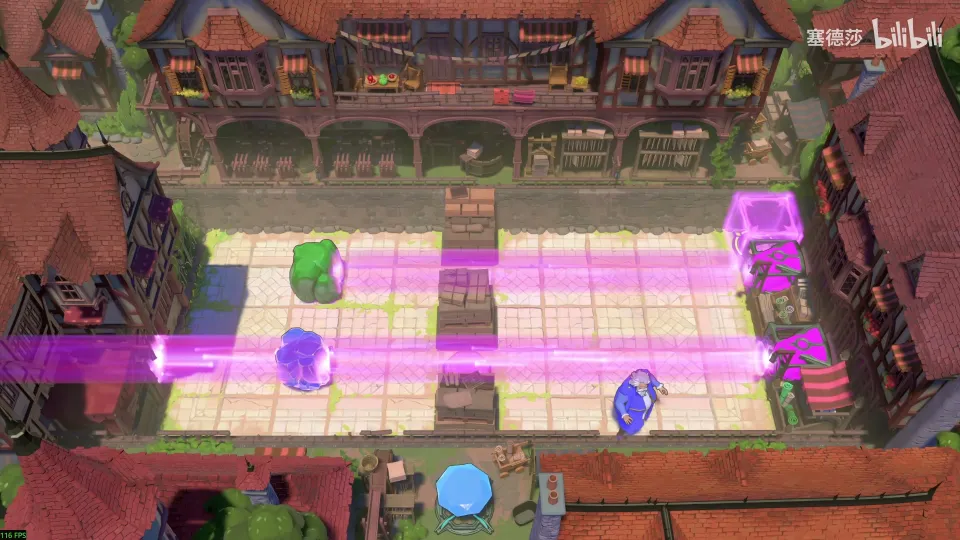
- The plan: the upper stone blocks the beam on the left of the button, and the crystal is swapped onto the button from the far end. (42:10)
- Send the crystal out of the way first, then send it to the end of a beam. (42:27)
- From the right end, send the crystal over, then send the stone to the lower end you picked. (42:47)
- Watch out: before you move the stone, use the lower end to move the crystal away, or you can’t get back. 塞德莎 forgets this and redoes it. (43:10)
- Swap the crystal down, move the stone from above, go back and put the crystal in place. (43:26)
- End-teleport to the left end, then end-swap the crystal on the right onto the button. (43:47)
Puzzle 5
Key idea: 塞德莎 calls this a big-star room. You start boxed in next to a goblin and can only get out by swapping with it. The only way to the goal is to carry the purple emitter to the top-left tile and ride its beam from the right end onto the button. (塞德莎 P17 44:14)
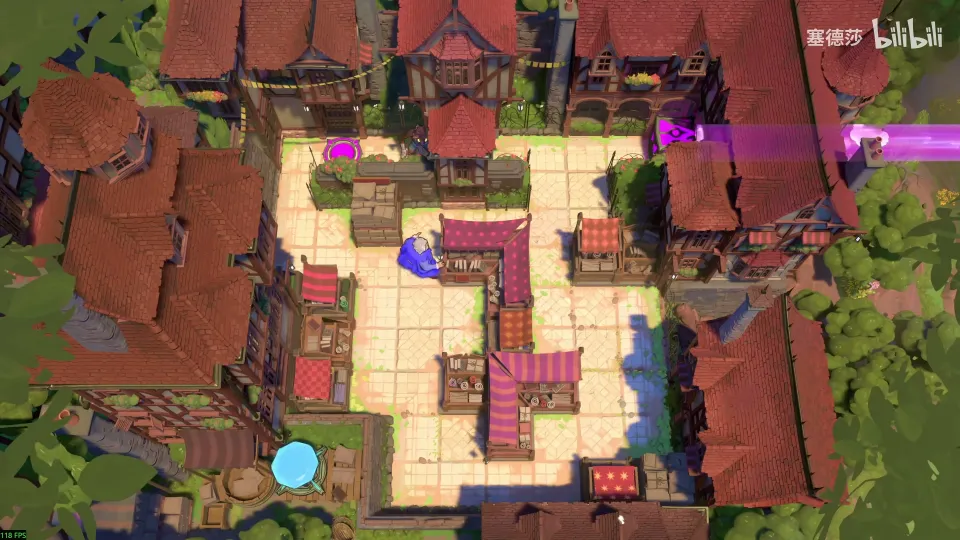
Getting there: puzzle 4 opens a cage on the overworld. Put the stone from it on the button and head up to this room. (44:01)
- Move the emitter to the first spot and end-teleport out of your starting corner. (44:37)
- Send the emitter down first and then up. If you send it straight to that spot, you end up above it and can’t get out. (44:45)
- Shuffle it on through the middle of the room, end-teleporting to the middle when you can. (44:58)
- Step into the beam and end-teleport: the emitter is now on the top-left tile. Ride the beam to the button. The tiles are easiest to follow in the clip. (45:11)
After this room, the stone on the overworld is there to block a beam, and the cage next to it opens once you clear the room below. (45:30)
Basic-area rooms: next 塞德莎 plays two rooms that belong to the basic area: the four goblins turned into crystals by the Druid (45:47) and the two goblins moved onto buttons (50:28). They are puzzles 49 and 48 on the Heroes and Light page. In between he notes that the path to the right leads back to the North and activates a teleport point. (50:09)
Puzzle 6
Key idea: the Wizard in orange light. Jumping beats swapping, and he only sees tiles of his own parity. Get the crystal and the button onto the same parity, then swap it over from a distance. (塞德莎 P17 52:01)
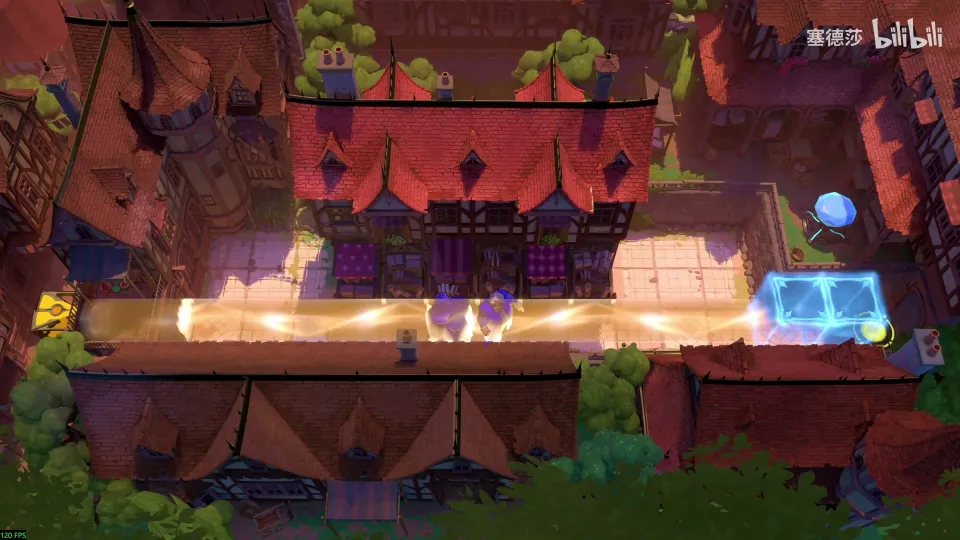
- Test it: walking left in the orange light, the Wizard jumps two tiles rather than swapping with the stone. (52:08)
- There is a hard-to-see button right under your starting tile. The crystal has to go on it, which means swapping with the crystal. (52:24)
- Step one tile to change your parity. Now walking right you see the crystal and swap with it straight away, however far it is. (52:41)
- 塞德莎 explains the orange sight rule with a drawing here; worth watching if the rule above isn’t clear. (53:08)
- The crystal and the button are on different parities, so first shift the crystal by one tile, then jump across and swap it onto the button. (54:16)
Puzzle 7
Key idea: a maze where walls on your parity block your sight and walls on the other parity don’t. Work out each swap by checking what lies on your own colour in that direction, and change the parity of yourself or of a stone whenever the wrong thing is in the way. (塞德莎 P17 54:45)
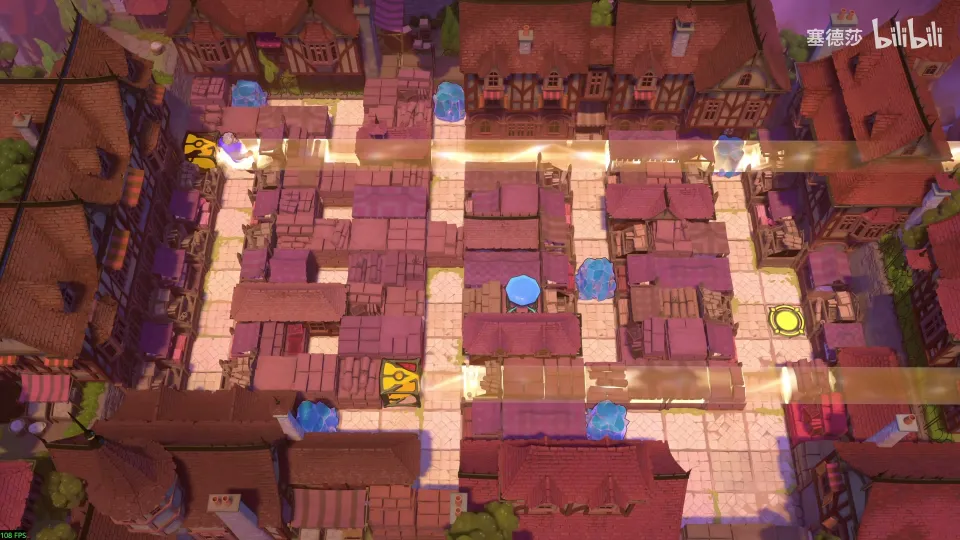
- In the orange light you can’t swap to the right because walls on your parity block it. Swap upward instead. (55:00)
- From there the right is walled off again, but the stone far below is on your parity with only empty tiles of your colour between you, so swap down to it. (55:13)
- Upward there is nothing on your parity, so you simply jump. (55:30)
- Swap with the emitter itself to change your parity. Now you see the stone above and can go up. (55:46)
- Go right. Moving down from here would swap you with the near stone, but you want the one further down, so change the near stone’s parity first. (55:57)
- Last, get the stone out onto the marked tile (its parity changes), jump down one, swap the stone to the next tile, jump to the tile above the emitter and walk to the goal. (56:18)
Puzzle 8
Key idea: three stones and an orange emitter must cover the four buttons. With four plain stones this is impossible: stepping onto the last button always swaps a stone off another one. The orange emitter breaks the deadlock, because in its light you can jump onto the last button without swapping. (塞德莎 P17 57:10)
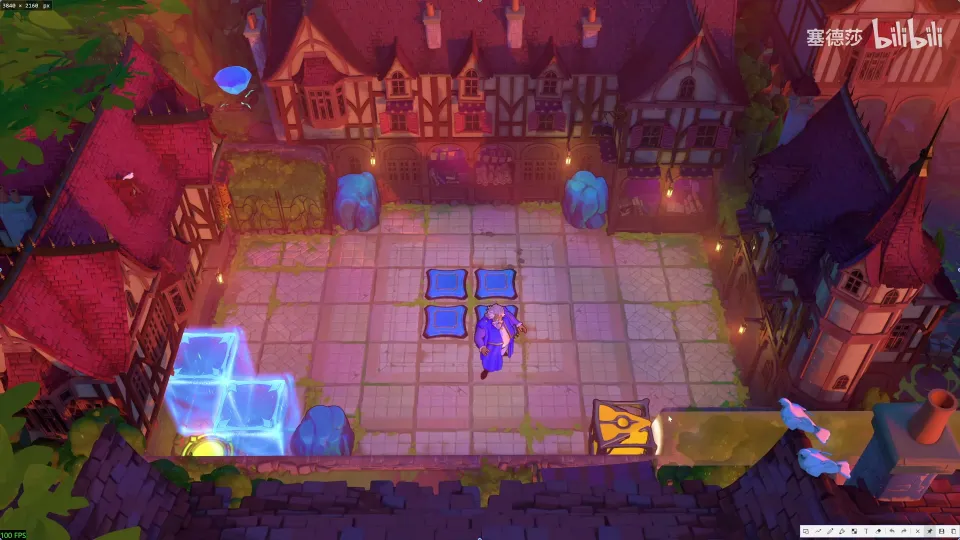
Getting there: on the overworld, activate the orange beam and swap to the one spot you can use; the others are out of reach or leave you stuck. (56:47)
- Why plain stones fail: with three stones on buttons, you can only reach the last button by walking onto it from a neighbouring tile, and that walk swaps you with one of the stones. (57:29)
- The fix: place the orange emitter so its light runs across the buttons to the right. Then you can jump into the last button tile and swap the final stone in from the same row or column. (58:25)
- Take the orange emitter out first. Going right and then up would swap you with a stone, so go left, then up. (59:09)
- Bring the emitter up, send one stone across and then to the end you picked. (59:17)
- Bring the other two stones over. (59:49)
- Walk into the middle of the orange light, jump left and then swap right. (60:03)
Puzzle 9
Key idea: three stages, each with a dragon in your way. Swapping straight with a dragon gets you burned, so swap in orange light across a gap, with a stone (or an emitter) left between you so that the dragon’s fire hits it instead of you. (塞德莎 P17 60:12)
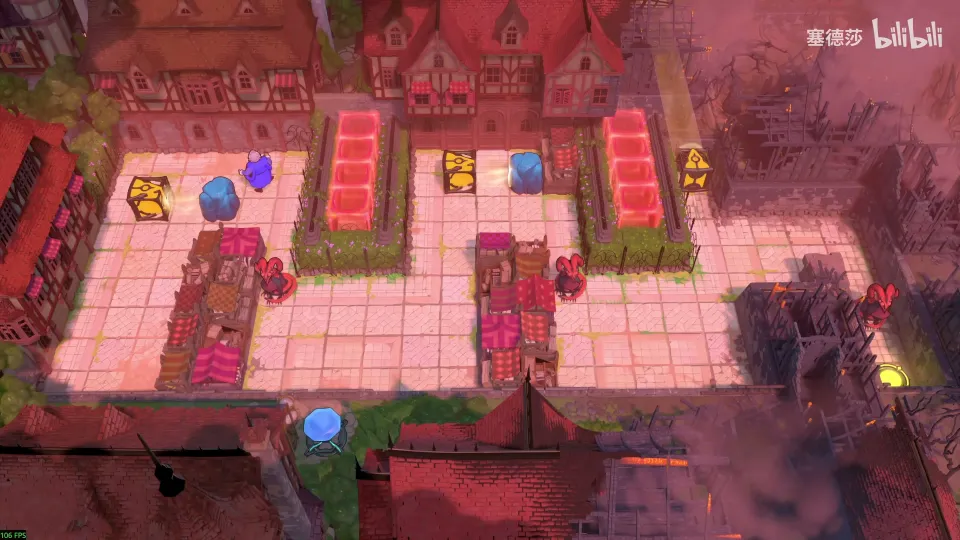
- Stage 1. Put the stone on a tile of the other parity from the dragon, next to it. (60:52)
- Bring the orange light up. Now you see the dragon (same parity) and not the stone, so you swap with the dragon. It lands behind the stone, which blocks its fire. (61:00)
- Stage 2. Same trick, but you can’t put the stone directly above the dragon. Send the stone to the marked tile and the orange light to its spot. (61:37)
- Jump in (the dragon and the stone are both on the other parity, so nothing stops you), swap the stone over, then move the orange light down one tile to match the dragon’s parity and swap across. (61:48)
- Stage 3. No stone left. Use the upward-facing emitter itself as the blocker on the tile directly above the dragon. (62:39)
- When you swap the emitter out, stand on a tile of the other parity from it, or the next step down swaps you back with it. (63:10)
- Put the emitter in place, jump to the tile where both it and the dragon are on the other parity, swap up and then down. (63:23)
Puzzle 10
Key idea: the Wizard and the green beam. The green emitter has to end up in the bottom-right space, but two rows are traps: once you swap the emitter across them you can’t get back in. Use green’s wall sight and a wall that blocks your view to take the long way round. (塞德莎 P17 64:30)
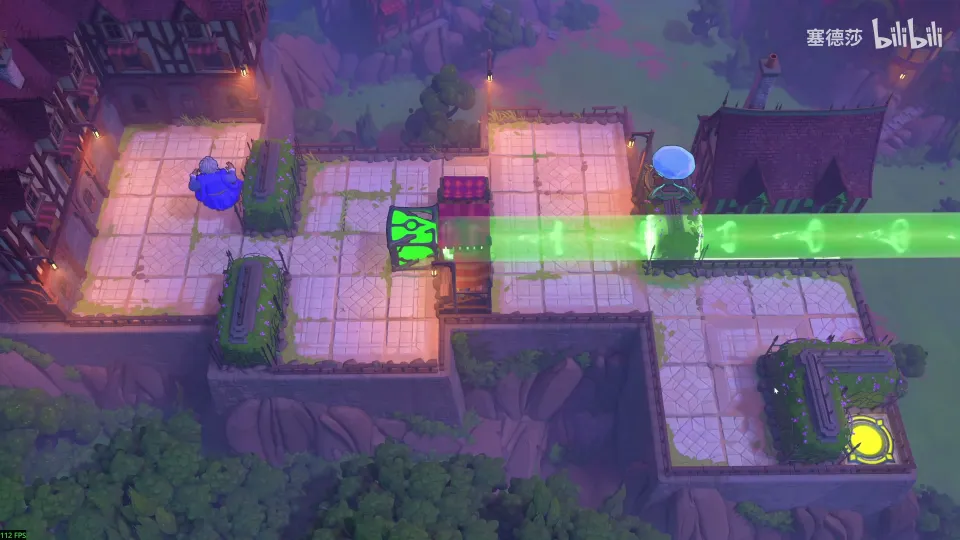
Getting there: a button appears on the overworld. Press it once: an energy block pushes the stone one tile right, which changes its parity, and you can jump in. (64:12)
- The two trap rows: swap something across either of them and you can’t get back in to move it again. (64:54)
- So the emitter can only reach the bottom-right through the three tiles where the floor is open, swapping from the right. (65:40)
- To get it there, first bring the emitter to the area beside a wall, stand in its light and swap across; the wall blocks your view so you don’t swap straight back. (66:10)
- Full route: first to the three tiles at the top right, then across from the top left, then down and over the wall to the bottom. (67:01)
- 塞德莎 plays it through from here. (67:22)
Puzzle 11
Key idea: fully inside green light, the Wizard sees through walls and can swap with things behind them. Only energy doors still block his view. (塞德莎 P17 68:09)
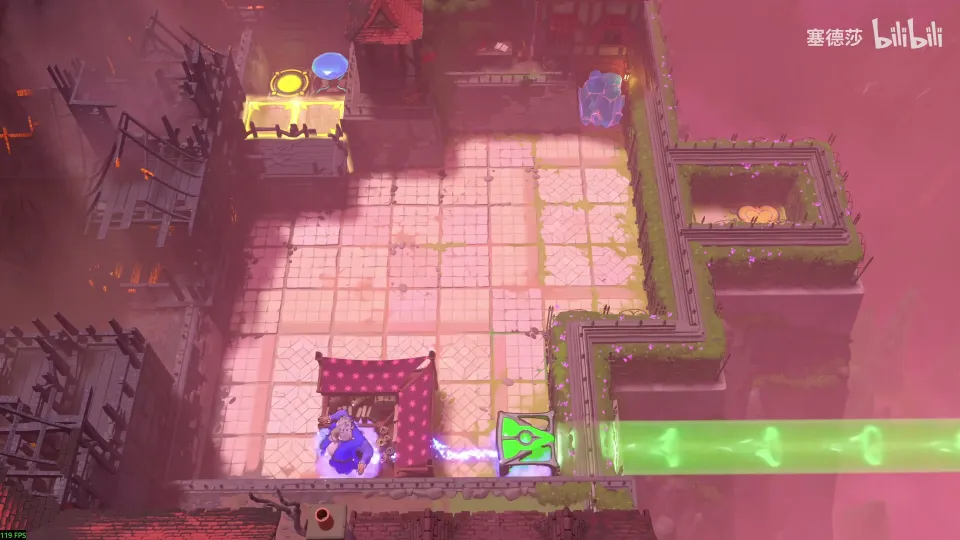
Getting there: puzzle 10 opens a cage on the overworld. Take the stone out, fix its parity, then swap to the stone at the top right. (67:57)
- With the emitter on the marked tile and you standing inside the wall, you can swap up with the crystal behind the wall. (68:48)
- A crystal stuck inside a wall doesn’t block your view, so you can carry on down and bring the crystal out. (69:12)
- Move the emitter to the next spot, go through the wall and put the crystal on the button. (69:30)
- Stand on the marked tile: you can see the gem straight above you, so swap with it to finish. This didn’t work earlier because an energy door was in the way. (69:40)
Puzzle 12
Key idea: you have to shuttle between the bottom-left and bottom-right halves several times: move the red emitter, open three gates, move it again, open three more, then put a stone on the button. Build a lift at the top out of a green emitter with a crystal right under it, so that going up swaps you with the crystal and not the emitter. (塞德莎 P17 70:22)
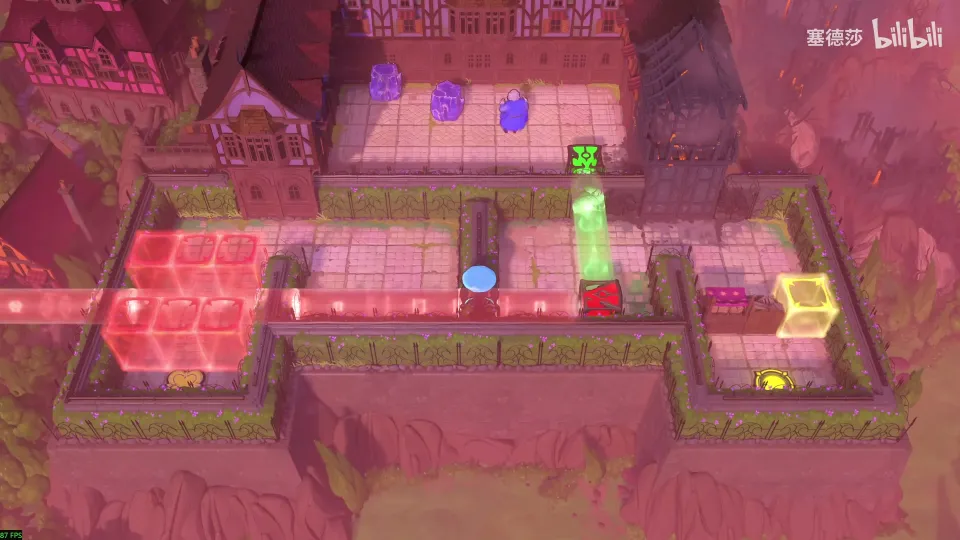
Getting there: puzzle 11 frees a green emitter on the overworld. Move it out, then swap to the left. (70:08)
- The overall plan: in the bottom-right, move the red emitter up two tiles; go left and open three gates; come back, move it down two; open the other three gates; then put a stone on the button. (70:30)
- Build the lift: send a green emitter to roughly the marked spot and a crystal directly below it (塞德莎 calls it a stone here). (71:02)
- Go down and move the red emitter up two. Going back up now swaps you with the crystal underneath, so the green emitter isn’t sent down. (71:09)
- Build the same lift on the other side, go down and open the gates (one is enough; 塞德莎 opens all three). (71:28)
- Come back up, move the red emitter down two and open the three gates on the left. (71:43)
- You don’t need the lift any more, so push a crystal straight onto the button. Walking up now would trap you; instead use green sight to swap with the crystal on the right and leave. (71:56)
Puzzle 13
Key idea: the last of what 塞德莎 calls the big-star rooms. Two green emitters, one facing down and one facing sideways, both have to get through a narrow gap that works like a trap row. Carry them across with green’s sideways wall-passing, then stack them with the sideways emitter on top and the downward one below it. (塞德莎 P17 72:44)
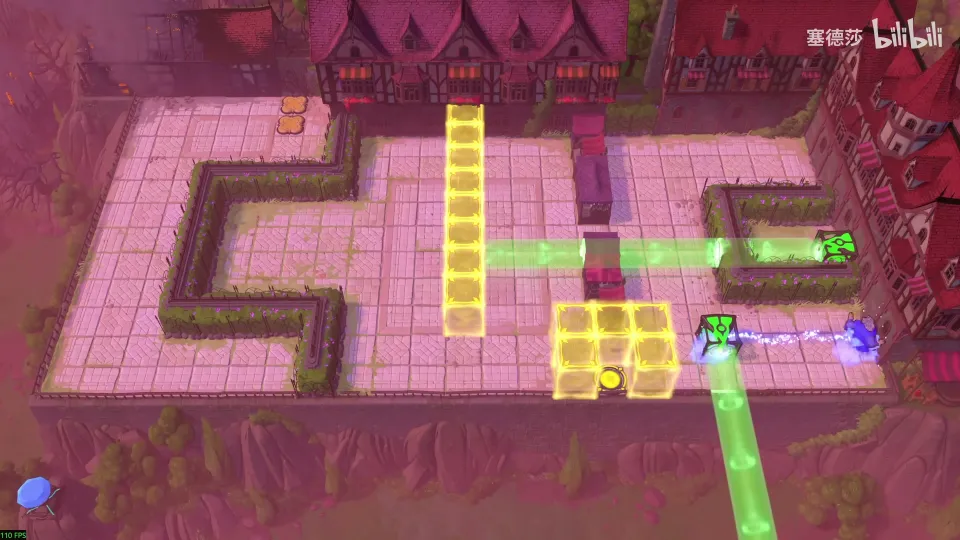
- Take the downward emitter out first, using the sideways one to get yourself out. Then shine the downward beam across from above, so you can leave while carrying out the sideways emitter. (72:52)
- The narrow gap is a trap route, so take both emitters across using green’s sideways wall-passing. Start with the downward one, which can’t be moved directly: move it to the side, bring it over, and wall-pass it into the left half. (73:11)
- Bring the sideways emitter across straight through the wall. (73:47)
- Now take both up through the walls: swap the sideways emitter inside and carry it all the way up, then use green sight to bring the downward emitter up too. (73:55)
- Come in through the wall and move the sideways emitter up one more tile. It must sit above the downward emitter; the other way round, the sideways emitter blocks the downward beam. (74:26)
That clears every puzzle in the north-west; 塞德莎 confirms nothing is left. (74:49)