Spoilers: this page covers the third stage of Order of the Sinking Star, after the second ending. It sticks to puzzle solutions, but the zone names and layouts give away third-stage content. If you haven’t gone down yet, see how to descend first.
Low Heroes is our name for the Heroes part of Antipode Low, the lowest layer, which opens after the second ending (see how to descend and the Antipode Low hub). It is the Low counterpart of the Hearty Heroes of Hauling and High Heroes: the same party of heroes, now with rooms that wrap round at the edges, stacks of mixed objects and the Bard’s water cars. This page solves all 21 puzzles and the 5 overworld puzzles 塞德莎 plays in the north.
Where it is: from Crossroads Low, head north. 塞德莎 labels the map tiles N1 and N2 (Wizard Wraparound), N3 (Mixed Stacking), N3W1 (Heroes Miscellany) and N4W1, N4W2 and N5W1 (Bard and Water).
How to use this page: there was no English solution video for these rooms when we wrote it, so the numbers follow 塞德莎’s narrated walkthrough, counted straight through his parts 46 and 47 in the order he plays them. Each heading has the key idea and a link to the moment the room starts; the numbered steps link to the second where he explains that move. Short walks on the area map between rooms are folded into a Getting there line. Antipode Low has no single Heroes sign: its rooms count towards crossover signs on Crossroads Low (see how to descend).
Zones at a glance (Chinese names as shown in 塞德莎’s game or narration; all English names are our translations and unconfirmed):
| Zone (塞德莎’s Chinese name) | English name | Puzzles | 塞德莎 part |
|---|---|---|---|
| 环绕法师 | Wizard Wraparound | 1–5 | P46 |
| 混合堆叠 | Mixed Stacking | 6–7, overworld puzzle 1 | P46 |
| 英雄杂项 (his own label, no name shown) | Heroes Miscellany | 8–9, overworld puzzle 2 | P47 |
| 吟游诗人与水 | Bard and Water | 10–21, overworld puzzles 3–5 | P47 |
The Wizard Wraparound name card appears on the way to puzzle 4; puzzles 1–3 share its wrap-around theme, so we put them there. In Bard and Water, puzzles 16–17 lie to the west of the rest.
Rules that matter here
- Wrap-around rooms. Some rooms are joined at the edges, top to bottom and left to right, like a sliding-block puzzle (P46 0:27). A Wizard who tries to walk off one side ends up swapping with himself, so he can only travel by swapping with objects (P46 1:23). A dragon with nothing in its row breathes all the way round and kills itself (P46 5:32, P46 15:58).
- The area map wraps too. Swapping off the bottom edge of the map can land the Wizard on a crystal at the very top (P46 2:27).
- Skipping stones turn what they carry. As in High Skipping Stones, a skipping stone turns 90 degrees clockwise per tile on water, and everything stacked on it turns with it (P46 8:33).
- The Thief pulls things in mid-air. He can pull a stone or a teammate while it is falling, which no earlier room teaches (P47 0:44).
- Crystal heroes aren’t dead. A hero the Druid turns into a crystal doesn’t count as a death, so the exit stays lit (P47 3:32).
- Bard water cars. On water the Bard moves the crystals he controls, and anything outside his control blocks them. Rubbing back and forth against such a block moves the whole structure (P47 9:57, P47 14:49). On water he moves two tiles while a controlled crystal on land moves one, which lets a crystal slip out of his control (P47 16:36). In a stack he controls, the bottom item moves one tile, the next two, and so on up to five (P47 26:08).
Puzzle 1
Wizard Wraparound (环绕法师)
Key idea: a sliding-block puzzle in a room that wraps round on all sides. Slide the three goblins into a row. (塞德莎 P46 0:23)
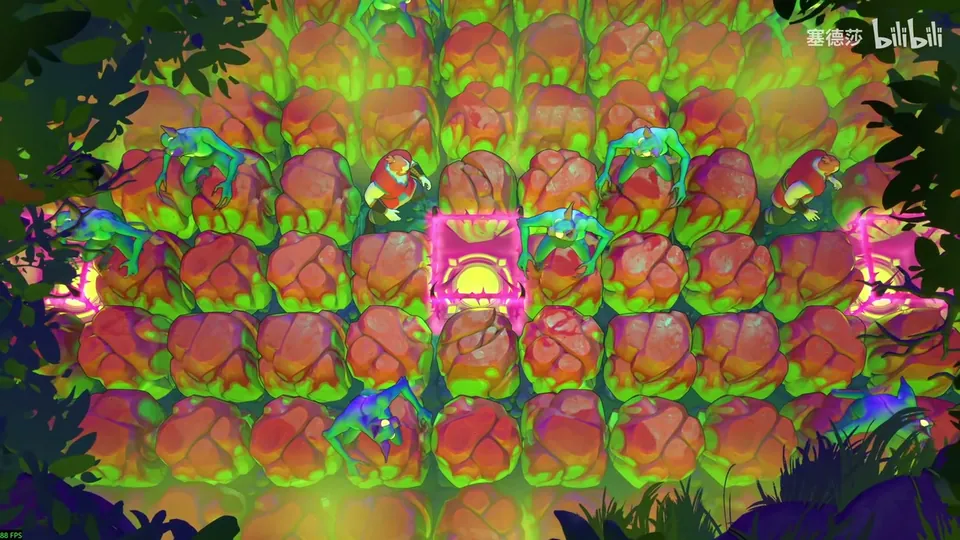
Getting there: from Crossroads Low go north; there is one thing on the way you can’t solve yet, so go straight up to this room. (0:11)
- Move right first and bring these two goblins into the same row. (0:52)
- Move that row one to the left, then come round and move the last goblin down. (1:00)
Puzzle 2
Key idea: the room wraps left and right, so the Wizard can’t walk sideways: he would swap with himself. He moves only by swapping with what’s on the board, the crystals and the carts. (塞德莎 P46 1:16)
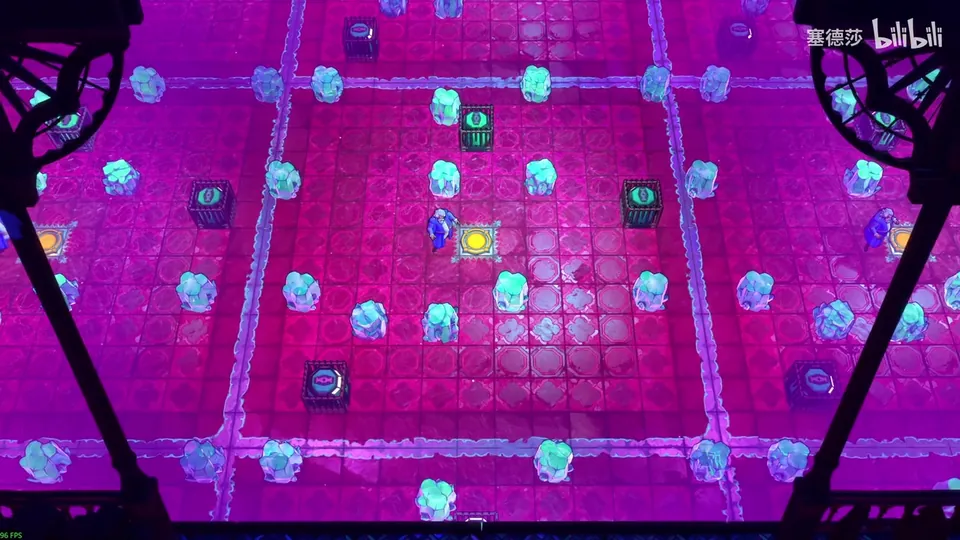
- The only first move is up. Then go up, right, up, left, down, right, right to reach the cart. (1:41)
- Use that cart to get here, switch to the horizontal cart, then to the vertical one in the middle, and reach the exit. Nothing else on the board is reachable. (1:53)
Puzzle 3
Key idea: a wrap-around room with the Bard. Pure shuffling: rub the crystals into place one by one. (塞德莎 P46 2:51)
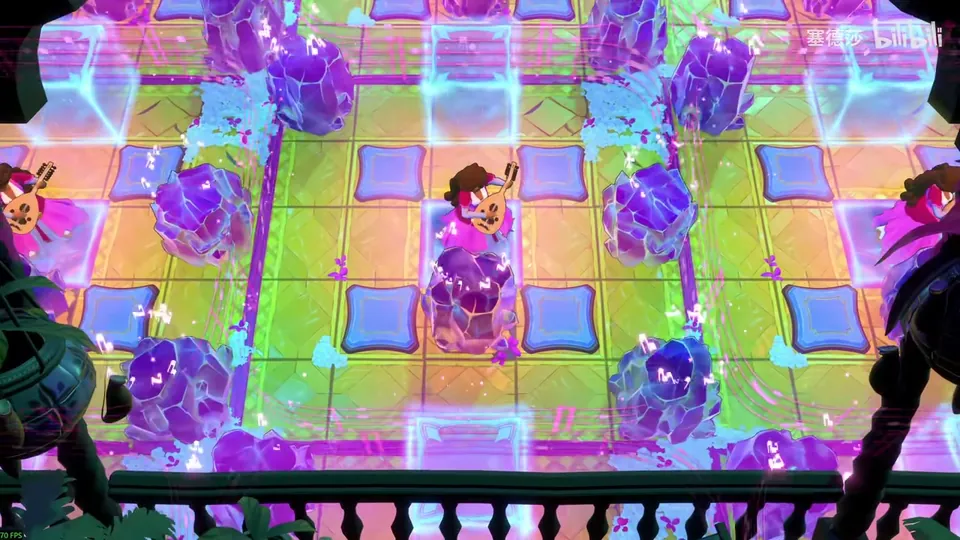
Getting there: the last room hints that the area map wraps as well. Press down here and the Wizard swaps with the crystal at the very top of the map, right across it. (2:07 · 2:33)
- Rub the crystal directly below him, then move the upper crystal to his top-left. (2:57)
- Move this one to the bottom right, this one up one, and one more left. Done. (3:03)
Puzzle 4
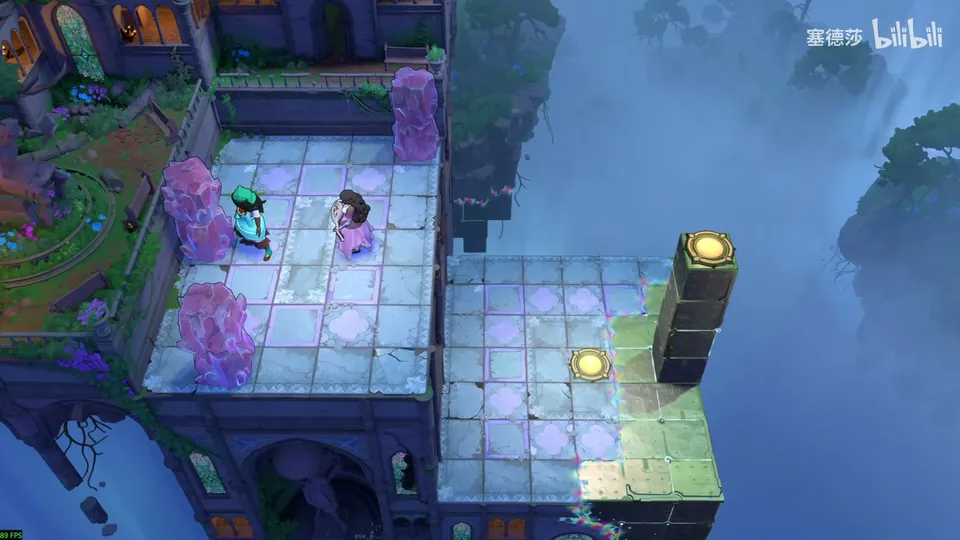
Key idea: with every button pressed, the purple energy block in the middle rises and lifts whoever stands on it one level, up to the exit on a stone ledge. Buttons can be pushed: push one onto the energy block’s tile, so the Thief standing on it gets lifted while a stone holds the other button. (塞德莎 P46 3:31)
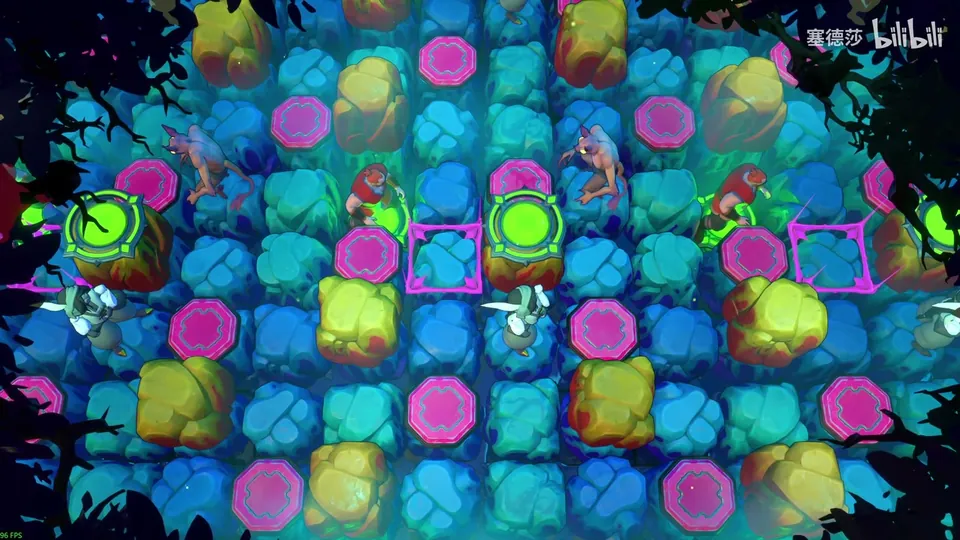
Getting there: using the map-wrap trick, stand on the crystal at the bottom right and go up. The name card here reads 环绕法师. (3:13 · 3:26)
- The plan: all buttons pressed at once, the Thief on the button that sits on the energy block, and the stone beside it on the other button. (3:53 · 4:04)
- Start with up, right, right, then down to move this away; the goblin is holding this button. (4:18)
- The rest is Thief pulling: move this left, pull this here, pull this stone to this spot and this one here, come round and pull this stone across. (4:31)
- Come down, go up and right, stand here and step up to the exit. The Warrior’s exit is here. (4:53)
Puzzle 5
Key idea: the wand is there to bring a dragon two levels up down to the floor. Any dragon with a clear row burns itself, so it can’t move freely. Bring the two-tile pit you stand in next to it, then use the wand. (塞德莎 P46 5:19)
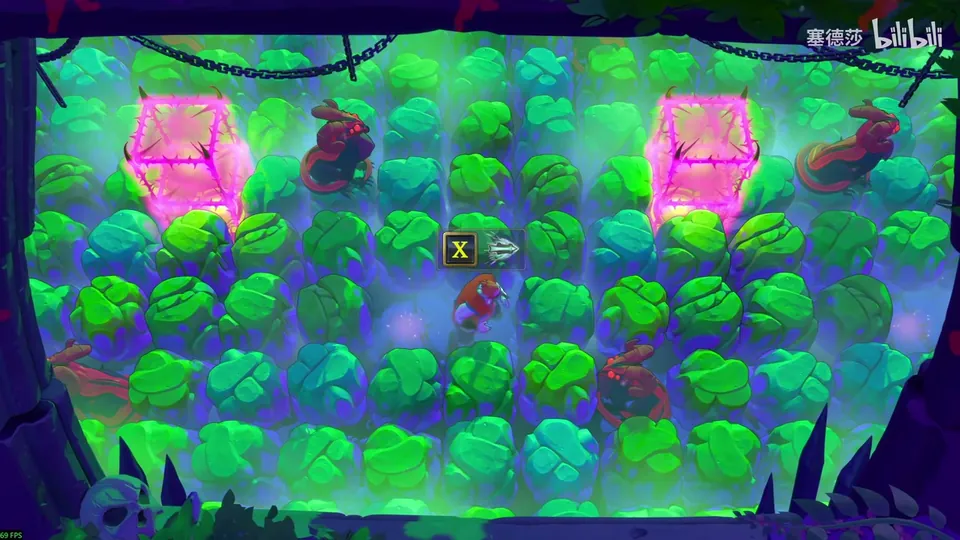
Getting there: from the next crystal, go right. (5:11)
- Move the two holes into the dragon’s row, then go up. (5:57)
- Push right with the wand; the energy block on the right stops it here. (6:08)
- Move the left hole over here and push right: the dragon moves one tile right. (6:15)
- Push right once more with the wand. The floor under the dragon is now empty, you don’t move because there is nothing behind you either, and the dragon drops. Then move it next to the lower dragon. (6:23)
That finishes the zone: go to the top-left stone and swap left to reach its end. (6:46)
Overworld puzzle 1
Mixed Stacking (混合堆叠)
Key idea: the zone stacks all sorts of things together. On the area map, spend one object early, pushed from above, so you can still get round the dragon’s line of fire, then fill the pit with the dragon. (塞德莎 P46 7:13)
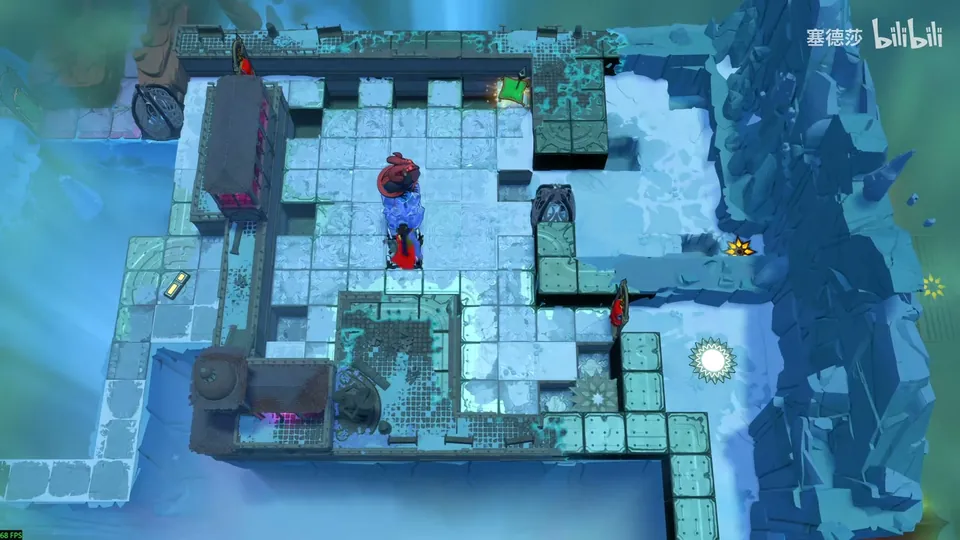
- Look on the right first and push this down. (7:21)
- The road at the bottom right has to be filled later, so use up one object here, pushing from top to bottom; otherwise you can’t get round the dragon’s fire later. (7:26)
- Push right and fill this pit with the dragon. (7:39)
Puzzle 6
Key idea: ten objects in a tall stack, ten pits (not counting the water around). The top dragon has to end up on the bottom layer facing left, but it faces up. The only thing that can turn it is the skipping stone in the third layer, which turns 90 degrees clockwise per tile on water and turns everything on top of it. 塞德莎 plans it before moving anything. (塞德莎 P46 7:44)
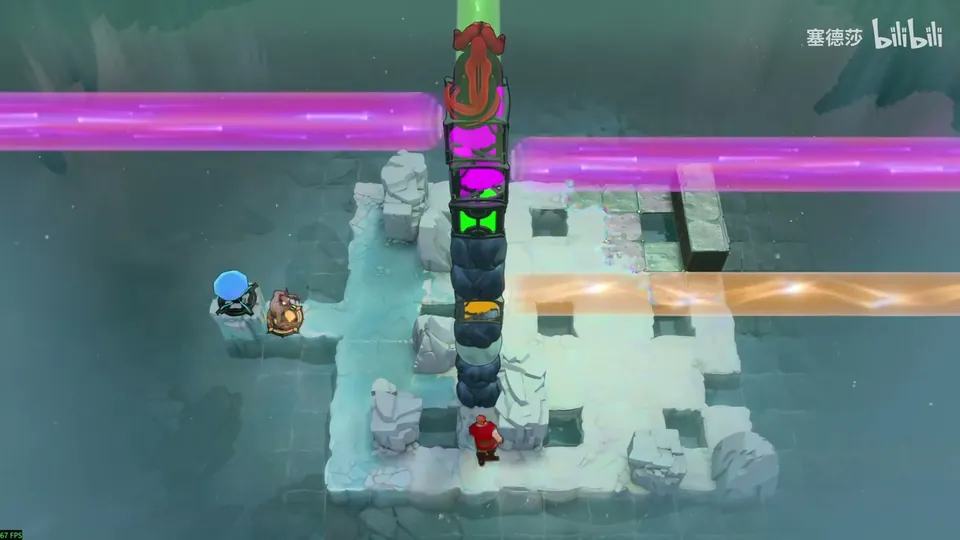
- Turning the dragon to the left means the stack turns 90 degrees anticlockwise in total. Afterwards the orange beam points up, the green one left, and the two purple ones up and down. Everything below builds on that. (8:23 · 9:05)
- The bottom-right pit: anything pushed in sticks there. When the lower three are filled and you place this stone, push it into this pit; the orange emitter then lands on the ground layer pointing up, and you can jump in behind the object and take it out. (9:46 · 10:28)
- The bottom-left pit can’t be reached by pushing. Use orange (green would also work, but another pit needs green): when you drop the stone into the water and take the stack back, move the up-facing orange emitter here, fill the pit, then jump down and push it into the water. (10:54 · 11:20)
- The top-left pit is against a wall. Filling it with this stone drops the green emitter to ground level facing left, and the green beam takes you through the wall to get it back. (11:47)
- The purple emitters: one facing up can’t be pushed down, and one facing down can’t be pushed up, so place them with that in mind. (12:17)
- His plan: turn the skipping stone 180 degrees in the middle first (so leave that pit empty at the start); it finally lands here, 270 degrees in all. The green one goes into the nearest pit, then this one; the far-right pit can’t be emptied again, so the object under the dragon goes last, there, and you push the dragon up. Fill the rest in any order. He also corrects himself on where the skipping stone lands, so watch the clip. (12:40 · 13:10)
- Play it: fill the left pit, then this one, turn 180 degrees in the middle and push down; the dragon now faces the right way. (13:46)
- Bottom right: fill it, then jump in with the orange beam to take it out. Move the next one along and push it down with orange, come round, push down one more, jump in and push it down; then fill the middle with this stone. (14:04 · 14:24)
- Fill the top left, use the green beam through the wall to push this here, push this here. (14:39)
- Last, push it down, but not from this side or the dragon burns you: go round from the left and push it up. (14:48)
Puzzle 7
Key idea (big star puzzle): the room wraps, so any dragon with no stone or obstacle in its row burns itself. The dragon on the blue button is your one chance to go up: when it dies the button is released and the blue energy block rises. Build a fuse from four dragons standing one, two, three and four levels high. Each dragon’s head carries the stone that blocks the next one’s fire; light the fuse with the one-high dragon while you stand on the blue block. (塞德莎 P46 15:45)
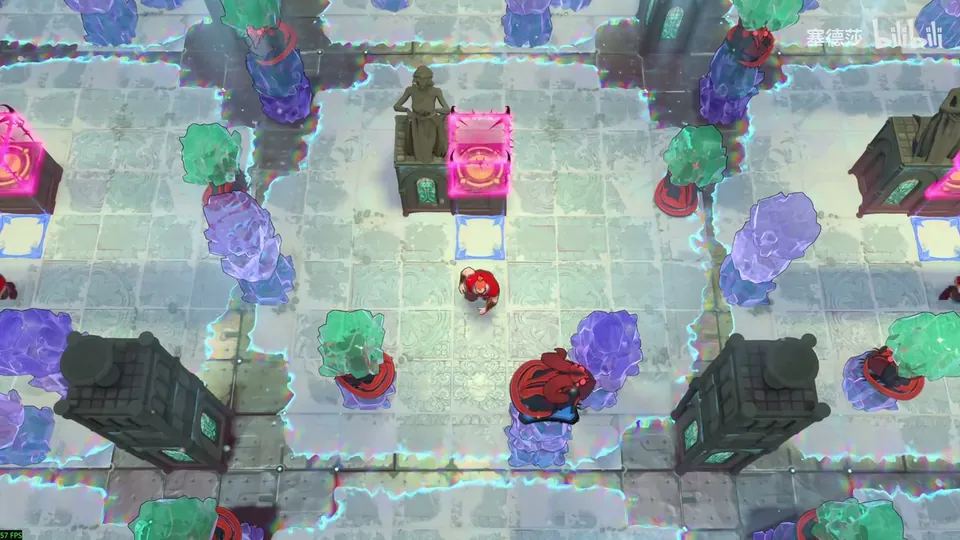
Getting there: reset and unlock the cage. On the way to the bottom right, use up one stone inside and one outside, so the dragon lands outside; then push it next to the big star room to fill the pit. (15:12 · 15:31)
- The chain: the one-high dragon kills itself and the crystal on its head falls, so the two-high dragon dies; its stone falls, the three-high dies; its stone falls, the four-high dies, and you rise on the blue block. (17:00 · 18:01)
- Set it up without letting any die early. First push this one down one, behind the obstacle that is already there, and this one left. (18:21)
- One-high dragon first: use the two tall towers, block here, take this stone round and push it left, nudge down, then left. Tuck it in here, because the last move is pushing it right. (18:27)
- Two-high: move it up and right to about here. Don’t put it right beside this, or something ends up blocked by accident and a dragon survives. (18:55)
- Three-high: only the big building at the bottom right and the stone on the three-high dragon’s head can block the four-high dragon, so the four-high one has to stay near there. Move the three-high dragon low: over, down, left, then one more down. (19:25 · 20:04)
- Move the four-high dragon up, but not to the spot he points out as a mistake: pushed from there, the fuse won’t light. Keep every other stone out of the dragons’ lines. (20:06 · 20:20)
- Stand on the blue block and push the one-high dragon right; the others die one by one (he shows it slowed down). (20:28)
Further left is an easy stretch: push these and you reach the next area, where his part 46 ends. (20:56)
Puzzle 8
Heroes Miscellany (英雄杂项)
Key idea: the Thief can pull a stone while it is falling, just as he could pull one off a skipping stone on water. Nothing earlier teaches this; the room exists so you find it. (塞德莎 P47 0:17)
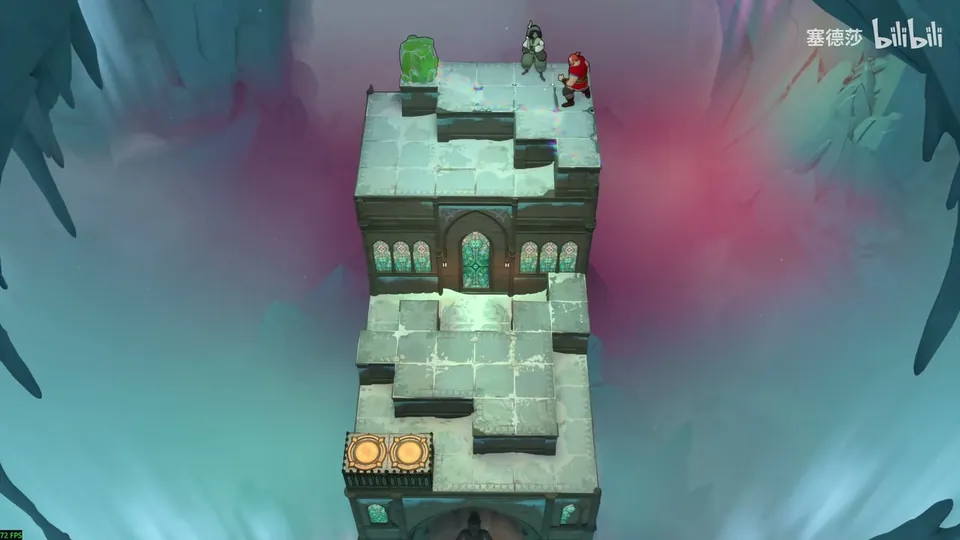
Getting there: from where part 46 ended, go up. (0:14)
- Pull the stone out, then send the Thief down to wait here (not there, the ledge above is in the way). (1:12)
- Push the stone down from this tile, and as it falls behind the Thief, pull it forward. Pull it to here. (1:26)
- The Warrior just drops straight down, and the Thief pulls him over the same way. (1:42)
Overworld puzzle 2
Key idea: use the mid-air pull on the area map: pull the stone to where the yellow energy block is; pressing the button makes it fall, and you pull it across on the way down. (塞德莎 P47 2:08)
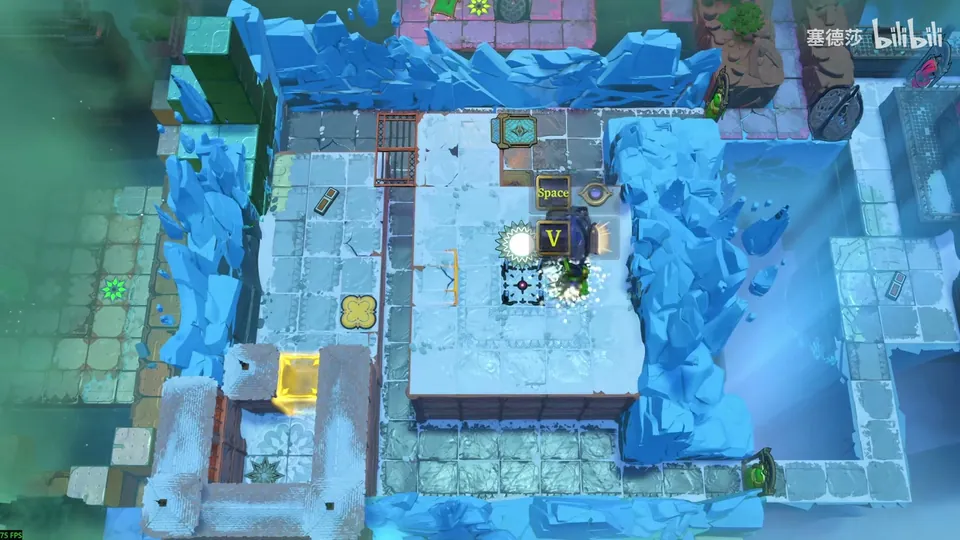
- Pull the stone onto the yellow energy block’s spot, press the button and pull the stone as it falls. Then go into the next room. (2:14)
Puzzle 9
Key idea: five heroes and only one exit. The Druid turns the other four into crystals one by one as stepping stones; a crystal hero doesn’t count as dead, so the exit stays lit and the Druid alone clears the room. (塞德莎 P47 2:25)
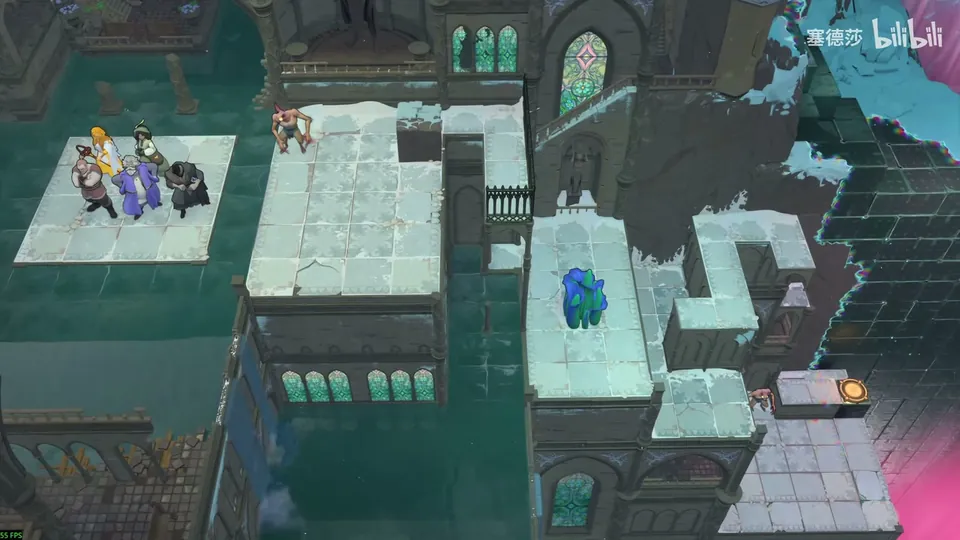
- Who fills the first gap? The Cleric has to float over later as the second one, the Warrior must stay to push and the Wizard to swap the goblin, so the Thief is spare: turn him into a crystal first. (4:10)
- The Wizard moves the goblin here. It has to go two tiles up, where the Wizard can’t get in, so send anyone there, swap the Wizard with them, then swap the goblin into place. (4:40 · 4:52)
- Stand the Cleric here and let the Druid turn him into a crystal. The other three drop down; turn this one into a crystal too. (5:02 · 5:18)
- Two pits two levels deep: one takes the crystal, the other the Wizard, because the Warrior still has to push crystals. (5:29)
- A goblin below blocks the way, so drop something on it: the Warrior falls, the Druid turns him into a crystal mid-fall, and he crushes the goblin. (A Trader-and-Druid room in the second stage used the same trick.) (5:50 · 6:16)
塞德莎 calls these two rooms Heroes Miscellany because they don’t share a theme. (6:28)
Puzzle 10
Bard and Water (吟游诗人与水)
Key idea: the Wizard and two crystals have to get over to the goblin, knock it into the water and come back. The Bard can’t climb up, so the Wizard keeps swapping with him to move the pair along. (塞德莎 P47 6:59)
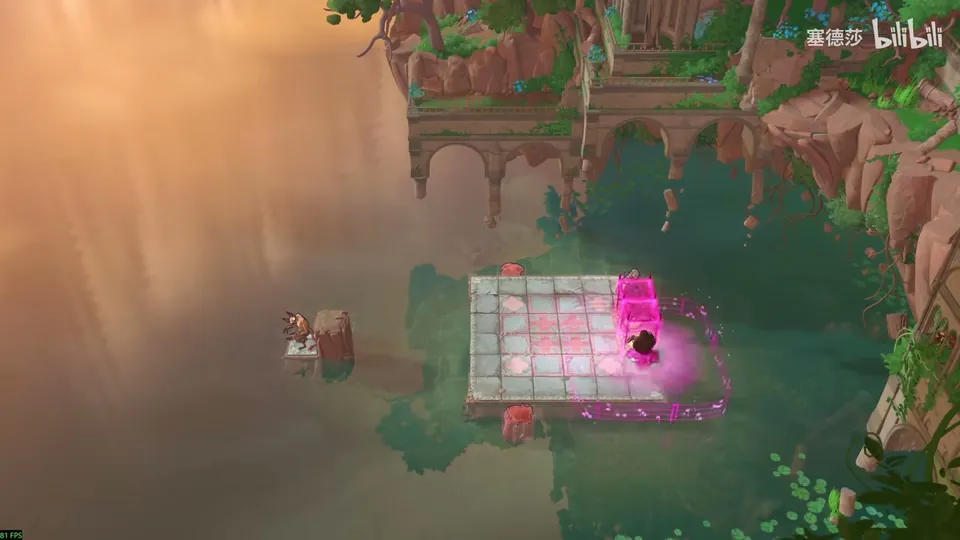
- Line the two crystals up vertically, level with each other. (7:20)
- The Bard can’t come up: the Wizard goes here, swaps with the Bard and moves one left. When he can’t go on, swap again, step the Wizard back, swap back and continue. (7:29)
- Repeat that until he is down there. (7:50)
- Coming back is similar: right, swap with the Wizard, simply walk left, swap back, right, and step up. (8:04)
Puzzle 11
Key idea: a “pedal car”: three crystals and the Warrior carry the Bard across the water to the far bottom right. (塞德莎 P47 8:43)
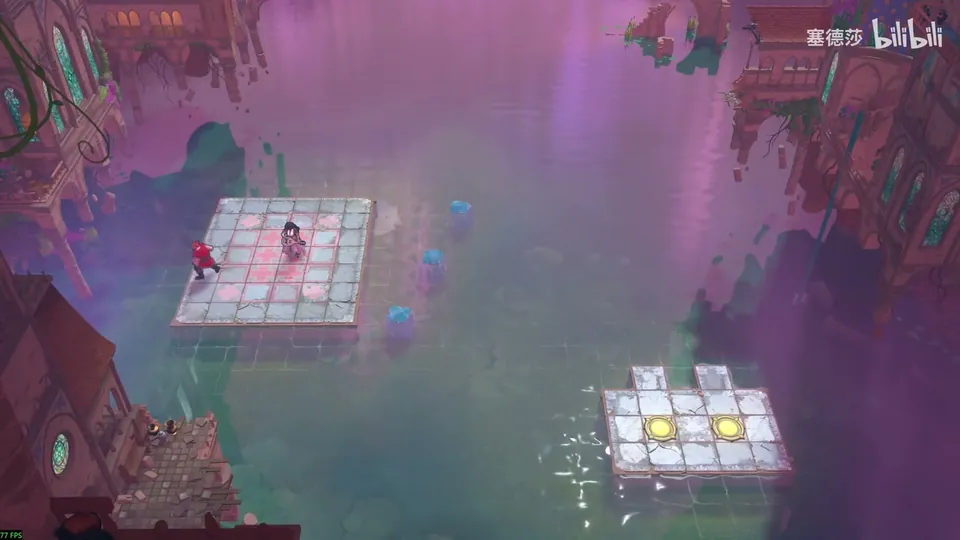
Getting there: unlock this stone, step on it and go straight down. 塞德莎 notes the area is called Bard and Water. (8:27)
- Bring the crystals back: pull one, let the Warrior push the Bard over, pull this, line it up, the Warrior pushes again; right, then left. (8:51)
- Pull once more and break this apart, push and pull until all are back. Push them down and put them together. (9:28 · 9:38)
- The Bard stands at the back (the left end), the Warrior next to him. (9:48)
- To drive: step one right; you can’t go further or the Warrior falls off. The Warrior pushes the Bard left, back to his spot, and you step right again. Repeat to reach the bottom right. (10:01)
- Put the Warrior here, step down, and both get ashore. (10:29)
Puzzle 12
Key idea: a floating car. The goblin attacks the Bard, the Cleric beside him protects him, and the goblin stands on a stone; in that state the group floats across to the right. (塞德莎 P47 11:06)
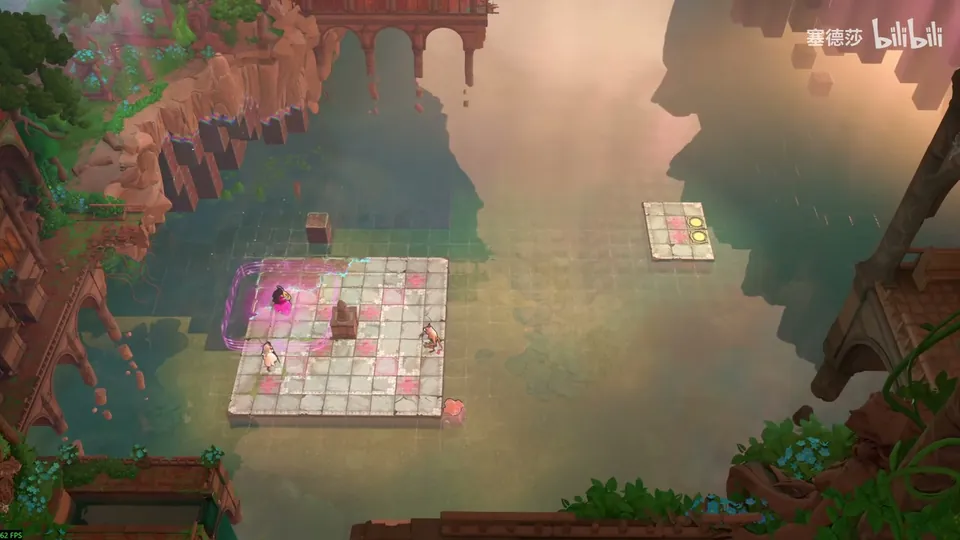
Getting there: one crystal is enough here. Go back, pull a crystal over and lay it on this tile. (10:43)
- Move the goblin over, then the crystal up: there is a wall up there, so that is clearly where you come up. Put this one here. (11:16)
- Build it: bring the Cleric next to the Bard first, then rub against the wall. That is the protected state. (11:53)
- Put the goblin on the stone (it can’t float), then walk right in this form. (12:01)
- Why the goblin looks like it is pushing: a second-layer item would move two tiles, but the Bard is blocked, so it moves only one. (12:10)
- Here the goblin drops into the water, and the room is done. (12:43)
Overworld puzzle 3
Key idea: lay three crystals in the middle at the bottom of the area map, using the Bard’s water walk to carry them to the left two at a time. The leftmost crystal, outside his control, holds the other two in place so you can climb up. (塞德莎 P47 12:56)
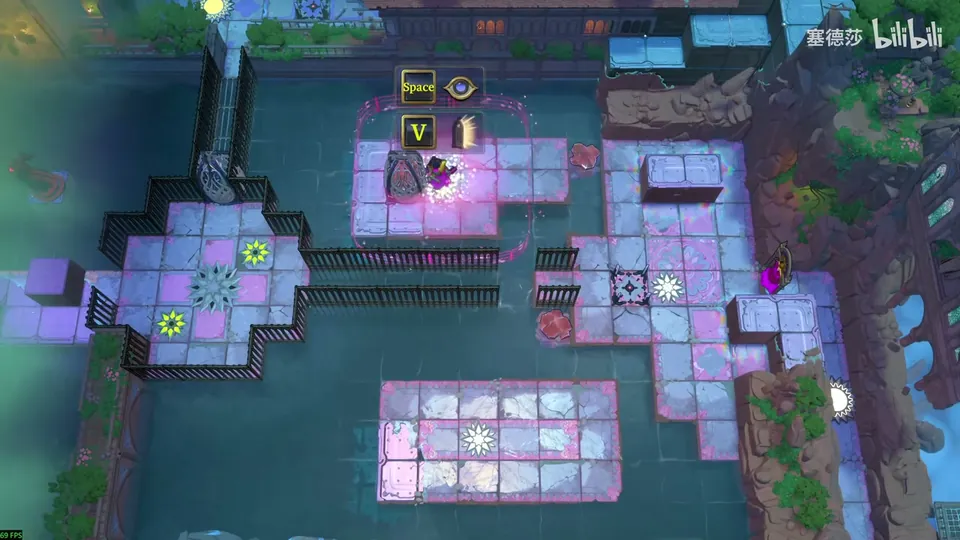
- Move this stone down and push it in here. (13:15)
- Come back from the top and bring the lower stone up as well. (13:25)
- Go up here, pull this stone left once more and line it up on the right (the alignment matters). (13:35)
- Now you can get up: the leftmost stone isn’t controlled, so it blocks the two you control. (13:52)
Puzzle 13
Key idea: build a car that needs no teammate: four crystals side by side. Drive it to the left, then bring a crystal back. (塞德莎 P47 14:03)
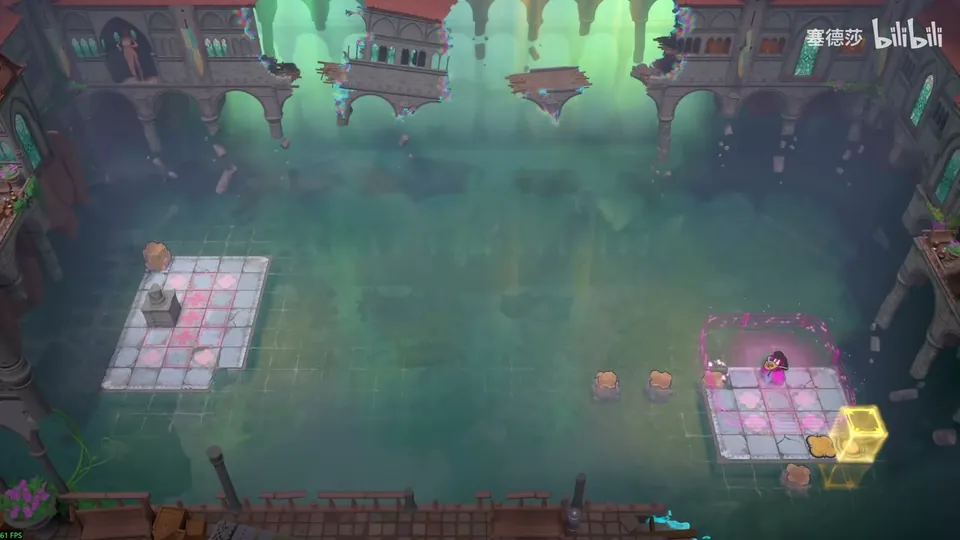
- Bring this crystal over and move this one down; climb on, and they join into four. (14:30)
- Drive forward to the end, then step back: the outer crystal isn’t controlled and holds the three below, so the structure stays put. Rub right, then left, again and again, and the car inches along. (14:44 · 15:00)
- Take this crystal along; it sits behind the Bard. Come up from below, rub, line it up and rub back. (15:12 · 15:35)
- You arrive with it in the right spot, and the room is done. (15:46)
Puzzle 14
Key idea: a crystal has to stay on the button, but without terrain to stop it a crystal can’t leave the Bard’s control. Use a speed difference: on water the Bard moves two tiles while a controlled crystal on land moves one, so it slowly falls out of his range. (塞德莎 P47 15:56)
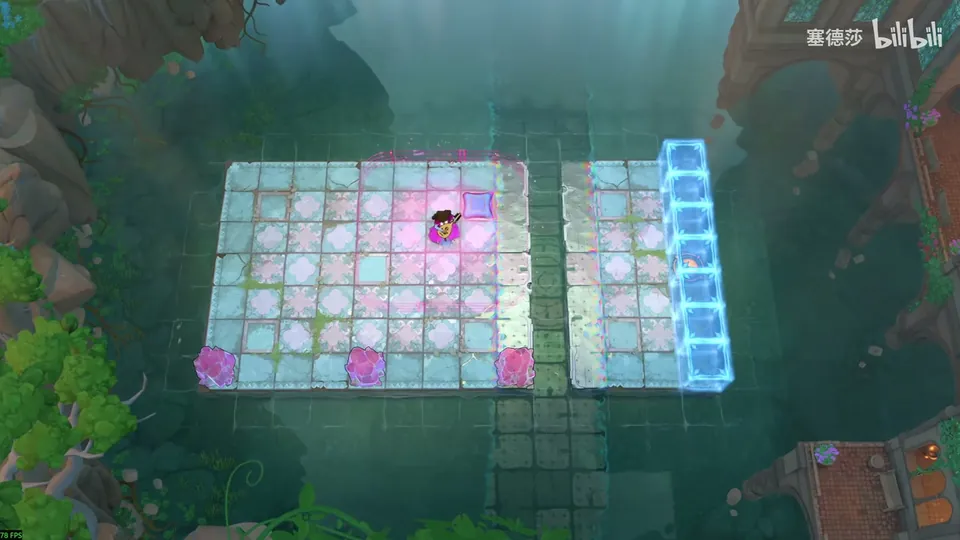
- Drop two crystals into the water, a little to the left, and put them side by side here. (16:51)
- Pull this one across horizontally, board here and go down: you move two, the crystal on land moves one. (17:03)
- Move the structure down, come up and rub down one more; repeat once and it’s done. (17:23)
Puzzle 15
Key idea (big star puzzle): an all-direction car that can drive up, down, left and right, though awkwardly. 塞德莎 only calls out directions here, so watch the clip. (塞德莎 P47 17:42)
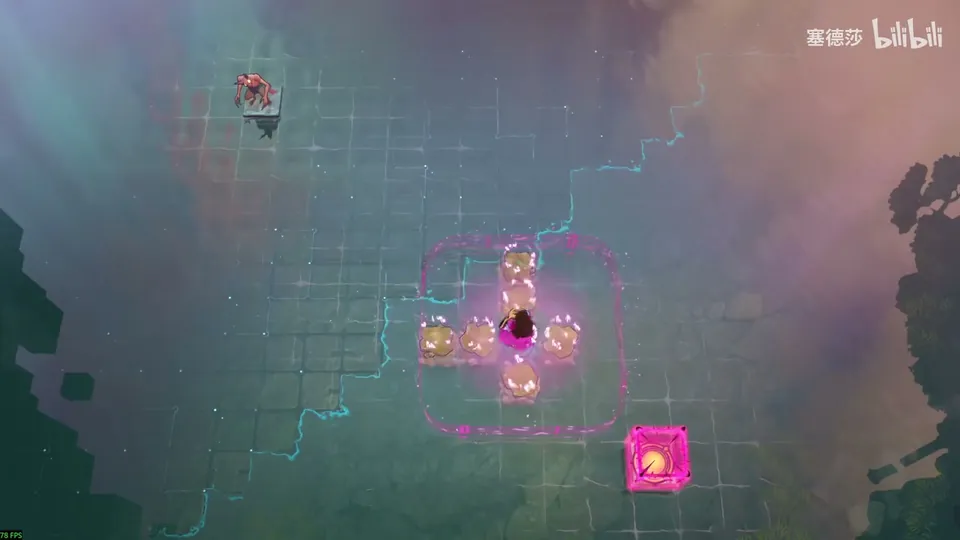
- Go up and rub, a little further up than needed, because you line up against it later. (17:54)
- Down, down, up, then rub left; come back rubbing right. (18:03)
- Line up left again, go down, and the room is done. (18:17)
Puzzle 16
Key idea: rub the crystal to the tile right below the Bard. The five red blocks are there to rub against, but the lasers make each one single-use, so you have exactly five rubs. (塞德莎 P47 18:45)
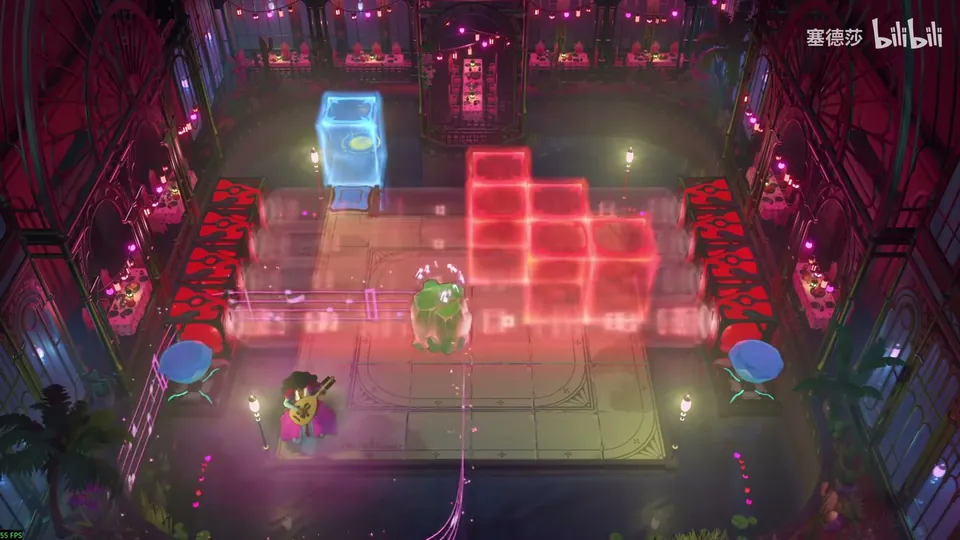
Getting there: two ways lead on, west and north; go west first. Pull the crystal over and leave it here. (18:29)
- Rub up, up, up, then right, right. That is exactly five. (18:58)
Overworld puzzle 4
Key idea: a dragon on the right blocks the way up to the big star room. Open the left door from a distance with a crystal, so the two dragons kill each other. (塞德莎 P47 19:32)
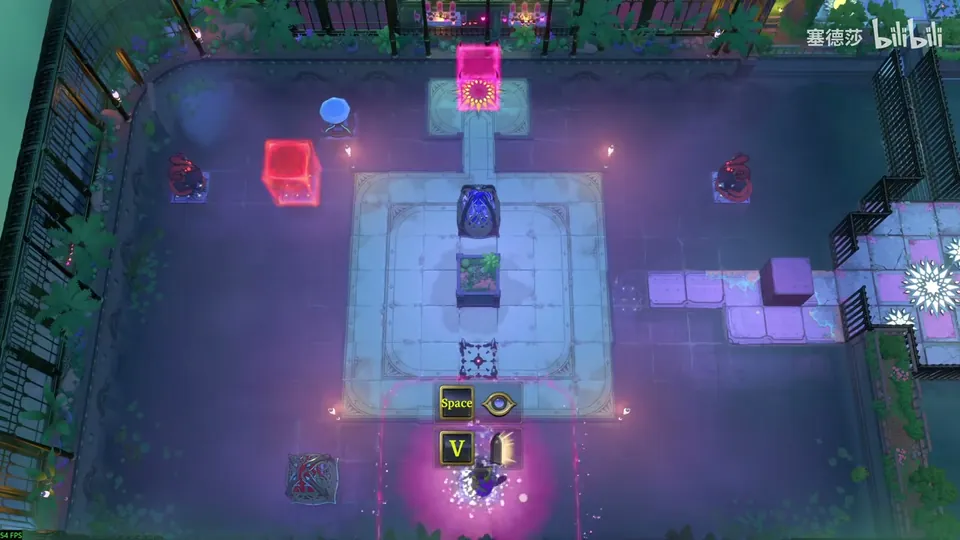
- Rub this crystal over, staying out of the dragon’s line of fire. (19:42)
- Adjust it a few times until it is on the left, at the upper left; from there it opens the door. (19:53 · 20:14)
Puzzle 17
Key idea (big star puzzle): like puzzle 16, but four red blocks are not nearly enough to rub the stone behind you. Let the crystal slip out of the Bard’s range first, then cut back in from another direction; that rubs it several tiles in one go. (塞德莎 P47 20:23)
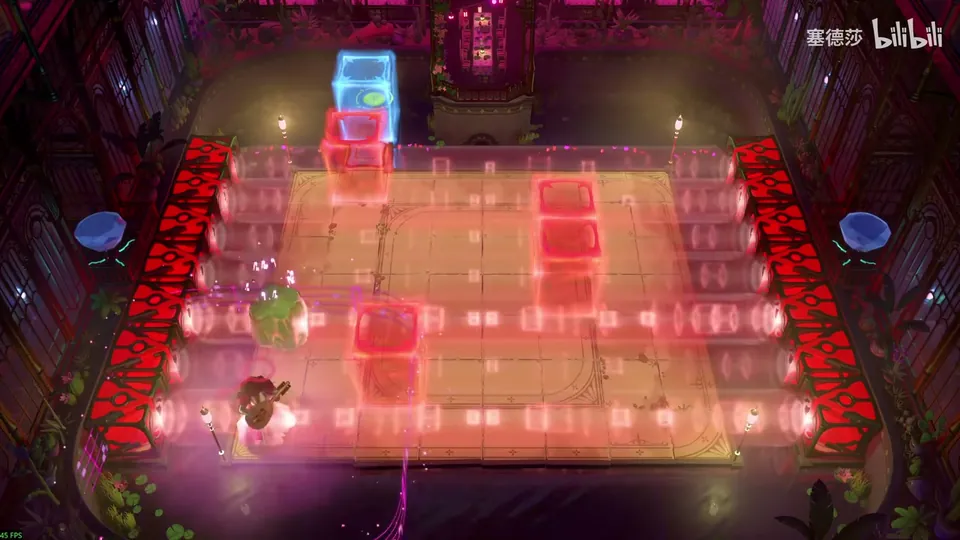
- Rub the crystal right here, then rub down: it leaves your control. (21:01)
- Go round and cut in from this side. That uses two blocks; rub horizontally with the rest and the crystal ends up behind the Bard. (21:09)
Puzzle 18
Key idea: a U-shaped car. Moving up, up and then left back shifts the whole structure up without changing its shape. (塞德莎 P47 21:43)
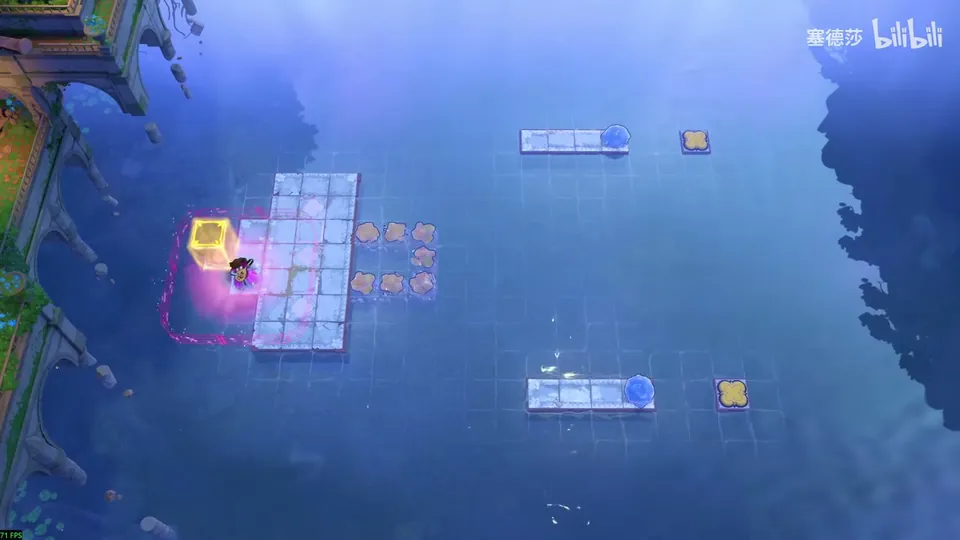
Getting there: go back and up. (21:24)
- From here go up, up again and left back: the whole U moves up. Keep rubbing up to reach the top right and switch this on. (21:57)
- Come back the same way, then rub the structure down from above, twice, and make one more trip. (22:13 · 22:24)
- You could also break the car into four crystals in a row, the all-direction car, at least half-built; it isn’t needed to pass. (22:38)
Puzzle 19
Key idea: the far right needs a crystal in the water, and the only spare one is part of your car. Take it off and rebuild the car so you can still get back. 塞德莎 isn’t sure his way is the intended one. (塞德莎 P47 22:56)
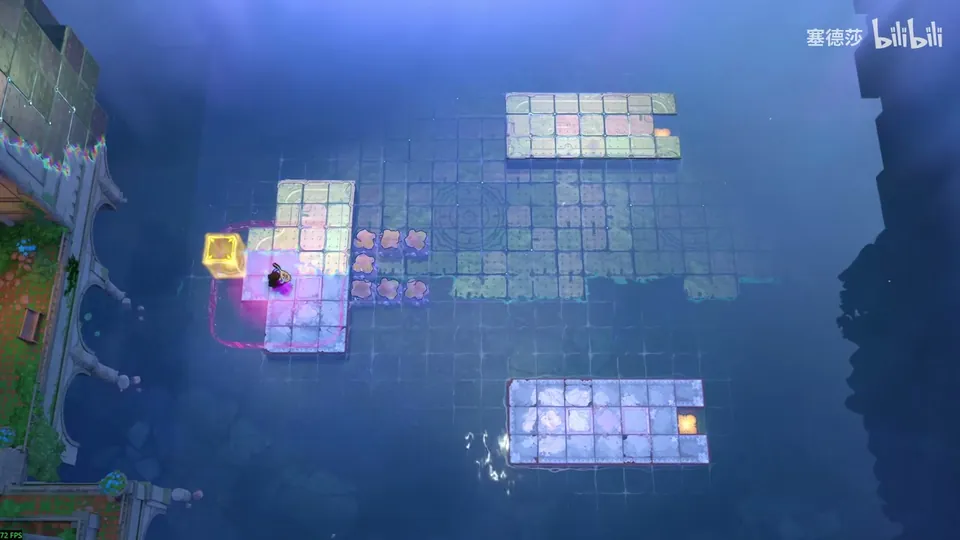
- Use the U car to go up, then up once more. (22:58)
- Move the whole structure up and left, bring this part over, go up and send the single crystal to the right. (23:25)
- Rebuild the car: like this, then down, right, up, and send the single crystal to the left. You now have four crystals in a line going down. (23:42)
- Line them up with the crystal on the left, climb on and rub down; at about here you can step up, and from here you reach the right. (24:00 · 24:15)
- Use the extra crystal to hold the button below. To go back, move these three up two, climb on and return. (24:30 · 24:38)
Overworld puzzle 5
Key idea: going back unlocks a crystal in the middle of the area map, exactly the piece that makes a U car. Build it and drive to the top right. (塞德莎 P47 24:52)
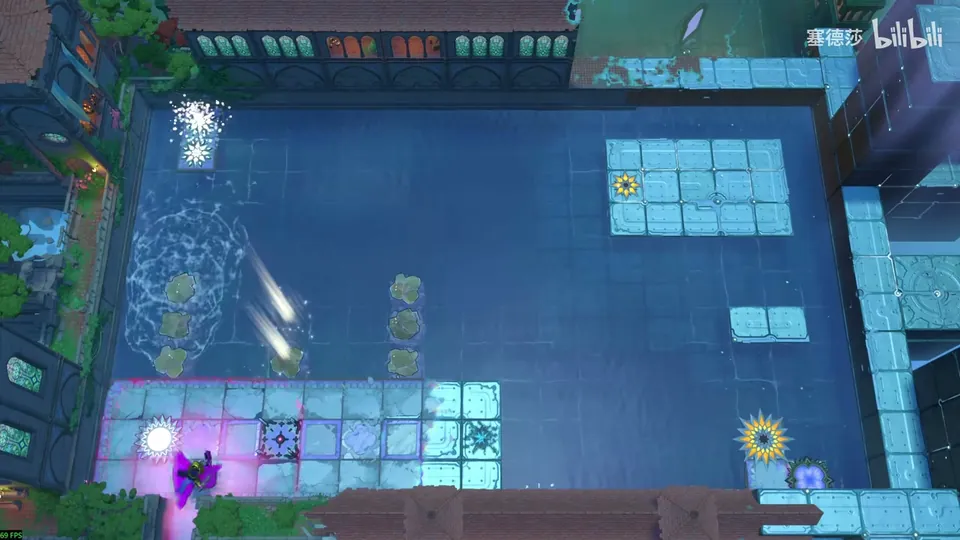
- Pull the two crystals below over and join them to the one on the right, then move right: that is the bottom half of the car. (25:01)
- A corner is missing: go left and pull that crystal over. Then drive the U car right to the top right. (25:15 · 25:26)
Puzzle 20
Key idea: the Sailor has to get onto a five-high spot on the right in one move. In a stack the Bard controls, the bottom item moves one tile, the next two, then three, four, five; so put the Sailor on top of a four-high stack and let the Bard move it all at once. (塞德莎 P47 25:41)
- The Sailor can’t push a two-high stack, it is too heavy. Let the Bard take control and move one crystal onto the Sailor’s head, then the Sailor pushes the rest. (26:53)
- Push one down into the middle. For the one on his head, the Bard steps right at the Sailor’s position: it moves two tiles and falls. Do the same with the rest to make a four-high stack. (27:07 · 27:18)
- The last two crystals lift the Bard: dropped straight down he controls only three levels, but he needs all five, so he must stand three high in the middle. Pull them over, push one up and the other down here to make a two-high step. (27:35 · 27:49)
- Put the Bard on the step and the Sailor on top of the stack, then walk right: the Sailor moves five tiles straight onto the exit. (28:02 · 28:12)
Puzzle 21
Key idea (big star puzzle): once the room starts, a skipping stone up top comes loose and would park in front of the exit, and the Explorer can’t push it. Block it with a stone in time, then block the next ones the same way. 塞德莎 finds this big star easy. (塞德莎 P47 28:54)
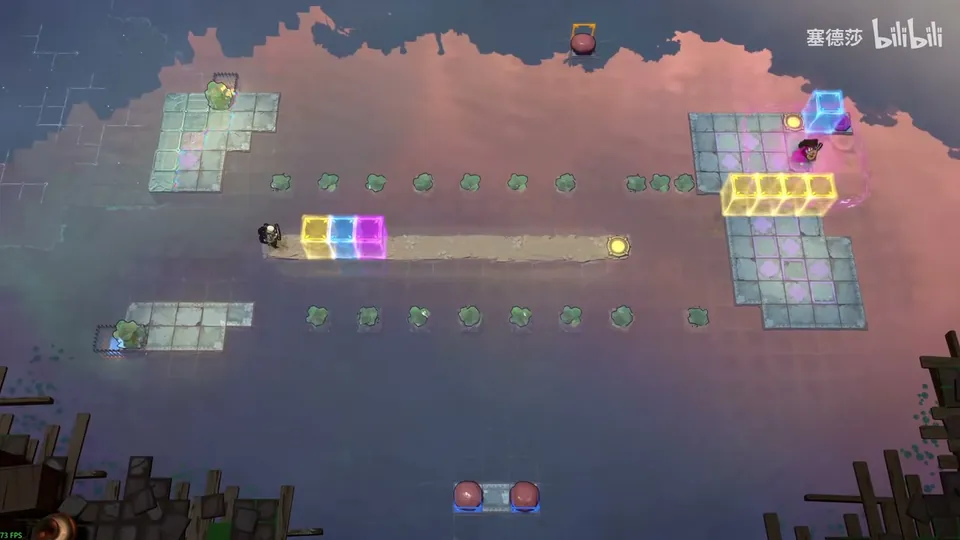
Getting there: take the U car apart: move these two over, pull these two across and make a 2×2 square, shift it all one left, come down and bring this along to build a bridge into the big star room. (28:26)
- Come over from here and drop this stone. The skipping stone above starts moving, and left alone it ends up blocking the Explorer’s exit. (29:08)
- Hurry back and block it with any stone. (29:24)
- Below, move this stone down and line it up, come up and go all the way to the bottom left. After the start two stones come along: block them here, catching one with your body (the timing is tight). (29:31 · 29:48)
- Press the button here and bring the Explorer over. (29:59)
That is everything in the north for now. 塞德莎 goes back to Crossroads Low and notes that he has finished two big star puzzles for the north–south sign and two for the north-west sign; his next part heads east. The series is still being updated. (30:12 · 30:37) Back to the Antipode Low hub.