Heroes and Light is the crossover area where the Hearty Heroes of Hauling (North) step into the beams of Vault of the Beamcasters (West). Each hero keeps its North ability, and standing in a beam adds that beam’s power on top. Crystals and goblins are alive, so the beams move them too. This page solves all 54 puzzles and the 3 overworld puzzles between them. The harder rooms beyond it are on the next page, Heroes and Light, Advanced.
Where it is: the north-west of the map, north of Heroes and Artifacts. 塞德莎 labels the main map tiles N3W2, N3W3, N3W4, N4W4 and N5W4 (part 16). Puzzles 1–4 are the energy-block rooms beside the Heroes’ Gathering tile (N3W1), which he plays in part 4; puzzles 5, 6 and 50 are side rooms west of the gold room in part 15; puzzles 34–49 open part 17, before he enters the Advanced area at 39:34.
How to use this page: numbers follow The Flying Chungus’s two solution videos (part 1, part 2), counted straight through. His chapter 5 in part 1 is the Heroes and Beamcasters gold room, which is on our Gold Rooms page, so from his puzzle 6 onwards our number is one lower; his part 2 starts at our puzzle 32. Each heading has the key idea and two links: the matching Chungus chapter (no commentary) and the moment in 塞德莎’s narrated walkthrough where the room starts. The numbered steps link to 塞德莎’s video, because the steps follow his explanation. His order differs from Chungus’s: he plays puzzle 3 before puzzle 2, plays puzzles 32 and 33 between 14 and 15, and reaches puzzles 49 and 48 (in that order) only after entering the Advanced area. Puzzle 50 is a room he plays that Chungus doesn’t show. Puzzles 51–54 are bonus rooms that open only after the first ending; 塞德莎 plays them in part 39.
Rules that matter here
- Beams lend their power. Standing in a beam works as in the West: yellow breaks rocks and crystals, cyan lets you push, red opens red energy blocks, green walks through walls, orange jumps two tiles, purple carries you to the beam’s far end. Each hero keeps its own ability on top: the Warrior pushes, the Thief pulls, the Wizard swaps, the Bard’s song drags a crystal along, the Druid turns creatures into crystals, the Cleric shields but can’t push without cyan.
- Push beats break. In a yellow beam you only break something if it can’t be pushed. To smash a crystal, walk into it from a side where it is blocked.
- Energy blocks are pistons. The pointed face of an energy block shows its direction. When it appears on a tile that is occupied, it shoves that thing one tile that way, and it only crushes it if the push is blocked. Puzzles 1–4 teach this, and later rooms use it to wreck a beam emitter or squash a dragon.
- Orange parity. Orange moves everything two tiles at a time. Colour the floor like a chessboard: a thing moved only by orange never changes colour. To push an emitter from the beam side you need a gap of two, so expect a lot of back-and-forth shuffling.
- Purple ends. Purple sends you to the end of the beam. A wall, a stone or an energy block makes a safe end; an open edge sends you off the map, which counts as dying. A goblin sent off the map is gone, which is how some rooms kill goblins. Purple passes through crystals, so only stones and blocks stop it.
- Crystals and goblins are alive. Beams act on them too: a crystal pushed in orange light jumps two tiles, crystals and goblins in green pass walls, and a goblin you push in orange jumps with you, so it can’t hit you.
- Beams cut the Thief’s pull. A jump or teleport isn’t a step, so the Thief doesn’t drag anything along. Use it to let go of a crystal or a stone.
- The necklace (puzzles 46–47). It turns the beam you stand in to face the way you face. If the step in that direction is blocked, you turn the beam without moving, which 塞德莎 calls blocking your own path.
Puzzle 1
Key idea: the first lesson on energy blocks. A block that appears under a crystal doesn’t destroy it, it pushes it the way its point faces, like a piston. Use that to place crystals where the Thief can’t pull them. (YouTube 0:00 · 塞德莎 P4 37:40)
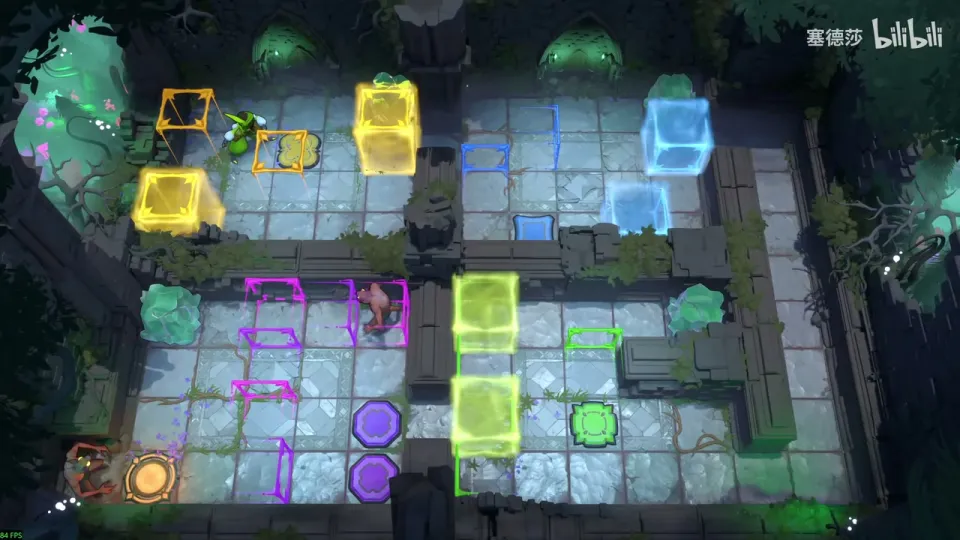
- Pull the first crystal onto its button. Only the two middle columns let you pull it down; then pull it across. (37:54)
- The next button is against the wall, and the Thief can’t pull a crystal flush to a wall. Put the crystal on a yellow block’s tile and switch the block on: it shoves the crystal left instead of breaking it. (38:23)
- Push it to the leftmost column this way, let the blue block push it down, then pull it onto the button. (39:23)
- Bottom-right: pull down and the energy block pushes you into place. Step left off the button: the left-facing green block appears where you stand and pushes you away, which breaks your hold on the crystal. (39:37)
- Two goblins block the exit at the bottom-left. Use the purple blocks to nudge one into the other a tile at a time. (40:20)
Puzzle 2
Key idea: pressing the button opens the top-right but closes the green block at the exit, so you can’t hold it from inside. Hold the top-left button from the big bottom-right space instead, using the left-facing blue block as a piston. (YouTube 0:52 · 塞德莎 P4 43:16)
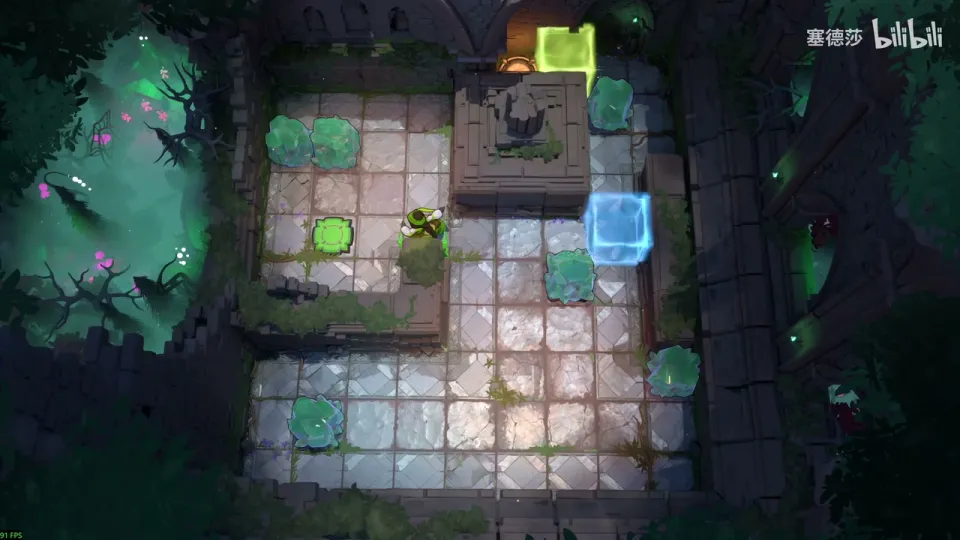
Getting there: on the map below, press the teal button to open the path left. Two white buttons together raise a right-facing silver block that holds the button under it, so take the crystal round the top; the block shoves it right, so first set it so the shove lands it in the green button’s column. (40:50) 塞德莎 then plays puzzle 3 first.
- You can’t fit two crystals inside, so carry one out and push the other into the marked spot. (43:58)
- Bring a crystal to the top-right, pull it down to the marked row and step left: the blue block shoves it along. (44:18)
- Repeat for each crystal until the row reaches the button. (44:27)
- The last one holds the green button from a distance and the exit opens. (44:49)
Puzzle 3
Key idea: the exit is a monster gate, and the three dragons die by being squashed: an energy block appears on the dragon, can’t push it because something solid is behind it, and crushes it. (YouTube 1:52 · 塞德莎 P4 41:58)
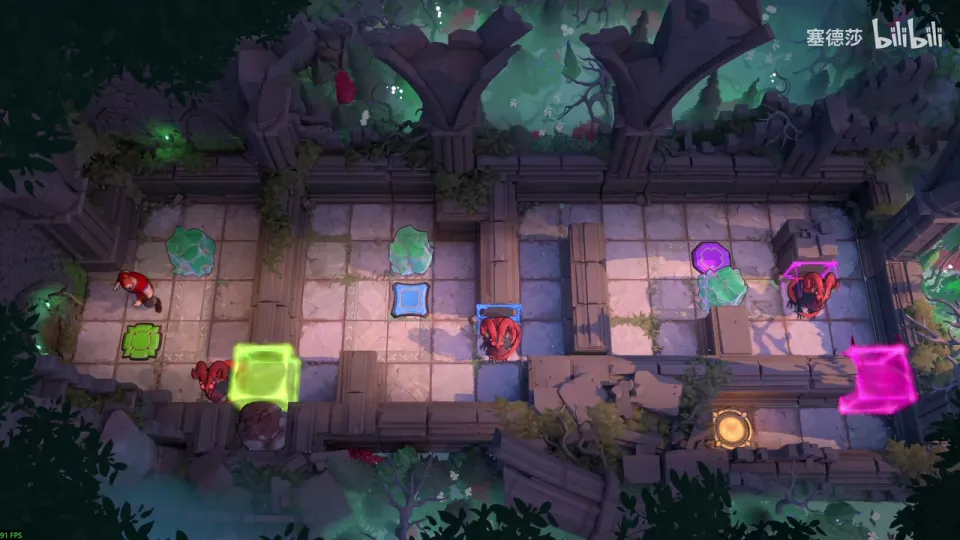
- First dragon: a stone sits below it, so switch the block on and it is crushed. (41:58)
- Second dragon: the tile below is empty, so the block would just push it. Push the crystal underneath first, then switch. (42:12)
- Third dragon: a wall stops you pushing the crystal over. Push the stone out, lure the dragon left (never let it reach the bottom row), then push the stone across and let the piston drive it down. (42:33)
- Squash the last dragon and walk out. (42:54)
Puzzle 4
Key idea: two crystals hold two buttons, and the dragon must hold the third. You can’t pull the dragon left, because the Cleric’s shield can’t follow the Thief round its side. Let the left-facing yellow blocks push it instead, one tile per push, with stand-ins on the buttons. (YouTube 2:36 · 塞德莎 P4 44:58)
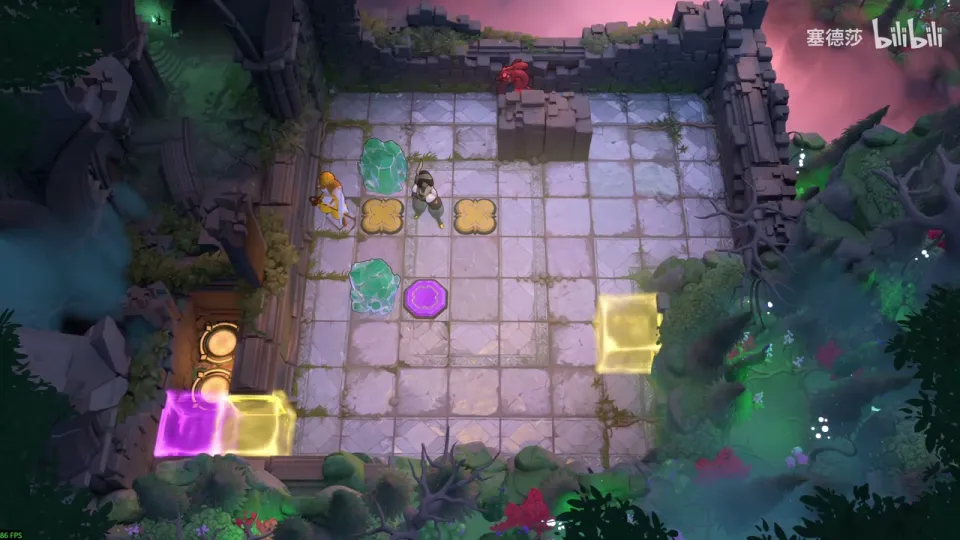
- The dragon’s fire catches the Thief at the start, so move him down first. (45:09)
- The yellow blocks can push the dragon at most as far as the column of the rightmost yellow button. (45:49)
- Pull the dragon out, put one stone on a button, stand the Cleric on another, bring the dragon over and let go: it is pushed one tile. (46:07)
- Repeat with the Thief as the stand-in (two tiles), then with the spare crystal (three). Pull the dragon onto the button, then the last crystal. (46:31)
Puzzle 5
Key idea: the dragons kill each other in a chain. The first burns the goblin at the bottom-left, the second burns the first, and so on, until the last two burn each other. Break the rocks in the order that frees each fire line at the right moment. (YouTube 4:23 · 塞德莎 P15 7:31)
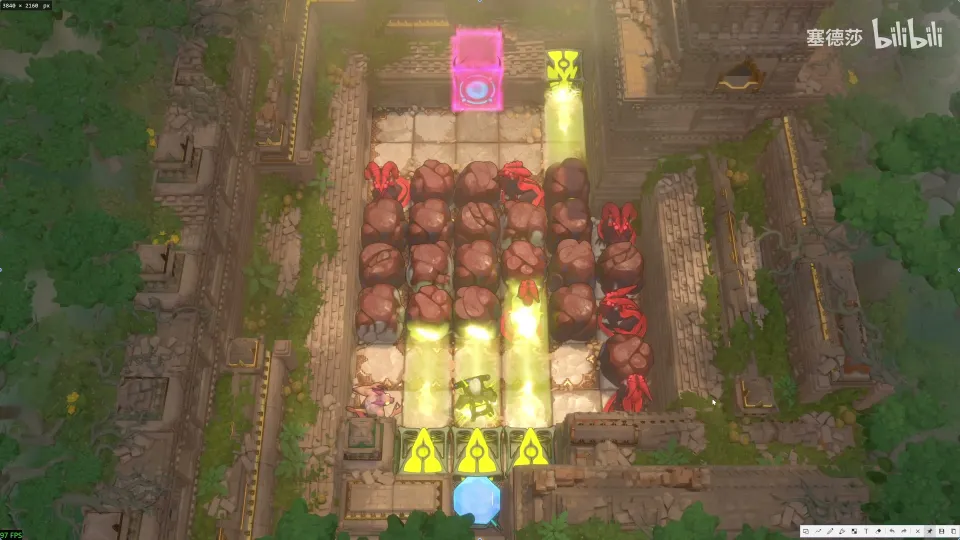
Getting there: a crystal blocks the entrance. Light the yellow beam on the left and break it, walking into it from a side where it can’t move, because a push always wins over a break. (6:59)
- 塞德莎 numbers the dragons 1 to 4 along the chain. That order is fixed: each dragon is useless once it has fired, so the next one finishes it. (7:38)
- Come in from the top and open the route in reverse. (8:20)
- Clear the rocks one fire line at a time and break the last rock to set off the final pair. The exact rocks are easiest to follow at 8:30–8:55. (8:30)
Puzzle 6
Key idea: a dragon guards the exit, and only the dragon below it can burn it once the dragon in between is gone. So the wall of stones in the middle must be opened, but never along a row, or the fire sweeps you. Break the stones from above or below, in an order that leaves you a way round. (YouTube 4:46 · 塞德莎 P15 9:55)
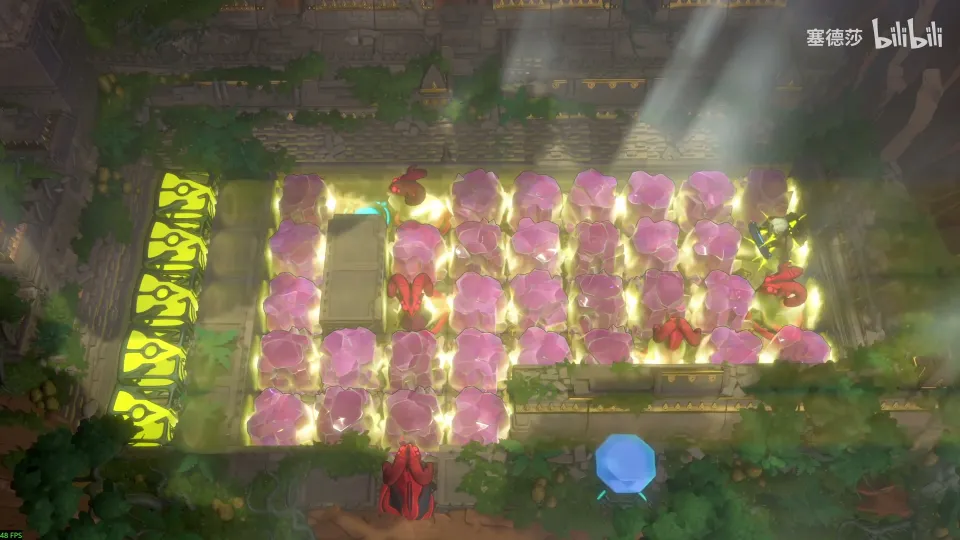
Getting there: reset, take back the broken crystal and push it one tile left before lighting the yellow beam. Only on those two tiles can you break it, and the two goblins then knock each other out. (9:11)
- Best plan: break the key stone from below so you end up at the bottom-left and can walk round. One stone is watched by a dragon, so break it from the side 塞德莎 marks. (9:55)
- Loop round and break the first stone, then come back for the second. Doing it the other way round gets you burned. (11:16)
- Open the line that lets the fire through later, then break the blocking stone from below. (11:37)
- Break the last ones from the left so you can still get out, and walk to the exit. (11:47)
Puzzle 7
Key idea: the red beam clears red energy blocks you touch. The only trap: the block left of the one in front of the exit can only be cleared with the red emitter in its left position. Never pull that emitter to the right. (YouTube 5:20 · 塞德莎 P16 0:22)
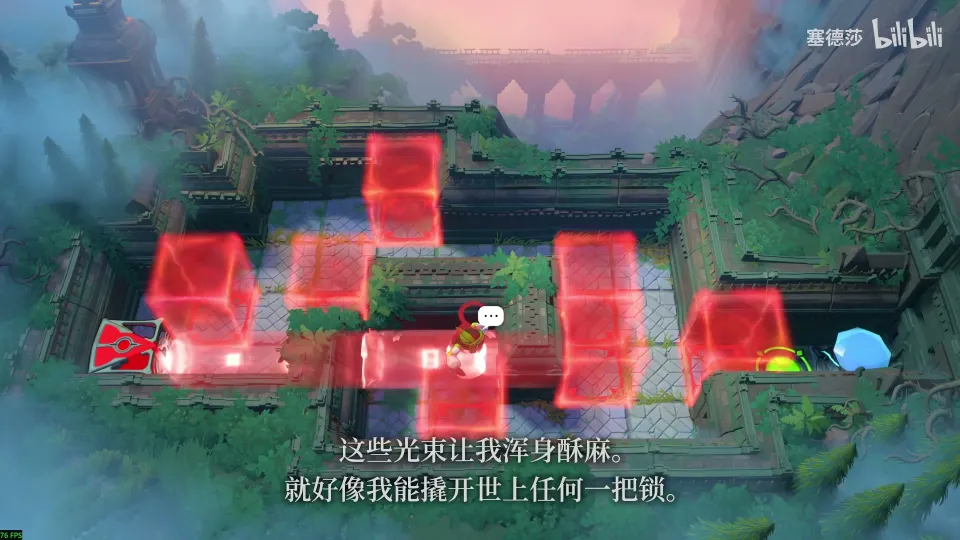
- Pull the emitter out and clear the blocks along your way. (0:29)
- To clear the block in front of the exit you also need the one left of it, and only the left position reaches that. (0:42)
- Come round, touch one block, pull the emitter down, touch the next. (1:03)
- Finally pull the other red emitter over to touch the last block. (1:14)
Overworld puzzle 1
Key idea: open a run of red doors on the map by moving stones and the red emitter, without pushing a stone where it gets stuck. (YouTube 5:50 · 塞德莎 P16 1:26)
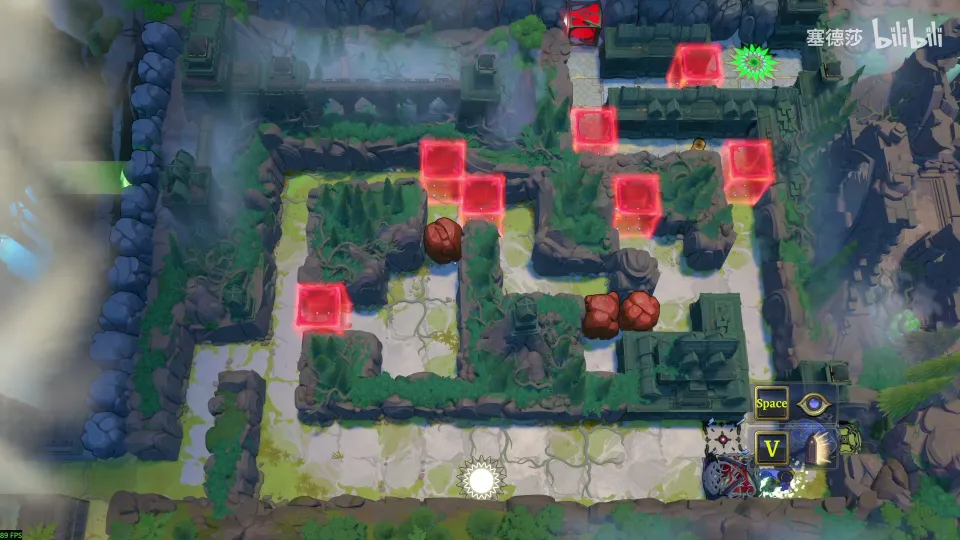
- Switch the beam on and open the first door. Move the stone in the way aside, without pushing it into a corner. (1:35)
- Push that stone to the top. The left path is now open, so you can walk round. (1:45)
- Open the next door and push the next stone aside, but not to the right, or the block above blows up. (1:54)
- Take the long way round, push the stone over, open the door, push the stone left, put the emitter in place, open two doors and push the emitter one more tile right. (2:05)
Puzzle 8
Key idea: a Wizard room. In the narrow row the Wizard is forced to swap with the red emitter, so that row is a bottleneck. And once you have brought the emitter in, keep one of the last three red blocks: with nothing to the left, stepping left swaps you into a dead end. (YouTube 6:51 · 塞德莎 P16 2:16)
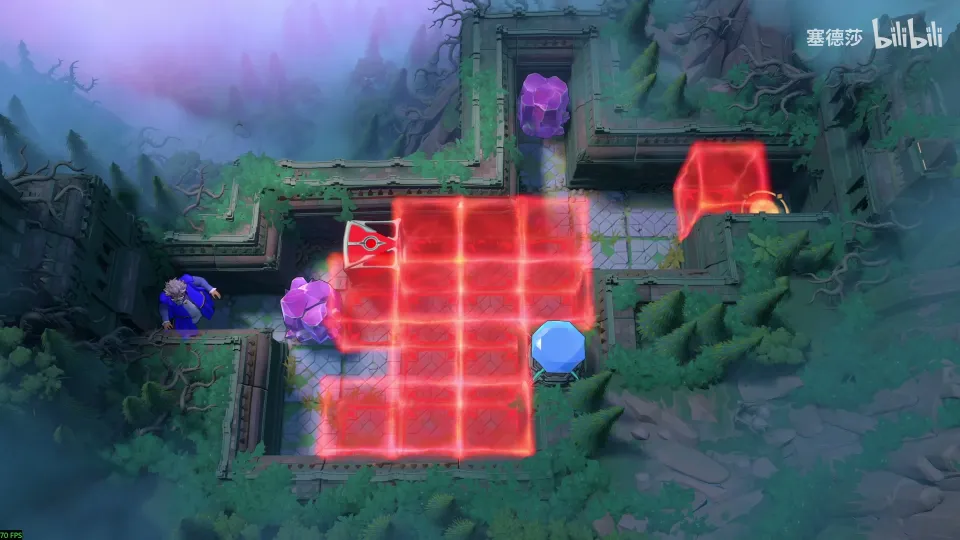
- Put the red emitter on the tile 塞德莎 marks, enter from above, go round and swap so the emitter ends up inside. (2:30)
- Don’t clear everything: of the three blocks he circles, leave one standing. (3:59)
- Clear the rest, move the emitter in, go round and up. With the leftover block in place you can now step left and finish. (4:12)
Puzzle 9
Key idea: the first green room. In the green beam you walk through walls, so step into a wall, shift along, step out, and repeat. (YouTube 7:27 · 塞德莎 P16 5:17)
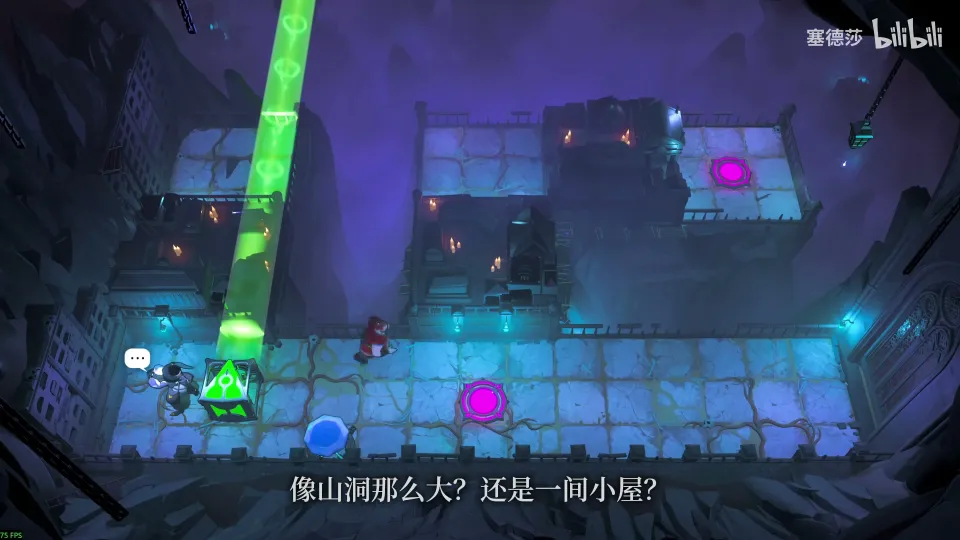
- Send either hero up; 塞德莎 uses the Warrior. In the green light walk into the wall, move over, walk through again, and so on to the other side. (5:36)
- With the Warrior below and the Thief above it works the same way. (5:48)
Puzzle 10
Key idea: the stone has to hold the button, because the green emitter is needed to get through the left wall. Move the stone with the Warrior and park the emitter where its beam lets you slip past. (YouTube 7:52 · 塞德莎 P16 5:57)
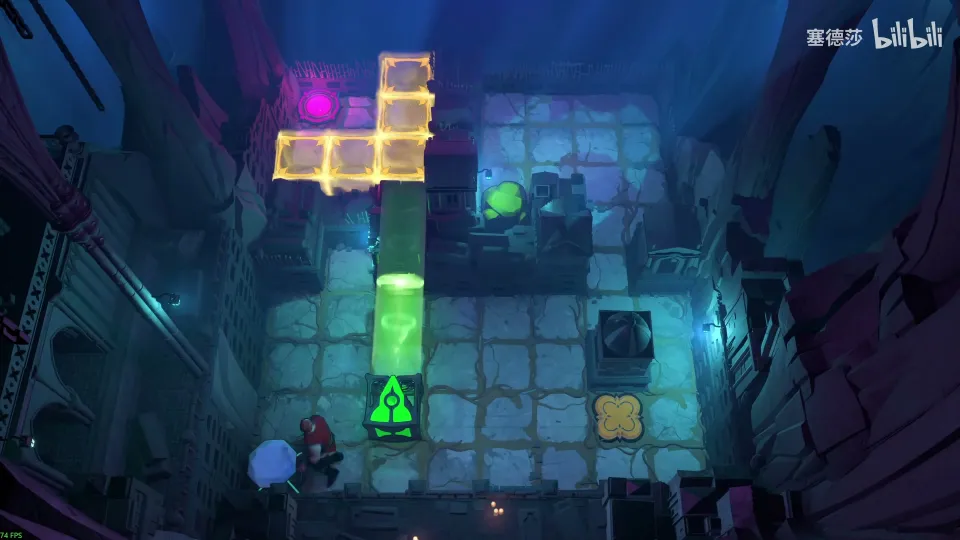
- Push the stone up, then right, and put the emitter where it lets you pass the wall. Nudge the emitter one more tile right. (6:07)
- Pushing the stone down later would block your path, so slip out through the wall first, then push the emitter left. (6:18)
- Only this notch lets you push the stone down onto the button. (6:28)
Puzzle 11
Key idea: a Tower of Hanoi feel. The leftmost gem blocks the beam and has to come down, but you can’t reach it directly, so use wall walking to shift it right first. (YouTube 8:28 · 塞德莎 P16 6:41)
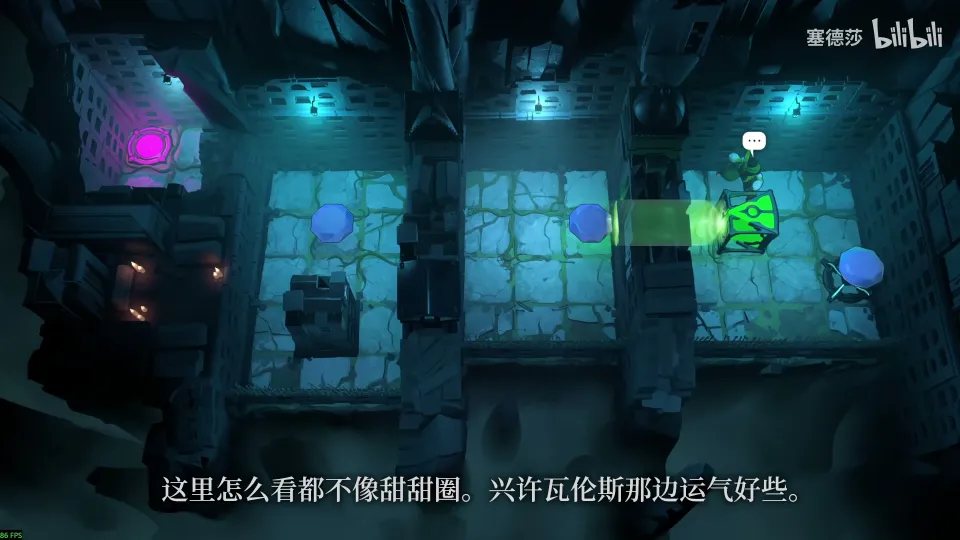
- Shift the green emitter one tile right. It drags a gem out, but you can pull it back. (6:47)
- Pull this one down, come back up and use wall walking to pull the gem one tile right. (7:09)
- Before pulling the beam back, pull this piece left one tile, or you can’t return. (7:22)
- Pull it up, go left and pull the blocking gem away. (7:31)
Puzzle 12
Key idea: the finish needs the up-facing green emitter as far right as the Thief can drag it, plus a sideways beam on the right row. The terrain stops you pulling it straight there, so use the row of walls along the top to go in and come out the other side. (YouTube 9:07 · 塞德莎 P16 8:30)
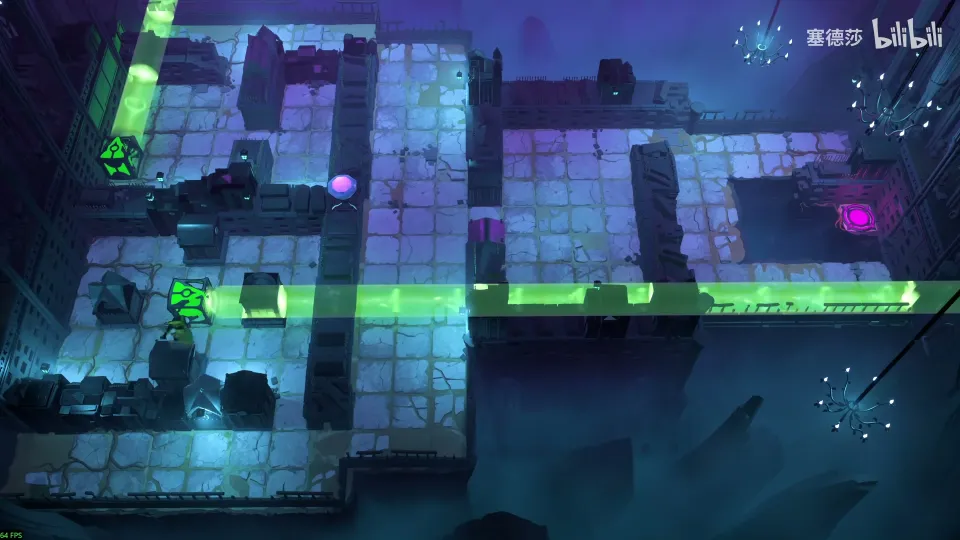
Getting there: take out the left-facing green emitter at the bottom-right: put this piece here, walk through the wall to the emitter’s left and push it out, then keep pushing it up and walk into the room. (8:03)
- First take both green emitters out using wall walking. (8:30)
- The upper one is harder: move it in, walk through to grab it, walk out, leave the beam here and pull back the other way, so the up-facing emitter stays in this column. (8:54)
- Target: up-facing emitter on the marked tile, sideways beam on this row. (9:18)
- Set the sideways beam on the top walls, pull the emitter up into the wall and out the far side, then pull the sideways beam back. (9:59)
Puzzle 13
Key idea: three short stages for the Thief and the Warrior. Each time a green emitter has to be pushed up from below, and that only works if the Warrior waits inside a wall while the Thief drags the emitter, then the Warrior steps out and pushes. (YouTube 10:05 · 塞德莎 P16 10:25)
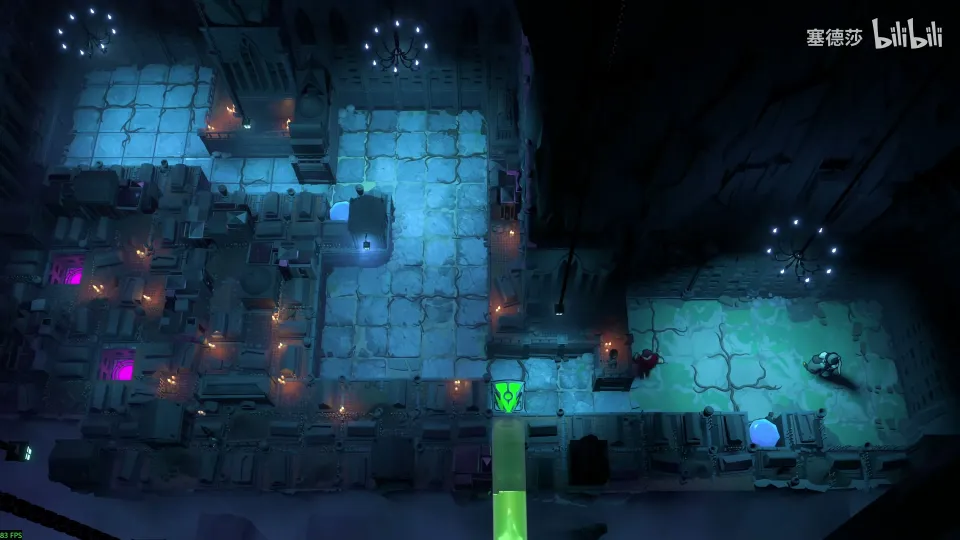
- Stage 1. Pull the emitter up one tile and walk the Warrior into the lower wall. (10:52)
- Swap roles and inch along: in the green light move one tile left, again and again, then push up to get the emitter out. (11:02)
- Stage 2. There’s no room to enter the wall from below, so push the beam over and send the Warrior in from this side instead, then inch along the same way. (11:23)
- Stage 3. Pull the beam up, send one hero in, pull it over, then go in yourself. (11:52)
Puzzle 14
Key idea: an interlock: every piece you push needs another piece pushed first. Break it by spotting the asymmetry: the gem on the right sits one tile further right than the others, and that extra wall lets you take it out. (YouTube 10:52 · 塞德莎 P16 12:33)
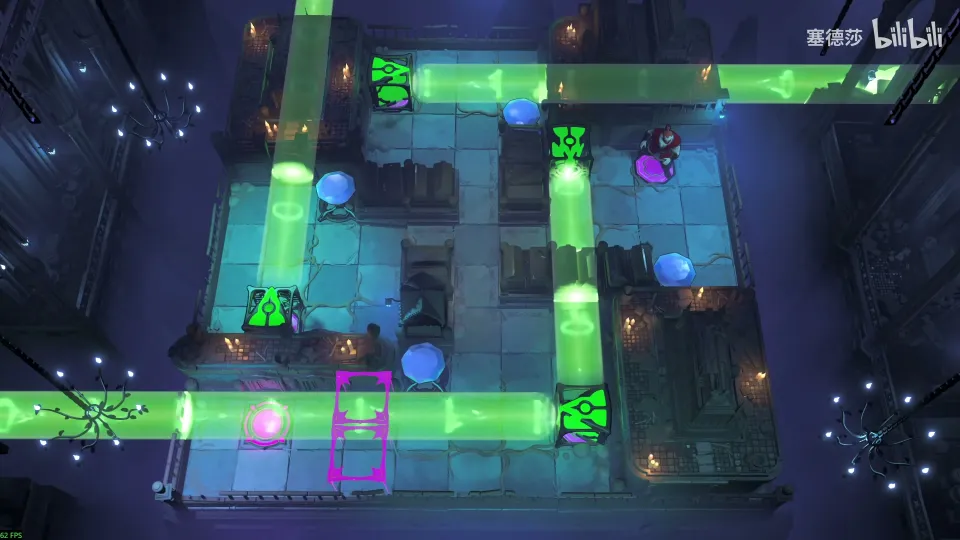
Getting there: on the map, keep pushing the left-facing emitter up with wall walking. (12:09)
- Pushing this piece right needs that one, pushing that one back needs this one: a closed loop. (12:42)
- Use the wall beside the off-centre gem to take that gem out. (13:24)
- Put the rest back: this one up to here, that one up to the end, this one left. (13:34)
- The last one can be collected: push it to the end, up, down again, then right. (13:44)
Puzzle 15
Key idea: the first orange room. Orange jumps two tiles, so pushing an emitter from its beam side needs a two-tile gap every time. One hero must jump in at the top-left via the leftmost column, which the Thief can’t set up alone, so the Warrior goes first. (YouTube 11:24 · 塞德莎 P16 20:08)
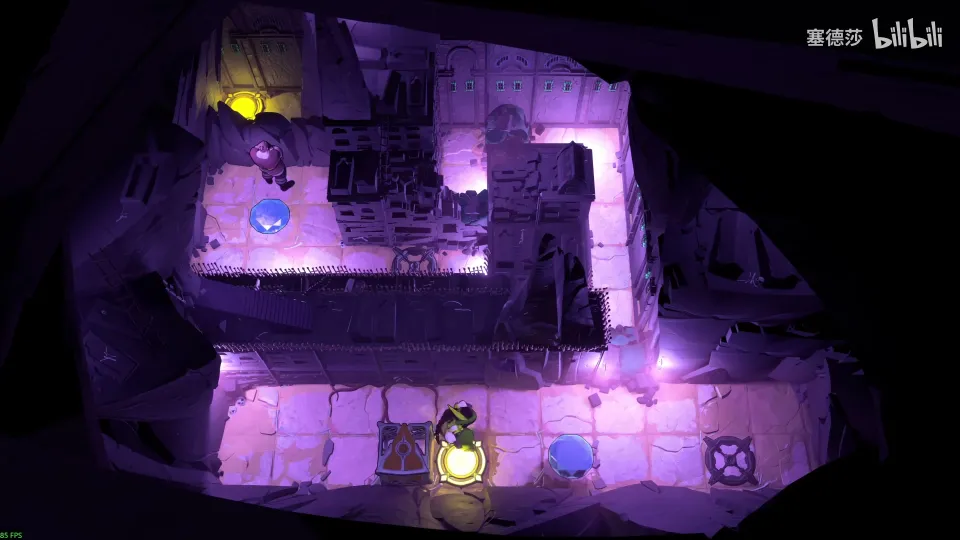
Getting there: 塞德莎 plays puzzles 32 and 33 before this one. Heading left, light the orange beam and shuffle its emitter with two-tile gaps. (19:47)
- Light it, pull the lower emitter over, aim the beam across and pull it up. You’re one tile short, so pull it away, up, back again and jump. (20:31)
- At the bottom, pull the emitter to the end and step out. (20:51)
- Now the Thief: push left, jump, jump down. Don’t go left again or he drags the gem out. (21:02)
- Because orange moves are jumps, the Thief doesn’t pull anything. Jump across, jump once more and release the gem. (21:12)
Puzzle 16
Key idea: two stones go onto the buttons at the right, but a stone pushed across an orange beam jumps two and lands in the wrong column. Block the beam for the first, and for the second move the emitter itself to change the gap. (YouTube 12:26 · 塞德莎 P16 21:43)
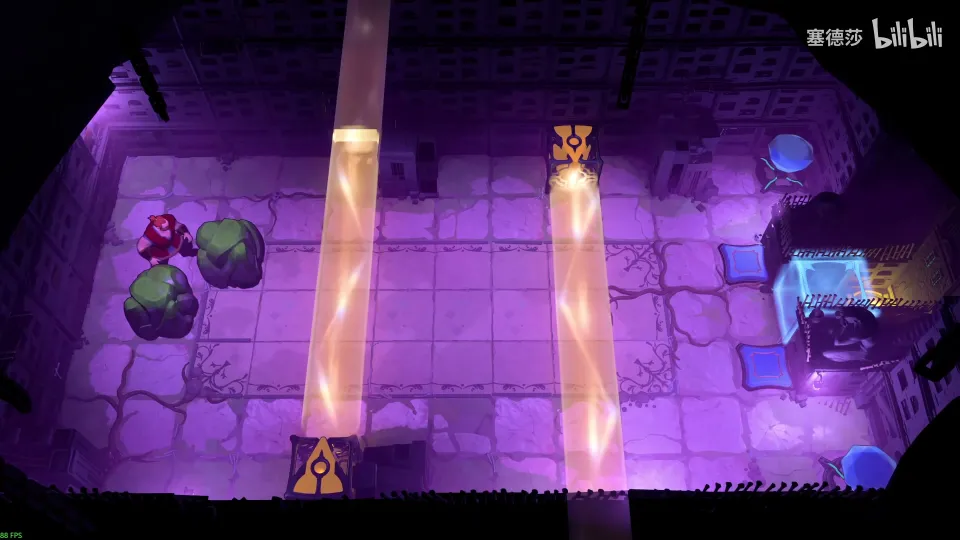
Getting there: keep moving the emitter left on the map, going up here to reach the bottom-right room. (21:29)
- First stone: stand in the way of the beam and push the stone straight across. (22:04)
- It still can’t cross the next beam, so shift the upper emitter left to change the spacing and push it out. (22:11)
- Second stone: the wall here is one tile wide, so jump over it and move the lower emitter out of the way. (22:23)
- Move it back by jumping, then offset it the same way and push the stone onto its button. (22:35)
Puzzle 17
Key idea: push one stone to the bottom row, one step at a time, using small detours to switch its parity when a two-tile jump would land it on the wrong square. (YouTube 12:59 · 塞德莎 P16 23:25)
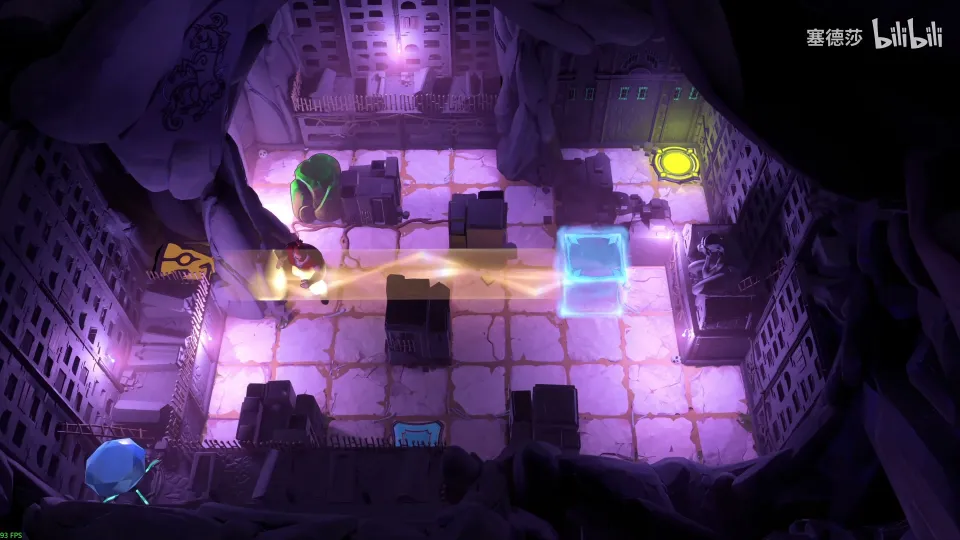
Getting there: move down, and don’t go left from this tile, because the two-tile spacing would be wrong; loop round and jump in, then jump across on purpose and push the emitter up. (22:56)
- Push the stone down, right one, up, then right again. (23:25)
- Down, left, then right twice, adjusting parity and jumping one more tile right. (23:37)
- Go back up, push it down one, push it to the end and jump in to fetch it. (23:53)
- The last push down isn’t possible directly, so use the orange jump to get over the wall behind it and push. (24:04)
Puzzle 18
Key idea: get the stone onto the green button with the Thief. In orange light he jumps instead of stepping, so he doesn’t drag the stone, which is how you let go of it or get to its other side. (YouTube 13:36 · 塞德莎 P16 24:18)
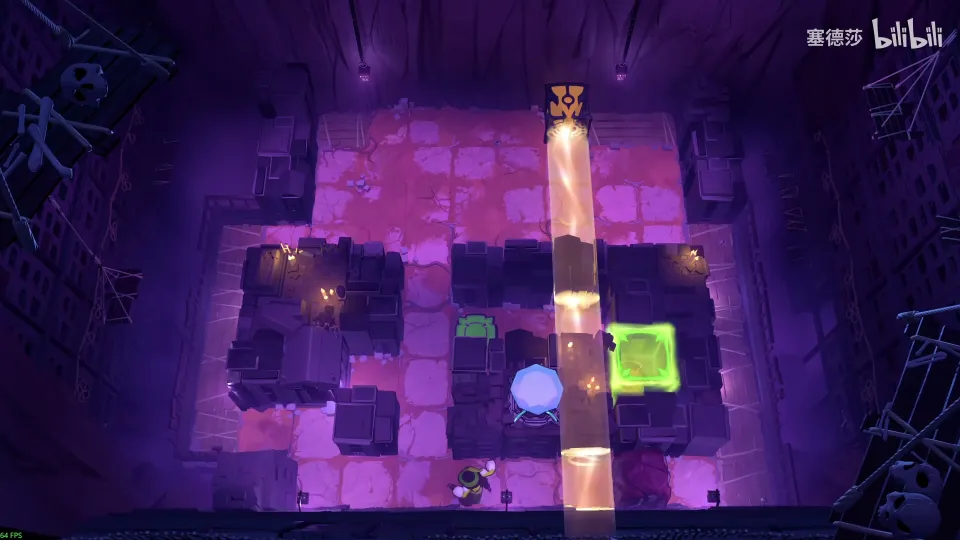
- Move the orange beam here and pull the stone to the far left. (24:28)
- Put the beam here, pull the stone right one tile and jump out. Then pull it up to the end. (24:37)
- Use the notch on the left to loop round into the button’s row. (24:47)
- To pull it right, jump in at the right end of the beam. It goes one tile too far, so pull it back from the other side, then jump into the exit. (24:59)
Puzzle 19
Key idea: put the top-right stone on its button, then reach the exit through a gap that an orange jump can’t land in. Park a stone so you jump in on a tile with no orange light inside, and walk the rest. (YouTube 14:38 · 塞德莎 P16 26:13)
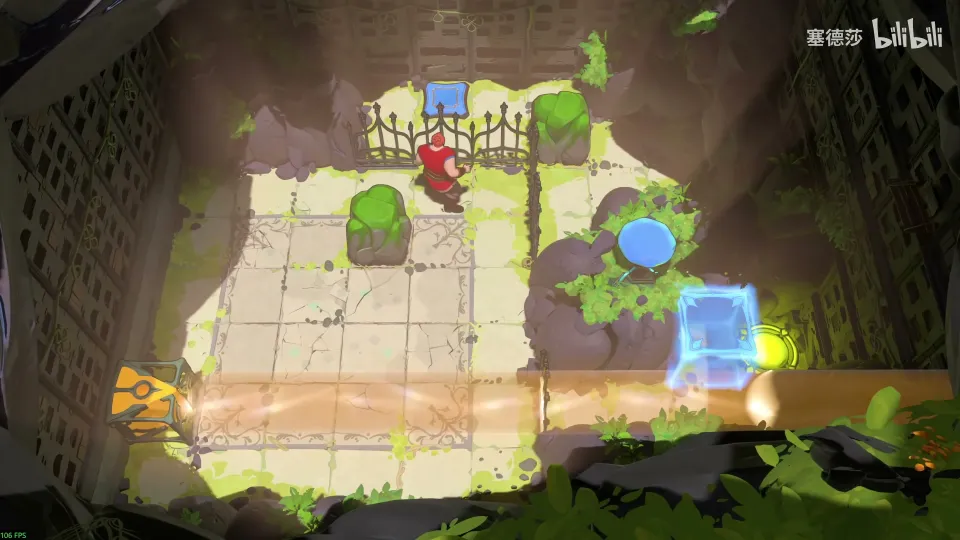
Getting there: keep shuffling the emitter along the map, looping round each time to fix the two-tile spacing. (25:28)
- Push the orange emitter up first, or you can’t get up at all. (26:13)
- Jump into the railings, push the stone, come out, jump up next to it and push it onto the button. (26:22)
- Take the emitter back by blocking its beam and walking round. (26:33)
- Jumping straight in falls short, so put the stone here: you jump in and there’s no orange light inside, so you can walk to the exit. (26:44)
Puzzle 20
Key idea: a pure orange-emitter shuffle. Slot the emitter into the gap at the top, adjusting its spacing with loops, and jumping over the emitter itself when you need to get behind it. (YouTube 15:16 · 塞德莎 P16 27:22)
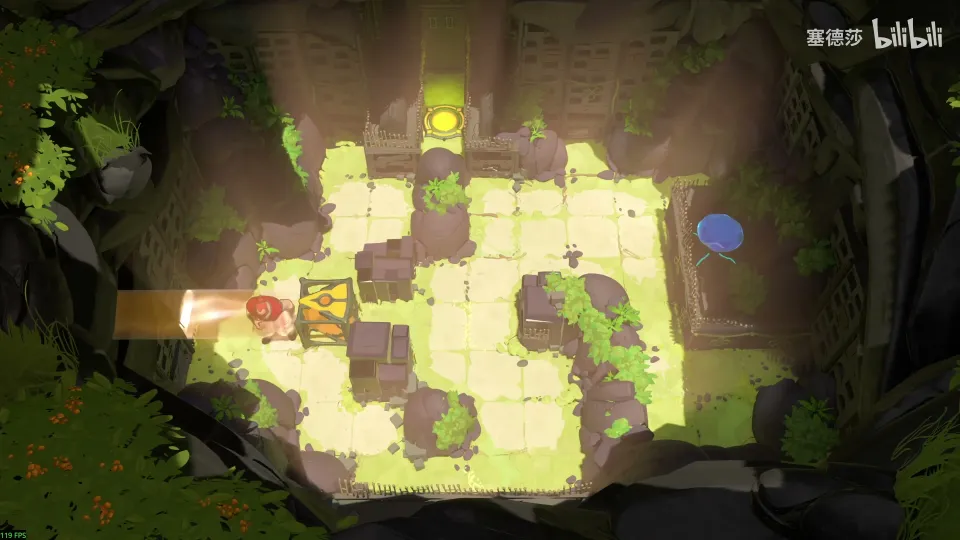
- Go round below, push one tile right, then two, and jump across. (27:22)
- You can’t land on the open floor here, so loop round, push three, come out and push it up. (27:31)
- Jump up, jump over the wall, push right, push down, push right one more. (27:43)
- It still can’t go straight up, so push it down, right, jump over the emitter itself, push it up and then one tile left into the slot. (28:01)
Puzzle 21
Key idea: use orange and green light to get past three goblins and a wall. The last step is the new idea: an energy block can destroy a beam emitter, so push the green emitter into an open gate and let it close. (YouTube 16:07 · 塞德莎 P16 28:40)
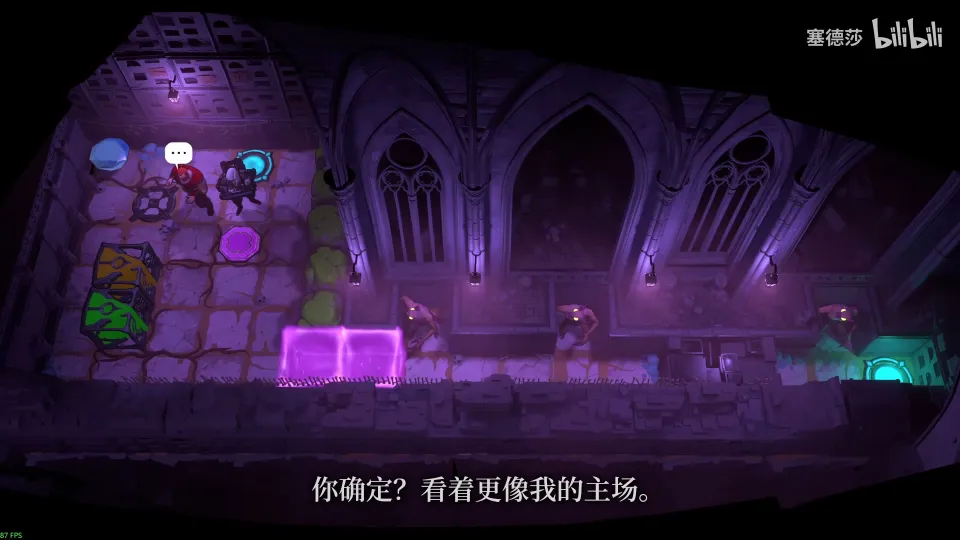
Getting there: this room is up at the top-right and unlocks the way on. Bring the orange beam over to enter. (28:22)
- The Explorer picks up the gem. Move the orange beam down first, because goblins are in the way, then set the gem back down. (28:40)
- Hold the spot and jump. The parity is wrong: two tiles right lands on a monster. Let go, take one plain step, open the door and jump. (28:58)
- Put the green emitter here and switch to green. It now blocks the orange beam, so the green emitter has to go. (29:11)
- Push the gem onto the button so the two gates open, push the green emitter into a gate, then release: the gate closes on it and it’s gone. Relight and leave. (29:38)
Puzzle 22
Key idea: the first purple room, a warm-up. Don’t step right after placing the gem, or you’re stuck in a tiny space. (YouTube 16:58 · 塞德莎 P16 30:10)
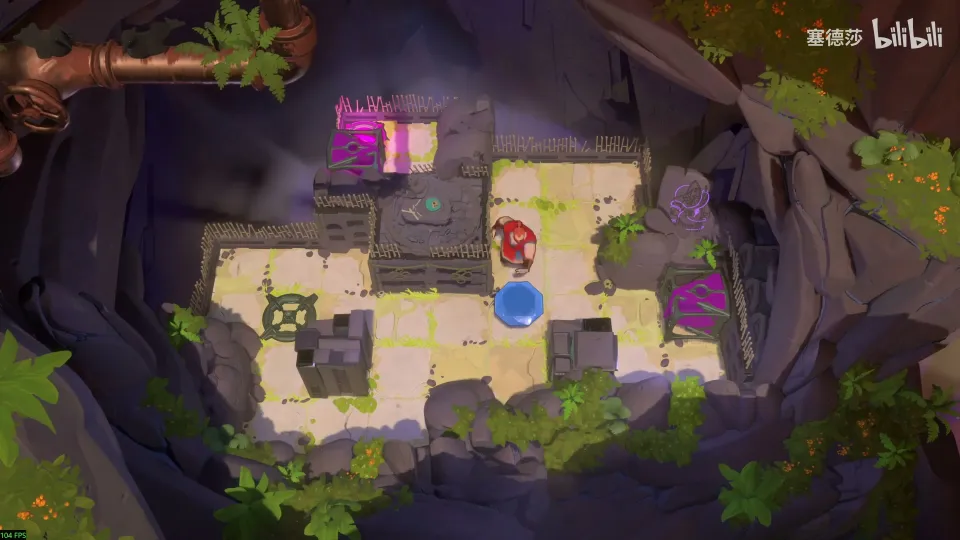
- Push the gem here. (30:10)
- Go up instead of right and take the gem out again, then push from below to get out. (30:22)
Puzzle 23
Key idea: the Thief can’t pull the purple emitter directly, because the moment he steps into its beam he is carried away. Pull the gem away first, then steer the emitter so its beam carries you out and lands it on the exit tile. (YouTube 17:12 · 塞德莎 P16 30:42)
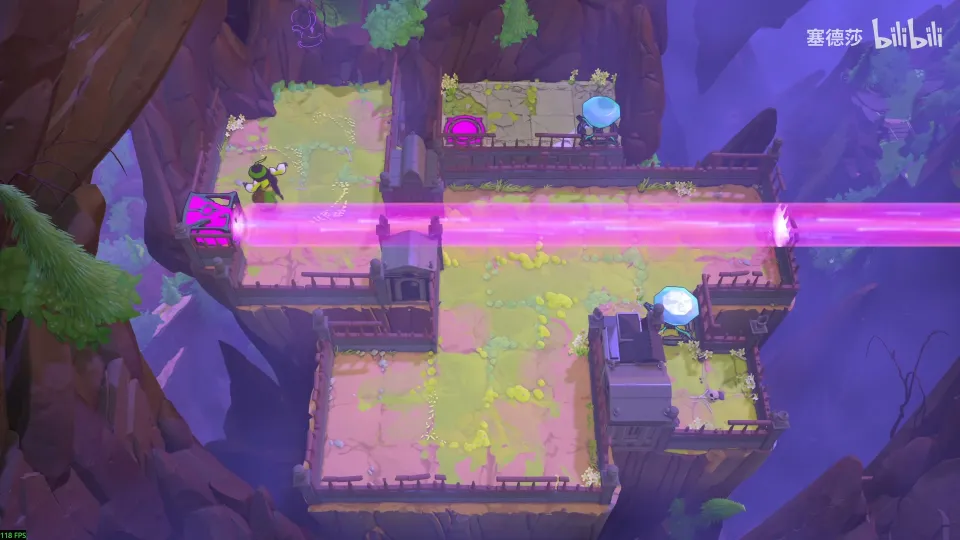
- Pull the emitter up a little, step out, and pull the gem aside. (30:42)
- To get out later the purple beam has to reach the bottom-right, so pull the emitter over and then down. (30:52)
- Ride out, then pull it up and left: the emitter ends on the exit tile. (31:12)
Puzzle 24
Key idea: a Warrior room. You finish by jumping onto the button with purple, which needs a stone to stop the beam there. The same stone also lets you push the emitter, since pushing it directly just keeps teleporting you. (YouTube 17:37 · 塞德莎 P16 31:29)
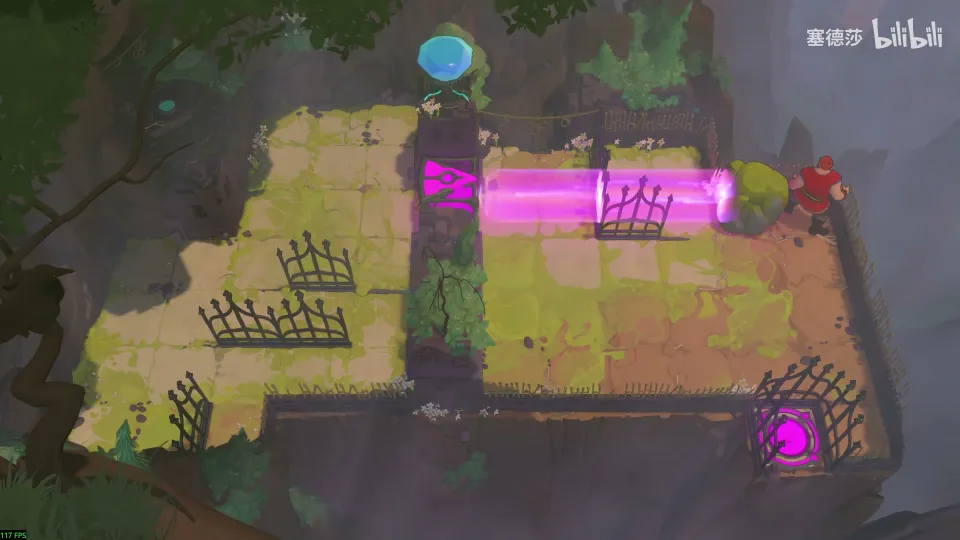
- Get the stone out: step left, then jump in. (31:40)
- Put the stone in the beam and push the emitter left with it. (31:50)
- Shuffle: stone into the lower slot, then right into the next slot; push the emitter down and left. (32:01)
- Bring the stone to the far right and jump in from the left onto the button. (32:11)
Puzzle 25
Key idea: two exits for the Thief and the Warrior. The right exit only needs the emitter as the end of the beam; the left one needs the stone as a stopper, so the stone has to come out first. (YouTube 18:20 · 塞德莎 P16 32:32)
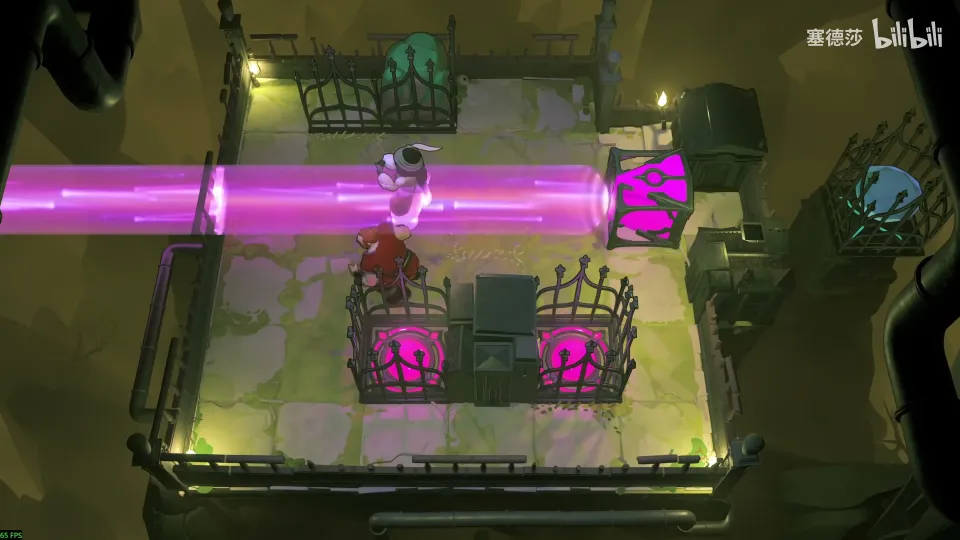
- The Thief pulls the emitter down, the Warrior wedges into the grass, the Thief pulls it back, and the Warrior pushes it out. (33:02)
- The Thief pulls the stone one tile left to make a gap; flip in on the purple beam and pull it out. (33:13)
- Move the emitter into this column. 塞德莎 notices you can push it with the stone instead of pulling. (33:36)
- Emitter here: one hero goes in, the other puts the stone here and crosses left to the left exit. Then take the right exit. (33:57)
Puzzle 26
Key idea: four rows of purple light. Each ends in a wall on the left and open space on the right, so inside the light you can’t step left or right. Block any one of the three lower beams on the left half of the exit, and you can slip into the gap, line up with the exit and walk up. (YouTube 19:10 · 塞德莎 P16 34:32)
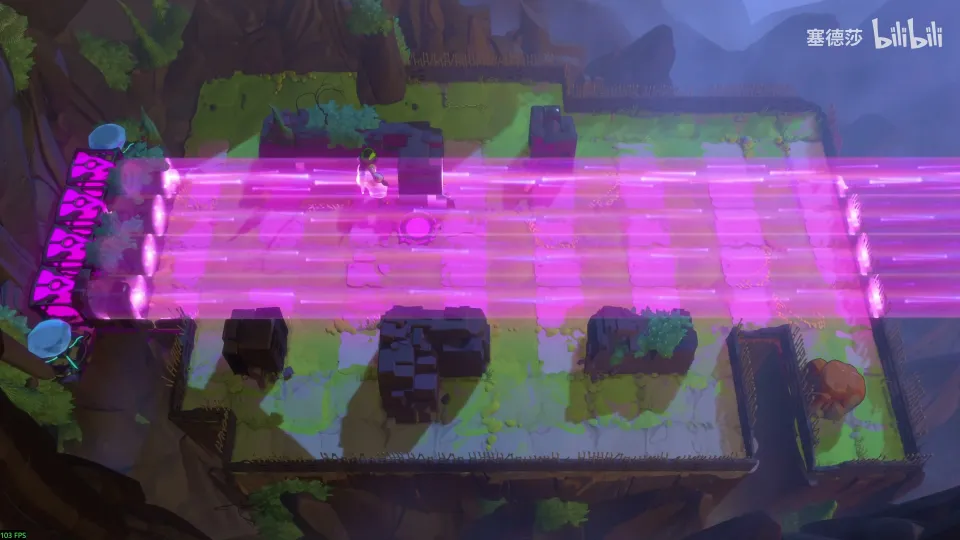
- Pull the stone up, then down again here, loop round, and pull it across, up, and down on the left. (34:51)
- Blocking any one of the three lower beams is enough. (35:11)
- Pull it up again and cut left: the top beam is now blocked. Go right, pull the stone a little, come down and park it here. Then go right and up to the exit. (35:38)
Puzzle 27
Key idea: the wall can only be crossed by jumping along purple, which needs a stopper on the right half, and the only one is an energy gate. Jump from the button: the gate is up while you stand on it and vanishes the moment you leave. Park the purple emitter on another gate, one that appears when the button is released, so the jump also wrecks the emitter and the beam is gone. (YouTube 19:58 · 塞德莎 P16 35:58)
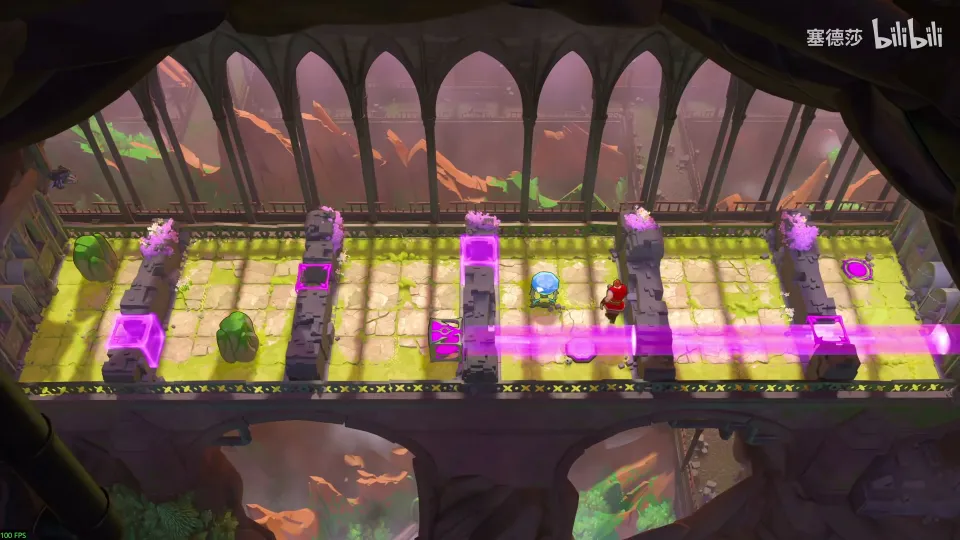
- 塞德莎 explains the plan at 36:17; it is worth watching once. (36:17)
- Hold the button, take the emitter out and use it. Don’t put it in the gate’s column, or you can’t get past. (38:39)
- After jumping, push the emitter left with the stone. Take the stone back (you need it on a button), move the beam to the gem, cross, and have the gem hold the button. (38:58)
- Use the last stone to shove the emitter onto the gate tile, then come back. (39:58)
- Move the stone off and jump right: the left gate appears and destroys the emitter, the right gate disappears, and you walk through. (40:03)
Puzzle 28
Key idea: two emitters at right angles push each other. An up-facing beam lets you push the left-facing emitter sideways, and then the left-facing one lets you push the up-facing emitter along, step by step. (YouTube 21:26 · 塞德莎 P16 40:44)
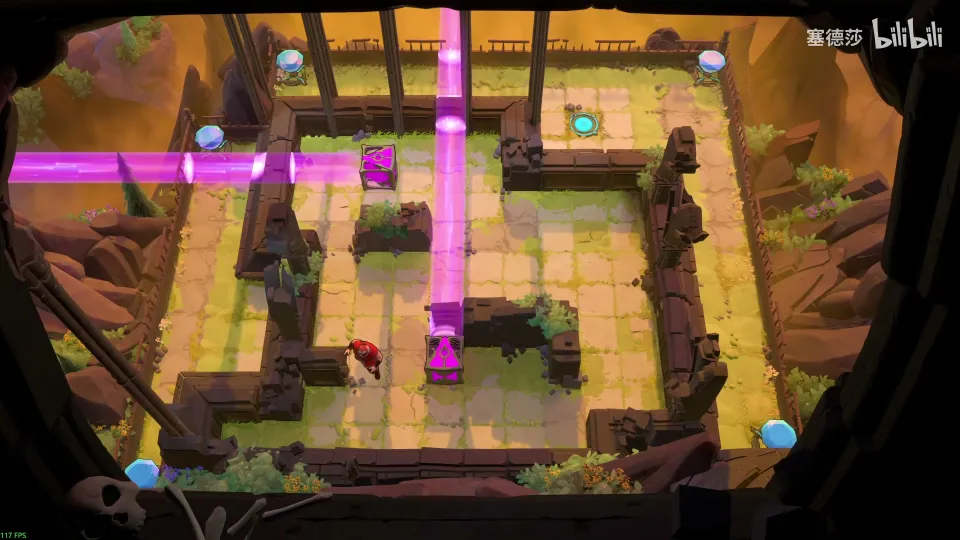
Getting there: 塞德莎 had pushed the stone on the right into a dead spot, so he resets the map, loops round and pushes it aside. (40:21)
- Move the up-facing emitter here and push this down, so the up-facing beam lets you push the left-facing emitter right. (40:44)
- Switch to the same set-up the other way round and push the up-facing emitter down. Shift slightly and keep going right. (41:03)
- Once the down-facing beam is in place, bring the left-facing emitter round from above, finish the up-facing one and set the left-facing one here. (41:16)
Puzzle 29
Key idea: a long Thief room. Stones block purple beams, and a purple teleport lets the Thief let go without dragging, so use one stone to block a beam while you pull another, until the right stone sits on the green button. (YouTube 22:35 · 塞德莎 P16 42:18)
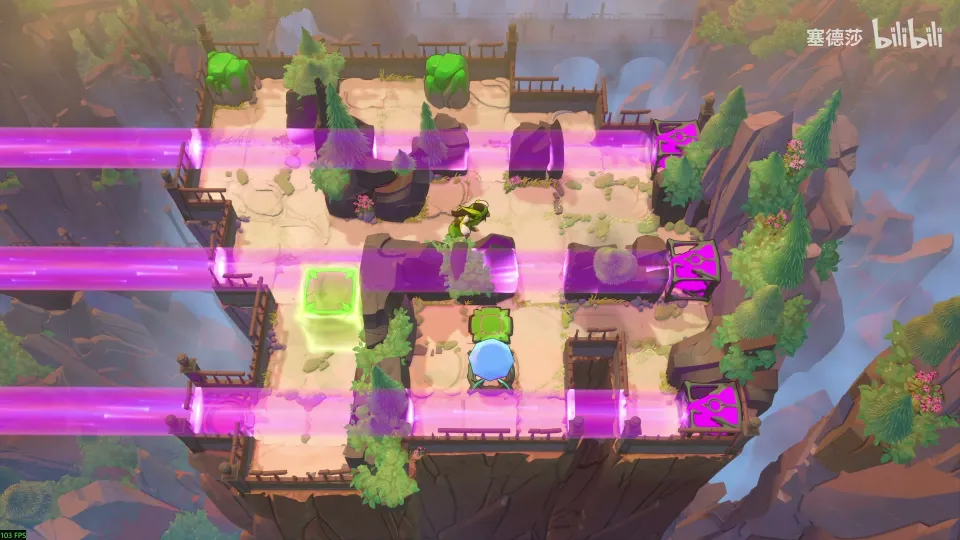
Getting there: if you get stuck on the map, undo (the button 塞德莎 shows) instead of resetting: it keeps your solved rooms. (41:44)
- Only the left stone can move first: the top-left one would need a rightward pull, and that teleports you. Pull the left one here, teleport out, pull it round and teleport out so it blocks this beam. (42:18)
- Quickly pull the top-left stone out to about here; you can’t teleport from the right at this spot. Then move it down to block the second row. (42:45)
- Pushed directly, the right stone gets stuck next to the gem, so use a teleport to let go of it. Pull the first stone here to cap the middle beam, loop round twice, and the stone lands where you need it. (43:41)
- Jump in, pull the stone right, jump out, and pull it onto the button. (44:22)
- Finally bring the left stone to the marked tile. 塞德莎 takes a wrong turn here; his corrected route is at 45:10. (45:10)
Puzzle 30
Key idea: walk the purple emitter to the top-right tile. Push it down early (any further left and it can never come out), then swap it with the stone and use the stone as a spacer to push it right. (YouTube 23:52 · 塞德莎 P16 45:48)
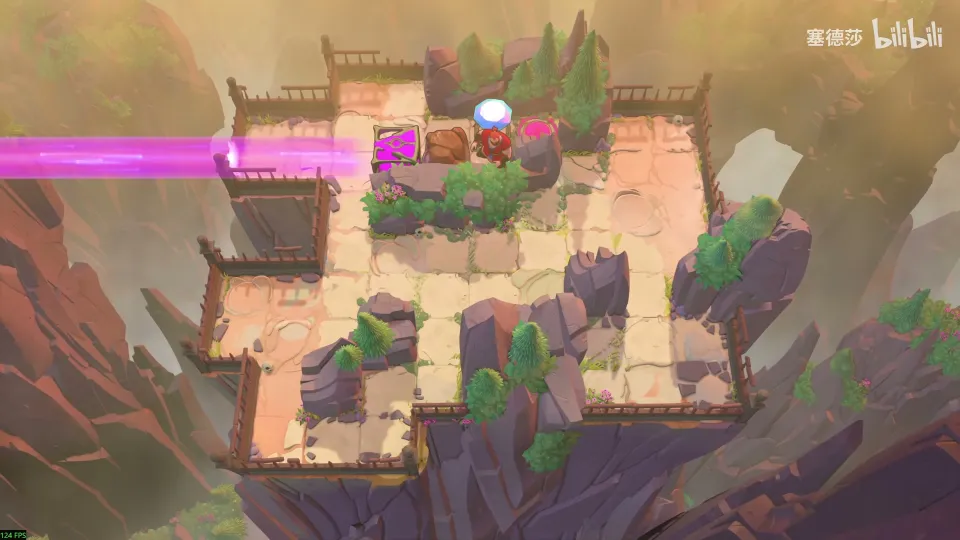
Getting there: park the stone so it blocks the right-hand beam, then push the other stone out from above. (45:28)
- Push everything left, then push the emitter down right away. (45:48)
- Move the stone to the left and push the emitter back, swapping the two. (46:00)
- Stone out, emitter out, then push the emitter right with the stone behind it. Stone up, right, back, tuck the emitter in, come up. (46:17)
- In the last stretch push the stone right first, push it up through the vertical channel, then down, and repeat until the emitter reaches the top-right. (46:38)
Puzzle 31
Key idea: build a staircase of stones. The final move is a purple teleport from a stone in this spot straight onto the exit, and getting there needs stones under you as steps. Both stones in the grass have to start on the right, so first move them over. (YouTube 25:02 · 塞德莎 P16 47:32)
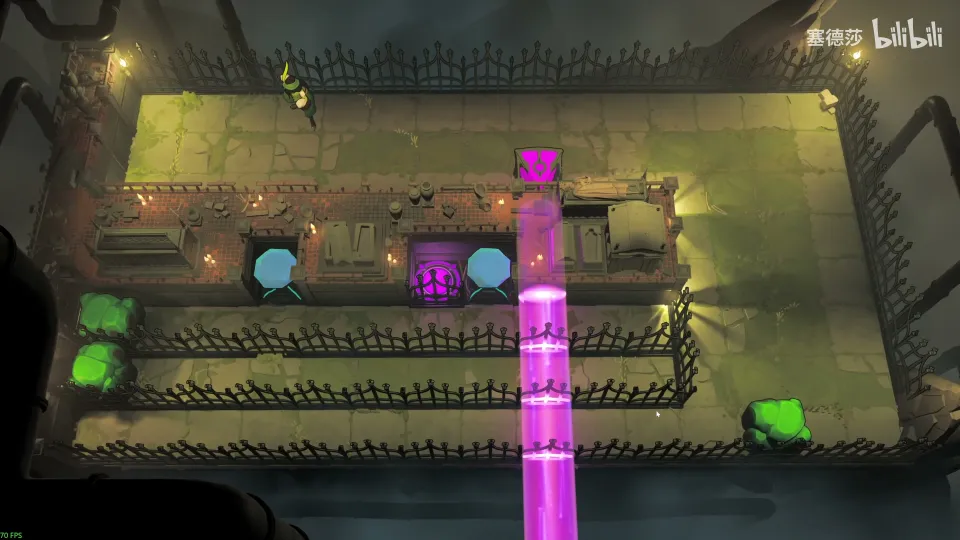
Getting there: a cage opens on the map. Push the stone into it so it no longer blocks the right beam, then push the other stone aside and teleport up. (47:11)
- 塞德莎 explains the end state and the staircase at 47:32. (47:32)
- Make a diagonal staircase in the right-hand space to bring the grass stones right, then one on the far left. (48:58)
- Move a stone here, jump in, pull the stone here; jump in, pull the next. (49:35)
- Pull the stone out, put the beam deep inside, pull a stone over and up, and put the beam here. (49:47)
- Pull the last stone into the end spot, then pull down the rest in order. (50:11)
Puzzle 32
Key idea: the green emitter sits on a green button, so you can’t push it out normally; walk it through a wall instead. Then use the one extra wall at the top to get both heroes past the blue and purple gates. (YouTube part 2 0:00 · 塞德莎 P16 14:45)
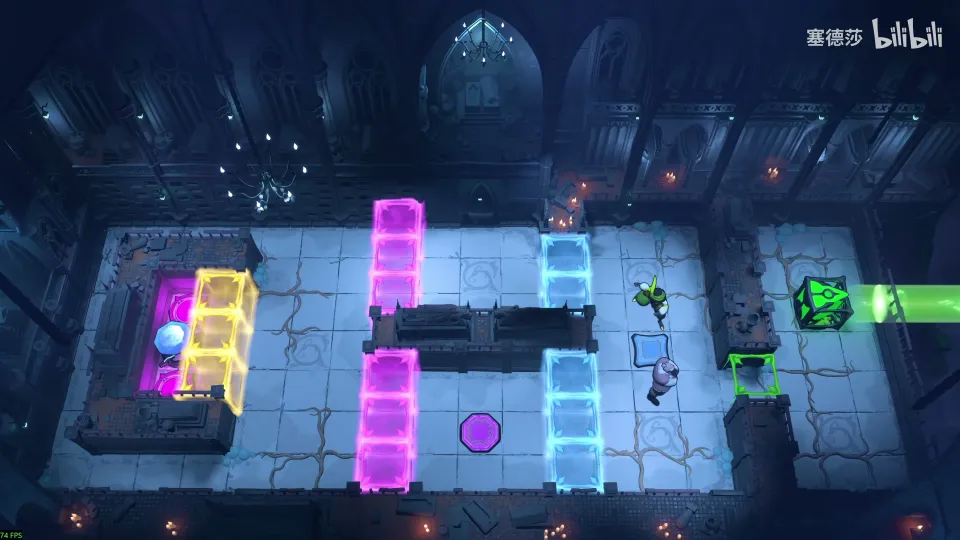
Getting there: on the map, use the notch at the top-left: push the stone up, push the emitter up with wall walking, push the stone, then push the emitter into the slot and out again. (14:02)
- Take the emitter out by carrying it through to a wall and stepping out. (15:06)
- The blue and purple gates are held by two buttons. The Thief holds one, the Warrior moves the emitter here, you go down, and the Thief walks through the wall to join you. (15:27)
- To bring the Warrior out, put the emitter on the middle row of walls and swap; the Warrior doesn’t drag anything, so he gets across safely and both walk through. (15:58)
- Exit: push the emitter all the way in, the Thief pulls it, the Warrior steps into the wall, pull it to the bottom and step in yourself. (16:26)
Puzzle 33
Key idea: an optional bonus room, all green. The trap is the leftmost stone: it blocks the green light, and when you push it up and left you need to get into the top wall, which is only possible through the notch of the top-right button. Deal with that stone first. (YouTube part 2 1:15 · 塞德莎 P16 17:12)
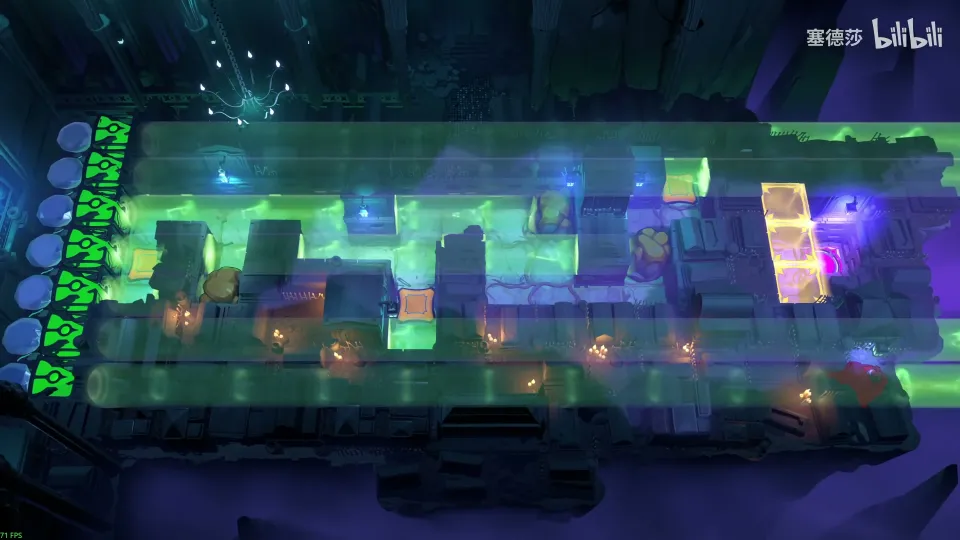
Getting there: 塞德莎 activates the teleport above but leaves that part for later. The bonus room is below: reset the emitter and push it down to enter. (16:49)
- Move the stone up one tile, bring this one down; it also works without the first step. (18:00)
- Push it to the top, walk through the wall, remember to push it left, come back through and push it down. (18:33)
- Sort the remaining stones: up, down, right, left. Push the leftmost stone down so it stops blocking the light, then push the next one up to the end. (18:54)
- Before pushing the last one into place, push the left stone back, because that’s the only spot where you can still enter the wall. Then walk through and finish. (19:15)
Puzzle 34
Key idea: crystals were living things, so beams affect them. A crystal pushed in orange light jumps two tiles and can’t be pushed onto the top button. Put the stone in the beam first, then push the crystal. (YouTube part 2 1:59 · 塞德莎 P17 0:19)
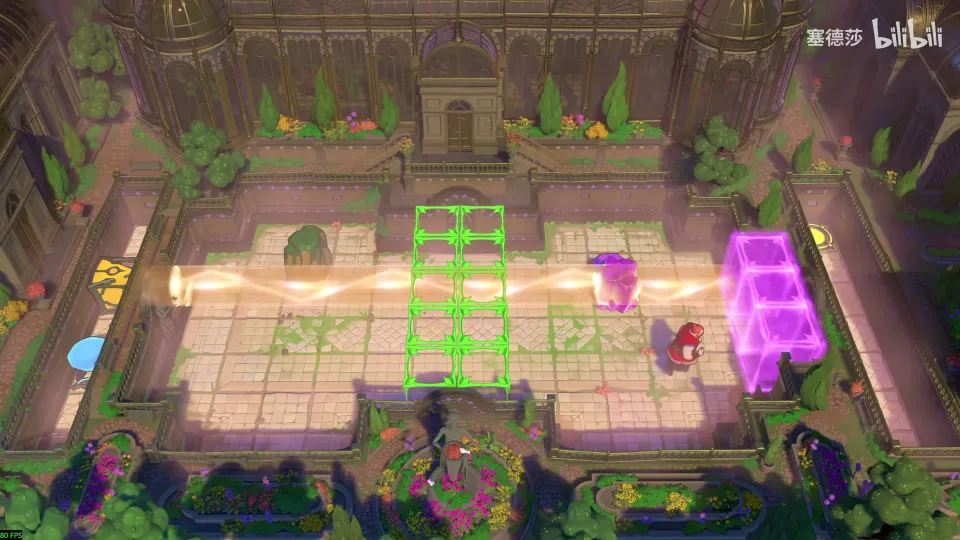
- The right button can’t be reached this way: with the stone blocking the beam, the middle gate disappears. (1:09)
- Push the stone left, block the beam with it and push the crystal onto the left button. (1:14)
- Push the stone down and step it right one tile at a time, then push it up onto the last button. (1:24)
Puzzle 35
Key idea: move a crystal with orange jumps. Stop before it hits the wall, push it right in jumps, and press the button before going to the exit, or the stone ends up on the exit. (YouTube part 2 2:31 · 塞德莎 P17 1:33)
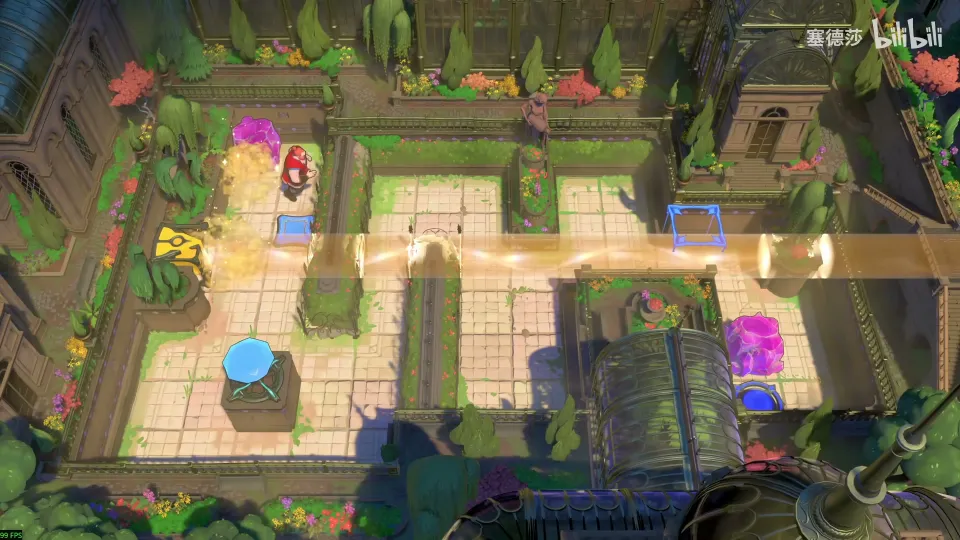
- There’s only one way to start. Come down and push the crystal right, but stop here: one more push up and it is stuck against the wall. (1:45)
- Push it right in jumps, then step round on the right and push the stone over. (1:54)
- Jump left. Walking straight to the exit would push the stone over it, which is why the button matters. Press it and finish. (2:05)
Puzzle 36
Key idea: push goblins in orange light. You and the goblin both jump two, so it can’t hit you. The three goblins have to meet, and parity decides where: the top goblin never moves, and only certain squares share its colour. (YouTube part 2 3:07 · 塞德莎 P17 2:25)
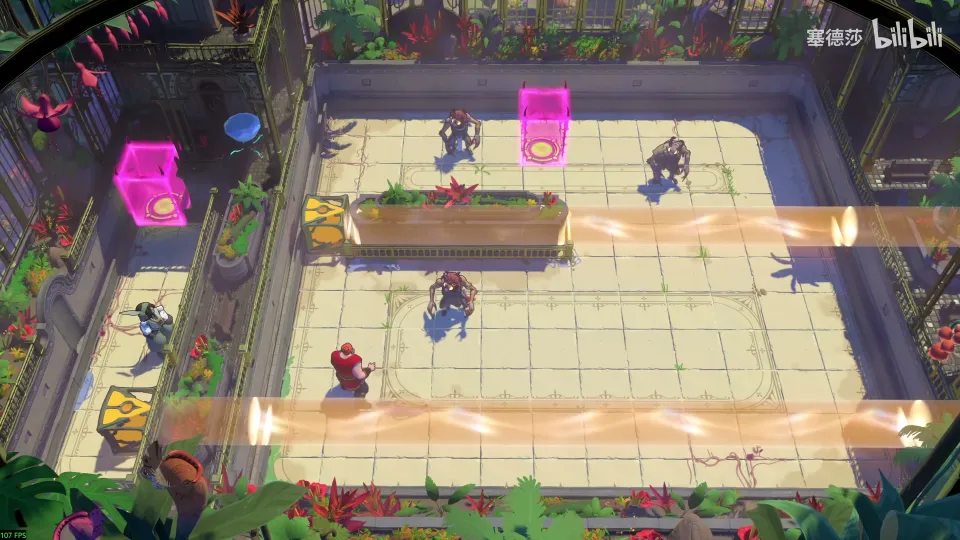
- 塞德莎 colours the grid like a chessboard: the top two goblins share a colour, so the third must be pushed in between them. (3:21)
- You can push the beam up only so far, and pushing this goblin straight into place traps the emitter. So first park the goblin on the tile below-right of it, and the other one far away. (4:29)
- Push the upper goblin here, walk round, collect the orange box, and set up as shown. (5:53)
- Push the beams up two, pull the left emitter out two, push this one up, then push the last emitter up two. Push both goblins in and they knock each other out. (6:15)
Puzzle 37
Key idea: a dragon sits in the middle, so never open the middle red block, or you can never cross back. The crystal also feels the red beam and would open it, so move it in a way that keeps it out of that beam. (YouTube part 2 4:26 · 塞德莎 P17 6:44)
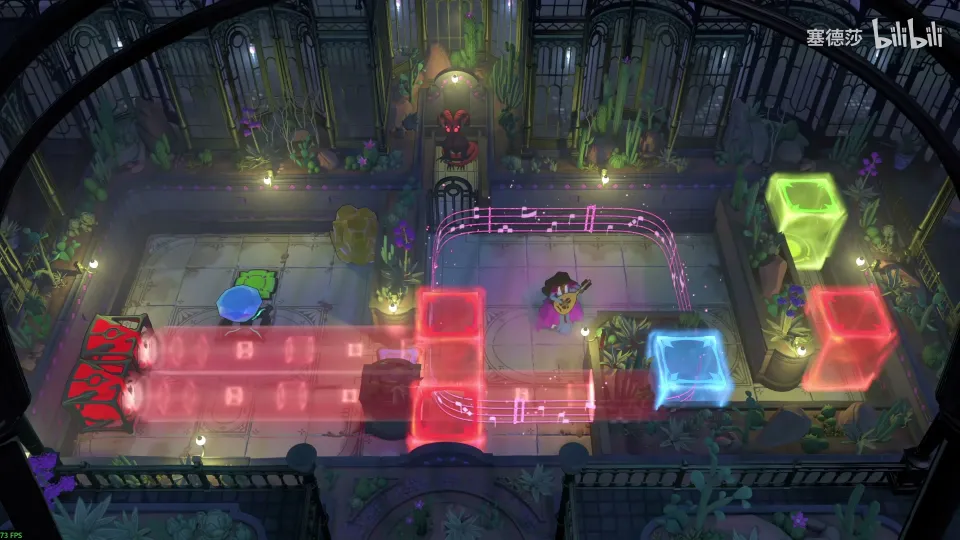
- Plan: crystal on the blue button to open the gate, red beam to open the red door, then move the crystal back to the green button, which means crossing from right to left. (7:06)
- Pushing the crystal straight in lets it open the forbidden door. Instead, set it in the top-left of the 5×5 area, bring it down to here, and don’t press right again. (8:02)
- Keep going up to let go of the crystal, press the blue button with the middle door still shut, open the red door, then return the crystal. (8:22)
Puzzle 38
Key idea: green light lets crystals and goblins pass walls too. The goal is to walk the goblin through the wall at the bottom, and for that it must push the crystal into the bottom-right. (YouTube part 2 4:53 · 塞德莎 P17 8:52)
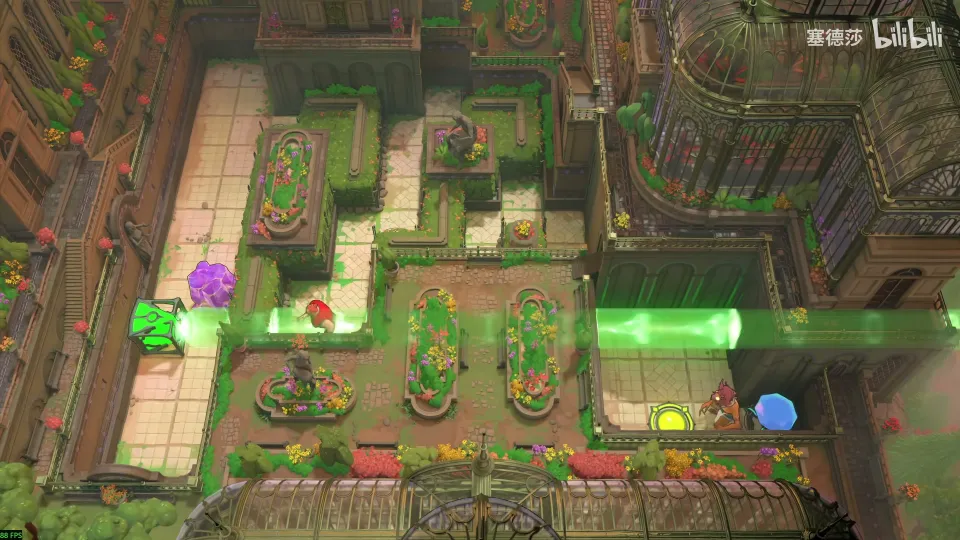
Getting there: with both cages on the left open, the stone can come out; use it to hold the gate open, which a goblin stopped you doing before. (8:44)
- Put the crystal in the pit and push it here, but no further. Push up, then push the crystal down to this tile. (9:37)
- Come out, push right, stop here, then push the crystal down one. Put the beam here, slip the crystal in, walk round behind it and push it left, then down to the end. (9:46)
- Don’t simply push right now. Place the stone and the beam like this, push the stone down into the wall, then push right. (10:18)
- Put the beam on the goblin’s tile and push down with the crystal as a spacer. (10:35)
Puzzle 39
Key idea: in yellow light a crystal that can’t be pushed breaks the crystal next to it. Use two yellow beams to clear a path of eight crystals so the trapped Explorer can walk to the exit, and break the two stacked crystals at the bottom last. (YouTube part 2 5:53 · 塞德莎 P17 10:49)
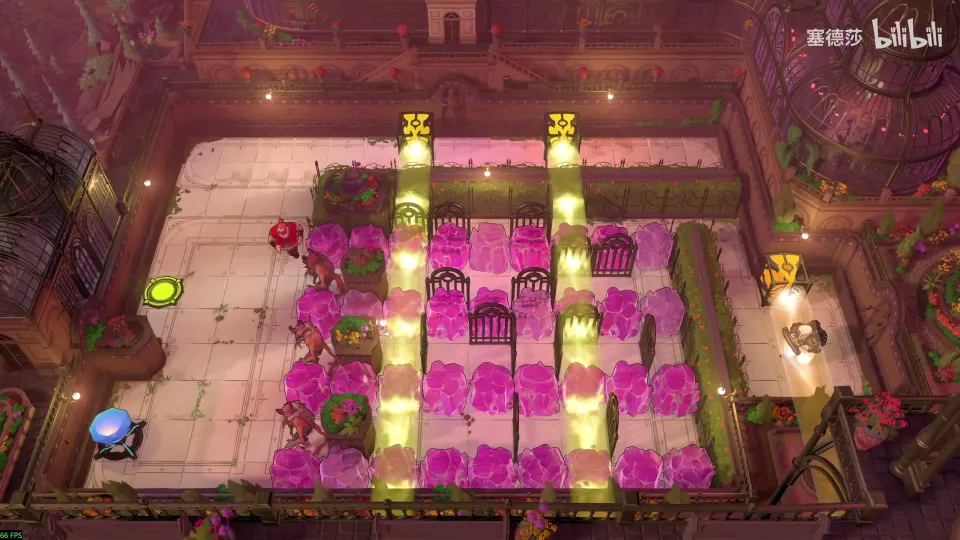
- Push a column: crystals that don’t move break their neighbours in the yellow beam. (11:06)
- The Explorer is pinned by the orange beam. Open the path first, then release the beam so the Explorer can walk. (11:42)
- 塞德莎 traces the only route and numbers the eight crystals to break. The bottom two are stacked; break them earlier and the two beams can’t be separated. (12:07)
- Break them top to bottom, switch the orange beam off and walk the Explorer out. (13:14)
Puzzle 40
Key idea: a Bard room with purple light. The Bard’s song can’t drag the crystal through the middle, but a crystal in the purple beam is carried along it, so ferry it round. (YouTube part 2 6:43 · 塞德莎 P17 13:59)
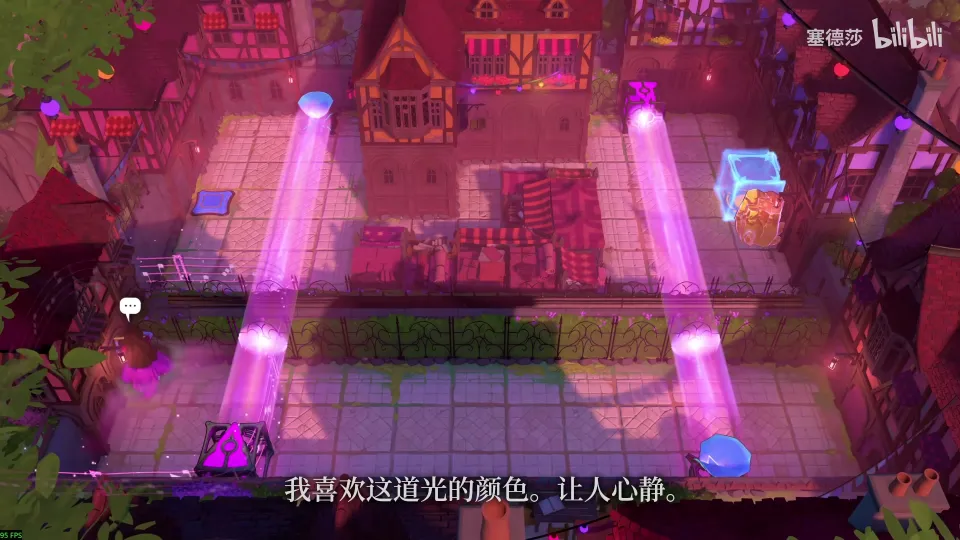
- Bring the crystal out and send it down along the beam. (14:23)
- Come down on the left, catch it, send it up, and come up on the right. (14:36)
- Send it left. To let go of it, go down here and teleport back, loop round from the right, and the crystal sits on the button. (14:46)
Overworld puzzle 2
Key idea: hold the blue button inside the bottom-right room with the crystal from the map, without sending it in so directly that you can’t follow. (YouTube part 2 7:13 · 塞德莎 P17 15:07)
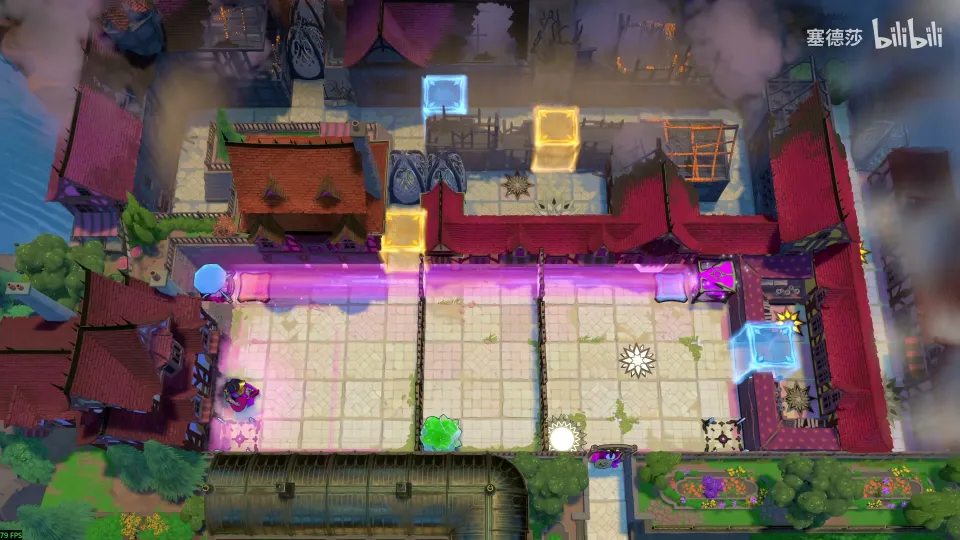
- Put the crystal roughly in the middle, offset from you so it sits below you, and send it to the middle cell. (15:16)
- Teleport across, then send it right onto the button. (15:37)
- You’re still singing to it, but here that’s fine: walk straight in while keeping control. (15:46)
Puzzle 41
Key idea: a chain of small rooms with one theme: move a crystal onto its goal from a distance, and use an orange jump to break the Bard’s hold when you need to step away. (YouTube part 2 7:40 · 塞德莎 P17 16:04)
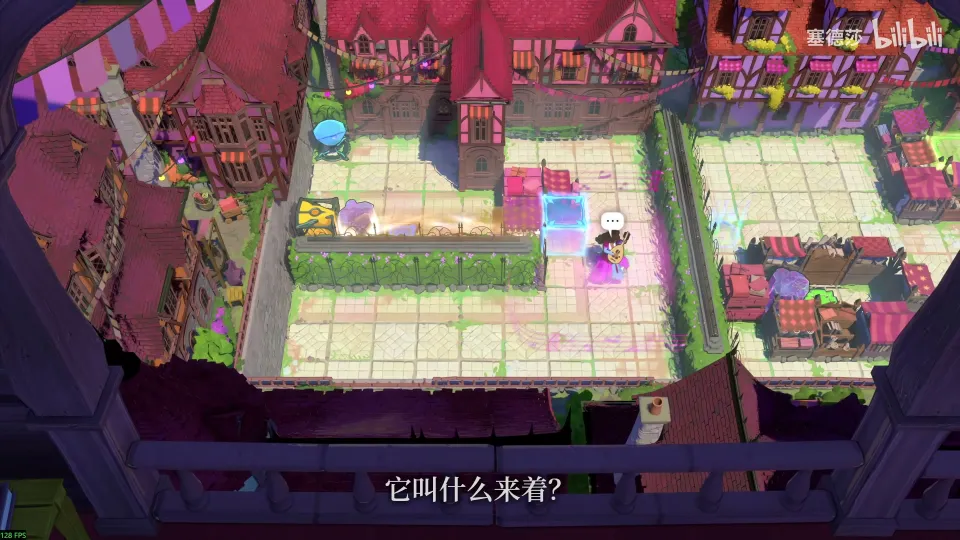
- Room 1. Don’t take the crystal straight out. Go right until it stops against the wall, bring it up and over, then left onto the button. (16:15)
- Room 2. Push the crystal to the far right, step left one, then jump out on the orange beam to leave it behind. (16:37)
- Room 3. Move the crystal to the side, go right, cut in here and jump out of range. (16:48)
Puzzle 42
Key idea: one huge room with a movable orange beam: carry three crystals to three spots. Each crystal takes its own small trick to fetch, and the middle one only goes in from the upper of the two entry points. (YouTube part 2 8:27 · 塞德莎 P17 17:17)
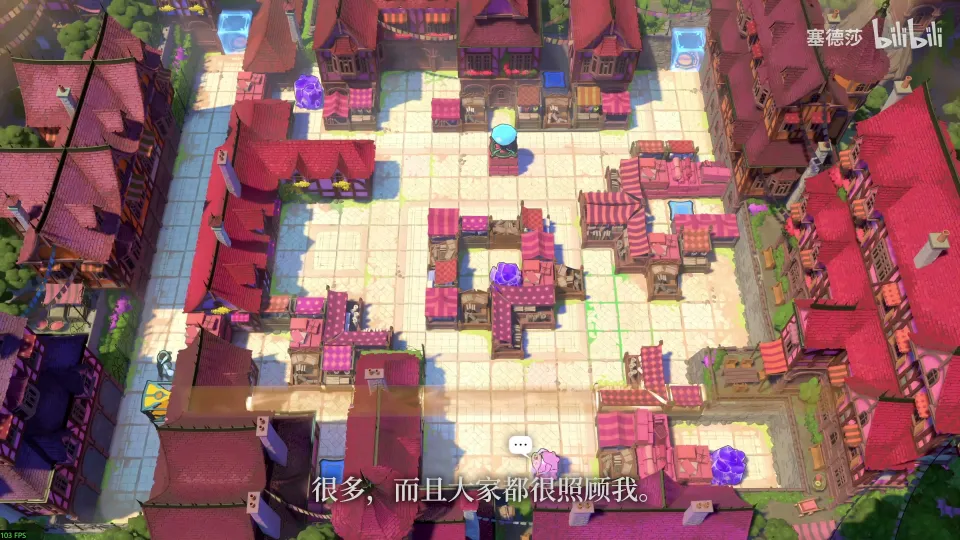
- Bottom-right crystal. Jump yourself in, shift it, move the beam here and jump right; now use the beam on the crystal to send it out and back left. 塞德莎 parks it at the bottom-left. (17:20)
- Teleport it inside with the orange beam, aim the beam left, go back in, hold the crystal in place with the beam while you shift, and bring it down at a two-tile diagonal. (18:06)
- Middle crystal. It comes out easily. To get it into the right-middle spot, only the upper entry works; the lower one would need a move that first drags it down. (19:07)
- Top-left crystal. Jump in right above it, hold it still, jump up, bring it down, then let it jump two and pull it one more right. (21:05)
- Top button: line the crystal up in this column, teleport it in, push it from the side notch onto the button, then hold it with the beam as you leave. (21:43)
Overworld puzzle 3
Key idea: reset, take the crystal up and left to hold a button, and keep it pressed against the railing as you move so it doesn’t slip free. (YouTube part 2 11:43 · 塞德莎 P17 22:38)
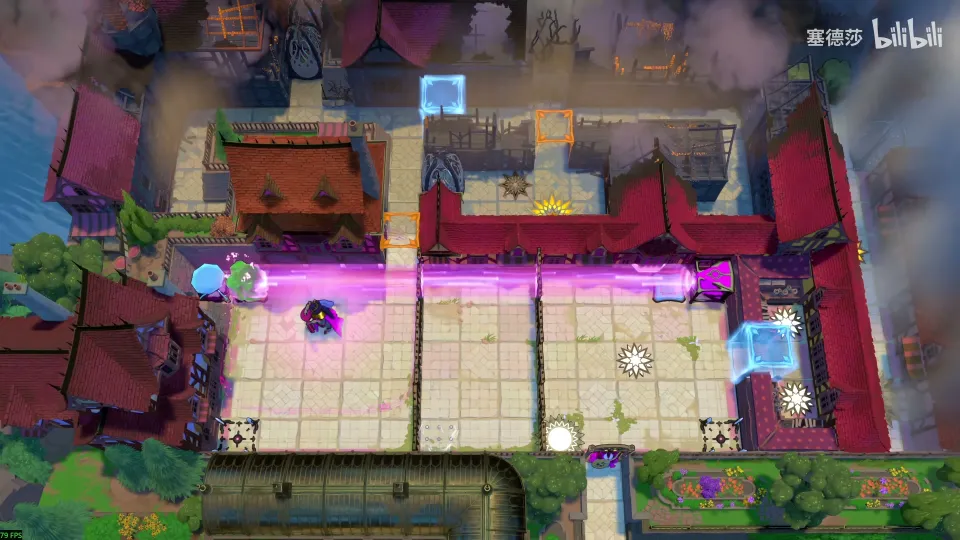
- Reset, go left and bring the crystal up, then left onto the button. (22:47)
- Move it hugging the railing; a gap lets it drop away when you move. Then go right and back left into the next room. (22:59)
Puzzle 43
Key idea: a series of five or so small rooms, all about killing goblins with purple light. A goblin carried to an open end of a purple beam disappears, just as you would. (YouTube part 2 12:04 · 塞德莎 P17 23:24)
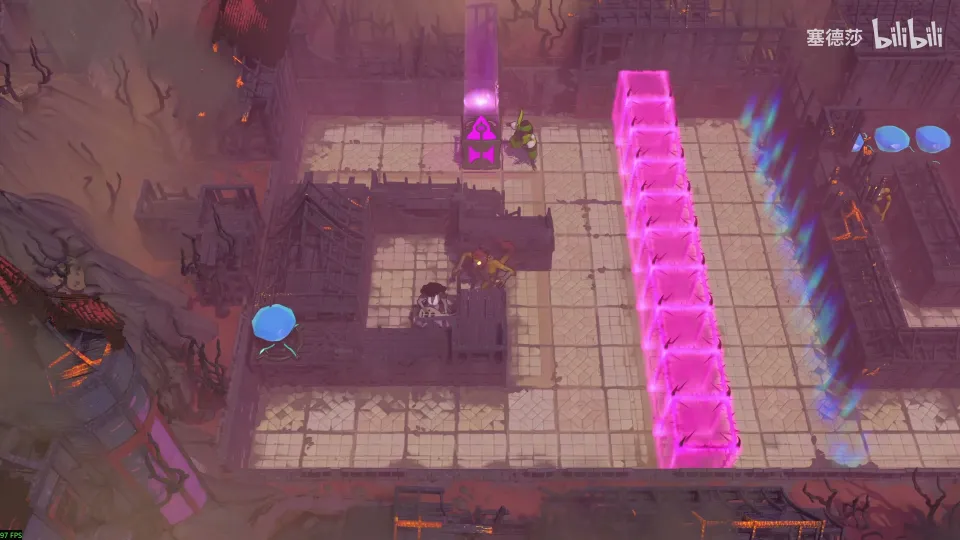
- Room 1. Bathe the goblin in the beam and let the Bard lead it up: it vanishes and the monster gate opens. (23:45)
- Room 2. Only the rightmost notch has an open end above it. Pull the goblin over with purple, teleport it up, release, carry it into the notch and step up. (24:08)
- Monster gates here only count the goblins in their own block, not the whole room. (24:53)
- Room 3. Inside, the goblin can’t reach an open end, so bring it to the middle, go round to the right, use the notch to bring it down and send it off on the left. (25:24)
- Room 4. Use the gem as the end of the beam to get the goblin down. Room 5: the beam ends in walls, so bathe the goblin to pin it in place and shift yourself around it. (26:15)
- Last room. The right goblin can never be sent off, so use the classic method: bring the left goblin out (one tile right first, so it can’t hit you on the way out) and walk it into the other. (27:42)
Puzzle 44
Key idea: two buttons raise the blue block that stops the beam so you can jump to the exit. You can’t separate the crystal and the Bard on the right side. The way out: the left button is in the same row as the block, so you hold it yourself, and the left crystal goes to the left end of the beam to break the hold. (YouTube part 2 15:46 · 塞德莎 P17 29:42)
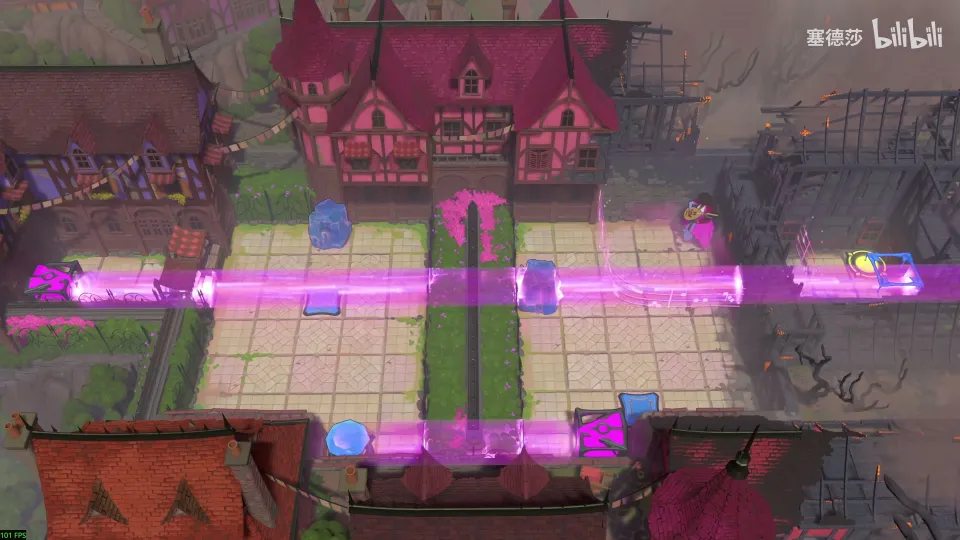
- On the right half there’s no terrain to separate the crystal from the Bard, so it can’t be put on the Bard’s right. (30:04)
- The bottom-right button gets the crystal; the left button you hold yourself, which opens the right gate so you can teleport across. (31:14)
- Send the left crystal to the left end of the beam, where it stops, and that breaks your hold on it. Then put the crystal on the button. (31:37)
Puzzle 45
Key idea: the Warrior has to get a crystal to the top-right button, and only a purple teleport puts it off the wall. Purple passes through crystals, so the stone has to sit behind the crystal as the end of the beam. (YouTube part 2 16:07 · 塞德莎 P17 32:42)
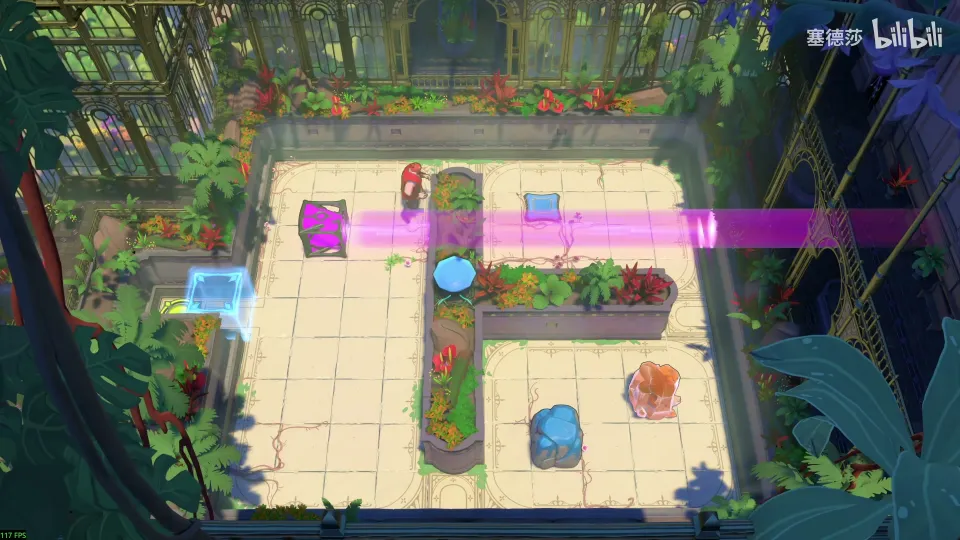
- Bring the purple emitter down and teleport the crystal to the left half, using the stone behind it. (32:49)
- Send the stone up first as the stopper, then the crystal. (33:17)
- Push the emitter itself right along with them, the crystal teleports over, and push it onto the button. (33:31)
Puzzle 46
Key idea: you get the necklace, which turns a beam to face your direction. To turn the left-facing orange beam down without being carried off, block your own step: if the move down is blocked, the beam turns instead. (YouTube part 2 16:48 · 塞德莎 P17 33:52)
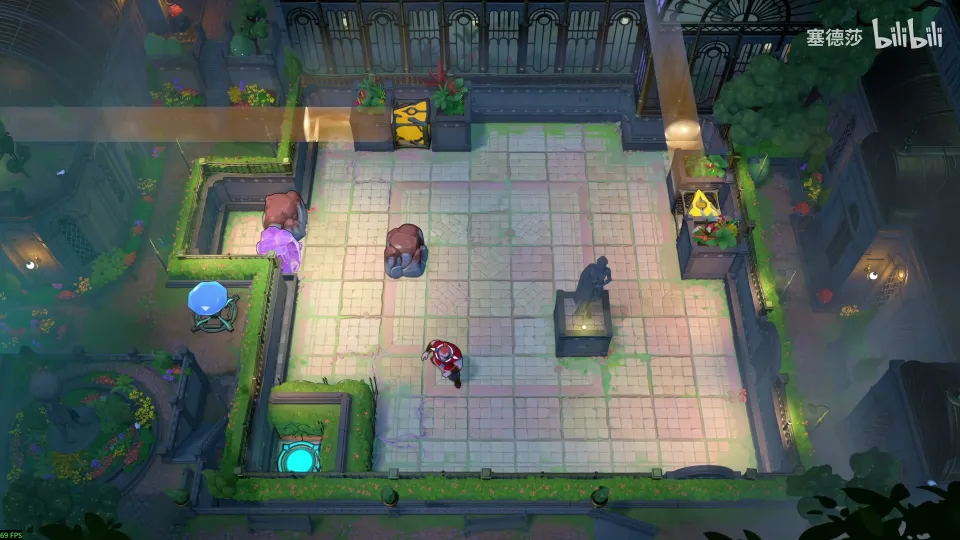
- Pressing down normally just jumps you. Blocking the path needs the statue, but the gap is too wide for one stone, so first take out the two stones on the left. (34:13)
- For that the beam must face left. The gap there is short: put one stone here, step left from this tile, and the beam turns left. Jump in and take the two stones. (35:04)
- Build the block: crystal here (in orange it tries to move two), a stone above it and a stone below. Step down: the stone can’t push the crystal, so the beam turns down. Jump to the exit. (35:23)
Puzzle 47
Key idea: the necklace again: turn the lower orange beam to face up, then push it to the far left. There’s only one crystal and the statue spot is blocked by a gem, so use two crossing orange beams, which make a four-tile jump, to build the block. (YouTube part 2 17:32 · 塞德莎 P17 36:20)
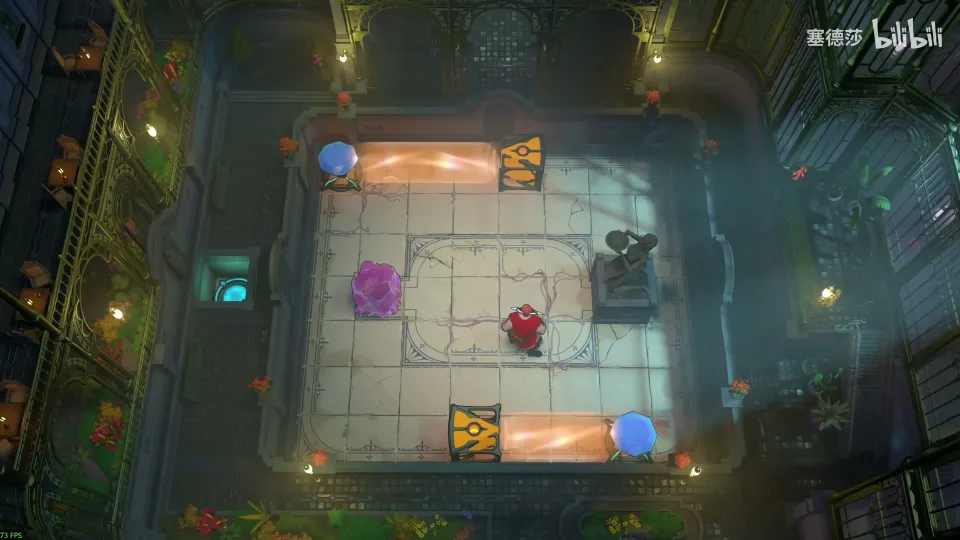
- Turn the beam right, put the crystal here and block yourself to turn it down. Break the gem, and nudge the beam a little left. (37:18)
- Put the crystal on the crossing point, four tiles above the double-orange spot. (37:43)
- Step up: you try to push the crystal, the crystal tries to jump two into the emitter, the emitter is against the wall. Nothing moves, the beam turns up, and you push it left to finish. (37:54)
Puzzle 48
Key idea: the Wizard and purple light. Move two goblins to the buttons in the middle by sending them to the ends of the beam and swapping with them. (YouTube part 2 17:57 · 塞德莎 P17 50:28)
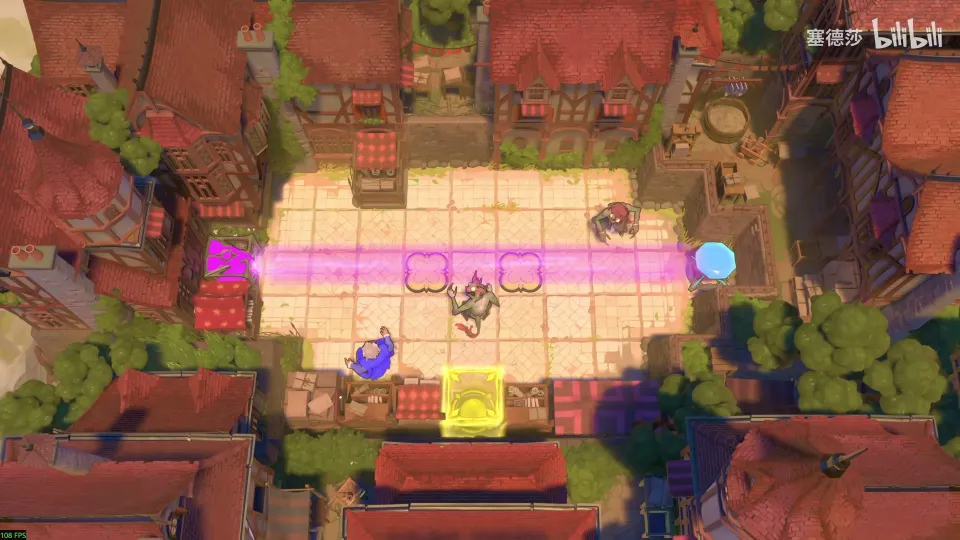
Getting there: 塞德莎 reaches this room after entering the Advanced area (and plays it after puzzle 49); activate the teleport next to it. (50:26)
- Move one goblin to the upper left and teleport it to the end. (50:51)
- The right end can’t be reached from above or below, so send the goblin from the left end to the right end. (51:00)
- Bring the other goblin to an end, then send one right and one left onto the buttons. (51:21)
Puzzle 49
Key idea: four goblins and no Cleric to protect you, but the Druid can turn goblins into crystals from a distance with the help of the beams: the double orange jump and the end of a purple beam carry the Druid’s reach. (YouTube part 2 18:32 · 塞德莎 P17 45:50)
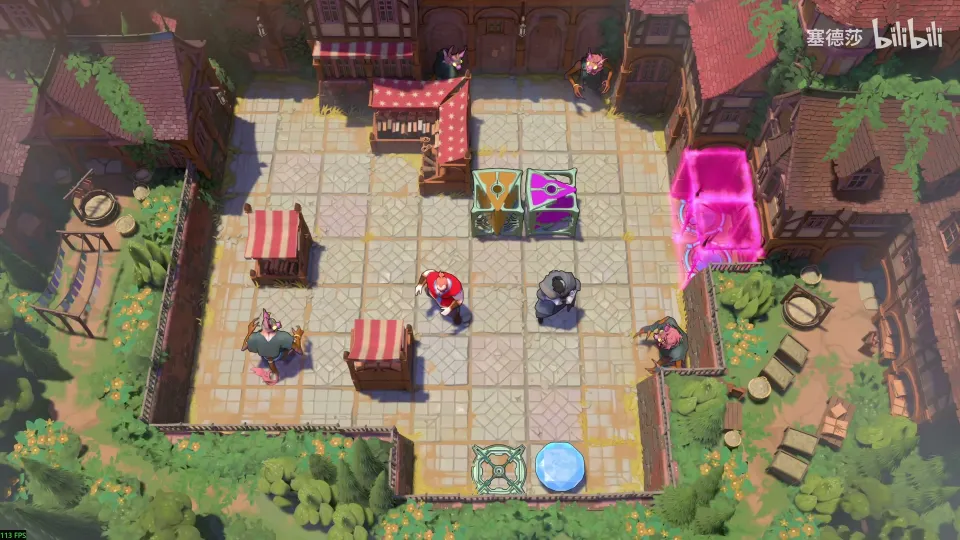
- The top two goblins are the hard ones. 塞德莎 works through the options at 46:18; knocking two goblins together also works. (46:18)
- For the top-left goblin: put the purple emitter at the top-left with the orange emitter in front as a stopper, so the goblin’s tile becomes the end of the beam. (48:21)
- Put the double-jump orange here and turn the first goblin to crystal from a distance, then switch that beam off at its gem. (48:42)
- Push this here: the emitter itself is the end of the beam, so the next goblin turns too. Cut the beam, put the emitter here and turn the next. (49:04)
- Put it on the goblin’s right, push it up, and the Druid goes left for the last one. (49:35)
Puzzle 50
Key idea: a Cleric room with cyan light, not in Chungus’s videos. In the cyan beam the Cleric can push. Push the two cyan emitters to the top and bottom rows so the goblins there knock each other out in pairs. (塞德莎 P15 4:58)
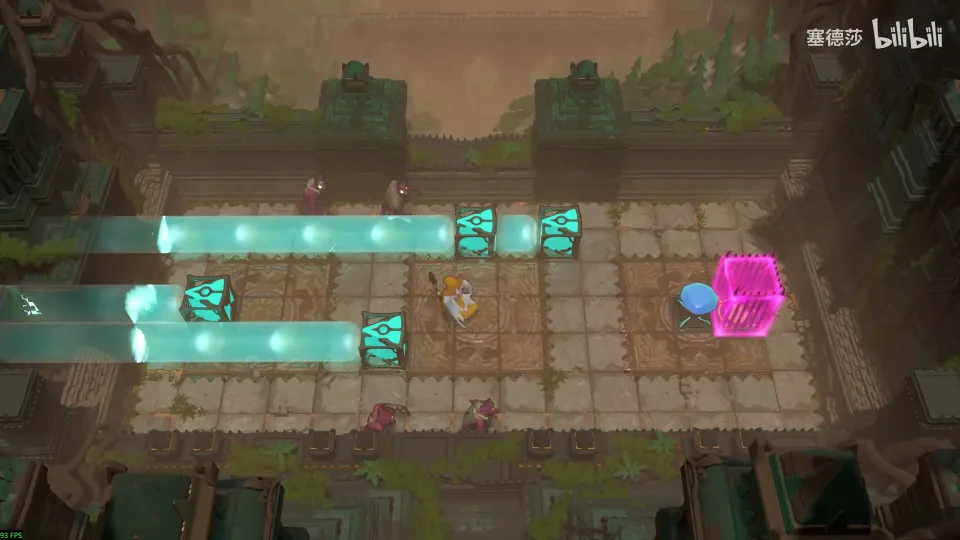
Getting there: this room is on the same map as puzzles 5 and 6, just after the gold room. A goblin stands on the entrance; 塞德莎 compares the push puzzle on the map to the first level of the classic Sokoban set Microban. Push this one right, that one up, bring the third down and up, then light the beam and clear the row. (3:40)
- Top row first. The extra emitter can push up, but needs a push point in the third row, so bring the left emitter here, one more tile right. (5:16)
- Push up: the top two goblins meet. (5:40)
- Bottom row: push each cyan emitter down one tile in turn, then the last one down, and the bottom pair meets. (5:51)
- The Cleric can’t walk through the gem, so push it aside in the cyan beam and leave. (6:13)
Puzzle 51
Key idea: the first of four bonus rooms that need the multicoloured beam, so you can only play them after the first ending. The floor is split into a 2×3 grid of sections (the faint teal crosses). Yellow plus multicoloured shatters every crystal in the section where you set it off. Carve the 5×5 block of crystals down to the “thumb” shape of purple buttons at the top left, and keep the blue button free: pressing it lets the fire dragon at the top right block your way out. (塞德莎 P39 0:51)
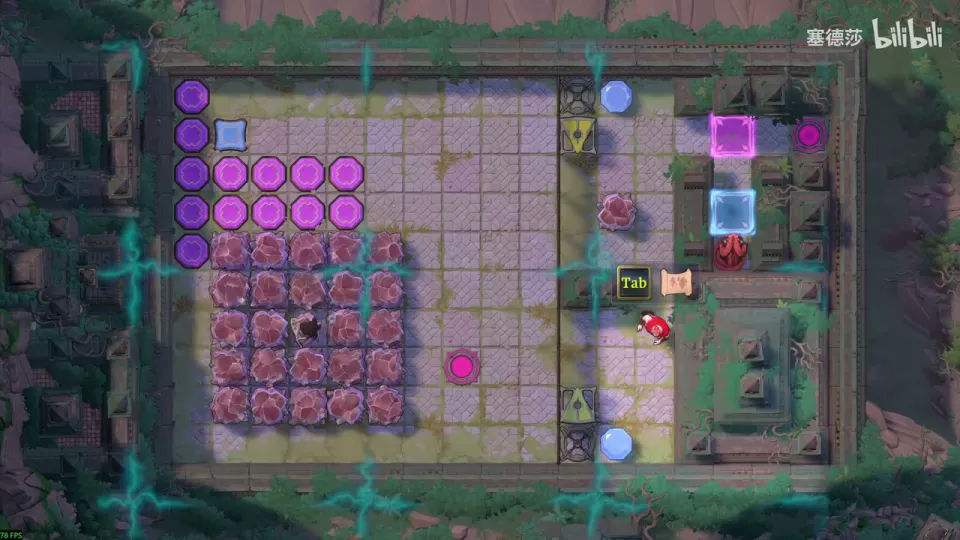
Getting there: after unlocking the multicoloured beam, teleport over. Before you go left, break the stone left of the yellow beam, then keep the yellow beam on. (0:39)
- Switch to the Warrior. Break the crystal on the right at this spot, switch the multicoloured beam on, and put the Bard on this tile on the left. (1:46)
- Set off the blast here. Every crystal in the same section shatters, so only the 2×4 part at the top right goes. (1:57)
- What’s left is exactly the shape. Move the Bard over and you’re done. (2:10)
Puzzle 52
Key idea: same idea, but the shape comes in two parts. The left part looks like an L with one extra tile in the middle, and that extra tile is where the Bard stands, so it really is an L. Blast away the 4×3 top right, then use the Bard to shift the rest so two crystals are left for the bottom-right buttons. (塞德莎 P39 2:19)
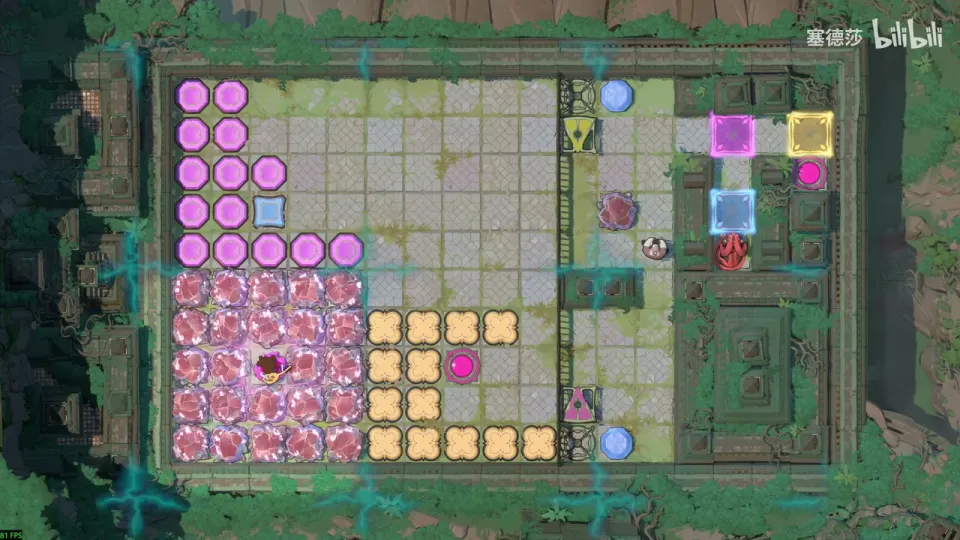
- Break this crystal, then set off the blast here. That clears the 4×3 at the top right and finishes the first part. (2:55)
- For the bottom-right buttons, reshape the block with the Bard: shift the structure up against the terrain outside so two crystals are left over. (3:10)
- Drag those two sideways into the marked frame. (3:25)
Puzzle 53
Key idea: the shape is now a staircase from the top left to the bottom right, which can’t be blasted out in one go. Blast away the part that has to go anyway (the 3×3 top right), then shuffle the rest into the steps with the Bard. (塞德莎 P39 3:37)
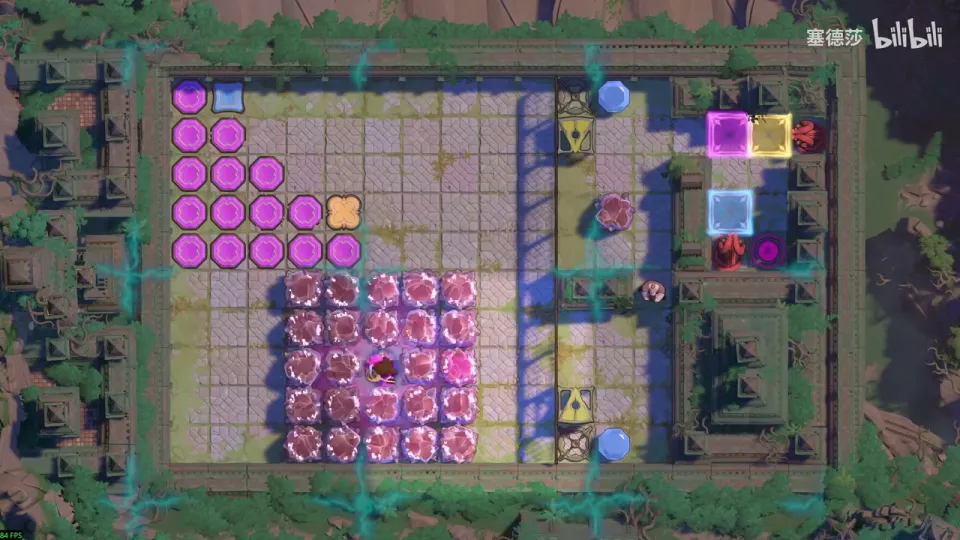
Getting there: reset the stones and come in directly from below. (3:37)
- First blast the 3×3 at the top right: switch the light on and set off the blast. (4:10)
- Shuffle: at the bottom right push in once, then right, up, left, and the bottom-right steps appear. At the top left: up, right, down. (4:32)
- The whole staircase is now in place. Step left, let the Warrior in, then bring the Bard over. (4:43)
Puzzle 54
Key idea: a big room with the prism, the artifact from later in the game. It switches every emitter in the room between the colours the room allows, here red, yellow, orange and multicoloured. The crystal on the right can only go in a yellow-plus-multicoloured blast, but you also need crystals in the water as a path across. Use the Druid to turn the crystals in the middle row into plants, which the blast can’t touch. (塞德莎 P39 5:59)
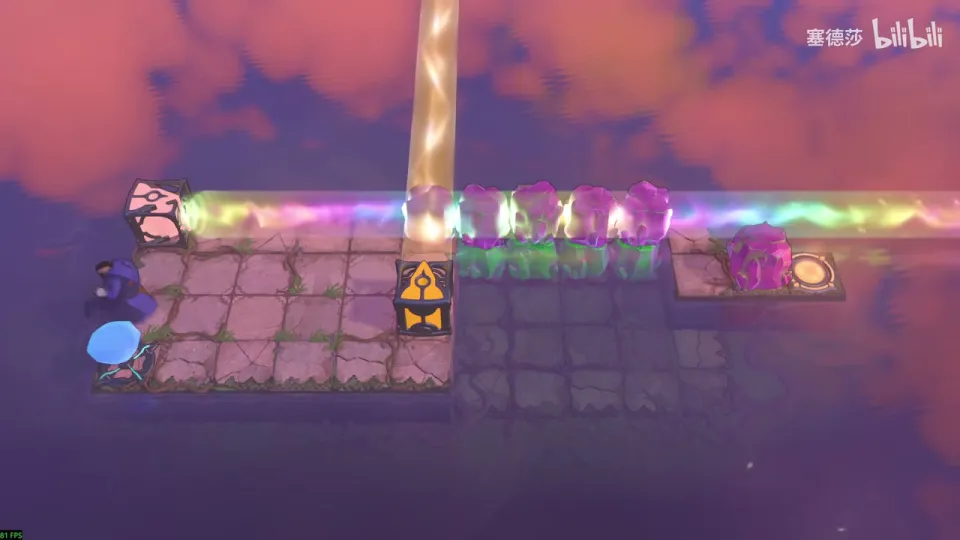
Getting there: go to the big room at the bottom left. The pile of stones in front of it needs a yellow-plus-multicoloured blast. Push these two stones out. Pushing comes before breaking, so put a stone behind the one at the crossing to keep it from moving, and break it. Then stand on the crossing, touch the shards, and every stone in that section goes, the top-left one too. (4:53)
- 塞德莎 also explains a beam effect you may stumble on here: in some beams you “walk on water” because the pull downwards has nowhere to go under one-deep water. It doesn’t help in this room, because parity makes you jump past the goal into the water. (7:24)
- So build the path: the two-high crystal stacks in the middle must each lose exactly one layer. Break the first crystal straight away; it’s the one you’ll set the blast off with. (9:48)
- Turn the next one into a plant: set both beams to red, which does nothing here, so they don’t get in the way. (9:58)
- The second one is a tile further away: orange light extends the Druid’s reach. The third is three tiles away: orange plus multicoloured makes the reach three. (10:08)
- The rightmost is four tiles away, two orange jumps of two. (10:38)
- Blast with yellow plus multicoloured. Then set the beams to any colour that doesn’t interfere, turn the row back into crystals and walk across. (10:48)
That clears the basic area. The next area up is Heroes and Light, Advanced.