Spoilers: this page covers the way into the third and final Endgame, at the very end of Antipode Low. It sticks to puzzle solutions and leaves out the story, but it gives away late-game places. If you haven’t finished Antipode Low yet, start at how to descend.
The final Endgame starts behind a red door at the Antipode Low star. Finishing it unlocks the Steam achievement Endgame Low (“Complete the Final Endgame”; see all achievements). To open the door, a red beam has to travel from its start in Crossroads Low, round the hub’s four corners and across the map. This page shows how 塞德莎 routes it. The puzzles behind the door are on Endgame Low: the final Endgame.
Before you start: clear the six signs on Crossroads Low (how to descend). Each sign unlocks a teleporter, and the whole route depends on them.
How to use this page: we found no English video of this part, so the order follows 塞德莎’s narrated walkthrough. Every step links to the exact second.
Rules that matter here
- The six teleporters land on the Gold platforms. Each of the six teleporters unlocked by the Low signs takes you to the top of an object on one of the six Gold platforms in Crossroads Low (0:15, 0:28).
- The goal is a red beam. It starts in the top-left corner and has to be guided, corner by corner, to the far side of the map where the Antipode Low door is (0:41, 0:49).
- Teleporting changes what you can do. Arriving in a corner room by teleport can put you inside it as a different hero, for example without the Thief’s outfit, so you can push where you could only pull before (2:38).
- Falling breaks things. A mirror you can neither push nor pull out of a corner can be smashed by something falling on it from above, or by landing on it yourself (1:27).
The four corners of Crossroads Low
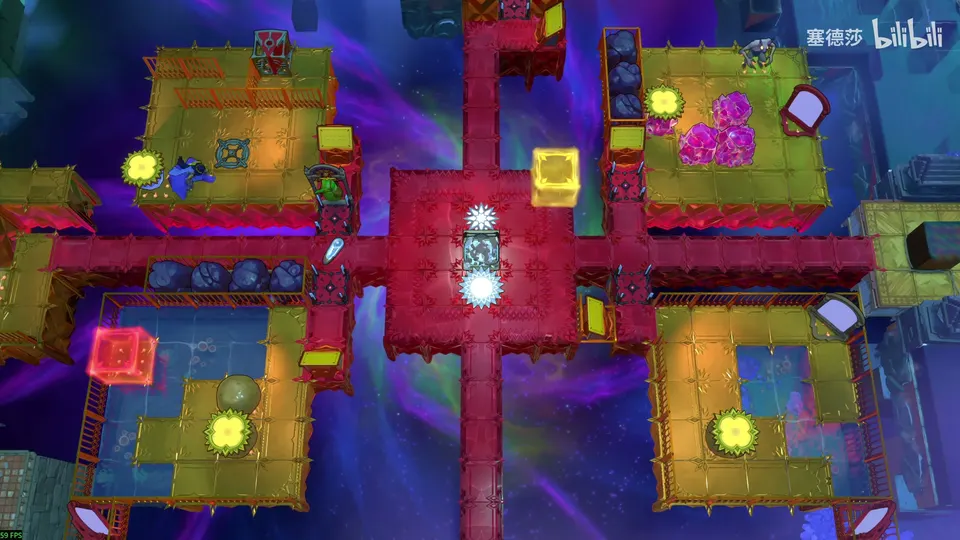
The beam starts top left, so that is the natural place to begin. 塞德莎 does the bottom-right corner first only because it saves walking (0:56).
Bottom right: smash the mirror
- The beam reaches the bottom-right mirror, which blocks it. It has to bounce up to the top-right mirror instead, so this mirror must go. You can’t pull it, and pushing won’t move it out of the corner (1:07, 1:17).
- Push the stone here off to the right (1:37).
- Shortcut: instead of walking all the way to Antipode Low, push the skipping stone in the bottom-left into the water and use the teleporter to reach the bottom-right quickly (1:48).
- Stand on the mirror from above to smash it (1:57).
- A stone still blocks the beam: push it down into the water. From now on this teleporter takes you back to Antipode Low quickly (2:00, 2:05).
Top left: move the red emitter
- A gem switches on the red beam here, but the emitter is in the wrong place: it has to go to the far left, where the Thief stands, and the Thief can’t pull it there (2:15).
- Teleport to Antipode Low from the bottom-right, then come back through the bottom-left teleporter. You arrive inside the room, without the Thief’s outfit, so you can push (2:29, 2:38).
- Push the gem here first, then teleport again: bottom-right, and back (2:44).
- Jump in over the railing and push the emitter all the way to the left (2:52).
Bottom left: a platform for the teleporter stone
- Reset the corner. You need a platform in the far top-left, and the thing to build it from is the skipping stone with a teleporter on it, pushed left along this row (3:02, 3:11).
- It can’t go left yet; the platform needs one more tile. Push the ordinary skipping stone (the one without a teleporter) here first (3:15).
- Now the teleporter stone is stuck. Go to Antipode Low, take the bottom-left teleporter and use the ledge sticking out on the left to get it out again (3:24, 3:33).
- Push it up to its place (3:39).
- Teleport over once more and open the red door in the bottom-left (3:41).
Top right: the mirror, the yellow door and the last mirror
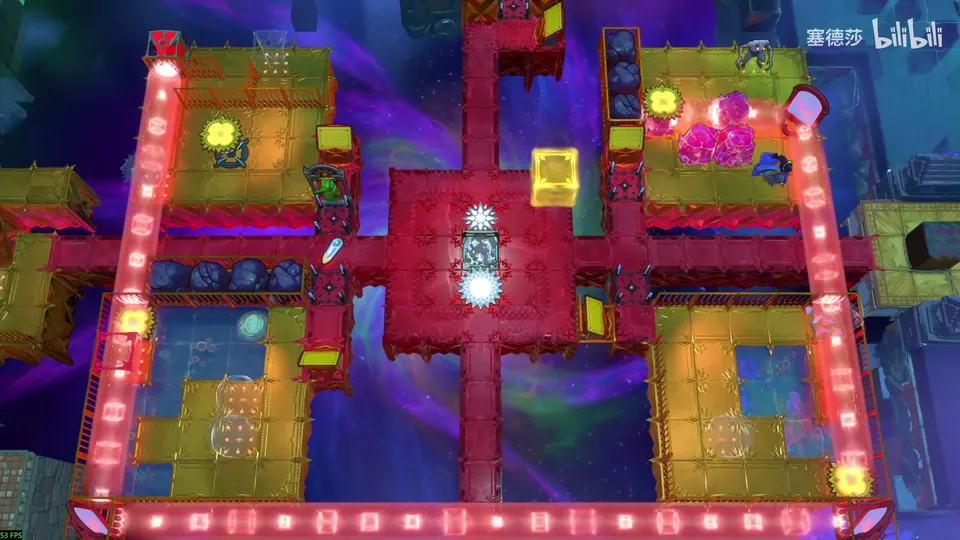
- The bottom-right is already done, so the beam now reaches the top-right corner. Shooting it straight up hits a stone, and to the left there is a pile of stones (3:52, 3:58).
- The left-facing mirror has to drop to the bottom-right tile, so you need to get past the goblin to the tile above the mirror. Build a straight path of four tiles here, then teleport to the top-right and push the mirror down (4:03, 4:16, 4:23).
- Next obstacle: a yellow door. Reset, push the crystal here and put the skipping stone in this spot (4:30, 4:38).
- Teleport, go in from above and push it left onto the yellow button in the water. The beam now reaches the platform on the left (4:44, 4:52).
- Reset again. The mirror on the high platform has to come down, and the only sensible place for it is the far top-right (4:59, 5:06).
- Push the small cart left, teleport onto its head and wait for the right moment to step onto the platform (5:13, 5:23).
- Push the mirror to the far right, using the cart as a step, or it gets stuck at the corner (5:26).
The goblin and mirror room
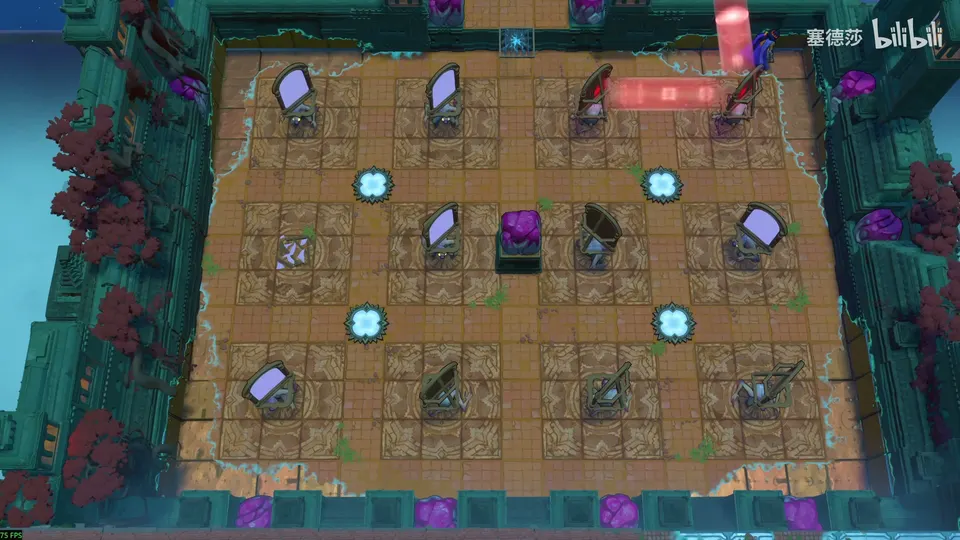
The beam now runs all the way to the odd 3×4 grid of goblins and mirrors you may have passed while exploring (5:34). You can only reach it by riding a lily pad from a teleporter; it is a long float (5:47).
Goal: send the beam out of the room to the left, straight through the middle row. That line leads exactly to the red door at Antipode Low (6:07).
- Turn the goblin in the top-right so it faces up (6:28).
- Turn this mirror to face down, and point these two to the right (6:32).
- Sending the beam on to the left from here only leads to dead ends up or down. The right-hand wall has no stone, though, so aim the beam there, walk round and rebuild the upper path completely (6:39, 6:47, 6:53).
- The beam now wraps round from the right edge to the left and hits the bottom-left mirror (7:08).
- Open the left path: bounce it up from this mirror, then bring it down here, and finally turn this goblin to face up. The beam leaves to the left. The two goblins at the bottom are spare (7:15, 7:23, 7:32).
Through the red door
Ride the lily pad out again (or get off halfway and teleport), go down, and you reach the Antipode Low star, where the red door now opens (7:36, 8:00).
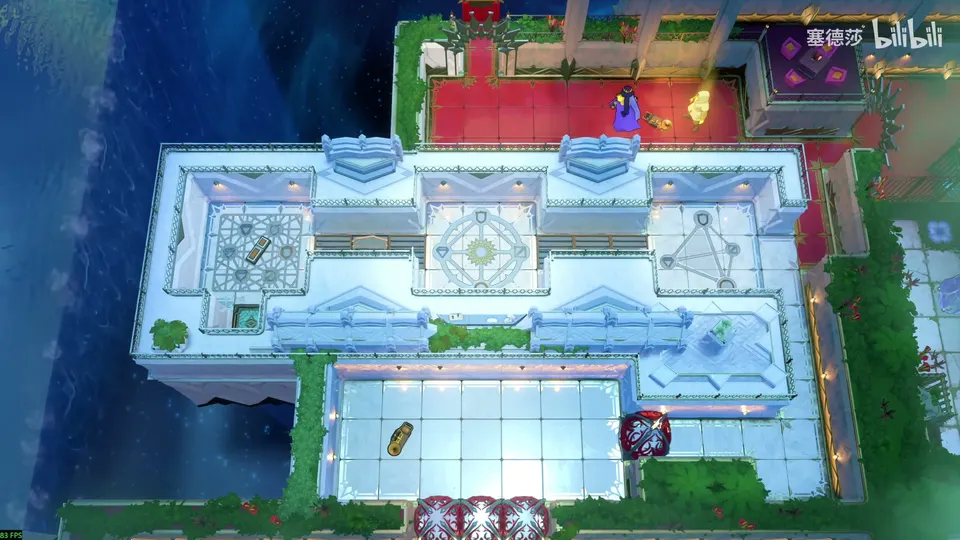
Behind it is the area his Chinese version names 出口:低处 (we call it Exit Low). Two recordings near the entrance explain what changes: the signs are replaced by a solid hologram whose text changes with what you do, like a sign that reacts (8:10, 10:04). The floor below shows the floor of each ending side by side, as at the earlier exit, and a cage there is unlocked from below; a pit blocks the way for now, so head right (10:41, 10:57).
Continue with Endgame Low: the final Endgame, or go back to the Antipode Low hub.