Spoiler warning: this page covers the final Endgame, the end of the game’s third stage. It sticks to puzzle solutions and leaves out the story, but the way these rooms work gives away the last twist in how you play. If you haven’t opened the red door yet, see how to reach the final Endgame first. The second ending is on Endgame High.
Endgame Low is the last of the game’s three Endgames, behind the red door at the Antipode Low star, in the area 塞德莎’s Chinese version calls 出口:低处 (we call it Exit Low). In Endgame High you placed pieces so a level became solvable. Here you go one step further and become the level designer: a hologram asks where a piece should start so the level is interesting, and comments on every spot you try. 塞德莎 sums up the idea: to design good puzzles you first have to be an experienced player who reads levels well (P61 0:20, P61 1:20). Finishing the Endgame unlocks the Steam achievement Endgame Low (“Complete the Final Endgame”; see all achievements).
This page is not complete yet. It solves the 14 rooms of the first two themes, Reading the Level and Implementing Ideas. 塞德莎 is releasing the rest in further parts.
How to use this page: there was no English video of these rooms when we wrote it, so the numbers follow 塞德莎’s narrated walkthrough (parts 61 and 62). Each heading gives the best placement first, then how to play the finished level. 塞德莎 deliberately shows the worse placements and the hologram’s replies before the answer, because that is where the lessons are; each room links to that part of the video if you want to see them.
Rooms at a glance (no name cards appear; the names are ours):
| Theme (hall floor) | Puzzles | What you place | 塞德莎 part |
|---|---|---|---|
| Reading the Level | 1 | Three heroes into three levels | P61 |
| Reading the Level | 2 | The Thief’s crystal | P61 |
| Reading the Level | 3–4 | A stone, then a mirror (East) | P61 |
| Reading the Level | 5–6 | A skipping stone, then a lily pad (South) | P61 |
| Reading the Level | 7–8 | Beam colours, then a purple emitter (West) | P61 |
| Implementing Ideas | 9 | Walls (Warrior and Thief) | P62 |
| Implementing Ideas | 10 | Stones that join four islands | P62 |
| Implementing Ideas | 11 | A skipping stone and the coastline | P62 |
| Implementing Ideas | 12 | The exit, a platform and a purple emitter | P62 |
| Implementing Ideas | 13 | Two goblins (a maze for the Thief) | P62 |
| Implementing Ideas | 14 | Beam emitters as one-way doors | P62 |
Rules that matter here
- The hologram replaces the signs. Its text changes with every placement, so you can try a spot and read the verdict at a glance. A recording explains why it is text and not voice: you would get tired of hearing the same reply five times in a row (P61 3:48, P61 50:28).
- Three kinds of reply. Impossible or trivial spots are rejected; a reasonable spot gets “I’ll accept this, but it isn’t the best”; the best spot gets praise. An accepted answer is enough to clear the room: place it, go down, play the level (P61 12:03, P61 12:13).
- The best answer uses everything. A good level isn’t a walkover and uses every element: each odd wall, notch and island is there for a reason (P61 48:25, P61 48:33).
- “One tile away, but a long way round” is a favourite: several best answers put the piece right next to its goal, where it can’t be moved straight there (P61 12:37, P61 30:41).
- The hologram makes mistakes. From puzzle 4 on, it calls some solvable spots unsolvable and the other way round; this page notes the cases 塞德莎 found (P61 20:13).
- Joke placements get their own lines. A piece in the air, on a wall, in the water or on a hero’s head gets a special reply. They’re fun to read but never the answer (P61 7:34).
Reading the Level
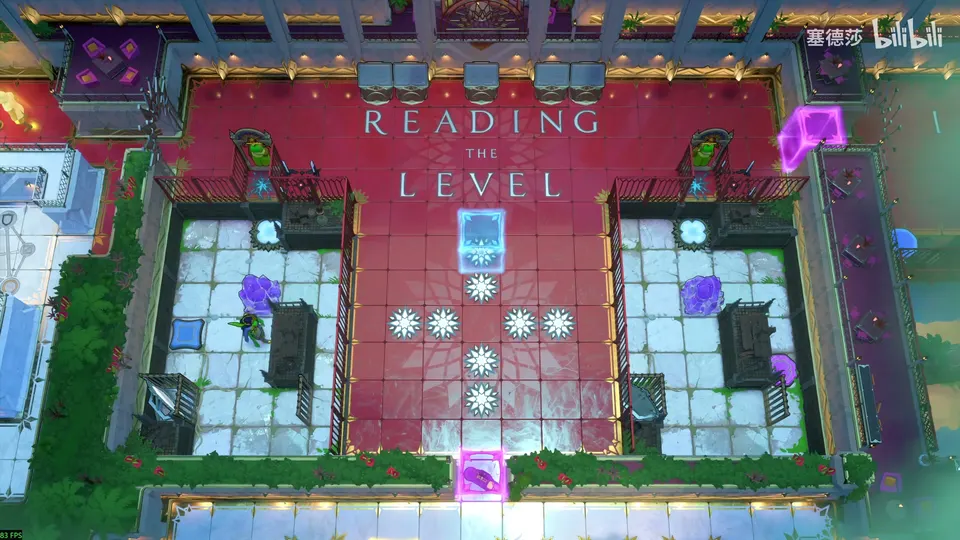
The first theme’s sign says that the skills of a good player carry over to design: when you enter a level and wonder why a wall is placed just so, and what the terrain lets you do or not do, you are already reading it like a designer (P61 0:41, P61 0:48). To get in, go left, pull to this spot and use the mirror to press the button (P61 3:23).
Puzzle 1
Best placement: Thief in the left level, Wizard in the middle, Warrior on the right. (塞德莎 P61 3:33)
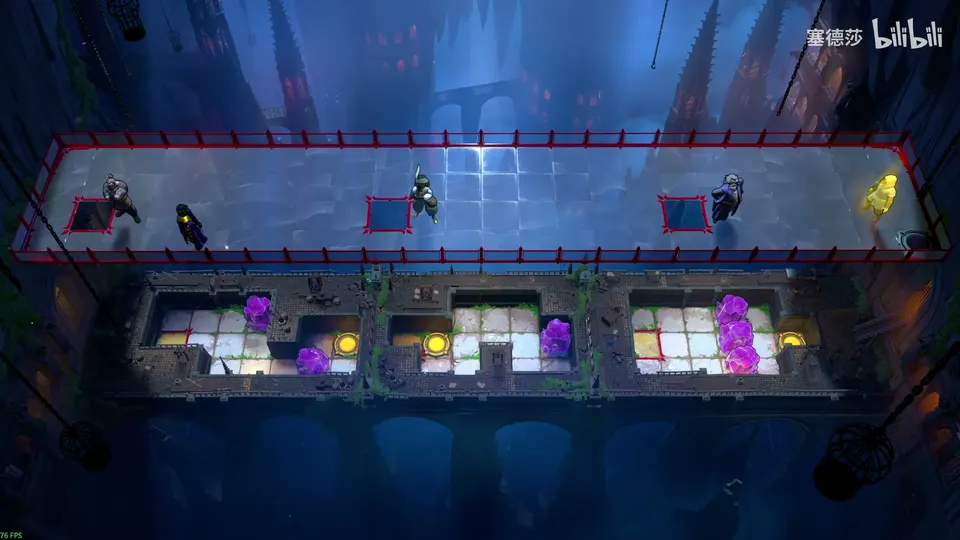
- The hologram asks you to push the three heroes into the levels below and play them. At first any order works, and too easily: the Warrior just pushes through, the Thief steps right and is out, the Wizard swaps once. The extra stones are never used (P61 3:51, P61 4:15).
- Now place each hero where solving is interesting. Left level: the Warrior and the Wizard would only use the bottom-right stone, so send the Thief (P61 5:08).
- Middle level: one stone sits far away; the Warrior and the Thief walk straight out, only the Wizard has to go round (P61 5:22).
- Right level: the Thief and the Wizard pass freely; the Warrior has to shuffle, a classic block-pushing structure (P61 5:35).
- Play them: the Thief pulls one stone left, then the other up, so both stones are used; the Wizard swaps at the start and must never meet it again on the way; the Warrior pushes the top and bottom stones apart to clear the way (P61 6:15, P61 6:24, P61 6:29).
Puzzle 2
Best placement: the crystal on the tile right next to the button. The Thief can’t pull it straight on, and has to drag it round the whole level. (塞德莎 P61 12:27)
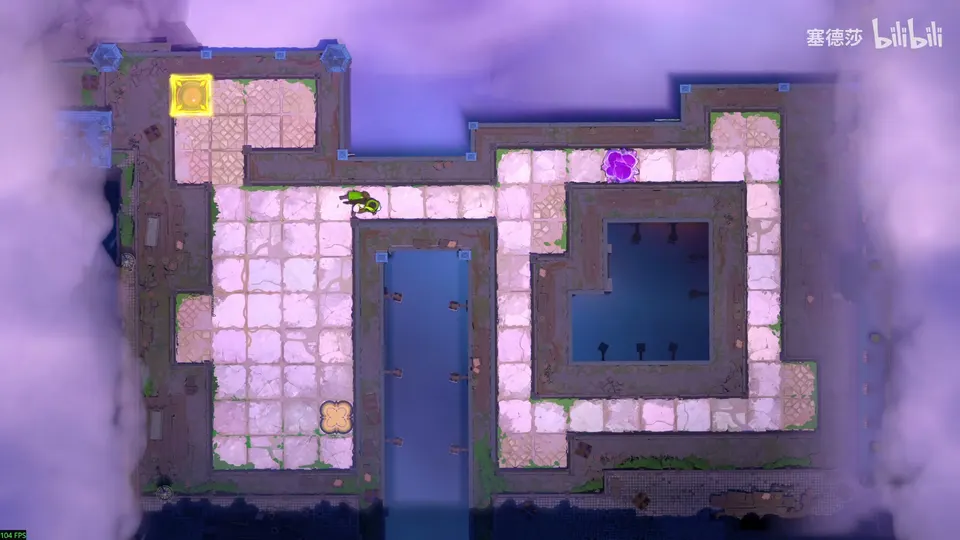
The theme is dragging a crystal a long way. As set up, the Thief pulls it out and straight down to the button, and the big loop on the right, the odd bumps and the exit room are never used (P61 6:40, P61 7:01). 塞德莎 then works from the worst spot to the best (P61 8:24):
- On the button is the worst spot: the level is solved before you start. Right beside it is still far too easy (P61 8:12, P61 8:36).
- Inside the loop, further in each time, uses more of the loop but not the corner bays, then not the west side (P61 9:04, P61 9:47).
- In the top-left exit room uses its shape, but the two-tile notch on the west side is still unused (P61 10:05). One tile there can’t be solved at all, because the energy door above is closed at the start (P61 10:33).
- In the notch gets “I’ll accept this, but it isn’t the best”: a one-tile notch would do for that, so why is it two wide? Anywhere in this area is accepted (P61 11:17, P61 12:00).
- Next to the button is the best answer. The hologram notes the irony of a crystal one tile from its goal (P61 12:27, P61 12:45).
Playing it: you can’t pull it across. Pull the crystal into the notch, use the notch to bring it into this column, up to the top exit room and round, then to the right and all the way round the big loop, and pull it out onto the button (P61 13:19, P61 13:27, P61 13:34).
Puzzle 3
Best placement: the stone on the last island. That tile and the three to its right are all fine; 塞德莎 prefers the one that uses the island’s length. (塞德莎 P61 18:15)
As set up, you build the whole bridge with stones and only use the mirror at the very end, which is odd in a mirror room (P61 14:16, P61 14:52). The idea the designer wants: cross each gap with the mirror first, then push a stone back from the far side to fill it (P61 15:05).
- Spots near the start let you push stones in from the first island and never use the mirror (P61 16:37).
- Moving the stone further along forces one mirror crossing, then two, but the end still falls back to plain bridge-building (P61 16:58, P61 17:34).
- On the last island the theme holds all the way. On the exit itself it can’t be solved (P61 18:15, P61 16:08).
Playing it: cross with the mirror, push the stone back into the gap, bring the mirror over, and repeat: every gap is crossed by mirror first and filled from the other side (P61 18:43, P61 19:03).
Puzzle 4
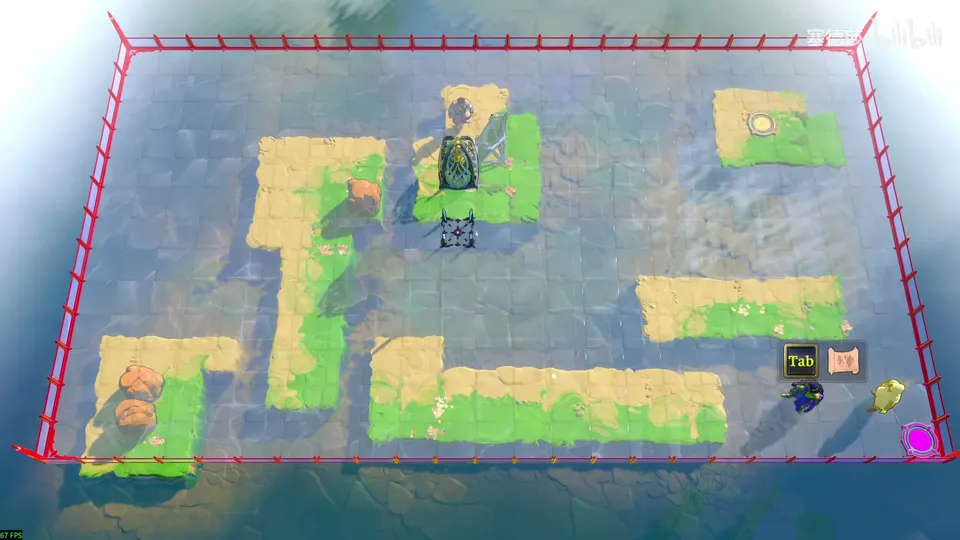
Best placement: the mirror far along the north shore, near its right end, so solving uses the whole island and leaves room to get behind the mirror and push it. (塞德莎 P61 25:43)
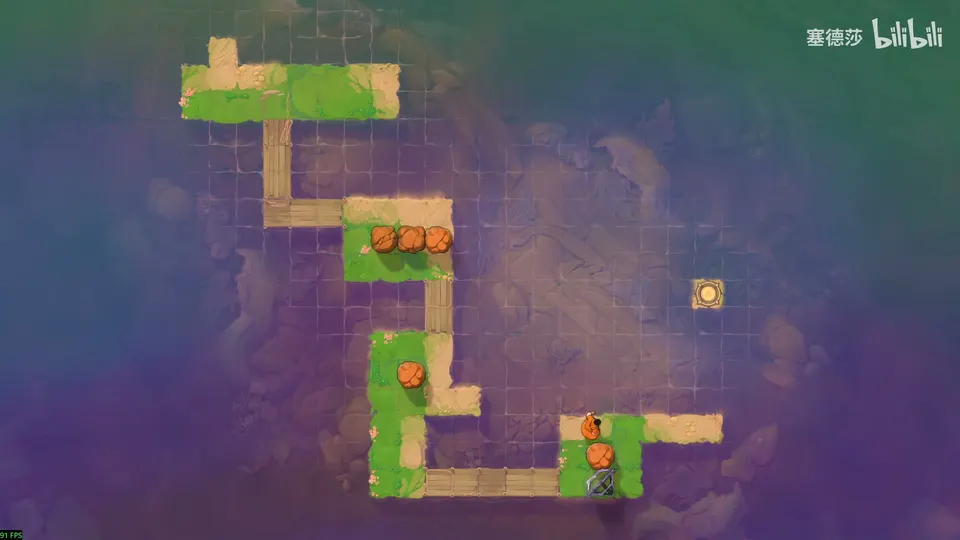
The mirror has to end up where the Trader stands. The theme is using spare stones to widen the island so the mirror can be pushed (P61 19:29, P61 19:39). As set up, two stones make a two-tile-wide strip and the mirror comes straight out; the two top-left islands and three stones are never used (P61 19:49).
- Spots near the start “don’t use the north of the island”; moving the mirror up reaches the north island but you can still push it straight off, leaving the top-left bump unused (P61 24:18, P61 25:04).
- In the top-left bump the hologram asks why the north coast is so long if you don’t push along it (P61 25:31).
- A little left of the best spot is accepted; the best spot is the one shown at P61 26:02.
The hologram’s mistakes here: it calls this spot unsolvable, but four stones from the left make a four-tile path to take the mirror down, plus one more stone in the bottom-left. It also rejects this one, which works too. The other way round, it suggests this spot, which can’t be solved: you need three stones to fetch the mirror back and two more for the bottom-right platform, and there aren’t enough (P61 21:40, P61 22:14, P61 22:49).
Playing it: the preparation is long. Push one stone to the bottom-right and one here for later, push a stone down to the bottom-right as the spot for the final push up, and one each here and here. Then take the mirror out of the bump, go down, reflect onto the stone you left in the water, push the mirror right, reflect the stone down, and fish the mirror out (P61 26:13, P61 26:41, P61 26:54).
Puzzle 5
Best placement: the skipping stone on the tile beside the exit, one tile from an easy win, so the Sailor has to send it round the whole island. (塞德莎 P61 30:08)
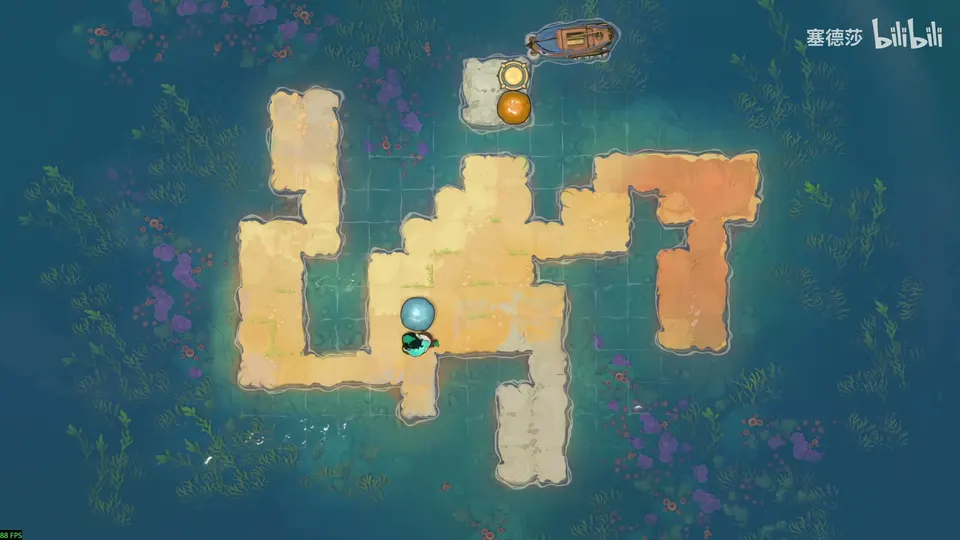
As set up, one push sends the stone straight to the exit (P61 27:23).
- Right by the exit, the hologram asks why you’d find that interesting; nearby spots don’t use the big odd-shaped island (P61 28:15, P61 28:39).
- Longer routes use several areas but leave the right, then the left, then the north-west peninsula unused (P61 28:53, P61 29:27).
- A long, winding route is “almost there, one more step could be designed” (P61 29:51).
- The best spot is right next to the worst one: one tile from winning, but the whole world to go round (P61 30:16).
Playing it: push it left first, then down and right to this island, which only lets it go up; then a big loop round the right side, push it over, up and finally left to the goal (P61 30:55, P61 31:07).
Puzzle 6
Best placement: the lily pad where the original overworld puzzle has it: the hologram praises the “great teamwork between lily pad and skipping stone”. (塞德莎 P61 34:56)
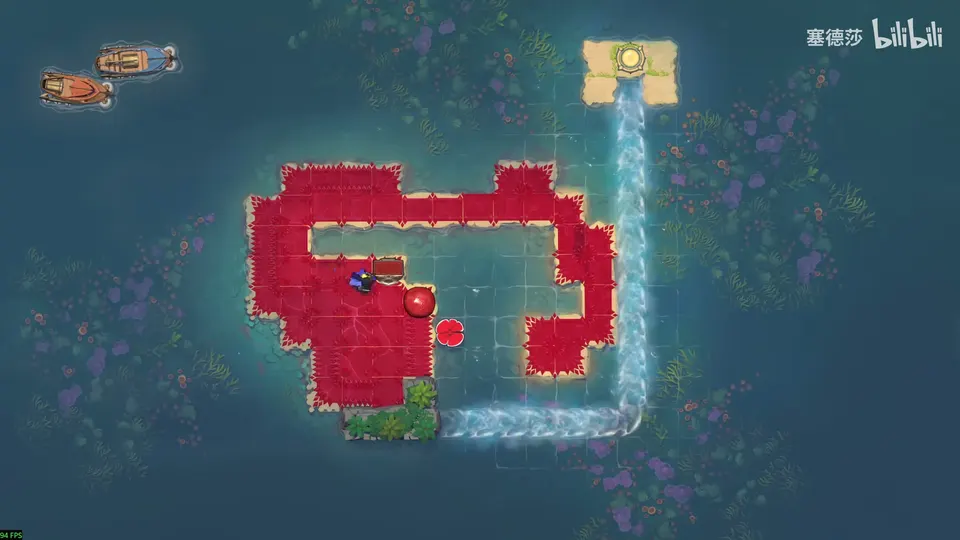
This is the South’s red overworld puzzle between the first and second stage, rebuilt. The Queen has to reach the high path, and you choose where the lily pad starts (P61 31:17, P61 31:28). As set up, one push right and you are through (P61 31:49).
- The pad has to go on water: on land, the object under it would dissolve (P61 32:25).
- On the current is the worst: it would have drifted away long before she arrives, since this is an overworld puzzle. Just right of the start is too easy (P61 33:21, P61 34:01).
- Moving it further makes her think a bit more, then more, but the shape of the bay is still not used in full (P61 34:36, P61 34:48).
- The best spot is the official solution of the overworld puzzle (P61 34:58).
Known issues: the tile at the top right of the Queen shows an “Unknown reginame” error instead of a reply, and several spots it calls hopeless can in fact be solved. 塞德莎 expects a fix (P61 32:44, P61 34:13).
Playing it: push from here to the right, sit in the middle and go down, fetch this stone, push it left, and wait for the lily pad to drift over (P61 35:33, P61 35:44).
Puzzle 7
Best placement: set the beam colours with the prisms, room by room: cyan in the north-west room; orange plus a horizontal red in the south-west room; yellow on top and orange in the rover room; and in the south-east room, orange instead of red, with green on the emitter next to the single gem socket. (塞德莎 P61 36:38)
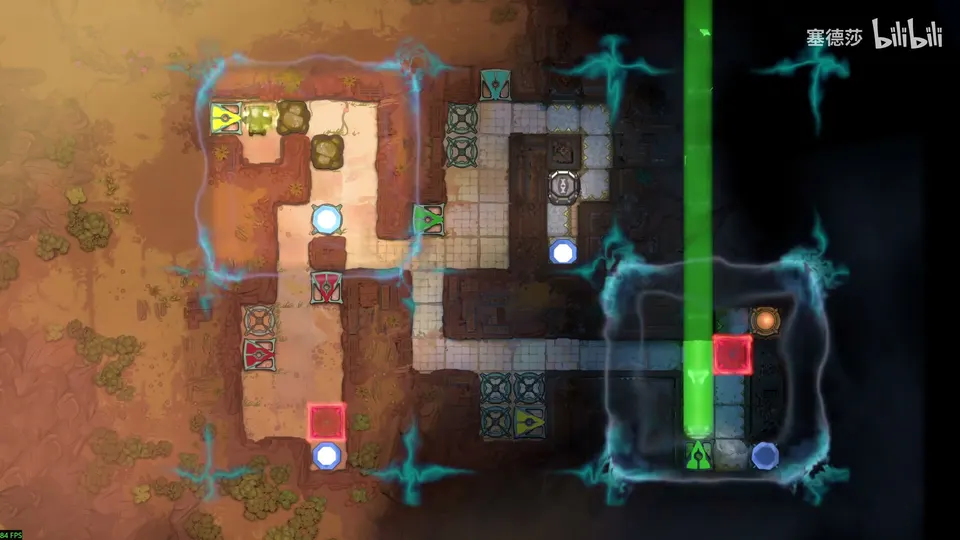
The hologram asks which emitters are under-used and whether there is a too-easy route. As set up, yellow breaks the first stone, a second stone sits there for nothing, and green lets you walk through the wall in the bottom-right and skip the rest (P61 36:06, P61 36:27). The replies come in four stages, one per room, starting top left (P61 36:41).
- North-west room: red leaves the Explorer stuck in the first room; orange lets you just walk out without using both stones (塞德莎 thinks it at least teaches orange jumps). Cyan is right (P61 37:08, P61 37:20, P61 37:58).
- South-west room: the upper red beam reaches the red door below on its own, so the left emitter is pointless. Orange plus a horizontal red makes you use both to reach the door (P61 38:06, P61 38:45).
- Rover room: green passes straight through to the gem behind the rover. Horizontal yellow with vertical orange is accepted; swapping them (yellow on top, orange on the other) is best, because now you must destroy the cart at the crossing (P61 39:02, P61 39:38, P61 40:02).
- South-east room: green lets you walk through to the exit, and the bottom-left red beam opens the door on its own. Make that one orange so the red door stays shut; now the level can’t be finished until you set the emitter beside the single gem socket to green, so you can reach the last gem (P61 40:22, P61 41:04, P61 41:22).
Playing it: push the two stones aside top left; open the red door at the crossing and switch it off; take the gem; place both gems top right and clear the cart at the crossing; take three gems down and place them here; green appears, walk through the wall to the last gem, cancel the orange that blocks you, and activate the bottom-left (P61 41:50, P61 42:08, P61 42:19).
Puzzle 8
Best placement: the purple emitter in one of two spots; the game uses the one directly above the entrance, which makes it clearer that you have to travel into the purple beam first. (塞德莎 P61 45:25)
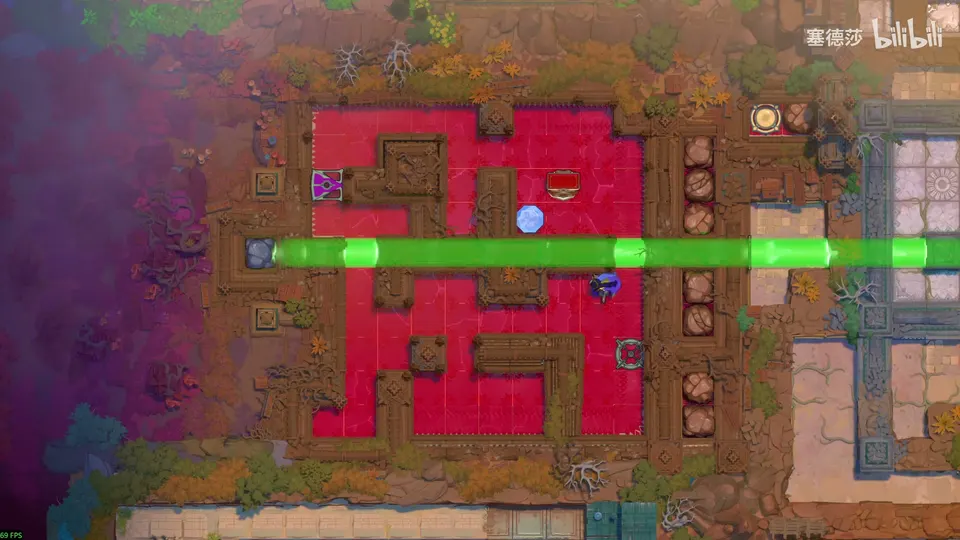
This is the West’s red overworld puzzle between the first and second stage. She “still has a long way to climb”; you choose where the purple emitter starts (P61 42:35, P61 43:08). As set up, one push up puts it where it needs to be (P61 42:50).
- On a wall or the sign: “she hasn’t learned 3D yet”. At the very top it can’t be solved; one tile left is a giveaway (P61 43:21, P61 43:44).
- In the south room it looks like the original answer’s room, but you can move the emitter to the exit before the room has power (P61 45:03, P61 45:12).
- The two best spots are the one shown at 45:25 and the one directly above the entrance; the hologram leaves the choice to you (P61 45:25, P61 45:35).
The hologram’s mistake here: this spot (the two gems stack up) and this one (the gem jams) really are unsolvable, but one tile to the right of the second, which it also calls unsolvable, can be solved (P61 44:23).
Playing it: push the purple emitter down, take the gem out, switch the purple beam on and travel in, push it up and switch off; then the same sequence of moving the purple emitter to the top left as in the original overworld puzzle, and activate it (P61 46:10, P61 46:31, P61 46:35).
The hall rooms and the figure room
The two small rooms on either side of the hall make the same point: in the left one you just pull the stone over and mirror it, and the railing on the right is useless; in the right one the button has been moved, so you pull the stone down and mirror it, pull it up from the left, turn it, and since the Thief can’t let go there, pull it up and back down again and use the mirror to release it (P61 47:18, P61 47:41). Solving them unlocks the cage on the right (P61 47:07).
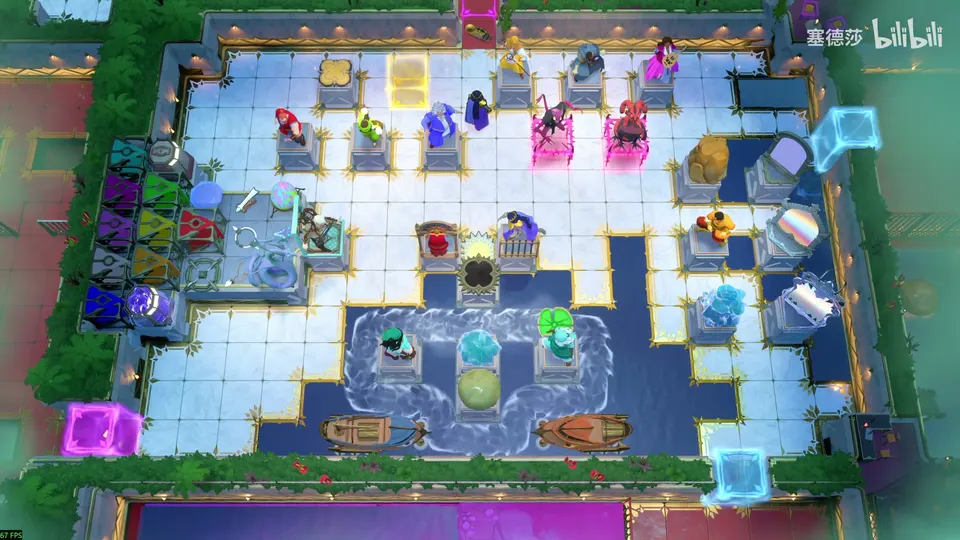
The room below is a figure room: models of nearly every object and character from the four worlds of the first stage, North at the top, East right, South bottom, West left. A few are missing, such as the duplicated heroes and Traders and upper-layer pieces like vertical mirrors. Touch the one in the middle to leave (P61 51:06, P61 52:01).
Implementing Ideas
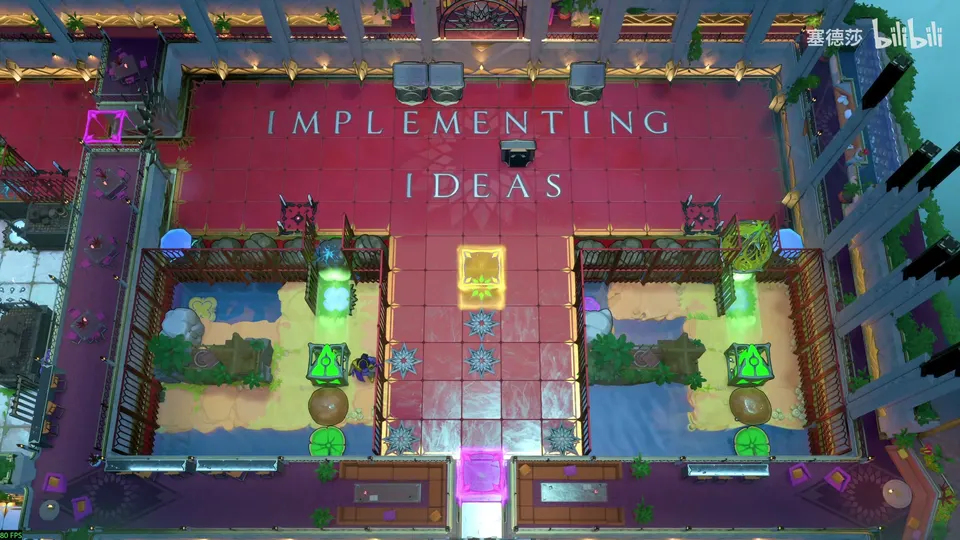
The second theme: you know how to restrict a level with terrain, but random restrictions make random puzzles. Now you turn one specific idea into a puzzle, and choose ideas that show the player something new (P62 0:16, P62 0:30). To get in, walk through the wall in the bottom-left using the lily pad below, wait for it to pass, then push up (P62 1:05). From here 塞德莎 shows only the more interesting replies (P62 2:36).
Puzzle 9
Best placement: a wall in the left half that the Thief can’t get round, and a block in the right half that stops the Warrior, so each half can only be solved by its own hero. (塞德莎 P62 2:15)
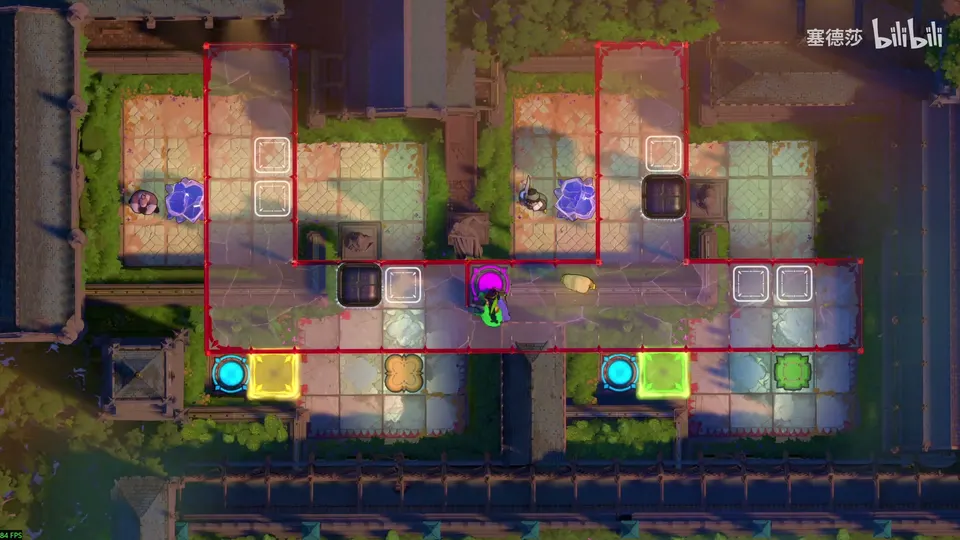
As set up, the Warrior pushes straight through on the left and the Thief pulls straight through on the right; nothing shows why the two halves belong together (P62 1:28). The task: change each half so only its own hero can solve it (P62 1:44). You can put walls on four tiles.
- Left: a wall here means the Thief can’t bring anything into this column, so only the Warrior can solve it (P62 2:23).
- Right: block this tile and the Warrior can’t push the stone down from the upper structure, but the Thief can pull it (P62 2:48).
- The hologram likes it: it shows the difference between the two heroes (P62 3:02).
Playing it: the Warrior pushes straight through; the Thief pulls from above (P62 3:10). 塞德莎 adds that a player solving each half alone would rarely notice the contrast (P62 3:17).
Puzzle 10
Best placement: in the left gap, the top tile; in the middle, either of the two right-hand tiles; on the right, the tile behind the button. Then the Warrior has to push the stone across all four islands. (塞德莎 P62 5:27)
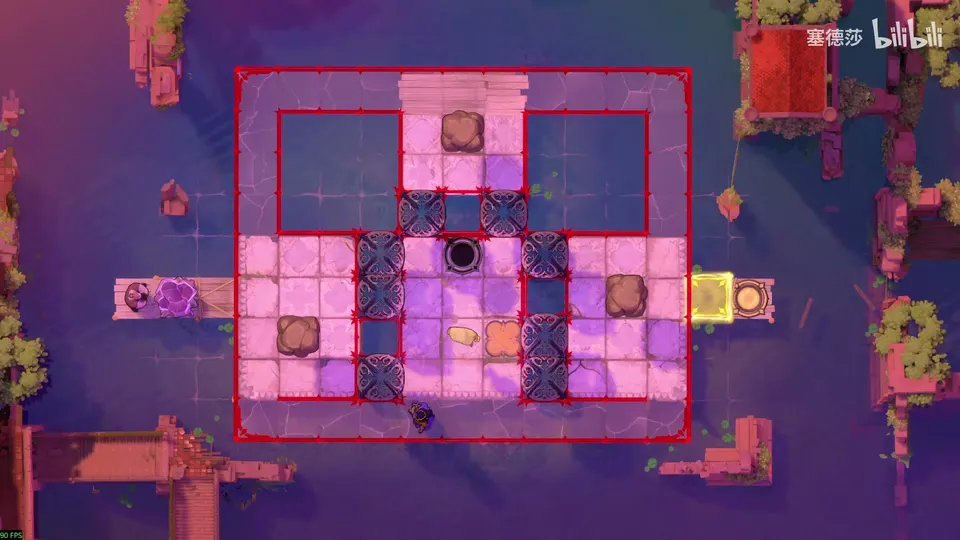
The level should make the player push a stone up to the button along a winding route. You push stones down to join the islands, then test it (P62 4:03). The goal: the Warrior takes the stone across islands 1 to 4 and back before finishing (P62 4:15). A careless layout lets the stone go straight on, never visiting the top or right island (P62 4:44).
- Left: the bottom tile is unsolvable (the stone can only go to the bottom row and can’t be pushed up from there); the two middle tiles let you push it straight to the middle island; only the top tile works, because pushing right jams it at the top edge and forces you to use the north island (P62 5:36, P62 6:00).
- Middle: this tile jams the stone against the middle island’s left edge; the other two, middle or right, both work (P62 6:12, P62 6:28).
- Right: anything that lets you put the stone straight on the button is useless; only behind the button works, because the stone on the button then blocks your way, so you have to take it round the right island and push it back from the right (P62 6:43, P62 7:09).
Playing it: push it over, go round from above, and push it back from the right onto the button (P62 7:33, P62 7:38).
Puzzle 11
Best placement: start the skipping stone where it is pushed up into a corner (塞德莎 finds two such spots; the original level starts at one of them), and put the last landing stone where the Sailor on the north island has to wait in the narrow gap at the top left before the stone arrives. (塞德莎 P62 11:16)
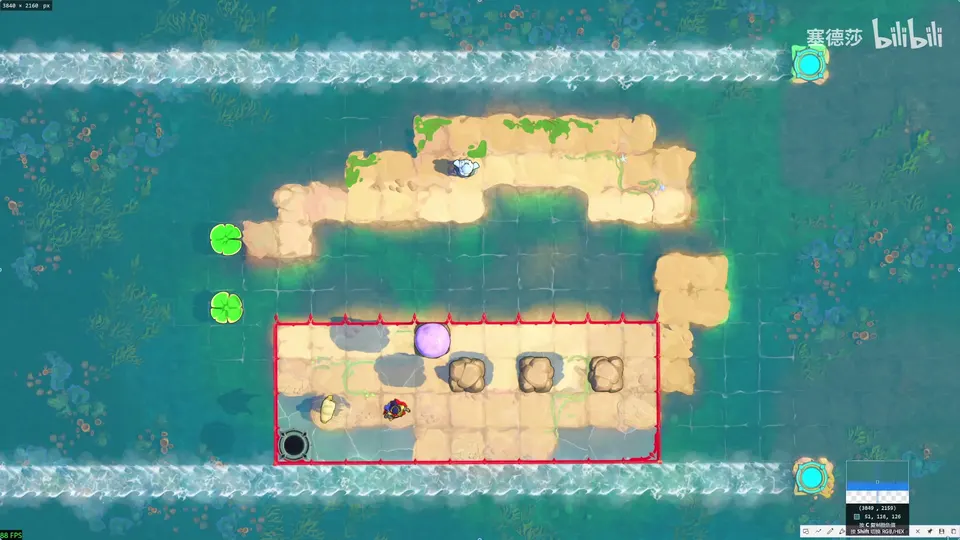
This is the first island of the South’s second two-Sailor tutorial level. The task: shape the coastline so the skipping stone travels between the two Sailors, crossing the water three times before it gets out, where it is used to turn the lily pad (P62 8:02, P62 8:46). As set up, push up once and the stone is out (P62 8:19).
- Where the stone starts. The top-left corner is unsolvable (the stone gets stuck where it is no use); the far right is too easy; two spots are “interesting, but not enough crossings” (P62 9:42, P62 10:07, P62 10:34).
- The start should push the stone up into a corner so it isn’t free to move along the edge; otherwise you can pick any spot to push it down from and it comes out easily (P62 11:16). The two good starts are this one and this one; the hologram only considers one of them (P62 12:03).
- Landing spots. After the first crossing the stone has to stop on the far side, so add a stone there; then you need a spot to push it back (P62 12:40, P62 13:03).
- Pushing from left to right works (two layouts) and is accepted, but the left half of the island goes unused and the last steps are dull (P62 13:11, P62 14:13).
- From right to left, many spots work; ones that just push the stone along the ground instead of skipping it are “dull”. The best are the two that force the north Sailor into the narrow gap first (P62 14:45, P62 15:48, P62 16:07).
Playing it: push up, then left and down; send the upper Sailor into the gap in advance; push the stone down here and take it out; the upper Sailor waits on the lily pad (P62 16:22, P62 16:31).
Puzzle 12
Best placement: the exit on the tile sticking out at the top; the blocking spot beside it; the purple emitter on the left; and the Sailor’s launch platform right in the corner. (塞德莎 P62 18:20)
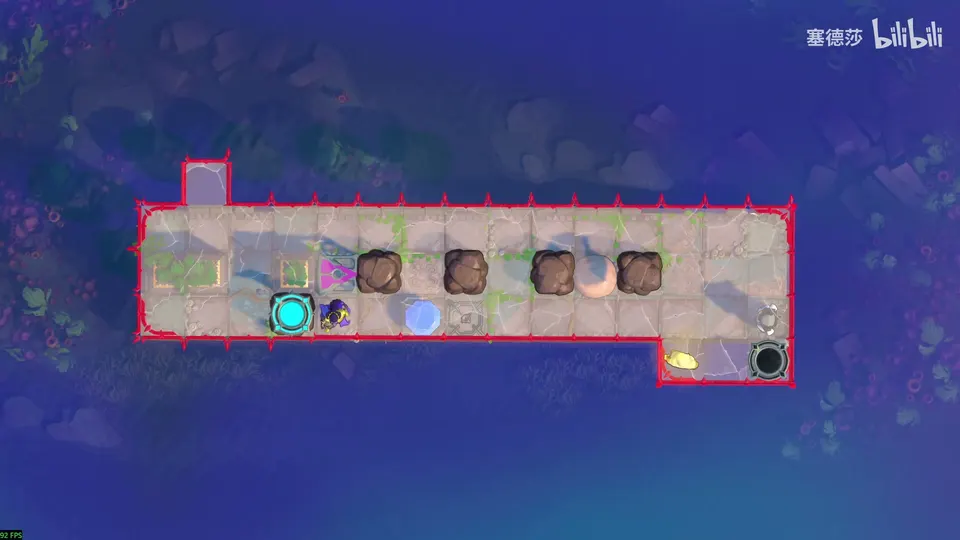
Here you don’t play first. The level is almost done: its point is that teleporting is faster than a skipping stone, so the long thin island gives the Sailor time to teleport ahead and beat the stone. Put all the stones in the water to shape the coastline, and start with a clever spot for the exit (P62 17:04, P62 17:28).
- Exit: at the near shore you can just walk out; a spot reached by sinking any object (a gem, an emitter) is not much better. The intended exit is the tile sticking out at the top (P62 17:38, P62 18:20).
- Blocking spot: the stone flies right to left, so the spot where your body stops it and sinks it is here (P62 18:34).
- Purple emitter: it fires left to right and its far end is the teleport target, so its place is fixed: here (P62 19:02).
- Launch platform: too close and the stone arrives too soon; further away is accepted, with a note that the coastline looks tidier without the bump; in the very corner is best, and the long distance also makes the timing easier (P62 19:25, P62 19:47, P62 20:10).
Playing it: put the emitter here, move the skipping stone over and switch it on, push the stone left and teleport at once, then block it with your body (P62 20:48, P62 20:55).
Puzzle 13
Best placement: copy the maze on the left. Counting from the fixed goblin, put one goblin one tile right and four down, and the other four right and one down. (塞德莎 P62 22:49)
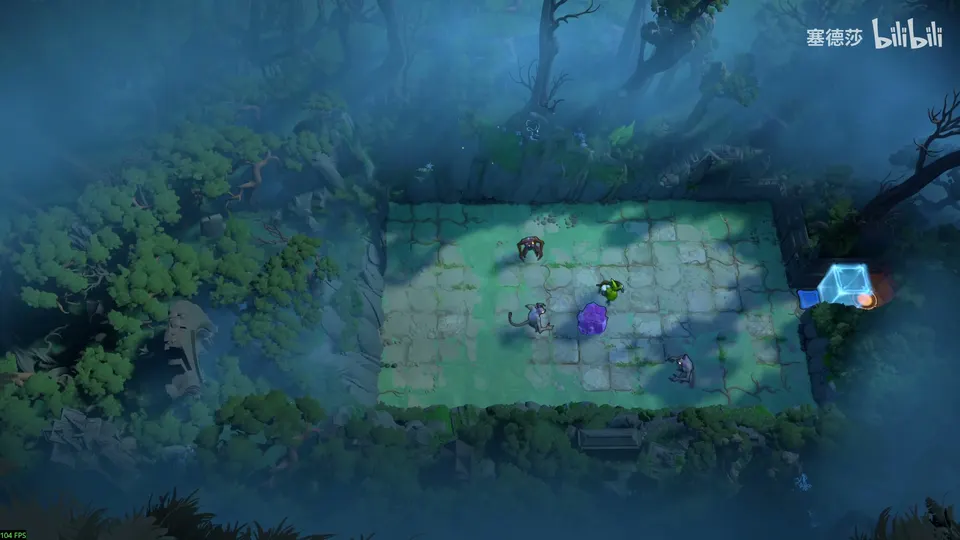
Use goblins to build a maze the Thief drags a crystal through. As set up, the Thief pulls it straight up from below (P62 21:09, P62 21:21). The goblins should block the direct pull, so the Thief has to let go and grab the crystal again from the other side, like the sample maze on the left (P62 21:34, P62 21:51).
- The fixed goblin effectively occupies one tile, sealed on its sides; by analogy with the sample, the other two places follow (P62 22:23, P62 22:40).
- Wrong: goblins too far apart, too far from the south wall, or too far from the fixed goblin; two goblins side by side attack each other (P62 23:13, P62 23:30, P62 23:45).
- Moving the lower goblin one tile right is accepted, but a wider gap is better: it tempts the player to think the crystal can be pulled straight through (P62 23:54, P62 24:28).
Playing it: pull the crystal here, walk round, and pull it on from above (P62 25:16). 塞德莎 points out that an early North level with the Thief and goblins uses the same idea (P62 25:28).
Puzzle 14
Best placement: orange in the first room, a moved wall and bridge so green takes you through the wall into the third room, and the purple endpoint beam in the last room’s block with the white beam below to switch it on and the wall moved one tile right. (塞德莎 P62 28:00)
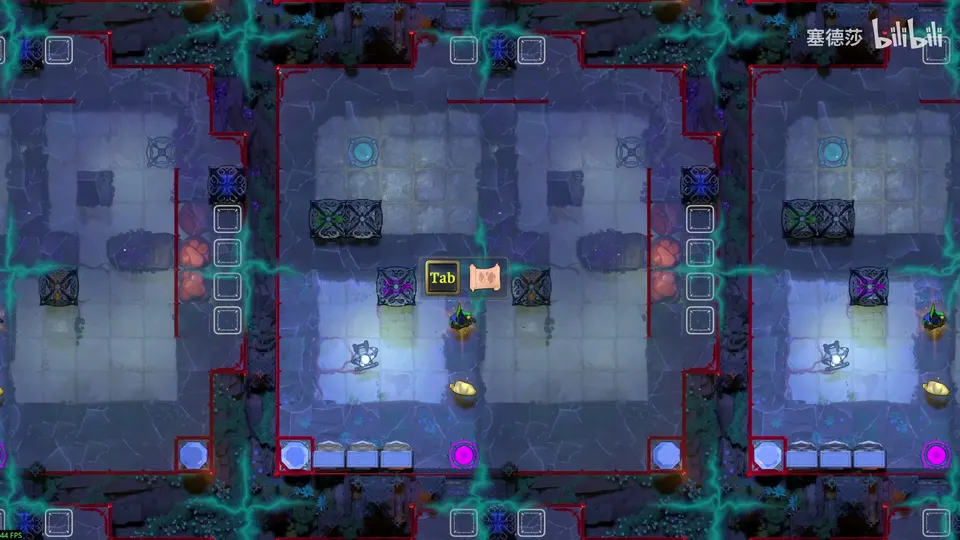
The sign: puzzle design is also about making sure players actually do the interactions you found. One of the simplest ways is a one-way door, a common trick in many games; this room is about the ways beam emitters can make one (P62 26:01, P62 26:12, P62 26:45). The Explorer must visit every room, and can’t go back into a room once the Explorer has left it (P62 27:20). As set up, purple lets you travel back and forth (not one-way), orange jumps are one-way, and some elements top left have no use (P62 26:56, P62 27:02).
- First room (bottom-left): you have to walk into purple to cross, and purple can’t have a far end you can’t come back from here, so it’s two-way; green the same. Only orange works (P62 28:04, P62 28:39, P62 28:54). 塞德莎 also shows an orange spot the designer didn’t foresee (P62 29:03).
- Second room: you can walk straight into the third. Block the right side with a wall, then you need to pass a wall, so green; move the bridge down here. You leave sideways, where there is no green, so there is no way back (P62 29:17, P62 29:36, P62 29:45).
- Last room: the gem socket needs a purpose. What’s left is the purple endpoint beam and a white beam: put the endpoint beam in this block, put white below where it gets power, so it switches purple on, and move the wall one tile right so purple carries you through (P62 29:55, P62 30:13, P62 30:26).
A flaw: with the orange where it is, you can jump straight to the exit, and even back. 塞德莎 suggests a stone on the orange path would stop it (P62 30:38, P62 31:32).
Playing it (intended route): jump to the second room, walk through with green into the third, use white to switch on the top-right emitter, travel across with purple, and jump to the end (P62 31:06, P62 31:18).
What comes next
Solving the four-room level opens the right side of the Implementing Ideas hall. Its small room is the better version of the bottom-left one: the green beam rides a lily pad to the far left, and you have to follow the moving beam through the walls to push the stone down, where in the left room you could just wait for the pad (P62 31:45, P62 32:05).
塞德莎 names the next area in English as something like “Robotless” (we haven’t seen its name card) and covers it in his next part (P62 33:18). We will add the rest of the final Endgame when it is out. Back to the Antipode Low hub.