Spoilers: this page covers the second stage of Order of the Sinking Star, after the first ending. It sticks to puzzle solutions, but the zone names and layouts give away second-stage content. If you haven’t finished The Antipode yet, you may want to stop here.
High Beamcasters is the Beamcasters part of Antipode High, the upper layer that opens after the first ending (see how to ascend). It is the High counterpart of Vault of the Beamcasters: the same Explorer, gems and coloured beams, now with height. Orange beams drop you as well as jump you, cyan beams decide who is strong enough to carry what, purple beams can make you float, and some rooms bring in Sailors, Traders, heroes and goblins. This page solves 58 puzzles and the 11 overworld puzzles between them. Reaching the area unlocks the Steam achievement High Beamcasters (“Reach the Beamcasters part of Antipode High”; see all achievements).
Where it is: from Crossroads High, go through its West gate room and head west. 塞德莎 labels the map tiles W1, W2, W3 and W4 (his part 36), S1W3, S3W3, S3W2, S2W2 and S1W2 (part 40), and N1W2, N1W3, N2W3, W5 and N1W4 (part 42).
How to use this page: there was no English solution video for these rooms yet when we wrote it, so the numbers follow 塞德莎’s narrated walkthrough, counted straight through his parts 36, 40 and 42. He plays a few rooms of Vertical Endpoints out of order (puzzle 53 sits next to the Turning Goblins rooms, and he comes back to it from the other side), and he leaves the drop points down to the ground layer for a later part (41). Three of those ground-layer rooms, which Joric’s map files under Double Beam Falling’s drop-downs, are at the end of this page as puzzles 56–58; the other drop-down rooms are on Reflected Beams (puzzles 20–25) and Stones Illuminated (puzzles 24–26). Each heading has the key idea and a link to the moment the room starts; the numbered steps link to the second where he explains that move. Short walks on the area map between rooms are folded into a Getting there line.
Zones at a glance (Chinese names as shown in 塞德莎’s game; Elevators is a confirmed English name, the others are our translations and unconfirmed):
| Zone (塞德莎’s Chinese name) | Puzzles | 塞德莎 part |
|---|---|---|
| Elevators (升降机) | 1–12 | P36 |
| Double Beam Falling (双倍光束坠落) | 13–29, overworld puzzles 1–3 | P40 |
| Strength (力量) | 30–35, overworld puzzles 4–6 | P42 |
| Side rooms (no name shown on screen) | 36–38, overworld puzzles 7–8 | P42 |
| Turning Goblins (转身的哥布林) | 39–44, overworld puzzle 9 | P42 |
| Vertical Endpoints (竖直端点) | 45–55, overworld puzzle 10 | P42 |
| Beam Road (光束之路) | Overworld puzzle 11 | P42 |
| Drop-down rooms below Double Beam Falling (ground layer) | 56–58 | P41 |
The name card for each zone appears when you walk into it, so the exact border between two neighbouring zones is approximate.
Rules that matter here
- Orange beams pull you down too. An orange beam doesn’t only jump you two tiles sideways, it also drops you two tiles. You never noticed in the West because two tiles below was always solid. If the tile two below is floor (even under water), you stay up; if not, you fall (P40 1:03, P40 3:25).
- Stacked beams multiply. One orange beam moves you 2 tiles, two crossing beams 4, three 8, four 16, down as well as sideways (P40 12:22). Because you move two at a time, parity decides which tiles you can reach (P40 2:38).
- Strength comes from cyan beams. The Warrior pushes any number of things, the Sailor, the Trader, your overworld character and goblins push one, and the Explorer pushes none. Every cyan beam you stand in adds one (P42 0:34, P42 8:27).
- You carry what you can push. A hero can hold as many things on their head as they can push; one more and they are crushed. That is why the Explorer dies the moment a gem stops holding up the stone above him (P36 2:01). Anything that drops onto a head from above kills, so slide things on at the same height (P42 16:04). A hero can drop onto another hero, though (P36 19:02).
- Stacks don’t teleport together. When a beam teleports something, whatever sits on top of it stays where it was. Use it to carry a stone as a helmet, or to leave a blocker behind (P40 22:43).
- What you carry turns with you, whether you are a hero or a goblin, which is how you re-aim an emitter on someone’s head. A purple beam teleport turns you round but not what you carry (P42 20:15, P42 24:56).
- Purple beams that run up and down. Standing in one, you sink to its lower end (P36 5:09, P42 43:31). If that end is blocked, you float in the beam instead, which is how you cross gaps in Vertical Endpoints (P42 48:36). A purple beam that ends in an endless drop, or up in the sky, takes a monster with it for good (P36 31:36).
- Green beams and walls. A green beam lets a hero walk through walls (P36 15:48), and some walls let beams pass through (P42 54:45).
- How goblins turn. A goblin reacts to you within two tiles (counted along the grid). Step next to it and it faces you; land on a tile two away and it faces that way. On the four diagonal tiles it faces where you are heading: come down into its top-left diagonal and it faces left, come in from the left and it faces up. A side that is blocked doesn’t count, so stones can lock a goblin’s direction (P42 27:45, P42 31:08).
- Elevators answer calls first. Stepping onto an elevator shaft calls the elevator, and that always wins over falling down the shaft (P36 22:53).
- Save tip. A dull warning sound means you’ve done something you can’t undo, and the game won’t save that checkpoint (P40 8:07). Tab switches the camera, and 塞德莎 often plays at the angled view because so much depends on height (P36 1:04).
Puzzle 1
Elevators (升降机)
Key idea: a big star puzzle. Right below the entrance, and a big one: a West-style pocket world with height, two floors of 2×3 screens. Collect all seven gems, then reach the exit through the inner of two purple beams using a delayed switch. (塞德莎 P36 0:10)
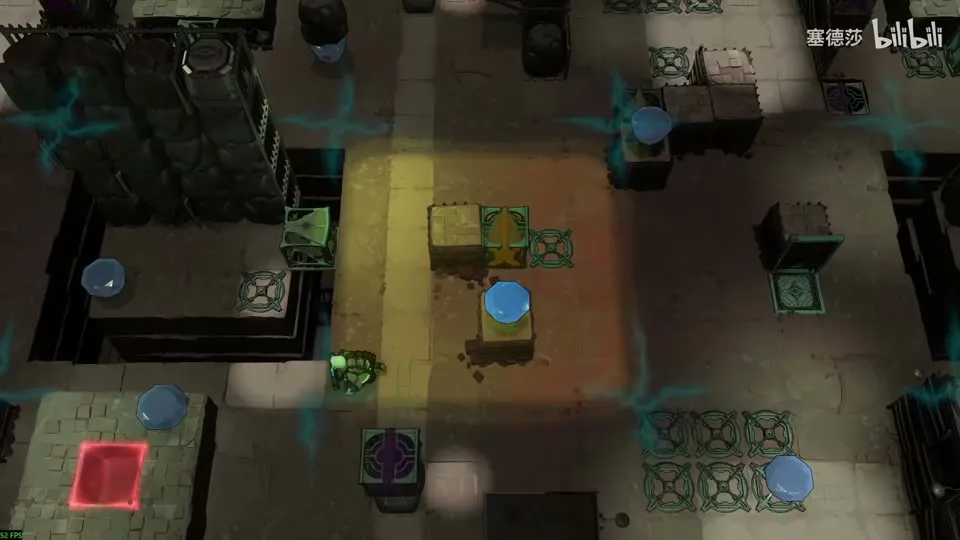
Getting in: move the two carts down and get them moving in step. Their rows are offset by one, so push one extra stone on the right and they sync on the way back. (0:21)
- Take the map at the arch. 塞德莎 recommends the normal angled camera here, because many puzzles depend on height. (1:04)
- First gem: switch on the cyan beam before taking the gem. The gem is holding a stone up, and without strength the Explorer is crushed the moment it goes. In the beam he can hold it. Then walk under the arch at the far right to scrape the stone off his head. (1:43)
- Bright patches on the floor mark holes in the floor above. Take the elevator up, grab the map, and drop through the right hole onto the high platform for the next gem. (3:01)
- The stone-and-cart gem: drop through the top-left hole, then lay a way out. Lower the cart first, open both paths, push a stone down one tile, then lower the cart’s arm once more so it jams instead of falling. Open the last path and let the cart push one more stone down and jam itself. (3:50)
- The orange-and-purple gem: activating it lights an orange beam, and the cart carrying a purple emitter switches on a purple beam pointing up. In a vertical purple beam you sink, so sink and immediately step right (塞德莎 buffers the input). Then jump with the orange beam to the gem. (4:38)
- The last lower gem sits on the red energy block, right under a pit on the upper floor. Put the gem in and let the cart push it away at the right moment, so you don’t fall into the pit. (5:36)
- The upper gem: two stones have to go, and only the crown’s beam reaches. Jump down from the side he shows; the orange beam lines up with the spot the yellow beam broke, and a one-tile jump breaks both stones. (6:14)
- The exit: of the two purple beams only the inner one drops you to the exit, and you can’t walk past the outer one. Break the stone first. The tile right of the red door is the gem socket, so drop the gem in from above, time it with the cart reaching the left, open the door and wait on the left. The cart pushes the gem into place and the beam switches on. (7:20)
Puzzle 2
Key idea: a stone-shuffling room built around the elevator. It looks like you should pave beside the gap, but that needs three stones. The real goal is two stones on the pair of tiles next to the elevator (either pair works), so the elevator lifts you and you walk right. (塞德莎 P36 9:22)
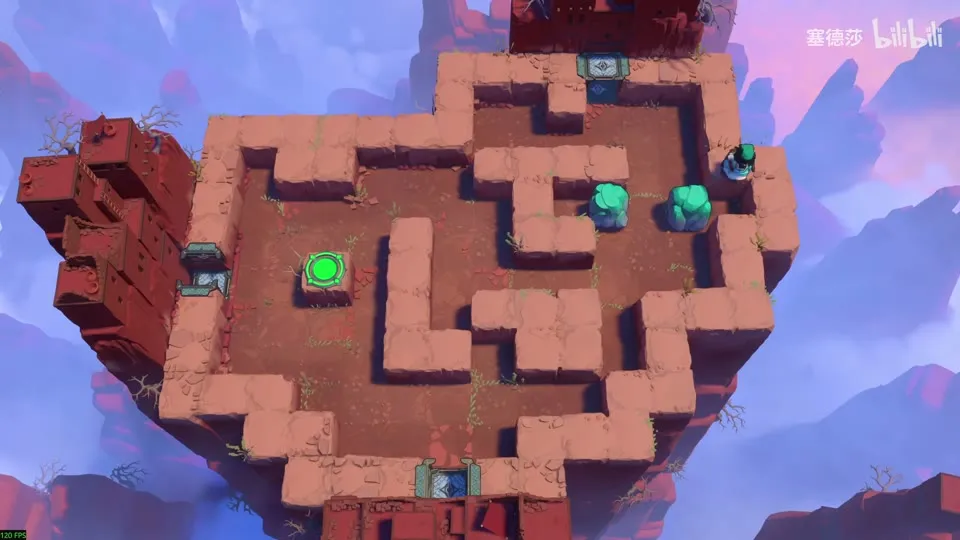
- At first only one stone can move: put it beside the pit and lift the other one out. Use it to take out the lower stone, then go round the outside to bring the next one out. (9:32)
- Collect the bottom-right stone the same way and bring it over. (10:39)
- Use the left stone to free the middle one, ride round on the lower elevator, and gather every stone. (10:55)
- Put two stones beside the elevator as he shows, ride up and walk right. (11:14)
Puzzle 3
Key idea: a big star puzzle. The Explorer has to stand on the Trader’s head on the second floor and push right, so the Explorer needs a right-facing cyan beam up there to give him strength, and the pit in the middle has to be filled with the crystal. Two heroes plus one elevator is the trick. (塞德莎 P36 12:14)
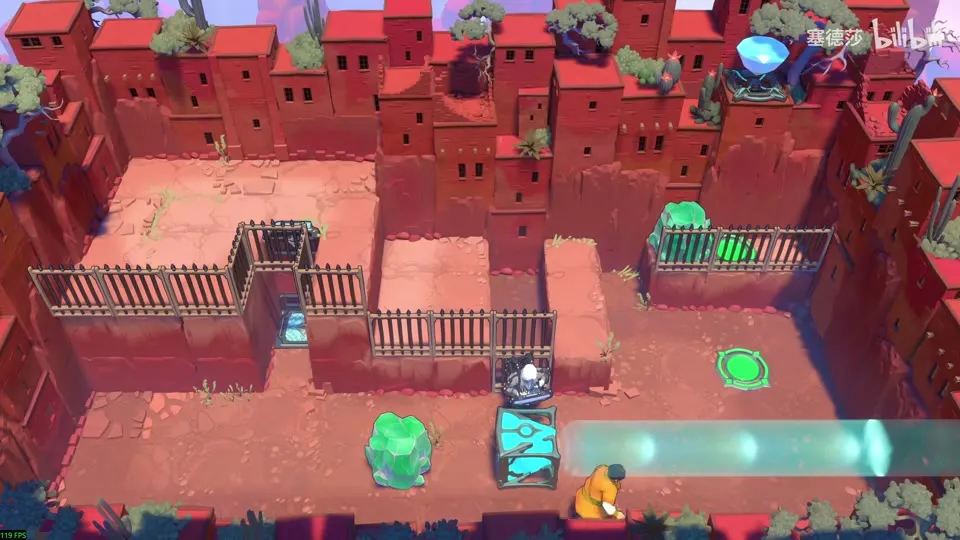
Getting there: a stone unlocks; push it left, ride it up with the elevator and fill the pit on the second floor. (11:56)
- Of the two ways (the Explorer carrying the Trader, or the Trader carrying the Explorer), the second is simpler. The Explorer can’t carry anyone without strength anyway. (12:25)
- Send the Explorer up to wait. The Trader calls the elevator down, pushes the right-facing laser on, and the hero upstairs calls it up again. Use the cyan beam to push the emitter left. (13:38)
- Same idea for the stone: send it up and push it away with the cyan beam’s help, then bring the Trader up. (14:07)
- Push the emitter so it isn’t against the edge, push the stone down into the pit and the emitter up to the target. (14:26)
- The Trader stands in place, the Explorer climbs onto his head and pushes. 塞德莎 mentions an unintended solution that skips filling the pit, but doesn’t show it. (14:44)
Puzzle 4
Key idea: a green beam lets a hero pass through walls. Get someone to the bottom right through the wall. The Thief can’t carry things, so the Sailor carries the green emitter on his head. (塞德莎 P36 15:48)
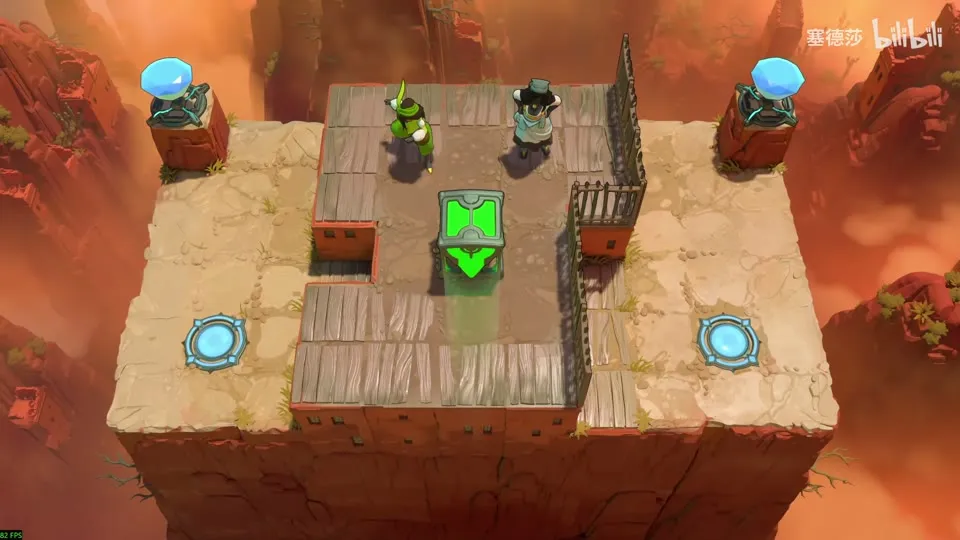
Getting there: two more rooms are at the bottom right. Push the stone down off the elevator so it lands on the corner floor, then come round from the far right. (15:13)
- Push the laser to the edge first, or the Thief can’t pull it there later. (15:57)
- Put the emitter on the Sailor’s head; he walks into the wall. The floor has friction, so he can’t drag it along. (16:05)
- Alternate: the Thief pulls, the Sailor steps, the Thief pulls the laser into place. (16:25)
Puzzle 5
Key idea: a chain of four or five stages about walking through walls with green beams. Each stage changes what you can push and from where. Remember two new rules: people dropped onto people stack (objects dropped onto people crush them), and Tab switches the camera. (塞德莎 P36 16:36)
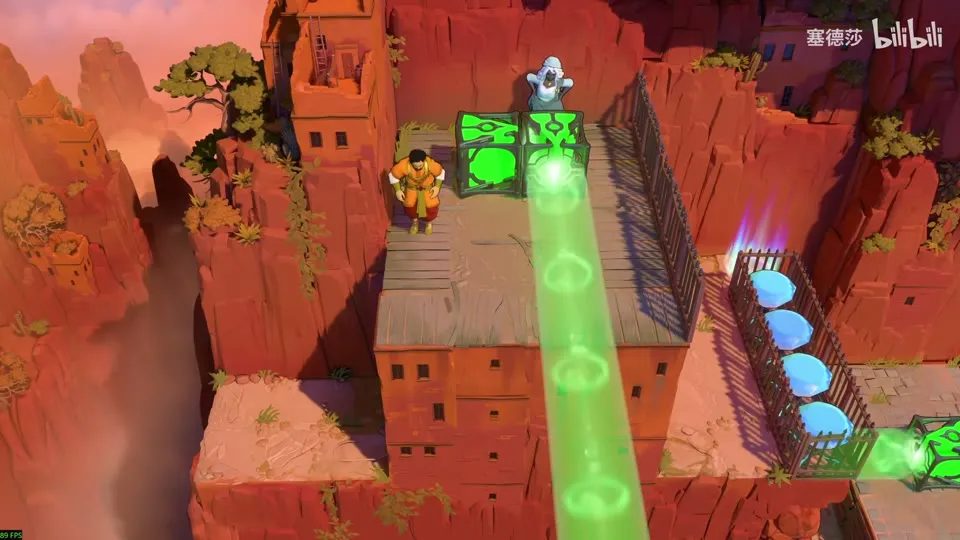
- Stage 1: pushed straight down, the green beam faces the wall and you can’t get in. Push the down-facing laser down first, let one hero slip into the wall on it, then bring the right-facing laser over; the hero inside the wall pushes it one tile left. (16:47)
- Stage 2: you need one hero standing on another. The one who fell in the pit has to reach the right and fill that pit: push the left-facing emitter where he shows, come through the wall from above and push down. (17:23)
- Stage 3: get the left-facing emitter to the right end of the lower platform by carrying it on someone’s head. Pushing it onto a head from higher up crushes him, but a hero can drop onto a hero. Push a stone down as a step, push the emitter over, let the upper hero slip inside while the other waits, then push the emitter onto his head and on to the right. (17:53)
- Stage 4: there are three emitters: green up, cyan right, green left. The up-facing one has to end up in the bottom-right corner shining up the wall. Push it to the second floor first, then down to the first. (19:19)
- Do it like this: bring the left-facing laser down, send a hero into the wall, push the cyan emitter over so the hero below can push several things, stack it, then drop one hero onto the other’s head. The hero on the second floor pushes the up-facing emitter down to the floor. (20:46)
Puzzle 6
Key idea: two elevators. Calling an elevator always wins over falling: step onto the shaft while it’s up and it comes to you, so you never drop. Instead put something under the elevator while it is up; when you ride it down, it stops on that object and leaves you on the second floor. (塞德莎 P36 21:58)
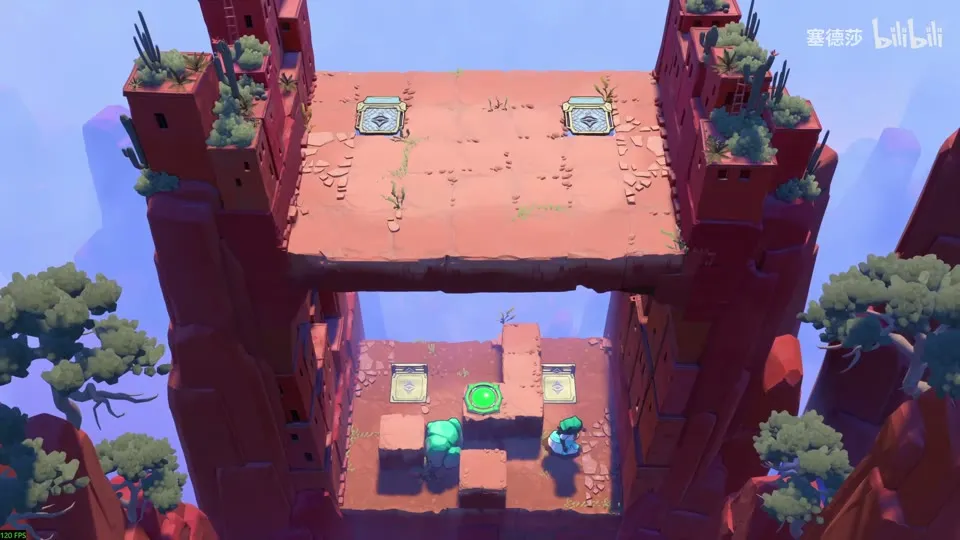
Getting there: the area is called Elevators. The lift going up is blocked, and the button only works once a stone is pushed in from above, so come up this way. (21:30)
- Get the stone out and push it onto the elevator. Come up from the other side and call the left elevator to bring it up; push the stone down. (22:25)
- Dropping through the upper shaft fails because the call takes priority. (22:53)
- Instead, with the elevator up, put the stone underneath; ride down and you are stuck on the second floor, which is the way through. This unlocks a red gem. (23:14)
Puzzle 7
Key idea: a big star puzzle. Drop through the hole beside the exit with a stone already waiting below. You can’t drop that stone in from above (walls block every angle), and from below there seems to be nothing to push it up. But the row below is water, not a cliff, and water can be filled: fill it with one stone, then drop into the water and push the other stone up. (塞德莎 P36 24:01)
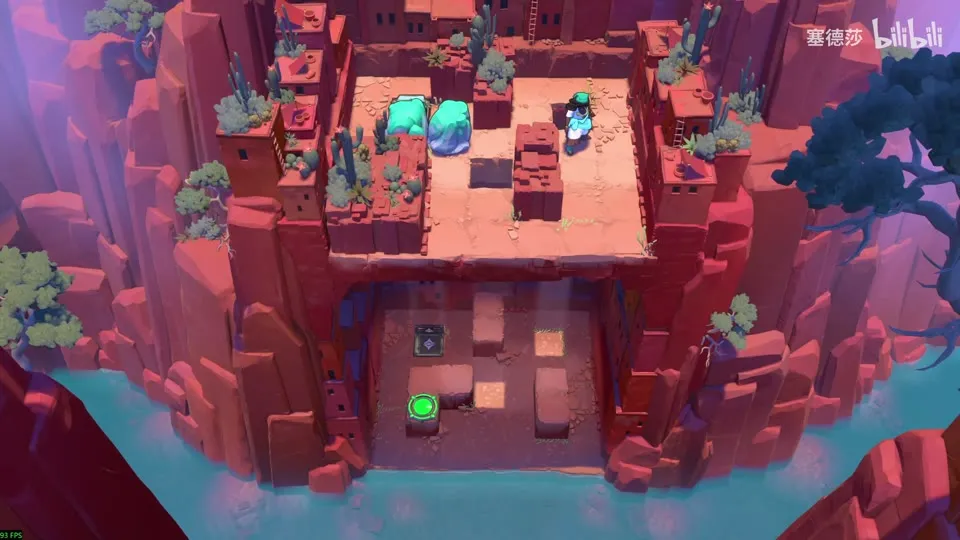
Getting there: put the red gem on the spot he shows, ride the elevator back and push it down. (23:53)
- Of the two holes, only the one beside the exit helps. (24:12)
- Drop down, ride up, push one stone down and take the other out; push it straight down, then into the water. (26:08)
- Bring the second stone up and push it down the right-hand hole, then into place. Go back up, drop from the edge, push, and finally jump down the hole by the exit. (26:27)
Puzzle 8
Key idea: push a stone into one of two target spots, then push left. The spot sits under the upper platform’s footprint, so you can never drop a stone onto it; it has to be pushed in from the right, which means filling the puddle on the right first. (塞德莎 P36 27:35)
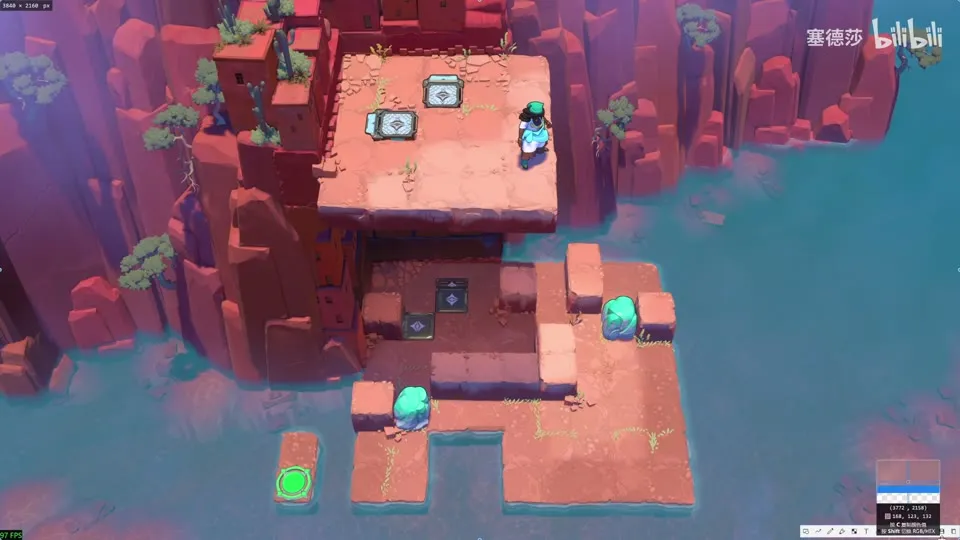
Getting there: move the gem round to the spot he shows, go round, set it down and ride the elevator up. (27:15)
- The plan: push a stone where he shows, drop from above onto the spot beside it, then push it right into the puddle. (28:23)
- First, though, the top-right stone is stuck. To free it, another stone has to go in its place, which you can only do by sending a stone up on the elevator and dropping it. (28:40)
- Take out the second stone, push it to the target from the right, then push left. (29:16)
Puzzle 9
Key idea: a plain shuffle with two stones and a button. Do the lower stone first: if the upper one goes onto the button first, you can’t loop round through the passage any more. (塞德莎 P36 29:46)
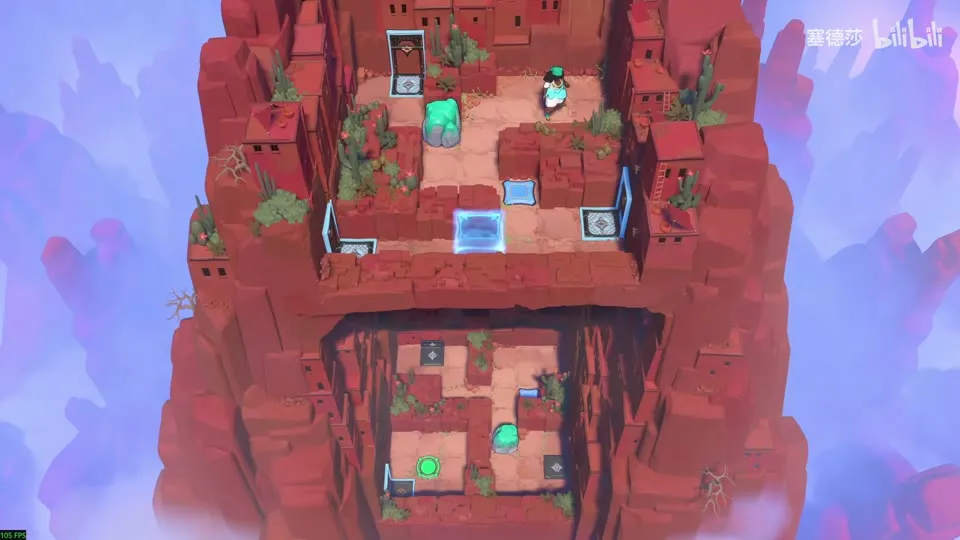
Getting there: drop down from here. (29:38)
- Go down, push the stone where he shows, come up and push the other stone right. (29:46)
- Take the lower stone round the loop to its spot (it won’t block the exit). (30:05)
- Then push the upper stone onto the button. (30:25)
Puzzle 10
Key idea: two goblins have to die, and the only way is to send them into a purple beam whose end is an endless drop. Stones block the beam, so a stone on a beam doesn’t fall. Pushing right breaks the beam before it can take you. The top-down camera shows which tiles you can walk on. (塞德莎 P36 31:27)
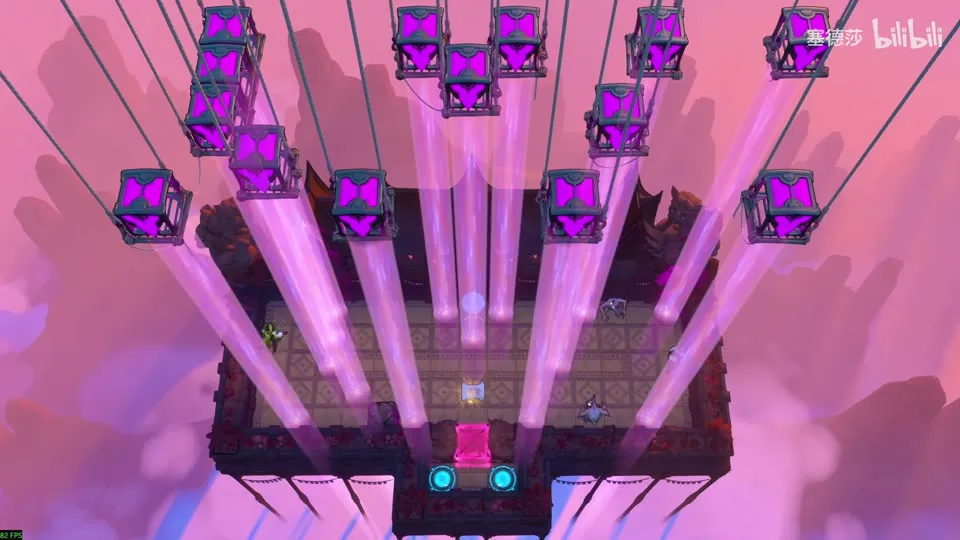
Getting there: go to the small area at the bottom left and fill the stone in, so from now on the button brings you up without the gem. (31:08)
- Bring the Warrior on the right round the purple beam (stepping in it would drop you forever) and take the gem. (31:27)
- Free the Thief: pull the stone left, have the Warrior push it onto the purple beam (it blocks the light, so it stays), switch places and pull it out again. (32:03)
- The goblins can’t be pushed straight in. Push the stone to the top and have the Warrior push right: that cuts the purple beam first, so you don’t drop. (32:39)
- Use the two stones to push each goblin into a purple beam, then use a stone as a step to put the gem back. (32:59)
Puzzle 11
Key idea: place four downward purple beams first, then come down and solve the floor below. The beams can only go in the middle 4×4, and they must not touch the Thief’s route. Only four tiles there are never stepped on, which makes it a unique solution. (塞德莎 P36 33:30)
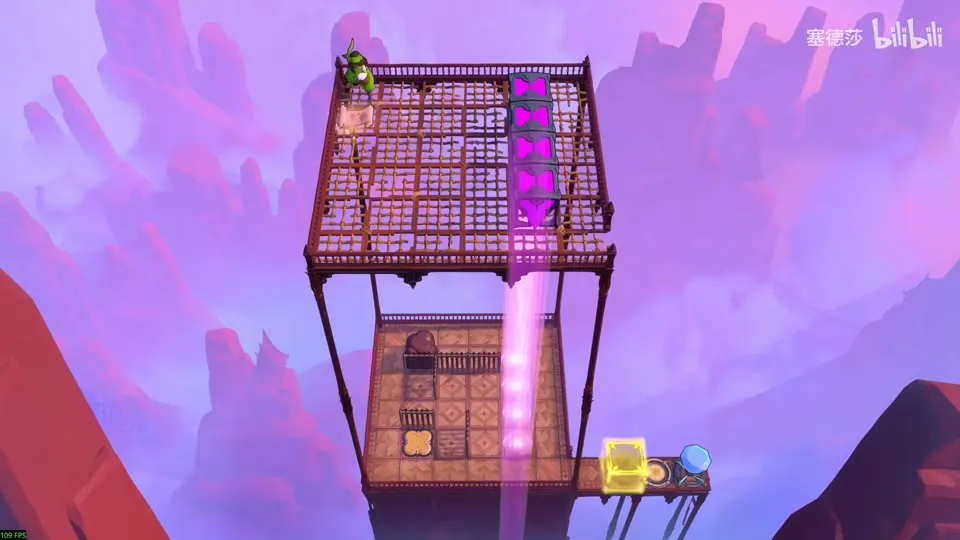
- Plan the floor first: the Thief starts here, pulls the stone right as far as it goes, goes round, pulls it down, then pulls it onto the button. (33:53)
- There are other pulling routes, but 塞德莎 takes the one that steps on the fewest tiles. (34:20)
- The four free tiles are the stone’s own tile and the three he marks. Put the four emitters there. (35:13)
- Come down, pull the stone left all the way, then right, then down and left onto the button. (35:49)
Puzzle 12
Key idea: a big star puzzle. The goblin can only die by riding a purple beam up into the sky. So it needs to be on a purple emitter with upward momentum, and the only upward push here is the energy gate. (塞德莎 P36 36:20)
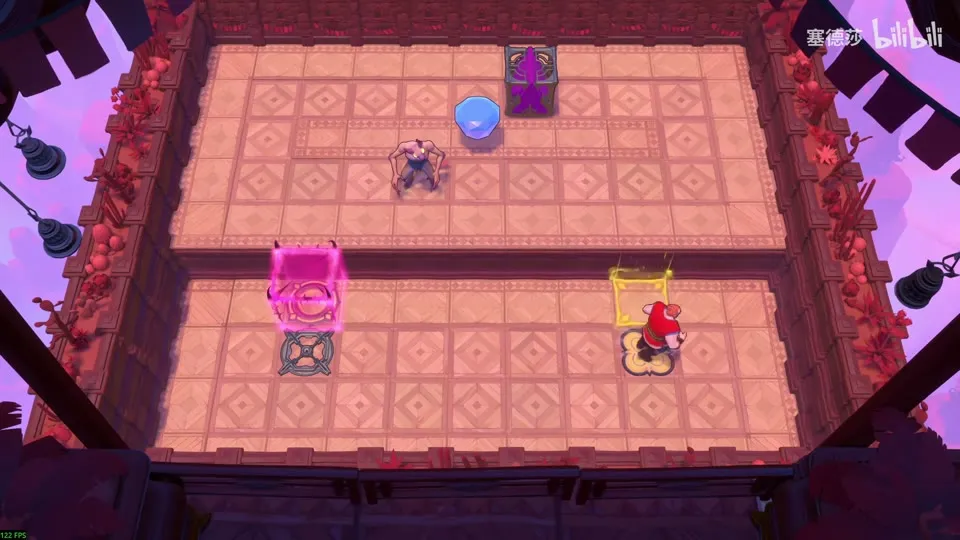
Getting there: activate the gem and let gravity drop you down. (36:09)
- Slip the purple emitter under the goblin, using the gem as a step, then push it a little right. (36:56)
- Push the gem down onto the energy block, and put the purple emitter with the goblin above it. (37:07)
- Switch the purple beam on, then press the gate so it sinks and rises: the goblin flies off. (37:26)
- A cart unlocks here. It lifts the purple emitter so you get upward momentum back up; the drop on the left is for later. (37:45)
Puzzle 13
Double Beam Falling (双倍光束坠落)
Key idea: the first room shows the area’s rule. An orange beam doesn’t only jump you two tiles sideways, it also drops you two tiles down. You never noticed before because two tiles below was always solid floor. Jump right from a spot where the tile two below is floor and you stay up. (塞德莎 P40 0:51)
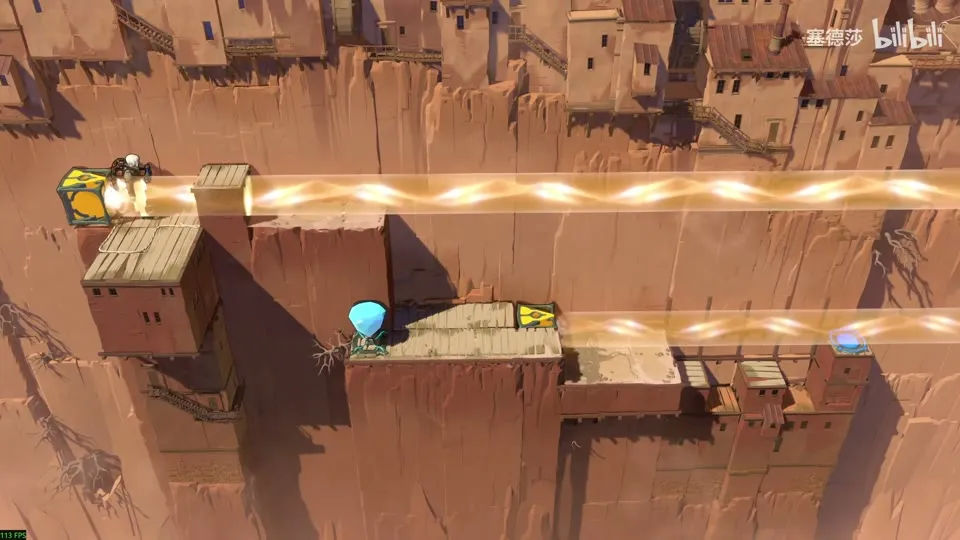
Getting there: from Antipode High, push the gem across as a step and follow the familiar path down from the iron bridge on the right. (0:21)
- Walk right into the beam and watch: the beam drops you two tiles in an instant. (1:03)
- Jump right from the spot 塞德莎 uses: two tiles below is floor, so you don’t fall. (2:19)
- On the right you lay a path. Because of parity, every stone has to be pushed along the same row; take the stone out and push it into that row too, then keep pushing right. (2:27)
Overworld puzzle 1
Key idea: switch on the orange beam and jump left from a spot where the floor two tiles below catches you, so you stay two high and reach the next platform. (塞德莎 P40 3:07)
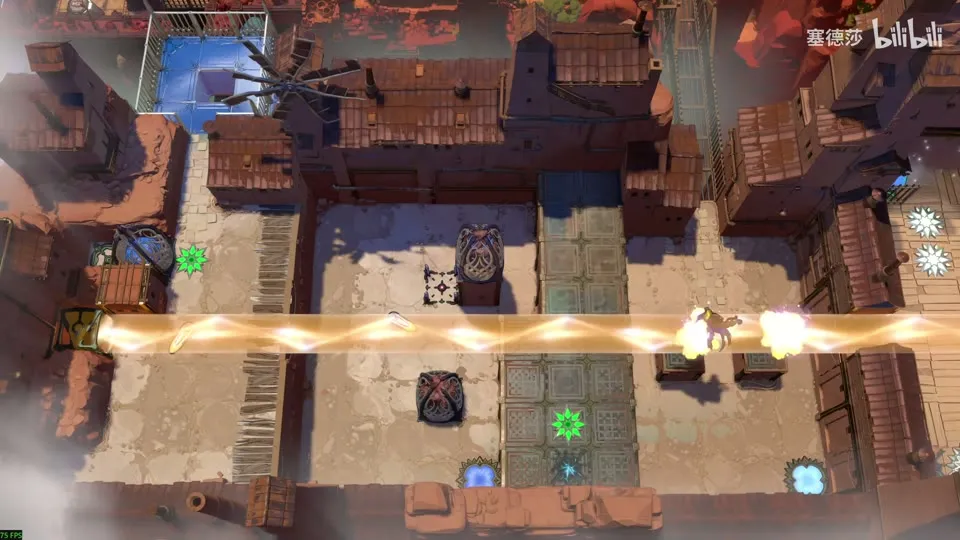
- Activate the orange beam, jump left and land on the platform. (3:07)
Puzzle 14
Key idea: water works the same way: if the tile under the water two levels down is floor, you don’t fall. Just jump right. The two jutting platforms on the right are a decoy: aim straight at them and you drop into the water, so go one tile off to the side (or straight at the goal). (塞德莎 P40 3:22)
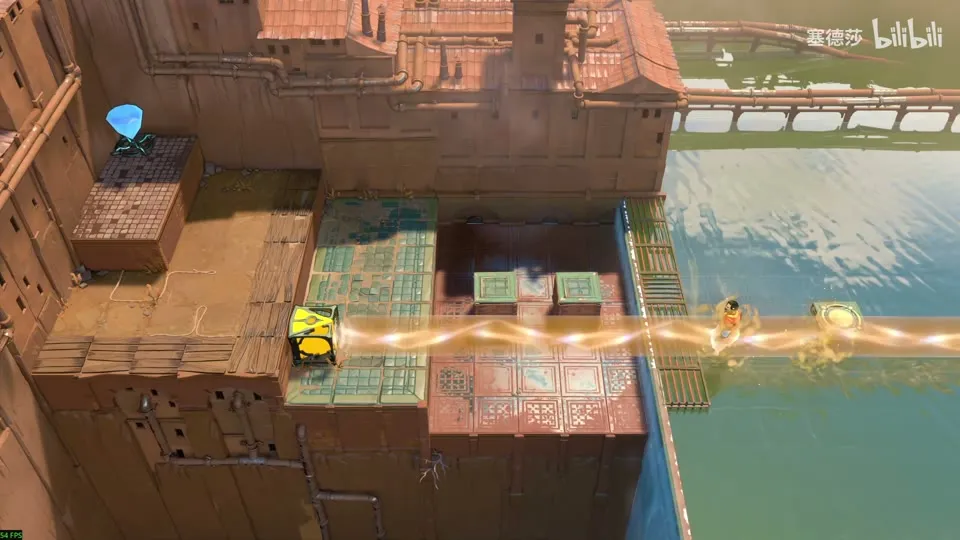
- Push the stone anywhere and simply jump right; the drop lands on floor under the water. (3:25)
- Don’t line up with the two jutting platforms; shift one tile, or face the exit directly. (3:44)
Overworld puzzle 2
Key idea: pave a path to the left. You need both stones, so take the one off the high ledge first, with a stone underneath so it doesn’t fall. (塞德莎 P40 4:03)
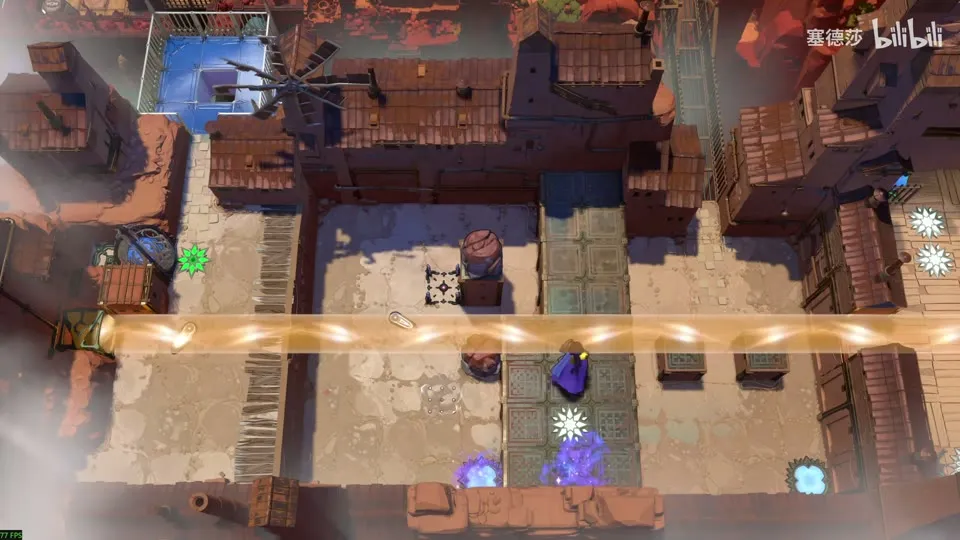
- Put a stone under the ledge, take the upper stone down, then push the two stones into the two spots 塞德莎 shows and go left. (4:14)
Puzzle 15
Key idea: two Sailors act as a moving floor so the Trader can walk at height to the exit. Moving him straight right would need both Sailors under him and nobody waiting on the right. The orange beam on the platform fixes that: in its beam the Sailors also stay at height. Watch the parity. (塞德莎 P40 4:33)
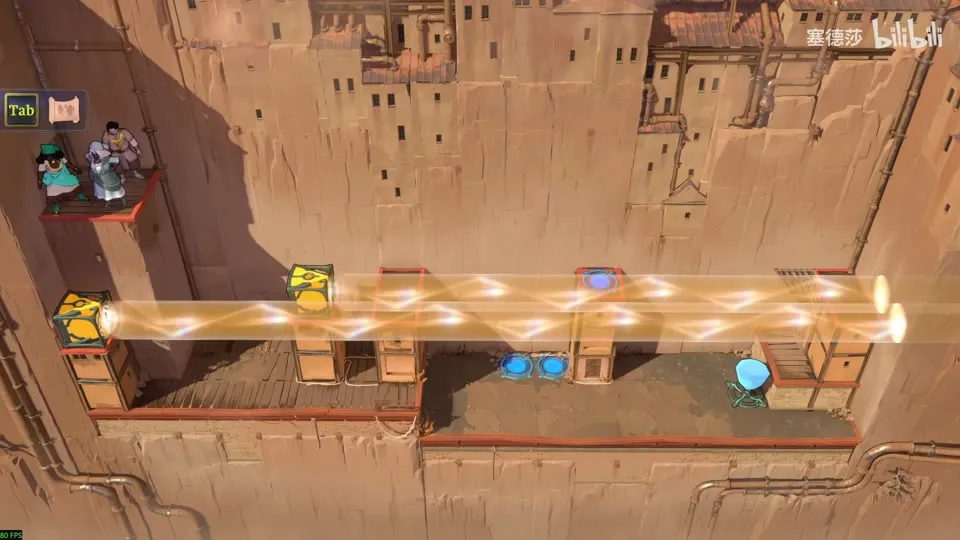
- Send two heroes down (two Sailors is tidiest). They stand underneath as floor while the Trader walks above. (4:42)
- Shuffle them right: one steps under, the Trader moves on. That gets you to the first stop. (4:59)
- Push the orange emitter on the platform down: in its beam the Sailors hold the same height and can carry the Trader on. Leave one hero in place, push the laser down, go left, and push that hero left once. (5:27)
- Enter from the two spots he shows, then push and step, push and step. (6:04)
- The parity is wrong for the exit, so keep pushing right, go up, push one piece back and switch spots on purpose, then pick the others up again from the right. (6:30)
- When the parity is right, both lower heroes simply step down. (7:00)
Puzzle 16
Key idea: a chain of short stages on platforms only one tile thick. In an orange beam the drop of two tiles goes straight through, so a beam can drop a goblin to its death, and it would drop you too. Thicker floors need more beams, and one stage needs you at a crossing of beams the moment the gem goes in. (塞德莎 P40 7:30)
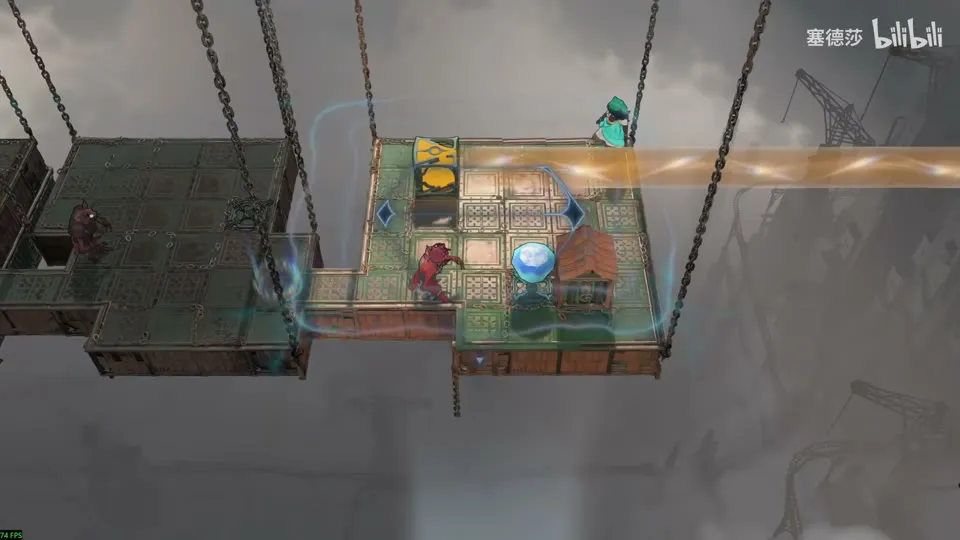
- Turn the laser off, put the emitter left of the goblin and switch it back on: the goblin falls through. (7:48)
- Save tip: if you hear a dull warning sound, you have done something you can’t undo, and the game won’t save that checkpoint. (8:07)
- The next goblin has nothing on its left, so push the beam down onto it at the right moment, then walk round and activate it. No warning sound means you did it right. (8:43)
- Here the floor is two tiles thick, so one beam isn’t enough: use two. (9:11)
- To cross, don’t use the doubled four-tile jump: drop one stone and cross with a two-tile jump. (9:40)
- The floor on the left is one tile wide, so a normal jump falls through. Place the laser so that your jump knocks the gem off and the beam stops as you land. (9:57)
- Last stage: you need a point where the beams make you drop four tiles, and you must already stand on that crossing when the gem goes in; walking onto it later drops you two tiles into the middle layer first. Set it up as he shows and push the gem right. (10:22)
Puzzle 17
Key idea: five teammates are locked in cages on the exit, held up by four stacked orange beams (a 16-tile drop that happens to land on floor). Break the beam and everything falls, and five dragons burn the five heroes. So block every fire line first: two blocks at crossing points stop four lines, and the gem stops the fifth. (塞德莎 P40 11:26)
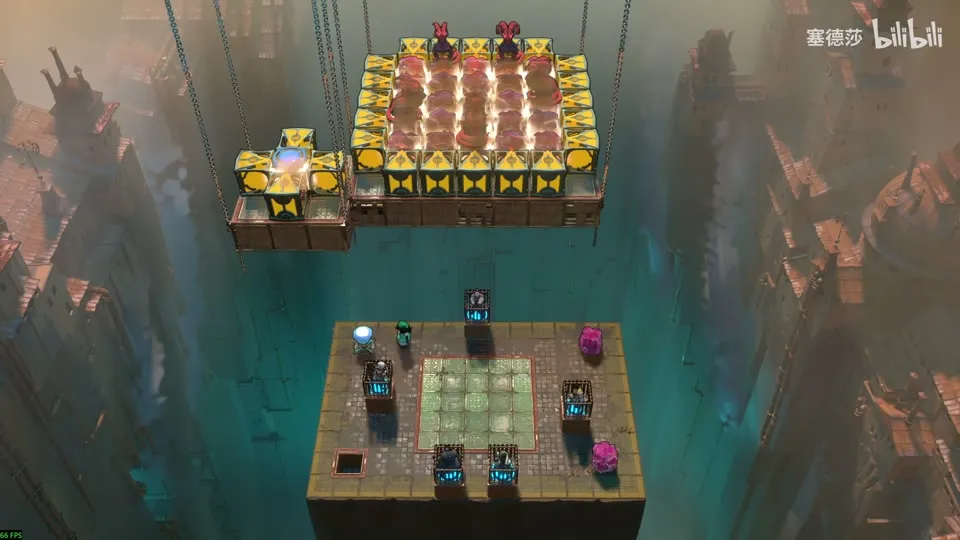
- Activate first: you can drop through the floor to the area below. (11:26)
- Try releasing it once to see the problem: everything drops and the dragons burn the five heroes. (11:46)
- Put one block where two fire lines cross (it covers the Trader and the Thief), and another at a second crossing (the Explorer and the Druid). No spot covers three. (12:57)
- The last line is a race: push the gem down and immediately push it right into the Warrior’s column. (13:33)
Puzzle 18
Key idea: like the last room, you have to break the gem to reach the exit, but then one of the 16 stones above lands on the Explorer. Put a stone and an emitter in his row first: falling things stop on top of him while a beam is there. (塞德莎 P40 13:52)
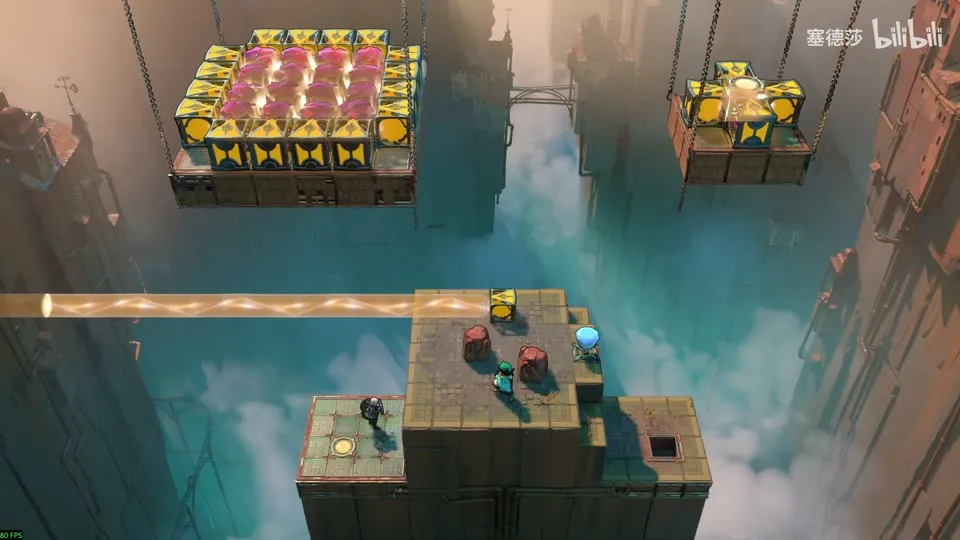
- Push a stone, then an emitter down into this row. Whatever falls then stops on the Explorer’s head. (14:10)
- You have to push the gem back in right after breaking it, so put the other stone where 塞德莎 shows first. (14:30)
- Push up, then go straight down. (14:48)
Overworld puzzle 3
Key idea: a crystal unlocks here; use it to pave the way down to the next platform. (塞德莎 P40 15:01)
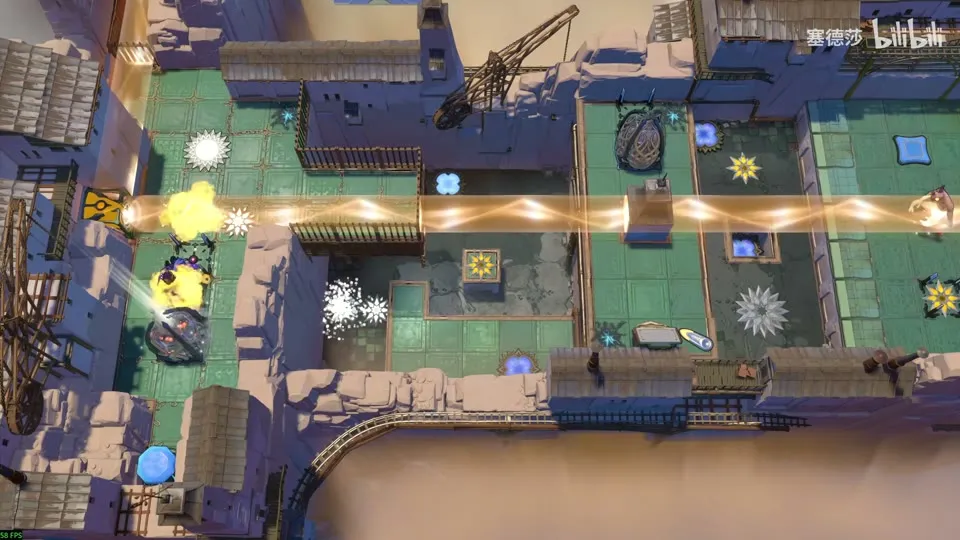
- Push the crystal up, then right; it drops into place. Come back down and push it on right. (15:09)
- Climb back up and drop down to the platform. The room above can’t be reached yet. The sign here couldn’t be read in his version. (15:18)
Puzzle 19
Key idea: pave a path to the exit by putting a stone on one key tile. You can’t push it there from below (you’d be stuck), so drop stones in from above. The right-facing laser starts one row off, so you also spend a stone crossing it to push it down a row. (塞德莎 P40 15:49)
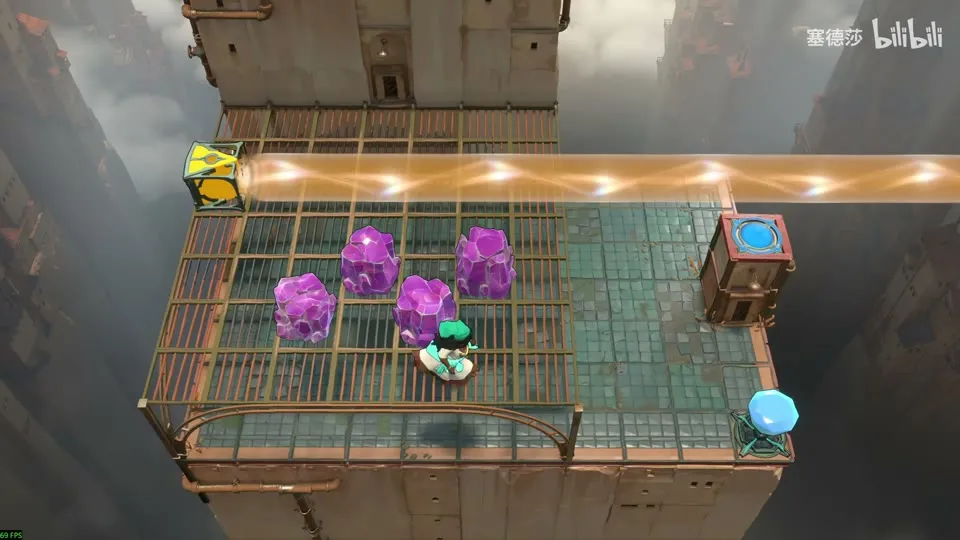
- The plan: drop a stone at one spot, another at the second, place a third in front, then stand on the dropped one and push right. (15:57)
- First fix the laser: it is one row off. Use one stone as a step to get past it, and push another one over in advance so you can get back. Push the laser down a row. (16:38)
- Push that stone left once, or it causes trouble later. (17:05)
- Place the last stones as planned and push right. (17:17)
Puzzle 20
Key idea: pave to the right again, but four tiles up, so you need three crystals under you, and the crystal on the left can’t be brought over. Use two beams to build a crystal that floats: one stops on a two-high right-facing beam, and another crystal goes on top. (塞德莎 P40 17:38)
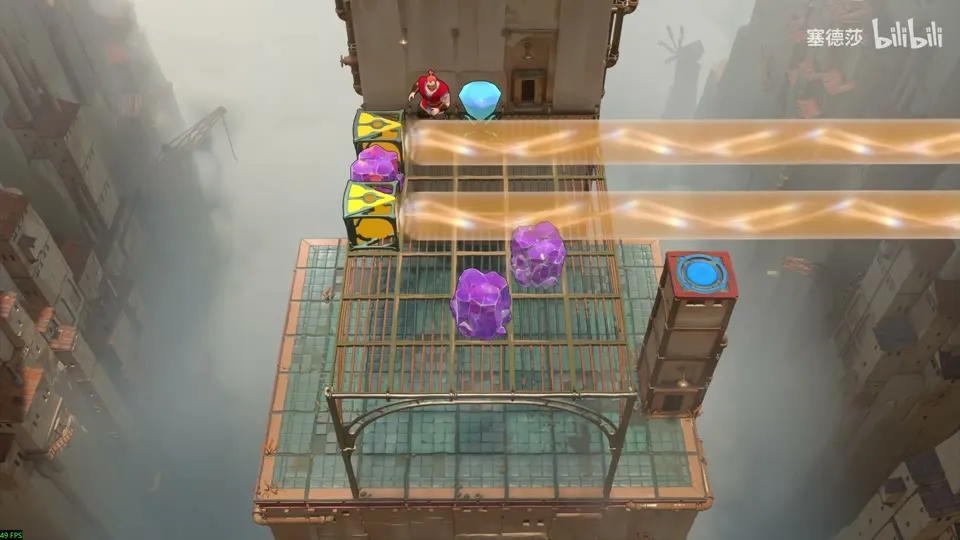
- Break the beam. In this row, first put a right-facing laser on the left, two high. (18:09)
- Push the crystal left, place one crystal where he shows (it will fall), then add another. (18:36)
- The crystal now floats below. Drop the last crystal on it and walk across. (18:54)
Puzzle 21
Key idea: the Explorer below sets the heights of three stone pillars (that is, where three orange beams sit) so the Sailor above can get down past the dragons. Two beams firing towards each other along a row make a four-tile drop that skips three dragons at once; the remaining dragon is killed by pushing something down onto it. (塞德莎 P40 19:21)
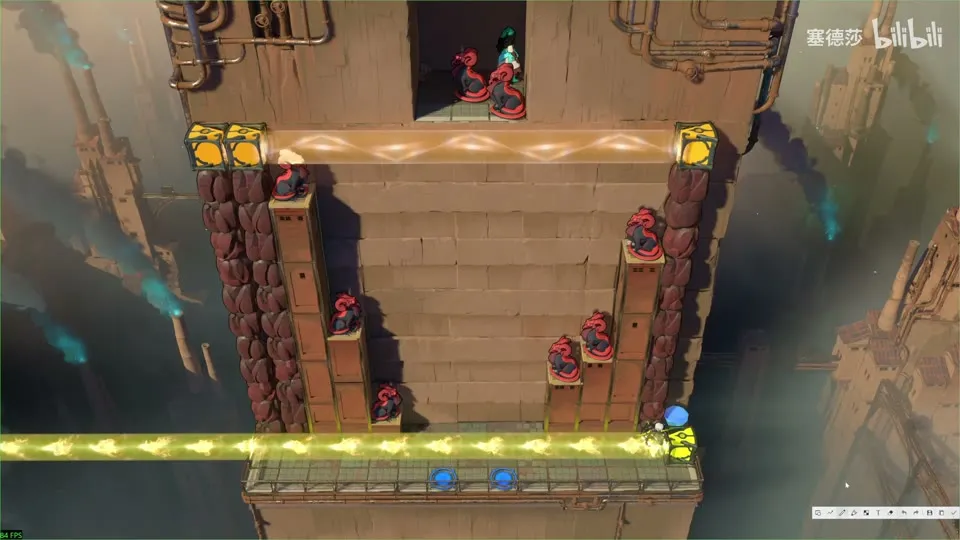
Getting there: push the stone off to the left, drop down after it and you reach the room. (19:12)
- Three dragons sit on three rows in a row: fire one orange beam left to right and another right to left along that row, and anyone there drops four tiles past all three. (19:57)
- That fixes two beams (one right-facing, one left-facing). The dragon on the right that faces left can’t be killed by anything, so the third beam goes right where 塞德莎 shows. (20:25)
- Place the three lasers, push one down to kill the top dragon, push the next to kill the bottom one, and come down. (20:52)
Puzzle 22
Key idea: reach the right-hand platform. The obvious jump has the wrong parity, so the beam must stop right after you cross. You can’t do that from afar, but stacked things don’t teleport with what is under them: carry the blocking stone on your head and teleport out from under it, and it stays behind blocking the beam. Then a goblin becomes floor. (塞德莎 P40 21:46)
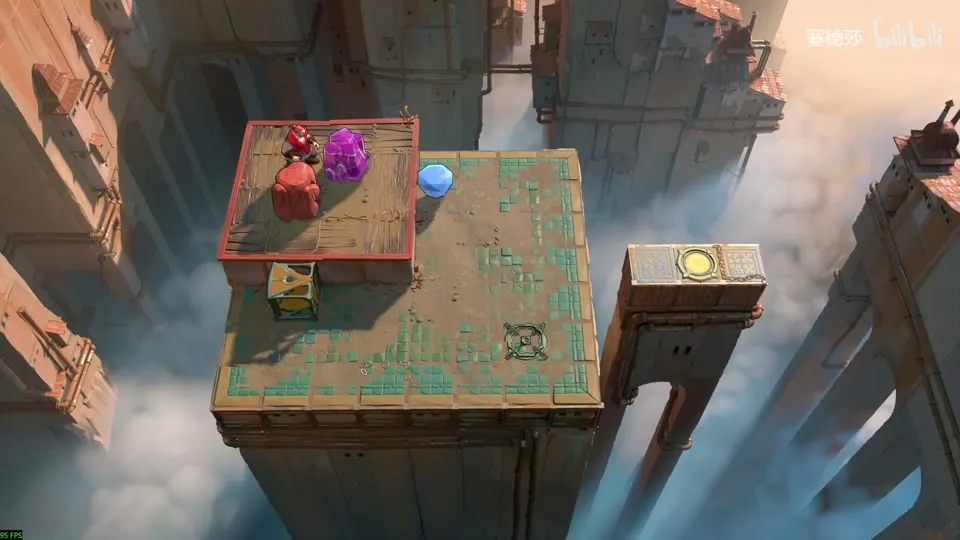
Getting there: go back up, reset the stone and push it left to right this time. (21:21)
- Try the obvious way (emitter here, one jump): the parity is wrong. (21:55)
- The trick, shown with a test stack: push the crystal underneath and it teleports two tiles, while what sits on it stays put. (22:43)
- Push the plain crystal down and stack it, put the gem beside it and the right-facing laser where he shows. Carry the plain stone, then teleport right: the stone blocks the beam behind you. (23:21)
- You can’t push the goblin up to the blue button. Instead fill the pit with the goblin (it can’t hit you when you stand on top of it), reset, then push the crystal right onto the button. (24:02)
Puzzle 23
Key idea: the Explorer is below and the exit is four tiles up, with no lift. The only upward push is the double button: let go and a piston pushes up. Use that with an orange beam to teleport up four, and a doubled orange beam up top to hold the hero in the air. (塞德莎 P40 24:58)
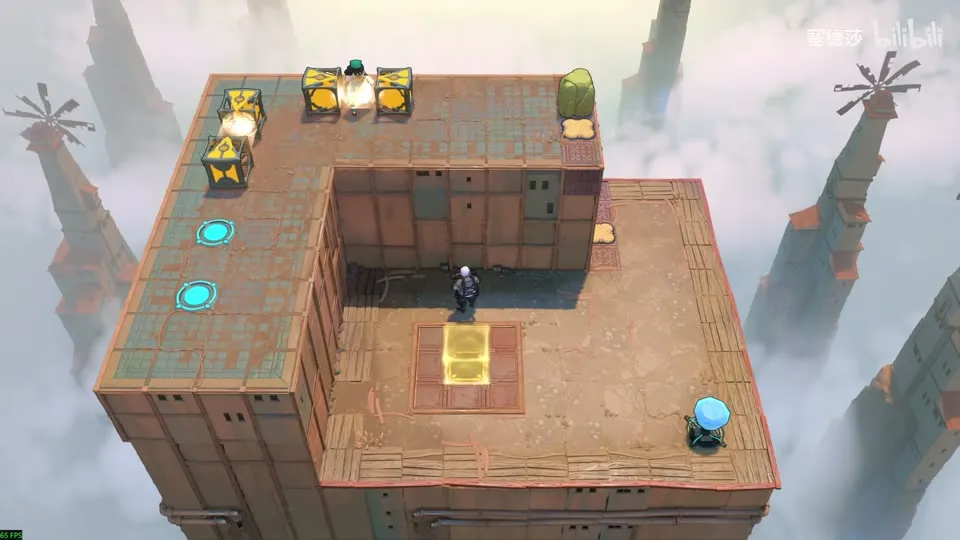
- Break the laser. Put the right-facing laser on top and the down-facing one where he shows: the crossing must be right above the energy block. Push down the left- and up-facing ones, and put the stone exactly where he shows. (25:58)
- The Explorer can’t push, so the Sailor comes down and pushes everything over. (26:26)
- Send the Sailor up first: press the button, put the gem in, let go and he flies up; step left or up onto the platform. (26:37)
- Then the Explorer: push the stone down onto the lower button, press the upper button, stand on the platform and get pushed up. (27:05)
Puzzle 24
Key idea: a dragon guards the exit and a vertical mirror stands in the way. Carry a stone on your head as a shield. Since a teleport leaves stacked things behind, pick a push that teleports the gem off at the same time, so the beam goes out and the stone stays on you. (塞德莎 P40 27:23)
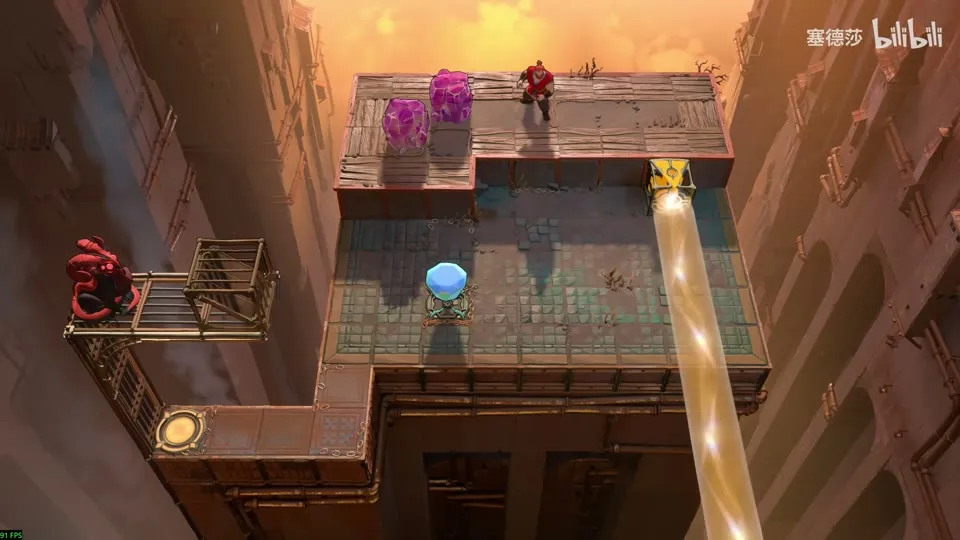
- Push out the two stones and stack them. Trap: come down on the right side of the laser, or you can never get to its right. Nudge it left a little. (28:03)
- A random spot doesn’t work: the next teleport leaves the stone behind. (28:32)
- Put the stone and the laser where he shows and push left: it teleports two tiles and knocks the gem out. The beam stops and you walk under the fire with the crystal on your head. (29:00)
Puzzle 25
Key idea: the Sailor needs a helmet too, but he can only push one thing, so the last trick doesn’t work. Instead stack the left-facing laser on a stone so its beam runs through the air and a crystal hovers in it. Step under the crystal and switch the beam off. (塞德莎 P40 29:19)
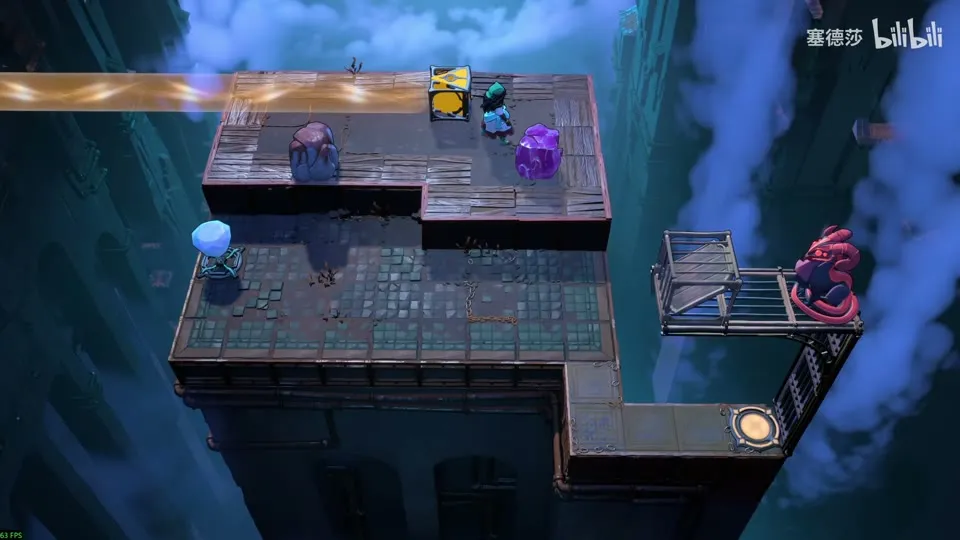
- The crystal has to hover directly above the gem; only then can you break the gem from under it. (30:31)
- Push the stone down from any ledge, push the crystal to the far left, let the beam catch it and push down: it teleports above the gem. Then bring the left-facing laser down. (30:39)
- Go down and push the gem away (any side works: the crystal rests on the floor two tiles down, not on the gem). The beam goes, and the crystal lands on your head. (31:06)
Puzzle 26
Key idea: a chain of seven short stages that all ask the same thing, getting across, but each layout breaks the method from the stage before. 塞德莎 also notes a big star puzzle in the middle of this area that he doesn’t play here. (塞德莎 P40 31:54)
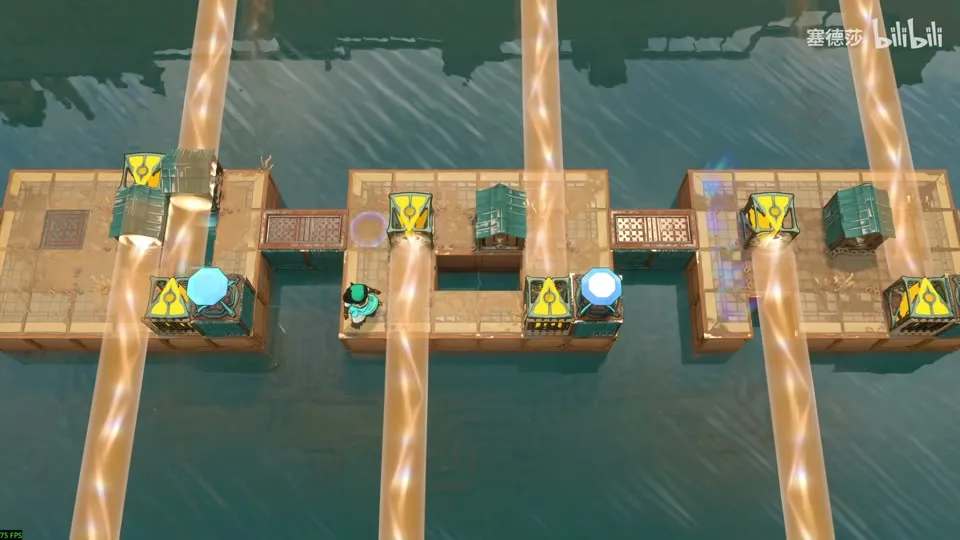
- Stage 1: put the down-facing laser where he shows and jump across. (32:06)
- Stage 2: use the spot he shows to teleport over the little house. (32:15)
- Stage 3: you can’t push the laser up (the tile below the yellow beam can’t be reached), but you can push it down, and the emitter itself blocks the beam. (32:40)
- Stage 4: push the laser to where he shows to make a double beam and jump four tiles. (33:14)
- Stage 5: push the laser onto the gem in the water and use it as a path. (33:32)
- Stage 6: the laser can’t reach that gem, but the gem works as the floor that stops your drop. (33:50)
- Stage 7: this time the floor is the emitter you push: up, right one, up again, then right into the water; it catches you and you finish. (34:17)
Puzzle 27
Key idea: build a path of orange jump points. The Trader uses the beam to reach the button, which lets the Thief reach the top-left exit, then you jump along the laid-out beams to the top-right platform. (塞德莎 P40 34:54)
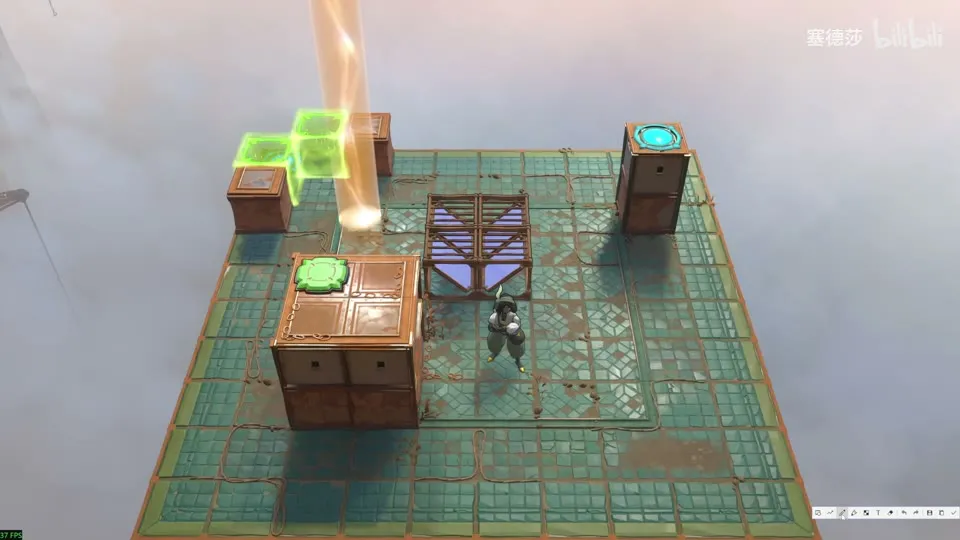
Getting there: aim the mirror over, fix the parity and go down. (34:54)
- The route is four jump points: right two, up two, right two. (35:33)
- Place the pair of mirrors below, line up the upper mirrors, then put the laser in place: the whole beam path is ready. (36:04)
- Go down, have the Thief stand by, then jump along the beam to the end. (36:37)
Puzzle 28
Key idea: pave a way up. Every jump spot has to drop onto something, and the gaps are fixed: one spot needs a four-tile drop, another an eight-tile drop. The eight-tile spot needs three lasers at once, and the four-tile spot leaves its side laser stuck against the waterfall, so build the eight-tile one first. (塞德莎 P40 36:55)
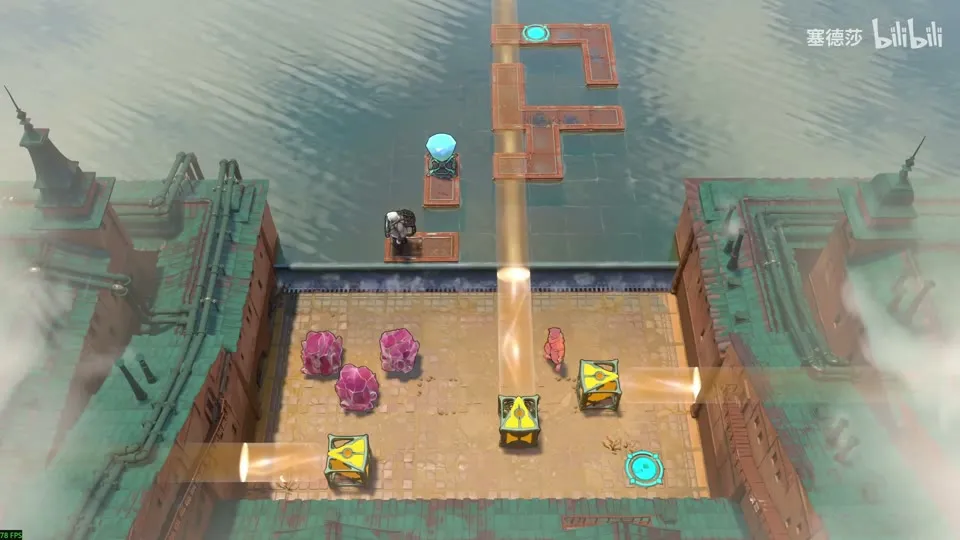
Getting there: reset, jump over and hit the laser with the right-facing mirror. (36:55)
- First spot: two tiles below is enough. Put a crystal where he shows and push up: you drop into the water two tiles down. Then the Explorer can take the gem from above. (37:14)
- Of the three possible spots, the one by the waterfall takes exactly four tiles; eight won’t work because there is no room to push the up-facing laser into place. (37:50)
- The other spot needs eight tiles (left, right and up lasers at once), and four tiles would land in the water. (39:35)
- Build the eight first: right-facing laser here, left-facing there, push a crystal up, set the gem and push up. (40:16)
- Then pick them up and build the four by the waterfall; push it up from where he stands. (40:48)
Puzzle 29
Key idea: carry the crystal from the right to the left using an eight-tile drop (three stacked beams). The safest landing is the spot he counts out. Further left the crystal would land against the shore where you can’t get it out. The beam in the water comes from the cart: drop the cart in and push the emitter on top of it. (塞德莎 P40 41:11)
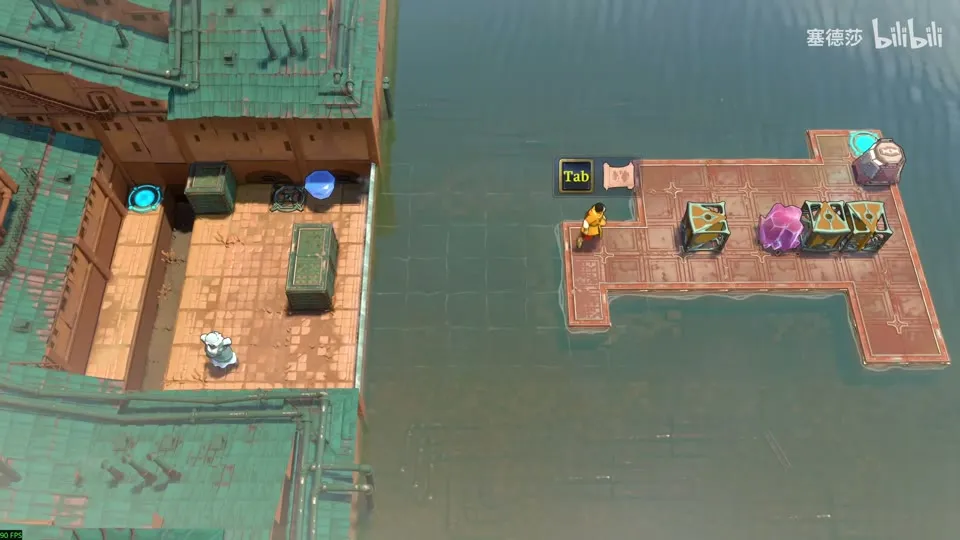
- Count eight tiles: the spot he marks is the only good one. (41:22)
- Put an up-facing laser here, a down-facing one there, and the right-facing one in the water on top of the cart. (42:05)
- Push the cart down into the water, push the right-facing laser onto it, then the up- and down-facing lasers and the crystal into place, and bring the gem over. (42:15)
- Push left and it lands. Going right drops you eight tiles to the edge, onto the high corridor you saw in the South part; you can’t come back from there, so 塞德莎 turns back. (42:47)
Puzzle 30
Strength (力量)
Key idea: a teaching room for the new rule: how many things each hero can push. The Warrior shoves a whole row, the Sailor pushes one thing, the Explorer pushes nothing at all. Every cyan beam you stand in adds one. (塞德莎 P42 0:20)
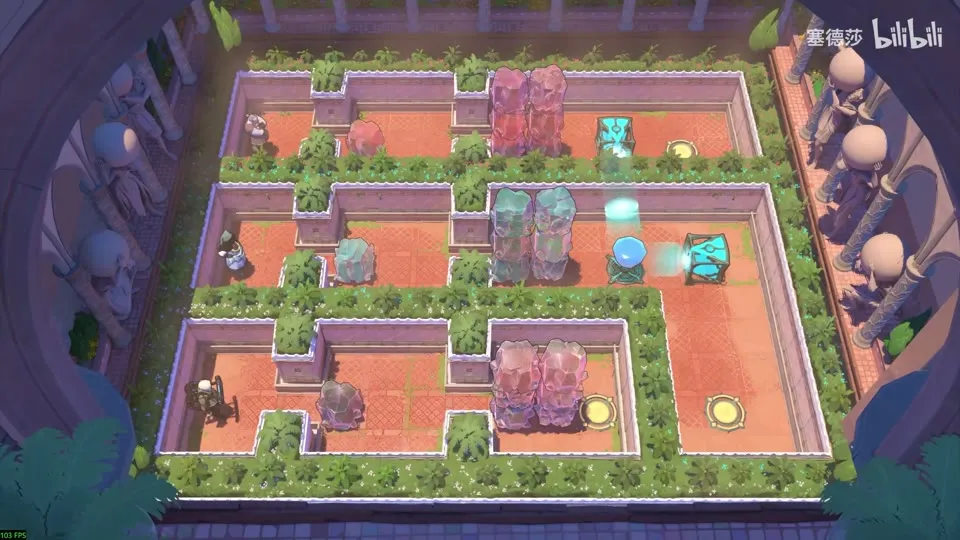
- The Warrior’s lane needs nothing: he pushes the whole stack. (0:34)
- The Sailor can push only one thing, so the stacked crystals won’t move until he stands in a cyan beam. (0:45)
- The Explorer can’t push at all. Give him one cyan beam to shove the single stone first, and don’t push it so far right that it blocks the lane. Then move the horizontal beam up and push down. (1:04)
- For the big pile, aim two cyan beams at him (double strength), push it open, then cross the beams once more where 塞德莎 shows to finish. (1:25)
Puzzle 31
Key idea: the Sailor carrying a crystal has to drop it on the left button three tiles up. He gets there by walking over a bridge of stones you rebuild one tile at a time. Two spots are bottlenecks, and each one needs a cyan beam aimed at it. (塞德莎 P42 1:56)
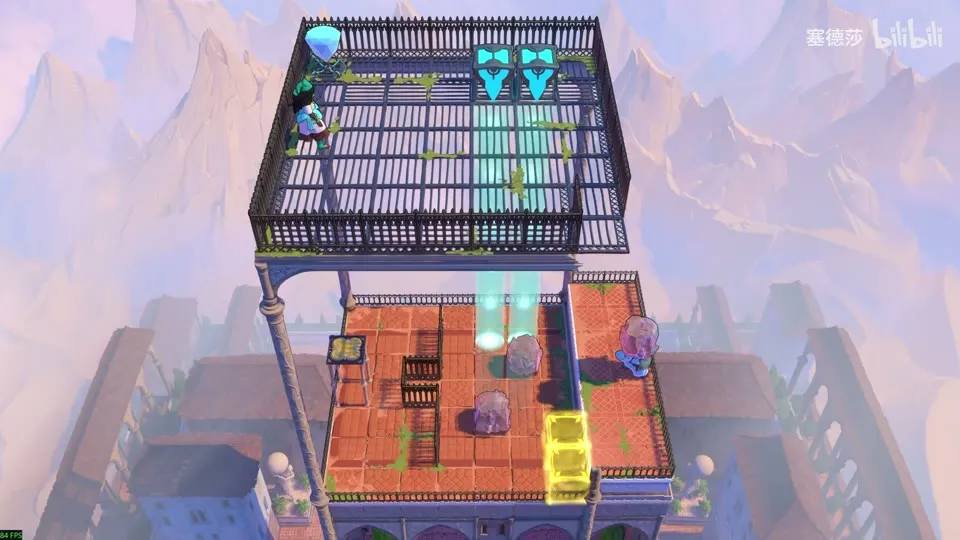
- Work out the goal first: only the crystal the bottom-right Sailor carries can reach the left button. (2:00)
- Bottleneck 1: the stones in the left half can’t be pushed into the middle, so the upper Sailor has to stand there as a step. A Sailor can only carry one thing, and two would crush him, so aim the first cyan beam at that tile to make him strong enough. (3:12)
- Bottleneck 2: the last step can’t be two crystal stones (you can never move the outer one inside). It has to be the Sailor himself standing there as a step, so aim the second cyan beam at the tile where he stands. (4:14)
- With both beams placed, lay two tiles of path, then move the stones forward step by step (up, then left), slot the crystal in with a hero standing as a step, and walk across. (5:35)
Puzzle 32
Key idea: this time the crystal is on the Explorer, who has no strength of his own, so he is crushed as soon as he leaves the beam. Keep him in a cyan beam the whole way to the top-left button, let the Sailor pick up the redirect ring that drops, then go to the exit on the right. (塞德莎 P42 6:05)
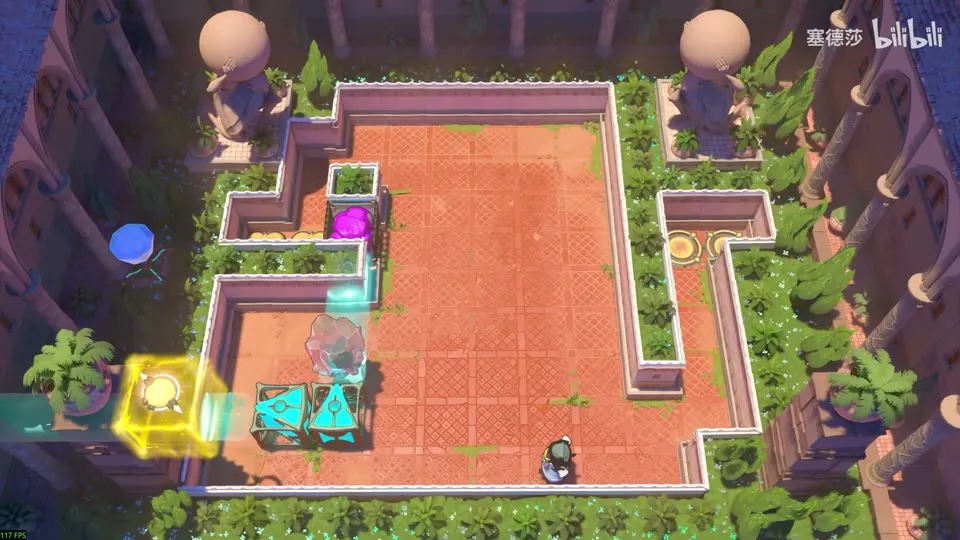
- Move the left-facing beam onto him, then step across; add an up-facing beam, then the left one again, then a down-facing beam. (6:35)
- Send the Sailor in first, then the Explorer. The button drops the redirect ring, and only the Sailor can pick it up. (6:48)
- Re-aim the emitters: turn one back to up, the left-facing one to down, then the next two to right. (7:02)
- Walk up one step at a time, moving the beam along with him. (7:23)
Overworld puzzle 4
Key idea: to reach the room below, simply put a cyan emitter down as a step and walk across. (塞德莎 P42 7:48)
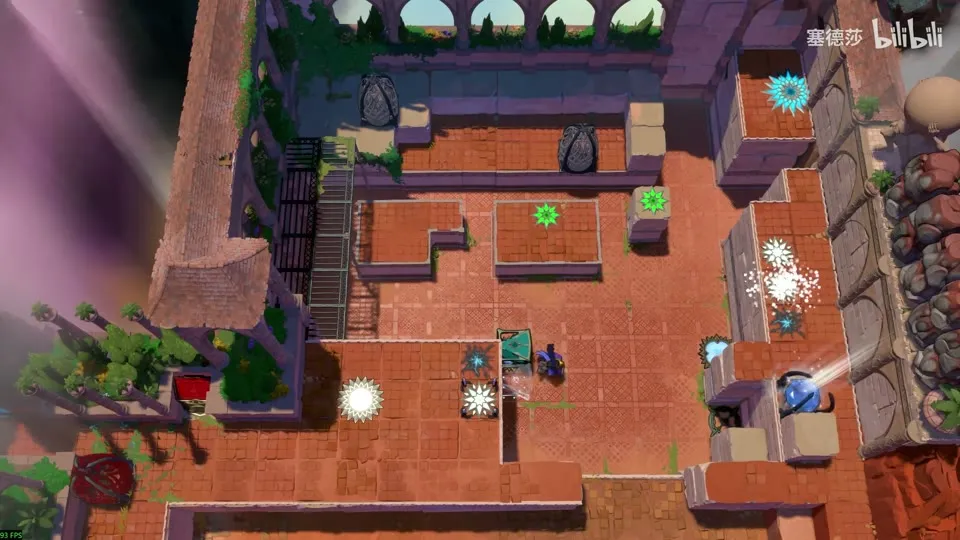
- Push the cyan emitter into the gap 塞德莎 shows and walk over it into the room. (7:52)
Puzzle 33
Key idea: goblins have strength too. Like the Sailor and the Trader, a goblin can carry one thing, so it dies under two. Have the Wizard carry two stones under two cyan beams, swap him with the goblin, then turn the beams off. (塞德莎 P42 8:03)
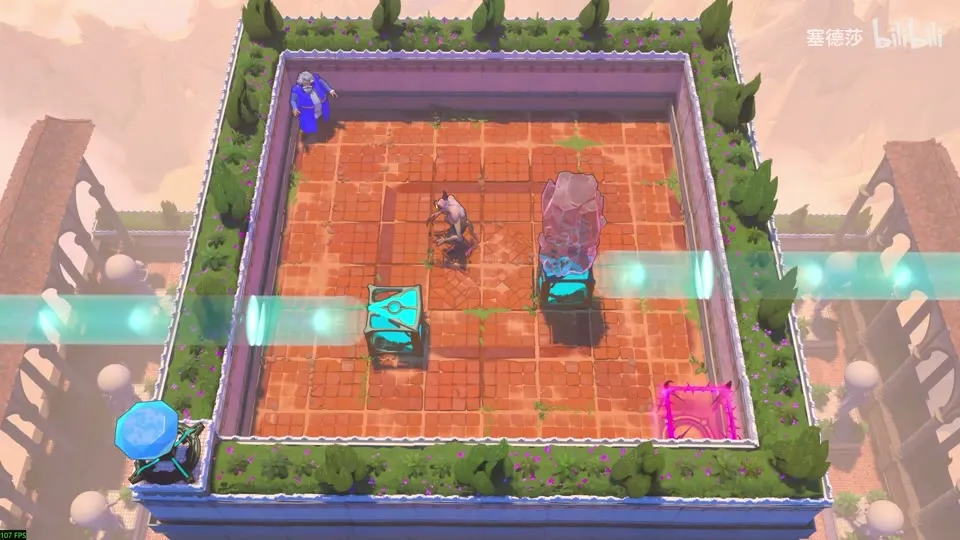
- Bring the goblin up to the spot 塞德莎 marks. (9:19)
- Send the left-facing beam onto that spot and the second beam from the other side, so both hit the same tile. With double strength the Wizard can hold two stones. (9:21)
- Swap the Wizard with the goblin. The goblin survives for now because it is standing in the beams too. (9:28)
- Take both cyan beams away: the goblin is crushed. (9:46)
Overworld puzzle 5
Key idea: climb the two-high ledge on the right with the cyan emitter plus the crystal you unlocked above it. Your overworld character can push only one thing, so use the cyan beam from the gem to push the two together. (塞德莎 P42 9:56)
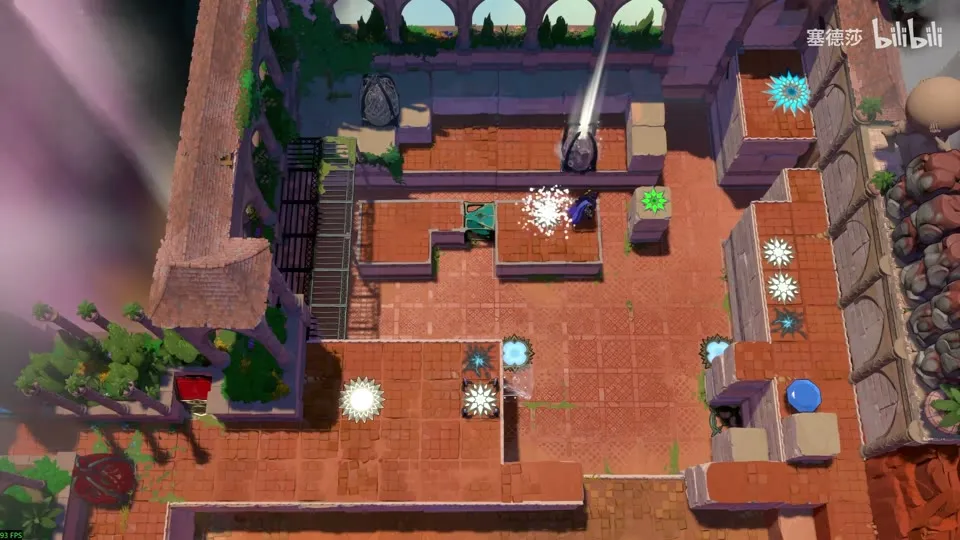
- Put the emitter down where 塞德莎 shows, then set the crystal on top of it. (10:17)
- Stand in the cyan beam and push the stack right into place, then walk round and climb up. (10:23)
Puzzle 34
Key idea: kill every monster while you are already standing in the target spot. The goblin at the top left can only die to dragon fire, from the left-facing dragon. The others can be crushed by taking the cyan beam off whatever they carry. The top-right goblin is no use, so kill it early: that frees its emitters and the two crystals it carries. (塞德莎 P42 10:37)
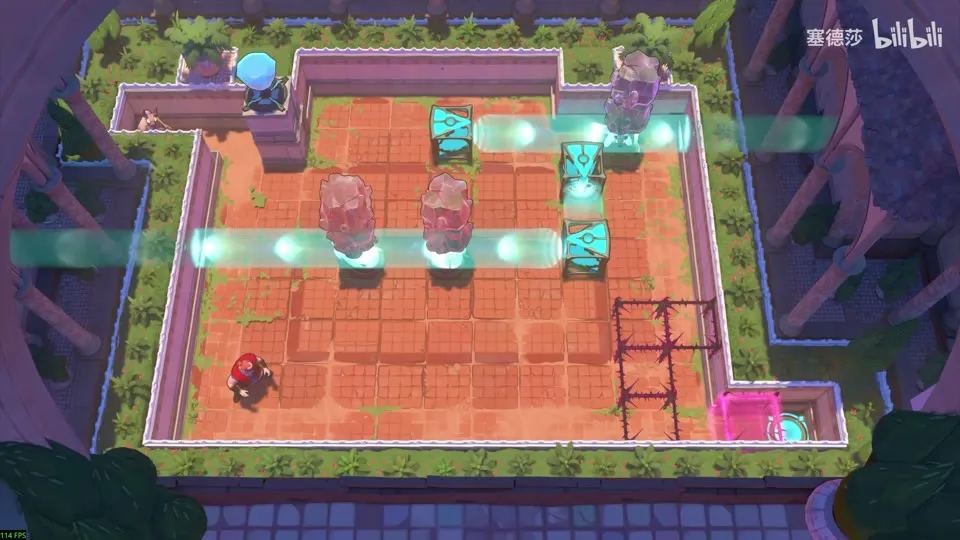
- Let the top-right goblin die first. This frees the right- and down-facing emitters, and its two crystals can block fire. (11:19)
- Move the left-facing dragon to the top-left corner: shift the beam up, push the dragon up, aim the right-facing beam at the cage and push again. It gets crushed, but it burns the top-left goblin first. (11:59)
- Bring another monster to the bottom right inside the cyan beam, step into the target, then push it out of the beam so it is crushed as the door closes with you inside. (12:31)
Overworld puzzle 6
Key idea: build a three-high tower to reach the big star room at the top right. You can’t push the existing two-high tower left, so reset first, take the second-level crystal down, and line the two crystals up in one column before stacking. (塞德莎 P42 13:02)
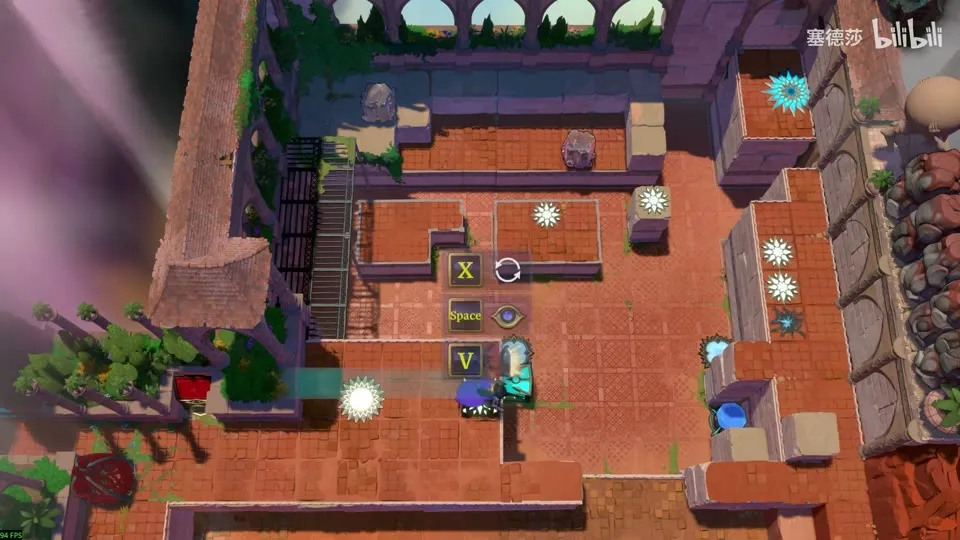
- Reset the area, then bring the second-level crystal down. (13:10)
- Push the cyan emitter out and place it so the two-high crystal can be nudged one tile left, into the same column as the other crystal. (13:39)
- Stand the emitter in place, push up the second-level crystal, then the third-level one, and use the cyan beam’s extra strength to push the whole tower to the far right. (14:00)
Puzzle 35
Key idea: a big star puzzle. Build a five-high tower so the Explorer can walk across. The only way to get five is four crystals plus the goblin. The goblin can’t go on top (it would kill the Explorer) and anywhere lower it ends up carrying two or more, so it must stand in the cyan beam. Note the hidden corridor behind the back wall; the camera hides it. (塞德莎 P42 14:21)
- The cyan emitter is on the second level, so push one crystal down first. (15:29)
- Push the goblin down: first down, then right, then down again. (15:41)
- Move the cyan emitter behind you so its beam hits the goblin. (15:58)
- Don’t drop the remaining crystals onto the goblin’s head from above: a falling object kills. Slide each one across at the same height: the first from the third level, the next from the fourth, the last straight up. (16:04)
- Go round through the back corridor and push the tower across. (16:30)
Puzzle 36
Side rooms (no name shown on screen)
Key idea: a chain of three or four short stages. The Sailor has to cross under a dragon’s fire line, so he carries a crystal as a helmet, and that crystal later goes on a button. Purple beams teleport whatever enters them to the far end, and the Bard pulls the crystal into place. (塞德莎 P42 17:07)
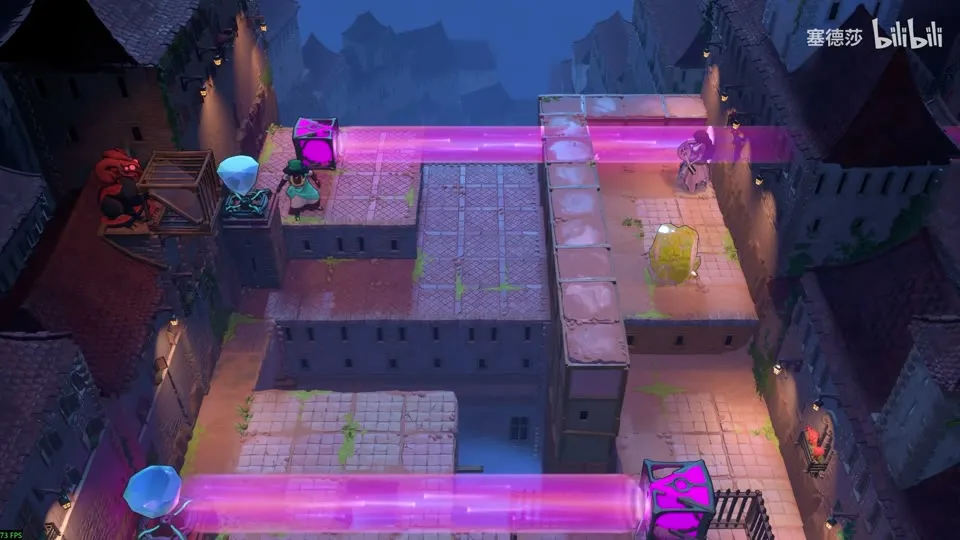
- Send the right-hand crystal to the edge with the purple beam, then use the Bard to pull it left so it lands on the Sailor’s head. Walk down together. (17:30)
- The left-facing purple beam would knock the crystal off when the Sailor steps right. Send the crystal to the far-left tile first, then step the Sailor there and right: the crystal teleports, but the end of the beam is the Sailor’s head. (18:11)
- Further down it would fall off again. Use the left-facing purple beam to send it to the right platform, then the Bard to bring it down to the crystal row and back onto the Sailor. (18:38)
- Last stage: the crystal has to end up on the button, so split it from the Sailor. Let the stack drop to the bottom and time a step right just as the purple beam reaches the Sailor’s row: he teleports, the crystal stays on the button. (19:01)
Overworld puzzle 7
Key idea: an emitter carried on someone’s head turns with them. Use that to swing the right-facing laser up and clear the stone at the top left. (塞德莎 P42 20:07)
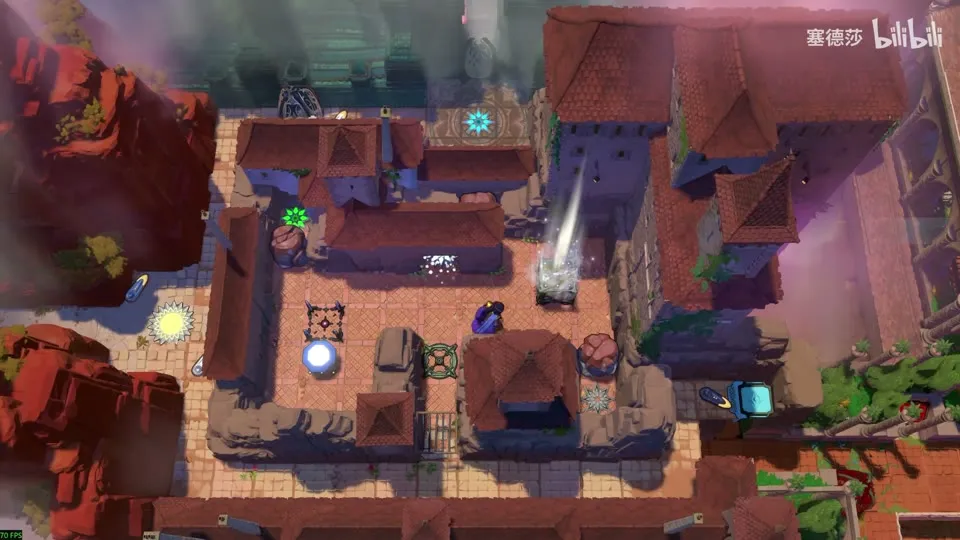
- The emitter starts on the second level, so you can carry it. Face right while you take it, then walk up into the small pit so it now fires up. (20:15)
- Keep it active: the beam clears the stone at the top left. (20:44)
Puzzle 37
Key idea: two Sailors carry lasers on their heads. The red laser has to point down when its Sailor reaches the left, and the orange one up, so the Explorer can cross a two-tile door. You re-aim a carried laser by pushing it, with a crystal underneath, using the displacer, never the Sailor himself. (塞德莎 P42 20:53)
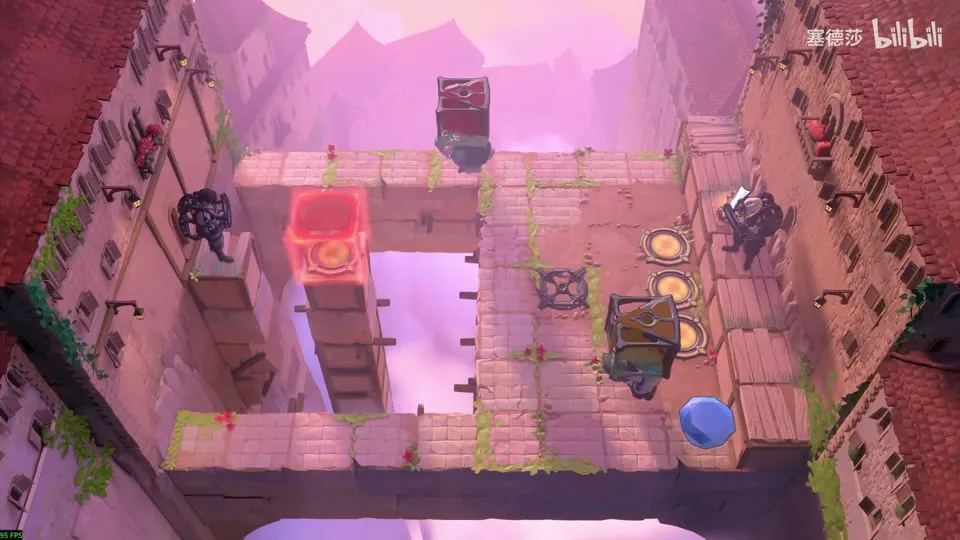
- Put the gem on the floor, not to power anything but as something the displacer can push. Pushing a Sailor directly just lifts him and drops what he carries. (21:18)
- Use the crystal to prop up the laser so the Sailor can step out from under it. (21:56)
- To make the red laser face down when he walks left, have him get pushed up into the gem’s tile facing up. (22:10)
- Do the same for the other Sailor’s laser, this time with him facing down. (22:32)
- Put both Sailors in place, set the gem down, and bring everyone home. (22:57)
Overworld puzzle 8
Key idea: turn the yellow laser the same way as before, but this time reset while facing left instead of right. (塞德莎 P42 23:18)
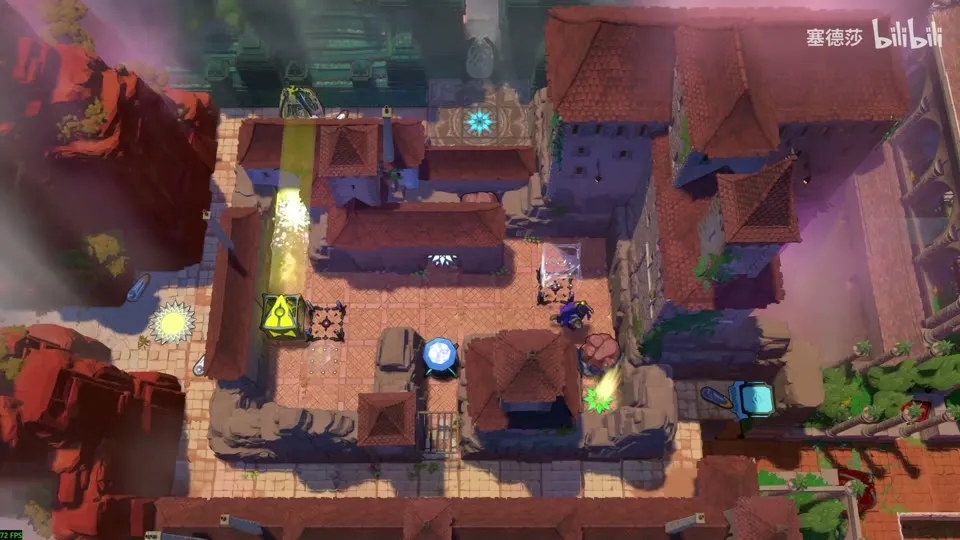
- Push the laser up one tile first, then walk up and knock it down so it breaks the block. (23:24)
Puzzle 38
Key idea: clear three red blocks by turning the red emitter on the lower Sailor’s head. A purple beam’s endpoint teleport turns you round but not what you carry, so each teleport changes the angle between the Sailor and his laser. (塞德莎 P42 23:42)
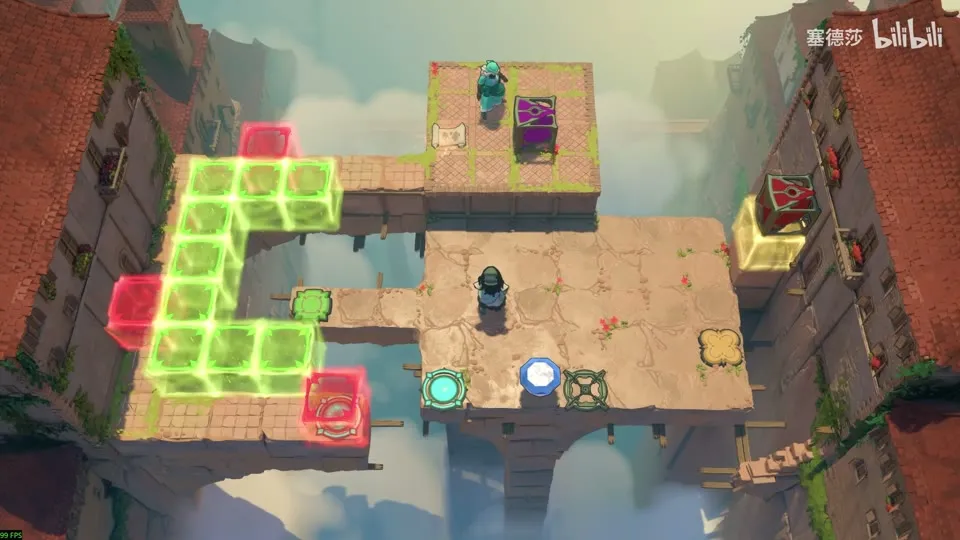
- The red emitter is one tile off from the button, so you can’t reach it directly. Turn the purple emitter to face down (walk right once) and put it in place. (23:56)
- Switch the purple beam on, stand on the button and teleport up: now you are under the red emitter. The first direction opens the top block. (24:41)
- Walk left to right into the top end of the purple beam to teleport; repeat three times in a row until the laser points the right way. (24:56)
- Do the same three times for the lower one. (25:27)
Puzzle 39
Turning Goblins (转身的哥布林)
Key idea: the green laser points down and you need it up, but nobody can carry it here. A goblin can turn, though: put the emitter on a goblin’s head and make it turn round. (塞德莎 P42 25:53)
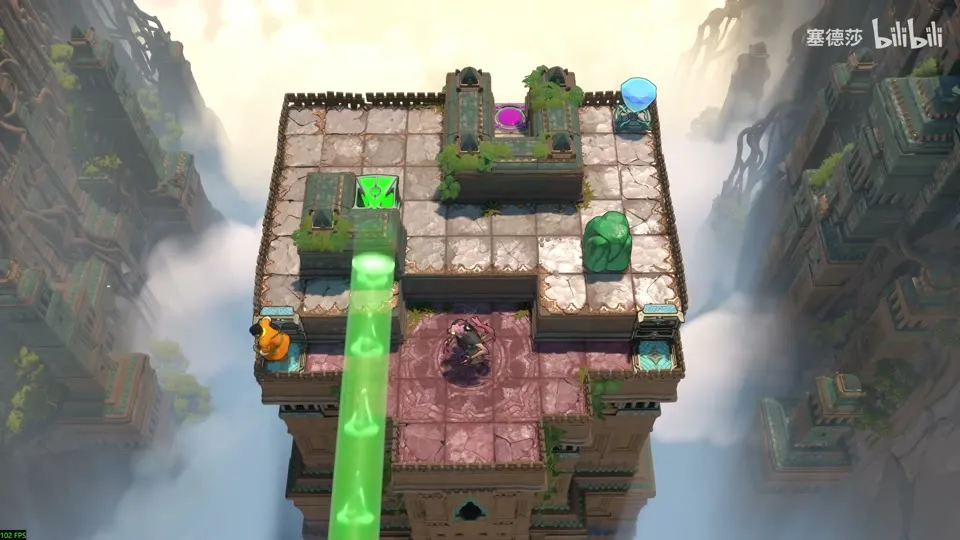
- Put a stone down as a step, then push the emitter onto the goblin’s head. (26:16)
- Go down and stand on its right: the goblin turns and the laser now fires up. (26:31)
Overworld puzzle 9
Key idea: activate the gem at the top right, then turn the middle goblin to face left so you can open the door. 塞德莎 uses this spot to explain exactly how goblins turn (see the rules above). (塞德莎 P42 27:03)
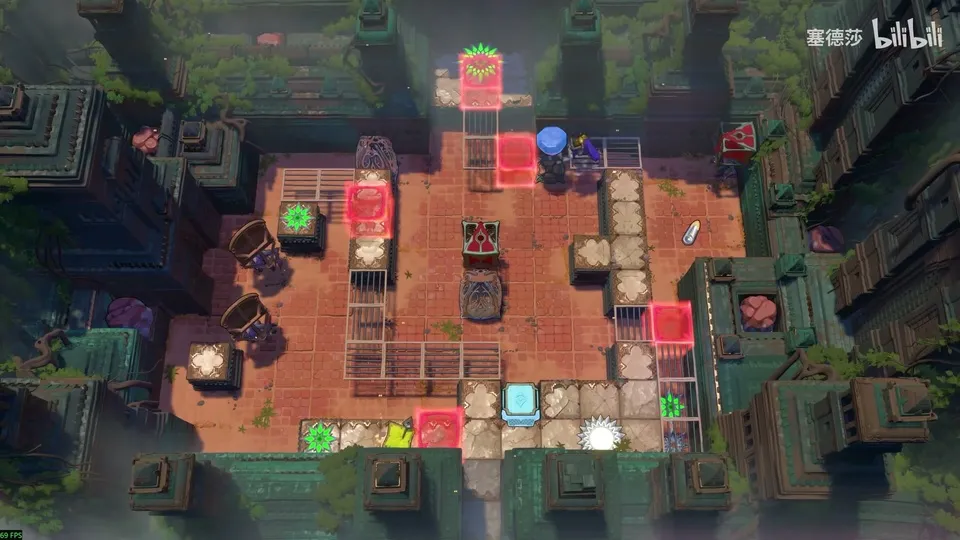
- Activate the top-right gem and push it down. (27:08)
- In his version six floor tiles here had no model and you could fall through. He calls it a bug that will surely be fixed. (27:13)
- Turn the middle goblin to face left, then go up and open the door. (31:56)
Puzzle 40
Key idea: a goblin has to keep holding the blue laser. Use the Explorer below to turn it, and watch the Trader’s jump. (塞德莎 P42 32:03)
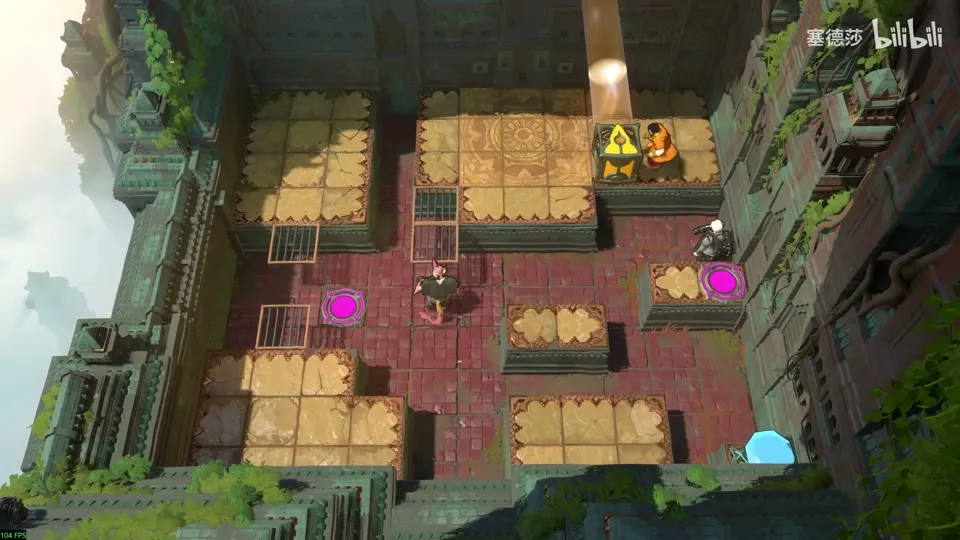
- Push the goblin up. (32:15)
- Go to the left platform and have the Explorer below turn the goblin to face left, then down. (32:17)
- Trap: if the Trader jumps straight to the spot 塞德莎 points at, you can’t go on. Go up first, then jump right. (32:27)
- Turn it to face right and you’re done. (32:37)
Puzzle 41
Key idea: a large room. The Wizard swaps along a chain of mirrors and goblins: first to the bottom-right button, then the top-right one, then the exit at the bottom left. Every goblin and mirror on the chain has to face the right way, and walking past a goblin turns it again, so you often go round instead of straight. (塞德莎 P42 33:07)
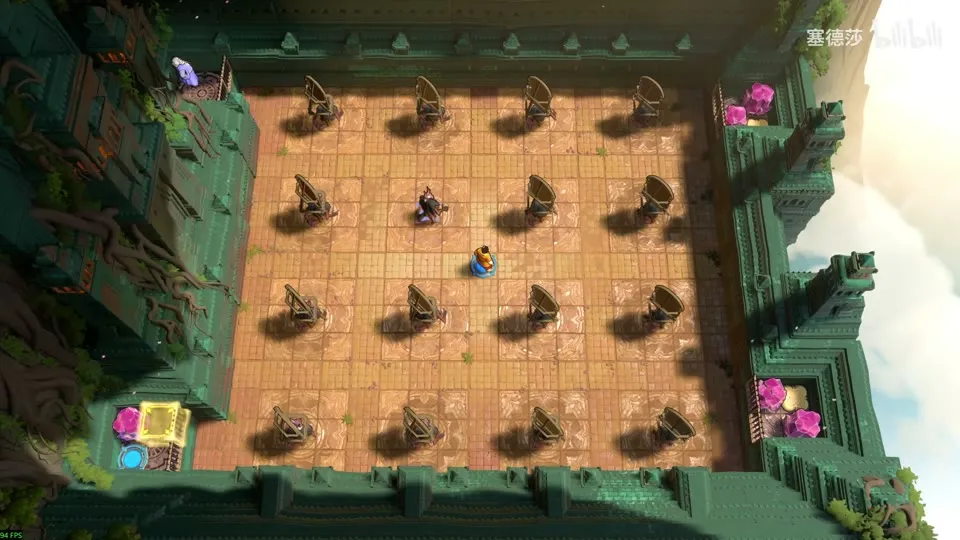
Getting there: back on the map the cage in the middle has gone, so you can turn the goblin to face down. Here 塞德莎 learns the area’s name. (32:48)
- At first the Wizard can only reach the bottom right. Set the chain: this one fires down, the goblin below to the right, the next mirror down, then right, then down. Fix the left goblin by walking round it, then swap to the bottom right and press the button. (33:29)
- To the top right: the three lower mirrors are already right. Turn the next mirror, step inside to turn the one after, and come back out along the bottom (walking straight back would turn it again). Fix the lower one again and press the top-right button. (34:00)
- To the exit: the top mirror fires up (of the two paths only the upper one reaches the bottom left). Adjust the next three as he shows, turn the bottom-left one to face left, circle round and swap to the bottom left. (34:38)
Puzzle 42
Key idea: to reach the exit, the bottom goblin has to face down, but all three start facing right. Push one stone so you can come at the bottom goblin from a diagonal tile and turn it down. (塞德莎 P42 36:23)
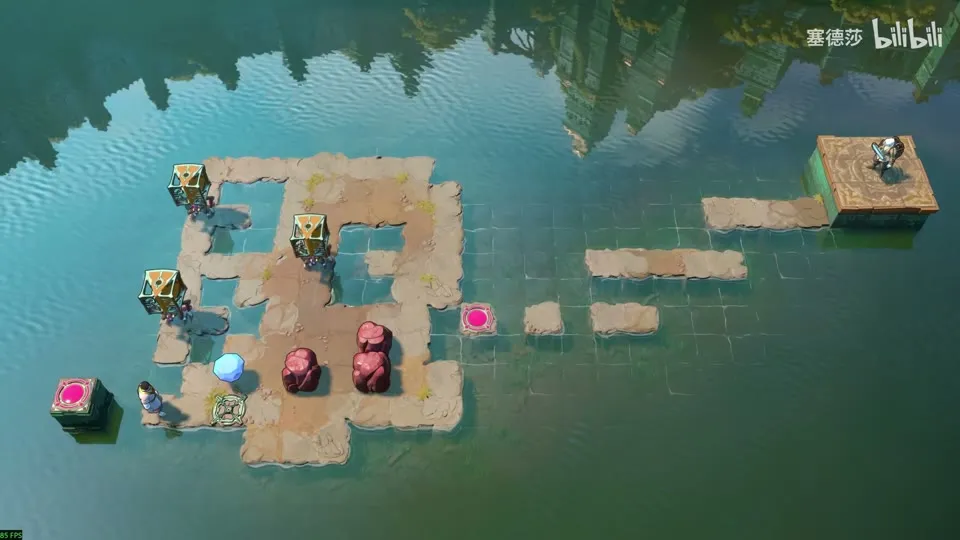
Getting there: with the upper cage open, turn the two goblins on the left (and so their mirrors), going round above them so you don’t undo them. The red beam is pulled by gravity and opens the door under your feet. (35:39)
- Push the one stone that matters to the spot 塞德莎 shows. Use the diagonal-tile rule to turn the bottom goblin. (36:44)
- Push the other two stones to the right of their goblins; the upper two lasers only need to face right. (37:00)
- Switch the lasers on and jump the Explorer across. Change carriers: the Trader takes over, then turn the goblin to face left. (37:16)
- Fill the last puddle with the gem. (37:34)
Puzzle 43
Key idea: you finish by pushing the gem at the bottom right to light two yellow beams, and after that you can’t get out. So both goblins have to face right first. Walking out would turn them again, so use the blocking rule: push stones so they cover the directions you don’t want, and the goblin can only turn right. (塞德莎 P42 37:39)
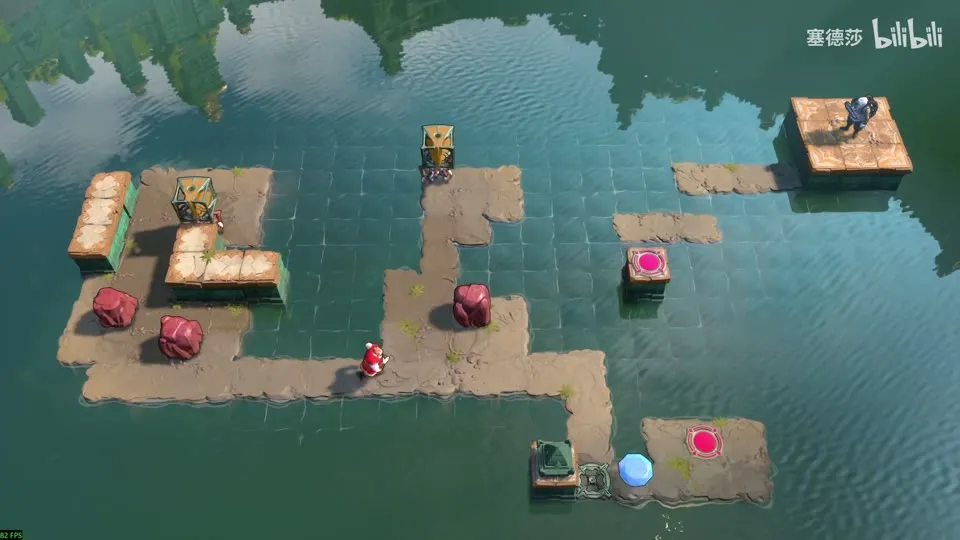
- Push the two stones up so they block the left goblin’s left and upper sides. Now it can only turn right. (38:07)
- Push a stone below the other goblin for the same effect. (38:13)
- Come over and activate the gem. (38:21)
Puzzle 44
Key idea: a big star puzzle. First get the goblin onto the centre tile with the mirror on its head. Then launch a skipping stone along the only long open lane and reflect it three times (each reflection turns it 90°) onto the button, turning the goblin to face each new direction just in time. (塞德莎 P42 39:01)
Getting there: on the map, turn the top-right goblin to face down (otherwise the door under your feet opens when you walk across), then up, and go round the left side. (38:32)
- Push the mirror left, push the skipping stone down and use a reflection to bring it up. Put the mirror where it can send the goblin onto the centre tile, push the goblin in with the mirror, then put the mirror on the goblin’s head. (39:13)
- Launch the stone down: only the lane below is open for more than five tiles. (39:42)
- Run down and turn the goblin to face left. When the stone arrives, reflect it left; turn the goblin up and reflect it up; turn it right and reflect once more just before it reaches the button. The stone moves slower in this room, which gives you time. (40:24)
Overworld puzzle 10
Vertical Endpoints (竖直端点)
Key idea: go down and move the red laser so it can later be bent up with the mirror, and make a purple endpoint on the gem so you can come back up. Both need the same mirror; the cart solves the timing. (塞德莎 P42 41:44)
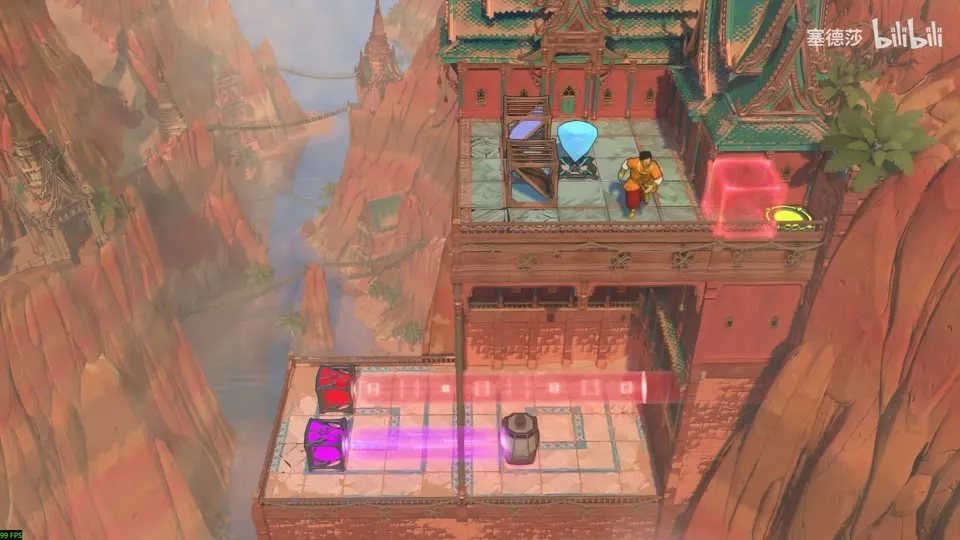
Getting there: take the teleporter back to the vertical-mirror area you saw in the East part (塞德莎 says it belongs to the West). (41:16)
- Push the mirror down, aim it at the gem to make an upper endpoint, then go down. (42:03)
- Below, set up the way back up (purple beam plus the mirror) and put the red emitter at the very bottom. (42:17)
- Both need the mirror, but in order: ride up first, then let the red beam open the red door. Push the cart towards the top right and go up before it reaches the mirror; it then pushes the mirror down for you. (42:50)
Puzzle 45
Key idea: a purple beam that runs straight up and down pulls whatever stands in it down to its end, like gravity. Use it to drop the goblins into line and finish them with a triple. (塞德莎 P42 43:18)
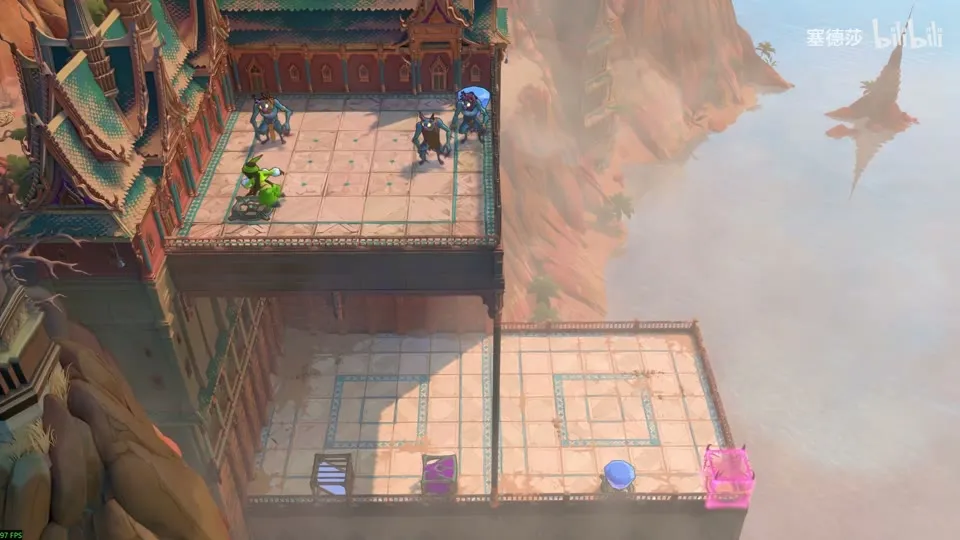
- Pull the gem out first, or nothing works. (43:27)
- Put the laser and the mirror where 塞德莎 shows: the top goblin sinks to the end of the beam. (44:07)
- Move them the same way for the other goblins, then one last time so the third drop lines them up and they all go together. (44:19)
Puzzle 46
Key idea: lay one purple beam route that lets both heroes reach the top right. One mirror sits on the edge and aims into the water, so the beam goes down into the water and back up. The Trader rides gravity to the right-hand end and the Sailor to the left-hand start, so both ends need a free tile. Only one layout works. (塞德莎 P42 45:09)
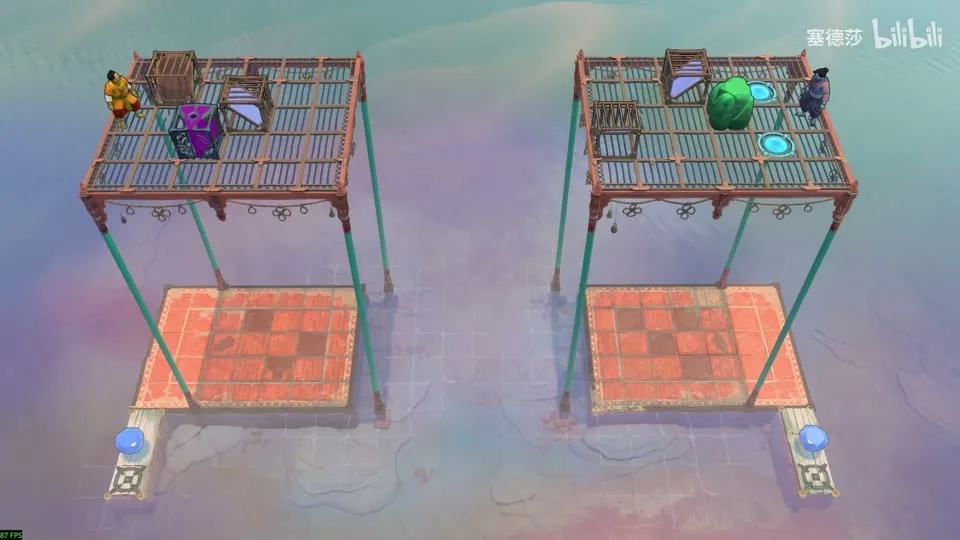
- The left column lines up with the water, not the floor; the shadows show it. (45:32)
- Leave at least one empty tile between the stone and the mirror on the right, and between the emitter and the mirror on the left. (46:27)
- The layout: emitter where he shows, mirror on the middle (third) tile, mirror on the third tile on the other side, stone at the end. Activate the gem and push the pieces down into the middle water tile. (47:14)
- The left hero goes up first, then the right one goes left and teleports right. (47:48)
Puzzle 47
Key idea: a new purple beam rule. If the far end of a vertical beam is blocked, gravity can’t carry you there, and you float in the beam instead. The Explorer floats over two gaps that way. (塞德莎 P42 48:14)
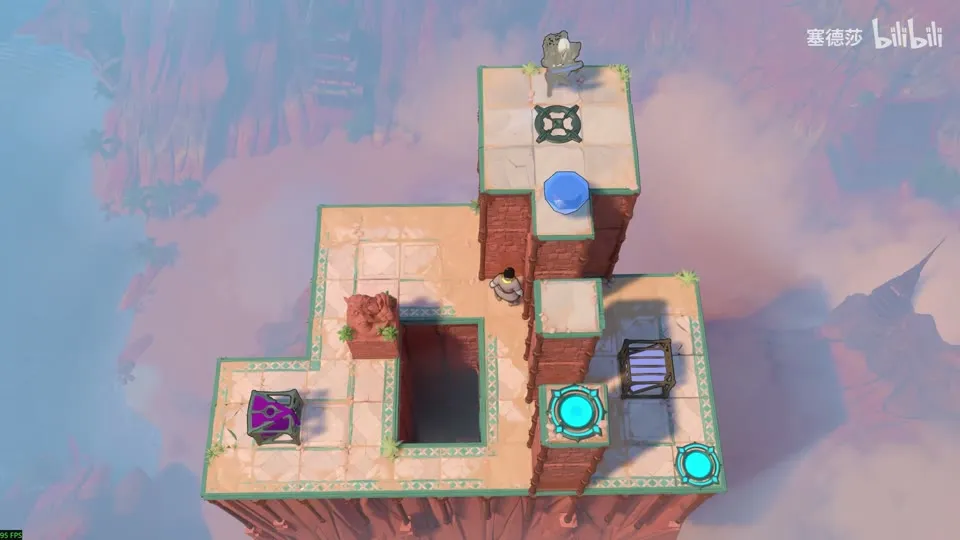
Getting there: a mirror that fires up unlocks; leave it for now and ride the elevator to a higher platform. (47:58)
- Aim the purple beam next to the statue (the statue blocks the end), put the mirror so the beam goes up, and set the gem in place. Walk up: you float instead of falling. (48:55)
- The second gap works the same way; this time the end is blocked by the Trader himself. (49:28)
Puzzle 48
Key idea: float across a row of gaps. The three purple beams below sit one level lower than this pit, so first push a plain stone down to change the height. Then each time, push a crystal to the end of the beam so the end is blocked and you float. (塞德莎 P42 50:07)
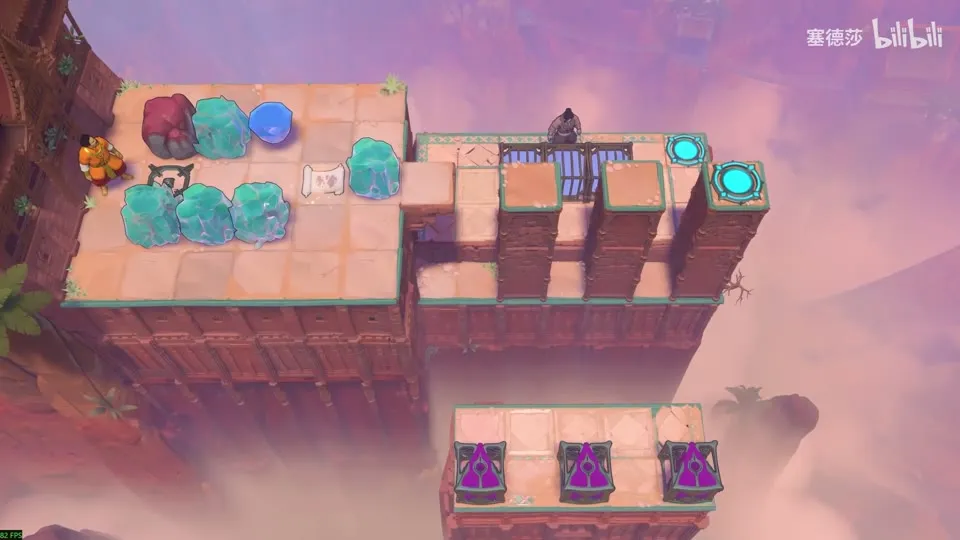
Getting there: a cage opens and unlocks a left-facing mirror. Push it onto the marked tile, go down and push the other one to the same spot. (49:44)
- Push a stone down into the pit, then push the mirror in. (50:32)
- Activate the gem: the beam hits the mirror and goes straight up. Push a crystal over so the end is blocked, and float. (50:45)
- Repeat: drop a crystal as a step, push the mirror up, push another crystal over, float; then the third. (51:02)
Puzzle 49
Key idea: three floats, three blockers. Push a goblin into the first end, crush the dragon with the spare crystal so the crystal becomes the second end, and for the third, use a crystal to block the dragon’s fire. Fire stops at a crystal, but the purple beam doesn’t. (塞德莎 P42 51:48)
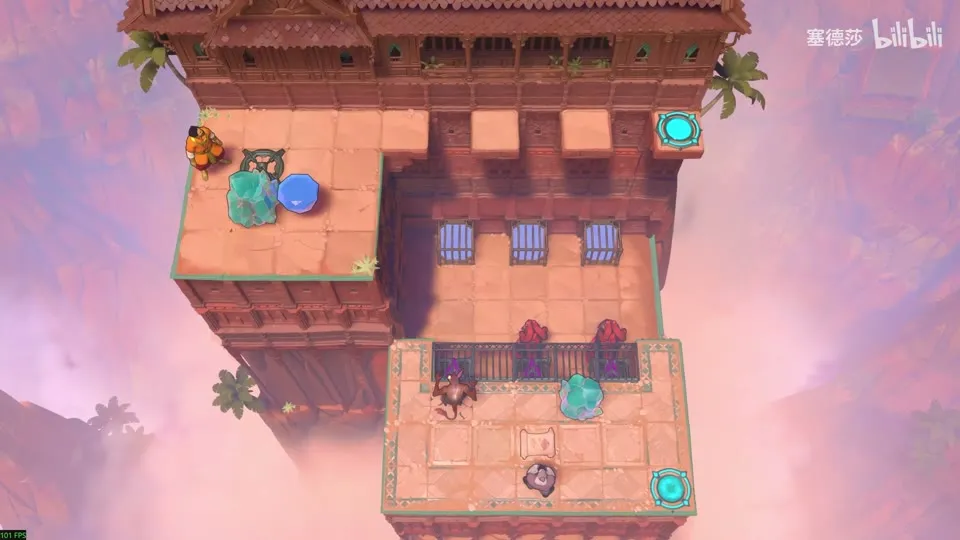
Getting there: a mirror opens that sends you down; jump down and teleport across. (51:36)
- First end: push the goblin down. Activate the gem and cross. (51:55)
- Second: drop the extra crystal on the dragon (a falling object kills it); the crystal is now the end. (52:12)
- Third: you don’t have to kill this dragon. Put the last crystal where he shows and cut the laser; it falls and blocks the fire line, while the beam goes through. (52:36)
Puzzle 50
Key idea: three purple beams have to go up: two from the pits and one from the third spot. The obvious layout (a left-facing emitter on the open floor) fails. The trick is that this wall lets beams through, so use a right-facing emitter behind it. (塞德莎 P42 53:01)
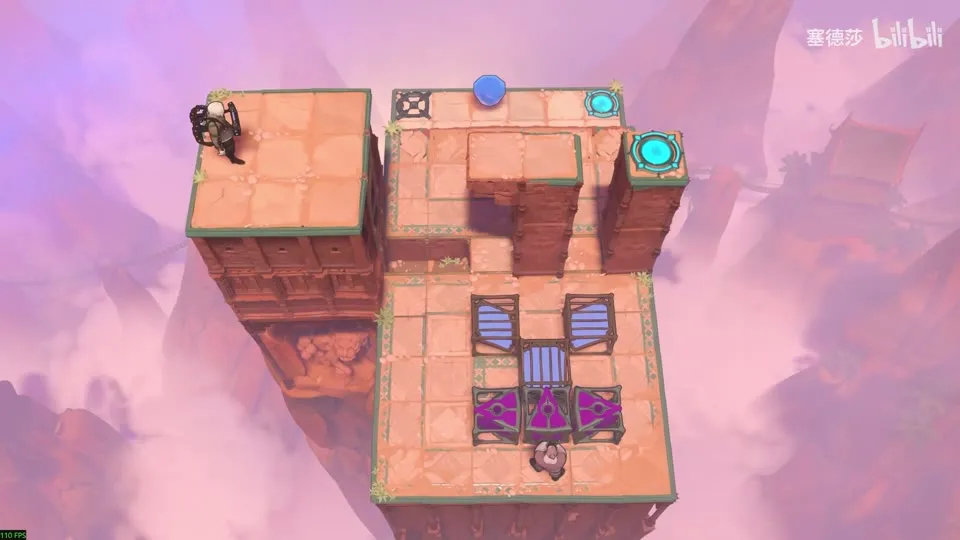
- The pit spot needs a sideways emitter, either left- or right-facing. (53:21)
- If you put a left-facing emitter on the open floor, the end must sit against the mirror, and the lower one would also need a left-facing emitter, so the directions clash. (53:43)
- Instead put a right-facing emitter behind the wall: the beam passes through and a left-facing mirror sends it up. Then the left-facing emitter goes in the pit, and the third beam comes up from a mirror on top. (54:45)
- Push everything in place (right-facing, left-facing, up). All ends are blocked; go down and push the gem in. (55:30)
Puzzle 51
Key idea: float across by building, taking down and moving the purple structure one tile at a time. Move it along the upper row: along the lower row you get stuck beside the wall above the mirror. (塞德莎 P42 56:00)
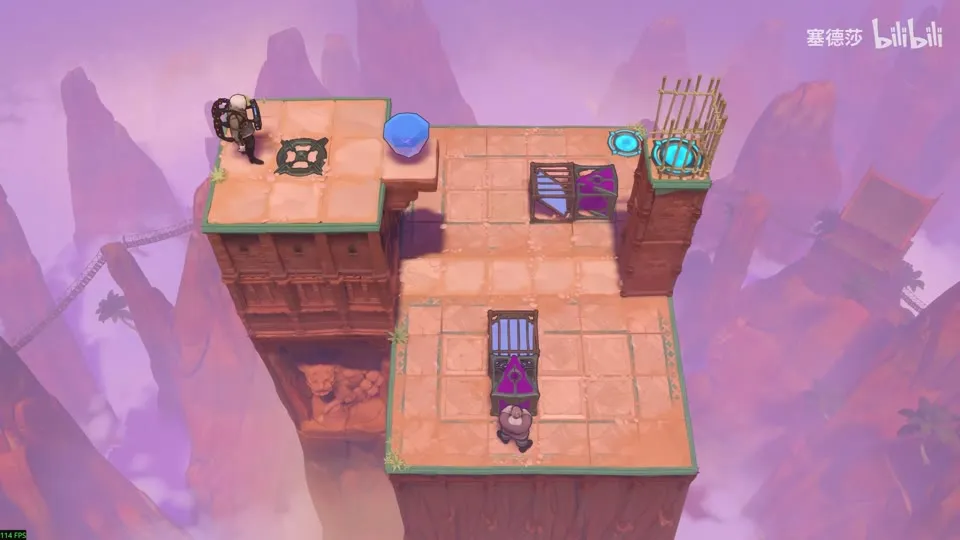
- Set up the start as 塞德莎 shows, activate, go up and push up once. (57:01)
- The loop: take out the mirror and laser, push them down, step right, push the lower piece right, then the whole upper part right. The Explorer above stays up. (57:21)
- When you reach the last spot, go down and push the structure in place. (57:43)
Puzzle 52
Key idea: hold the button below, then get back up. The only way back is the purple beam, which only fires straight down, so you need upward momentum from the yellow energy gate. The cart holds the button. (塞德莎 P42 58:08)
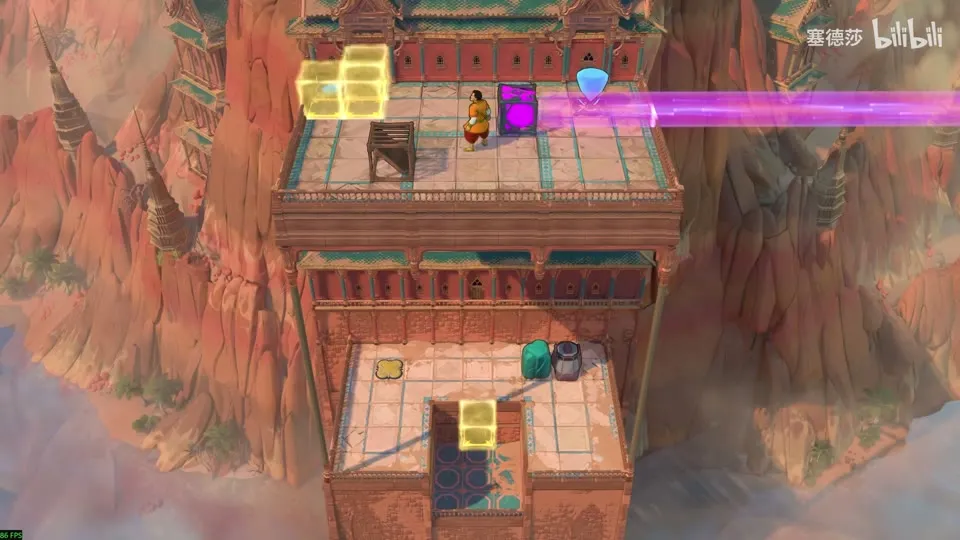
Getting there: push the leftover mirror onto the marked tile; it sends you down to the right. (57:55)
- Break the beam, aim the purple emitter at the yellow block and go down. (58:36)
- The stone is a step: the hole under the energy gate is two tiles deep, not one. (58:53)
- Let the cart press the button. The moment you are pushed up, you ride the beam up; come back across while it holds the button. (59:09)
Puzzle 53
Key idea: a big star puzzle. Float up to five levels, using the blocked-end trick again. The hard part is taking the structure apart and rebuilding it a row lower. 塞德莎 enters this room from the Turning Goblins side, which he skipped earlier. (塞德莎 P42 59:46)
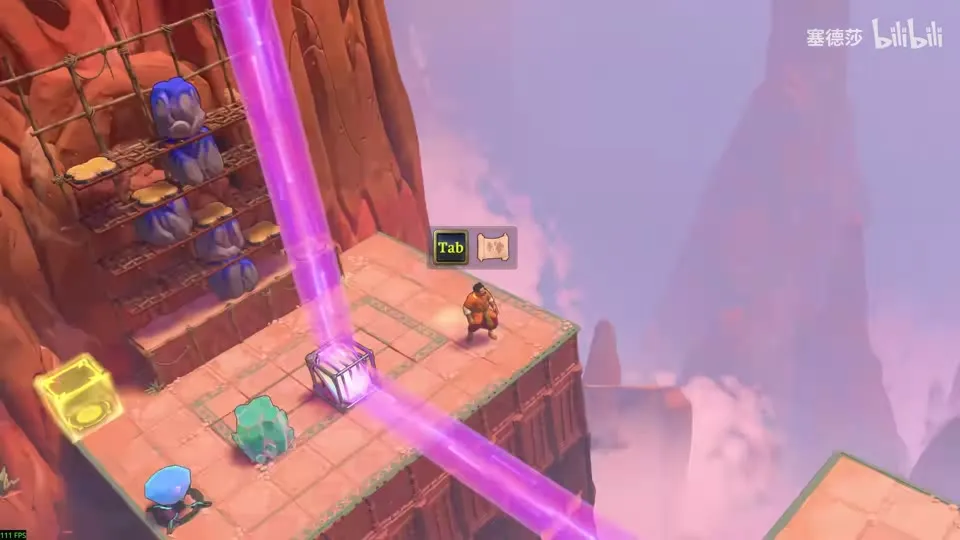
- The top two levels are pushed from right to left, so handle them first: put the mirror and the stone where he shows. (60:07)
- Teleport across, reflect once (the stone falls across by gravity), reflect back. The right end is now blocked: float to the fifth tile, push, then the fourth. (60:22)
- Break the beam, bring the stone back and move the structure to the bottom row. Rebuild, teleport over and push the third, second and first levels. (60:49)
Puzzle 54
Key idea: the Trader, the Bard and the Thief start out each blocking the end of a beam, and each holds up a monster. If one walks off, the goblin drops and kills them. Free them one by one, always keeping something at each end. (塞德莎 P42 61:53)
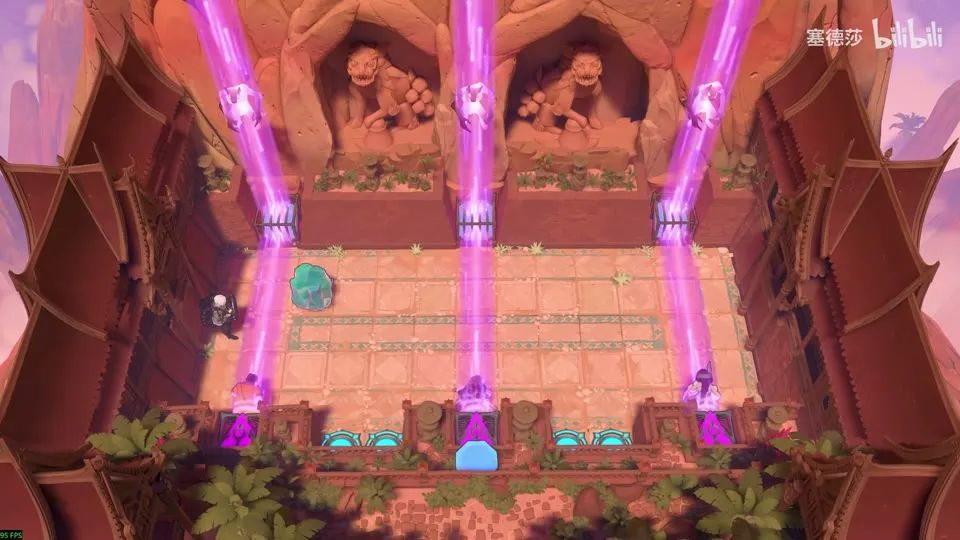
Getting there: this area also unlocks a rainbow beam. With the purple beam it gives an endpoint teleport to the middle, a shortcut but nothing more. (61:35)
- The Thief pulls the Explorer over, which frees the Thief. (62:13)
- Put a stone beside the Bard and have the Thief stand in as a step: the Bard can come out. Keep an object at every end. (62:18)
- Move the stone sideways (not up, or you lose it); a monster drops. Have the Thief pull the Bard a little left, then carry the monster up: it rises out of sight. (62:36)
- Use the crystal and the Bard to swap the Explorer out, take the crystal back, kill the goblin, then do the same on the left to free the Trader. (63:01)
Puzzle 55
Key idea: get one hero to the high platform’s beam end. The Explorer goes up (he can’t push anyway), and the Trader pushes the laser straight down; the moment it touches the Explorer, he teleports across. (塞德莎 P42 63:52)
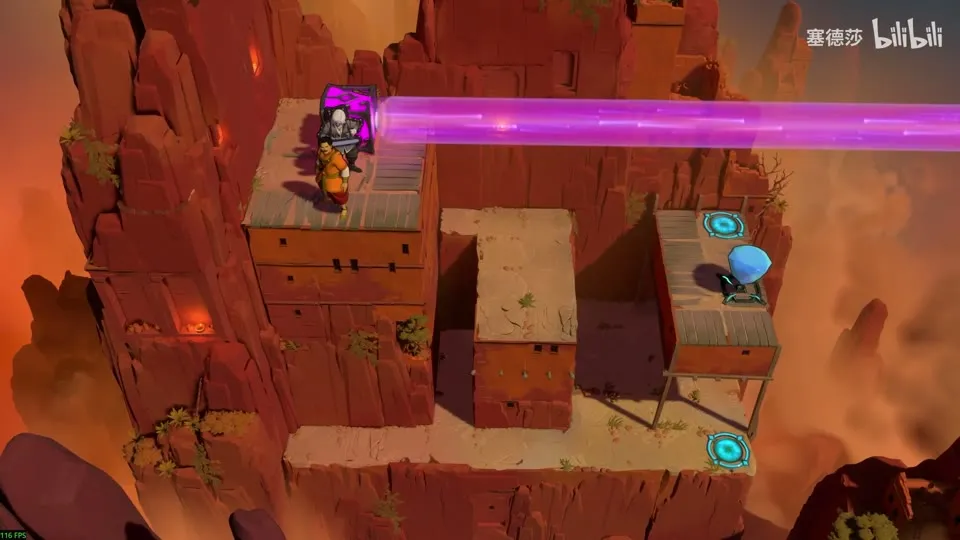
- Put the Explorer on top, then have the Trader push the laser down. Step right as it reaches him. (64:04)
Overworld puzzle 11
Beam Road (光束之路)
Key idea: after the West is cleared, the way down from the unlocked laser back to Antipode High is a chain of map puzzles. The cart does the timing twice: once pushing a mirror while you walk back, once pushing a gem away so a purple beam disappears. (塞德莎 P42 64:47)
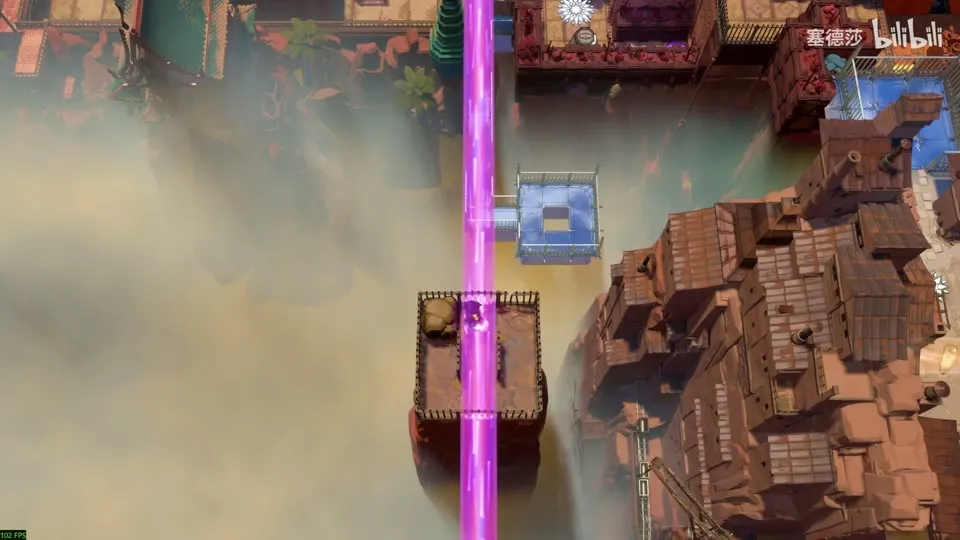
- Move the stone blocking the path. Then take the stone out, put it back on top so you can push the lower stone, and move both. (64:54)
- Pushing the mirror to the top end yourself would trap you. Push the cart up, let it push the mirror across and go back while it does. (65:10)
- Below, clear the gem blocking the way: put two rainbow beams and a stone where 塞德莎 shows, ride the purple end onto the rainbow beam and across, and knock the gem away. (65:43)
- The last stretch: jump down to look first. On the ground layer there is an emitter, a jutting floor and a small platform with a purple and a yellow beam. Undo and go back up. (66:13)
- Push the gem down and run across: the yellow beam breaks the stone, but the purple beam would then drop you. (66:52)
- So set the cart to be facing up when it reaches the gem (facing down it would drop into the pit). It pushes the gem off, the purple beam goes away, and you walk on to Antipode High. (67:13)
Puzzle 56
Drop-down rooms below Double Beam Falling (ground layer)
Key idea: pure footwork over shallow water. The water here is one tile deep, so the floor under it is exactly two tiles down and an orange beam’s drop lands on it: in orange you stay up on the water. Two crossing orange beams make you jump four tiles, and taking gems in and out switches your parity. (塞德莎 P41 6:45)
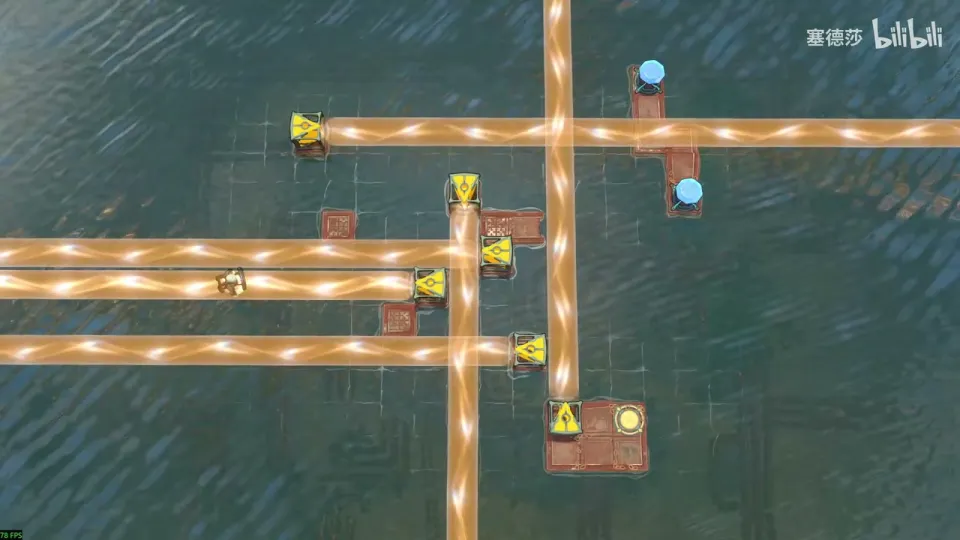
Getting there: this is a post-game room on the ground layer. After the first ending, go back up to Double Beam Falling (puzzles 13–29) and take the drop point on the right of the first drop’s tile (the first, top-left drop leads to Reflected Beams puzzles 20–22). 塞德莎 notes that the rooms below it belong to the south-west area; Joric’s map files them under Double Beam Falling’s drop-downs. (P41 6:25)
- Jump over from the start, go left, then down and left, switch once, and come back right. (6:55)
- Where two orange beams overlap, jump four tiles up. (7:10)
- Switch your parity with the gems: take this gem out, take the second one, come up, put the first back, then the second. Now you are on the right. (7:20)
- Come over and go down to finish. (7:35)
Puzzle 57
Key idea: a small shuffle: work the orange emitter down to the bottom of the platform. Every push needs you on the right side of it, and twice you have to switch parity to get there. At the end you don’t need to jump in: just push the emitter into the water to fill the gap. (塞德莎 P41 7:55)
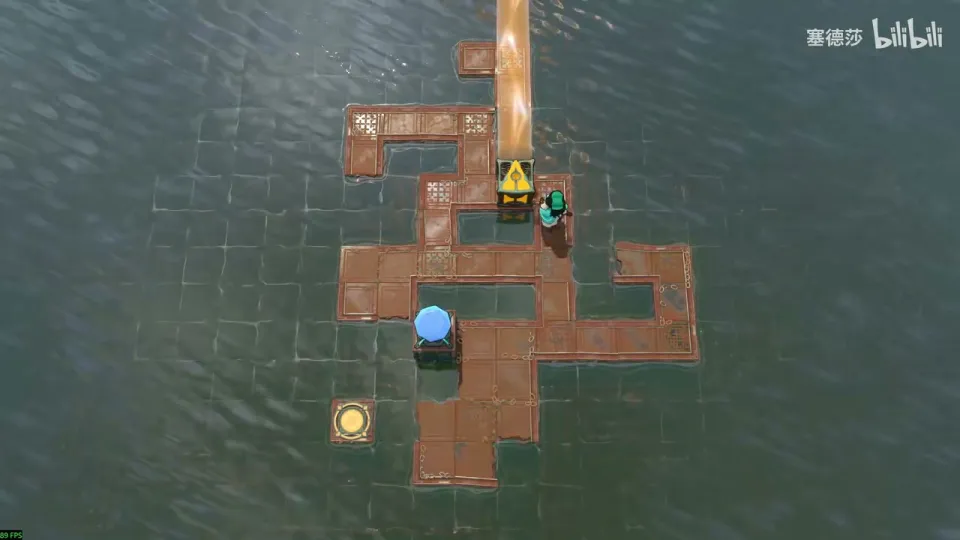
Getting there: light the orange beam on the area map and walk along the water on it, jump up at the end and go right. (P41 7:45)
- Push the emitter left, go down from this spot and push it to here. Come back up from the left, or you can’t get back, then go down. (8:00)
- Push it left, go down from here to get behind it, push it right to here, then keep pushing it down. (8:15)
- Switch parity on the upper platform: step right there, then push down once more. (8:30)
- Switch parity again to get out to the right. Push the emitter to the end and down, then find the tile where the parity is right and push it down one more. (8:45)
- Don’t push it down again to jump in: push the emitter into the water to fill it, and walk out. Afterwards undo to get back; 塞德莎 found no way out on foot. (9:05, 9:13)
Puzzle 58
Key idea: a big star room. You have two things to stand on, the right-facing emitter itself and the stone, and the stone has to go left. Use a doubled orange beam, which jumps four tiles, to land behind the stone in one go. (塞德莎 P41 9:40)
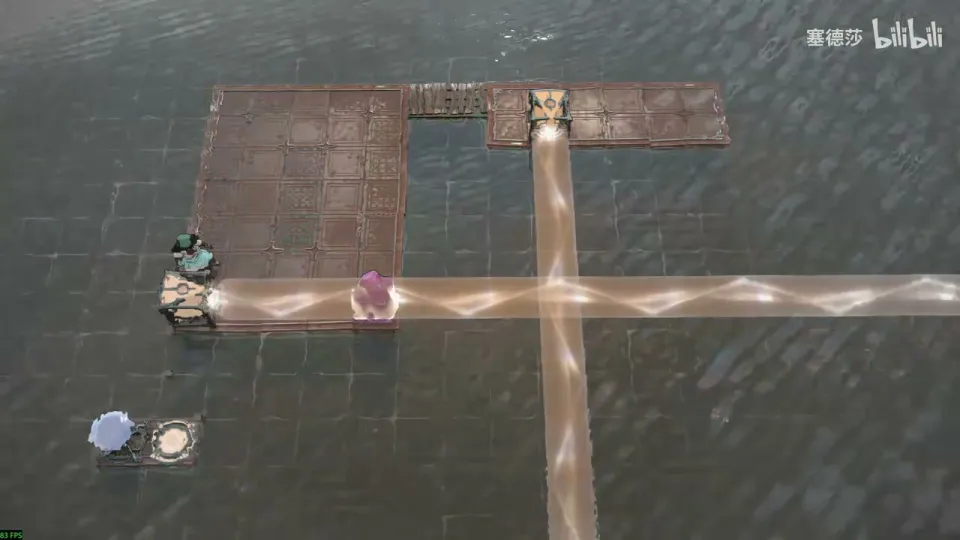
Getting there: on the area map, put the orange beam where 塞德莎 shows, walk up and push the gem across. It becomes the step up to the big star room. (P41 9:24)
- Push the stone right to the spot shown. (9:55)
- Move the emitter so that it only travels two tiles right, then switch back left. (10:10)
- Go up and take the four-tile jump: you land behind the stone and can push it left. (10:20)
- Open the shortcut below on your way out. (10:33)
The third-stage counterpart is Low Beamcasters.