Spoilers: this page covers the second stage, after the first ending. It sticks to puzzle solutions and leaves out the story, but the area itself and its new mechanics give away late-game content. If you haven’t finished The Antipode yet, you may want to stop here.
High Mirrors is the Mirrors part of Antipode High, the High counterpart of the Mirror Isles. Reaching it unlocks the hidden achievement of the same name. The Trader’s mirrors are back, but now everything has height: you reflect while falling, drop stones on goblins, bounce off vertical mirrors and finally carry a mirror on your head. This page solves all 45 puzzles and the 8 overworld puzzles between them.
Where it is: after the first Endgame, go up into Antipode High (see How to Ascend) and head to the upper east. 塞德莎 starts by dropping down from the upper level. He labels the tiles E1 and S1E1 (Mirror Falling), E2, E3, S1E3 and S1E4 (Vertical Mirrors), S1E2 (A Mirror Overhead) and N2E4, N4E4 and N4E3 (Mirror Road).
How to use this page: we found no chaptered English solution video for this area, so the numbers follow 塞德莎’s narrated walkthrough (parts 31 and 32), grouped by sub-area. Each heading has the key idea and a link to the moment the room starts, and the numbered steps link to the matching second. We moved one room: 塞德莎 left one A Mirror Overhead room for later and solves it in part 32; here it is puzzle 30, at the end of its sub-area. The Vertical Mirrors rooms of part 32 come after A Mirror Overhead because one of them needs the mirror you earn there.
Sub-area names: the Chinese names below are what 塞德莎’s game shows. Mirror Falling is the confirmed English name; the other English names are our translations and may differ from the official English text.
| Sub-area (English name) | In 塞德莎’s game | Puzzles | Overworld puzzles |
|---|---|---|---|
| Mirror Falling | 坠落之镜 | 1–11 | 1 |
| Vertical Mirrors | 竖直之镜 | 12–25, 31–39 | 2–3, 6–7 |
| A Mirror Overhead | 头顶一面镜 | 26–30 | 4–5 |
| Mirror Road | 镜之路 | 40–45 | 8 |
Rules that matter here
- Mirrors work in 3D. A reflection still lands on the same diagonal through the mirror, but at the height of the landing tile, so you (or a stone) may land in the air and fall. 塞德莎 switches to the top-down view (it appears on its own in some rooms) to count the diagonal.
- Reflect while falling. You can reflect in mid-air. The mirror you use must be lower than you, at least one level (puzzle 8 explains it). 塞德莎 holds Ctrl throughout these timed moves, which appears to slow the action down.
- Reflection plus gravity moves things sideways. Reflect something into the air on the far side and it falls straight down, so a pair of reflections shifts it towards the mirror. 塞德莎 uses this “shift” from puzzle 18 onwards.
- Falling things crush. A falling crystal kills a goblin and breaks a mirror. It also crushes a weak hero (the Explorer and the Wizard), and a clone that falls into the abyss fails the room.
- Two mirrors at the same height make a clone. As in the Mirror Isles, two mirrors on one object split it into two. Up here that is usually something to avoid (puzzles 7 and 30), but puzzle 24 uses it to make extra stones.
- The Trader is weak. He can’t push a stack: a stone with a mirror on it, or the Explorer standing on a gem, counts as too heavy.
- Vertical mirrors. These mirrors reflect up and down. Heroes always stay upright after a vertical reflection. Two vertical mirrors facing each other in a U move you by the gap between them on every bounce: mirrors three tiles apart move you three tiles (puzzle 15).
- A mirror on your head. In A Mirror Overhead you push a mirror onto a character’s head. It travels with them, reflects from wherever they stand and can be turned. Its facing depends on the way you faced when you reset onto it.
- The checkerboard rule. Anything moved only by mirrors stays on squares of the same colour. The floor in A Mirror Overhead is drawn as a checkerboard, so you can tell which goblin or stone can ever reach which tile.
- Undo keeps your progress. 塞德莎 uses undo to walk back after a room; it doesn’t erase the room you just solved.
Puzzle 1
Mirror Falling
Key idea: the first room is a mirror-shuffling puzzle with height. Get the mirror out of its notch by pushing a stone down first and sliding the mirror along it. (塞德莎 P31 0:15)
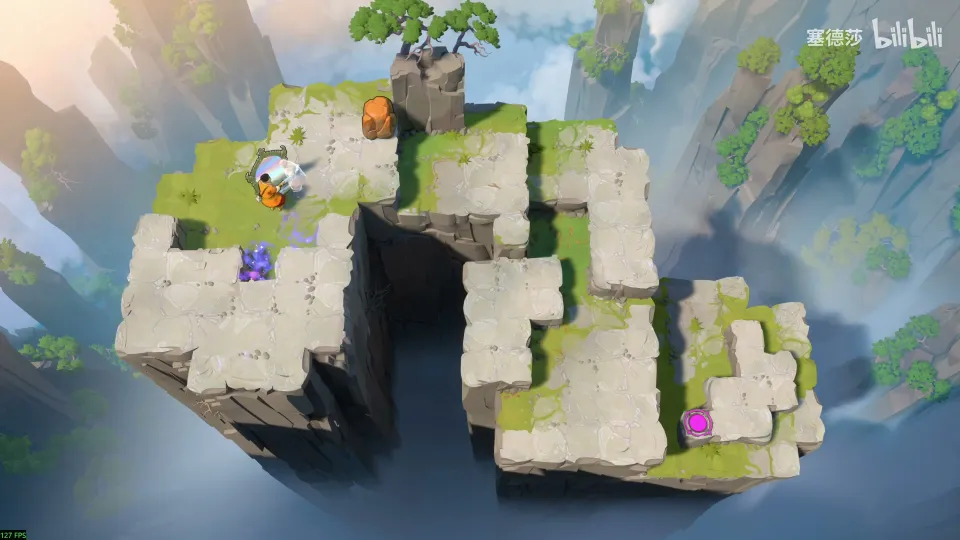
- Push down from the top, then reflect into the notch to take the mirror out. (0:22)
- Push the stone down, then push the mirror down along the stone. That frees the mirror. (0:30)
- You can’t push the next mirror out from the right, so go round: reflect to the other side, then push the mirror onto the marked block. (0:45)
- The last gap isn’t for a stepping stone. Just reflect: because of the height, you fall and land right where you need to be. (0:52)
Puzzle 2
Key idea: don’t reflect to the ground, where the stones can’t be pushed out of the way. Reflect straight onto a stone instead. (塞德莎 P31 1:07)
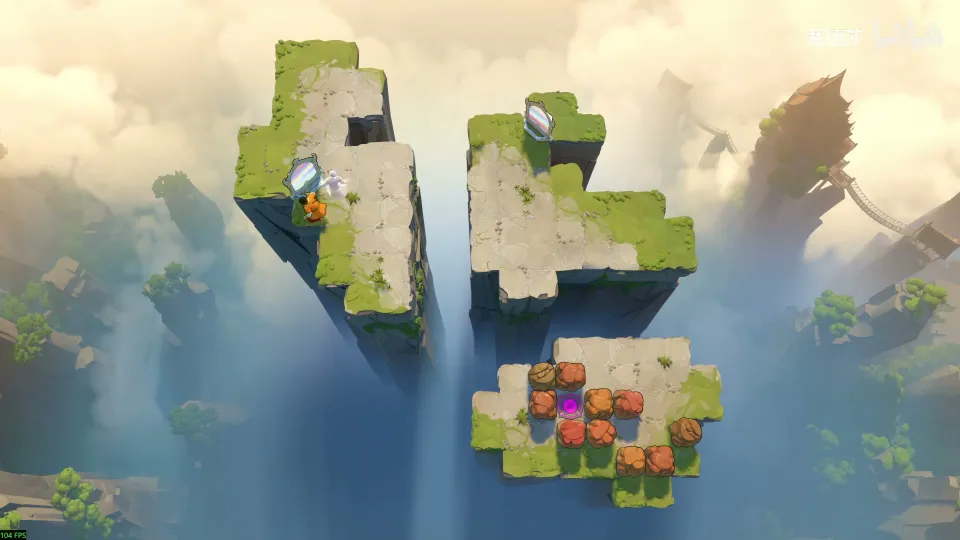
- Start from your highest ground and reflect to the second high ground (top right), behind the mirror. Leave the mirror there. (1:15)
- Landing on the ground below is a dead end: you can’t push the stones apart, and the bottom-left stone only goes onto the exit. (1:25)
- Reflect directly onto a stone, place the mirror nearby, move down one tile and you’re through. (1:47)
Puzzle 3
Key idea: take the mirror out while keeping the stones reusable. Wedge the mirror in first, then use stones as landing spots. (塞德莎 P31 2:18)
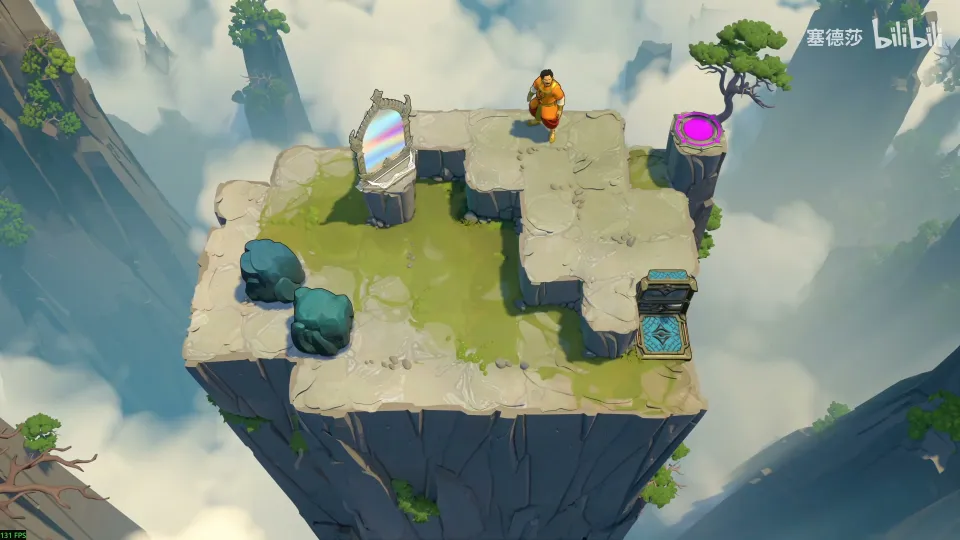
Getting there: the previous room unlocks a stone and a teleporter on the map. Put the stone in place, take the teleporter up to the high ground and jump: the reflection lands you on the stone you just pushed. (2:08)
- Push the mirror up first so it is wedged in. (2:35)
- Put one stone under the mirror and another next to it, so you can reflect onto a stone. (2:49)
- Push up one tile. Both stones can be taken back. Then push the mirror right. (2:59)
- Place the two stones on the marked tiles, reflect inside, walk round and push the mirror out. (3:08)
Puzzle 4
Key idea: the mirror has to end on the single tile at the top middle. Draw the diagonal from there to find where you must stand (seven tiles each way), which tells you that three of the four stones must come back with you. (塞德莎 P31 3:20)
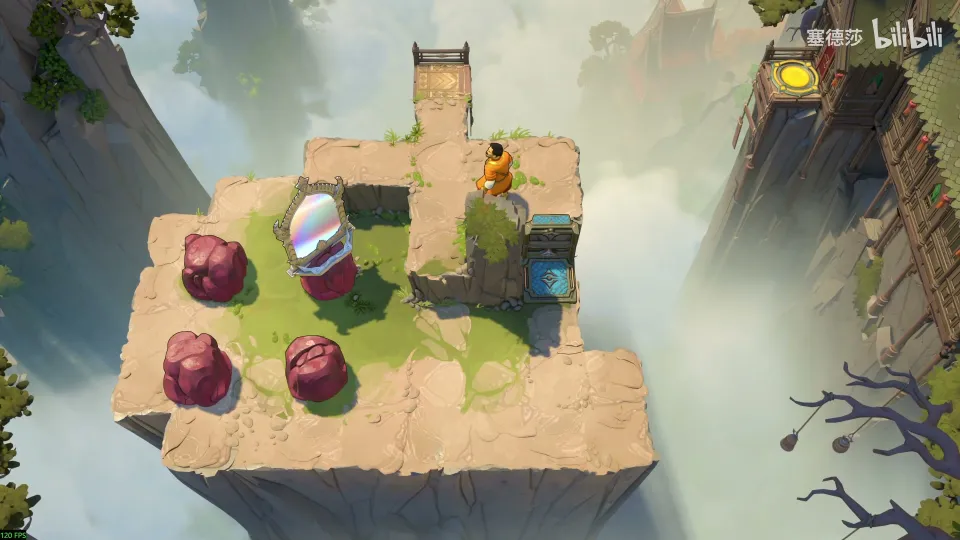
- The mirror starts on a stone, and the Trader can’t push that stack. Get the stone out first: line things up in a column and reflect below. (3:29)
- Push up to the end. Count the diagonal from the top-middle tile: that is where you must stand at the end. (4:06)
- You can lose only one stone, the one round the back. Arrange the other three in an L. (4:47)
- Reflect across, push the mirror to the crossroads and carry the three stones to the spot below. (5:07)
- Push the last stone down, open the path, push the mirror up to the end and reflect from the bottom. (5:27)
Puzzle 5
Key idea: the first falling room. Place the mirror, drop off the far edge and reflect while you are in the air. (塞德莎 P31 5:55)
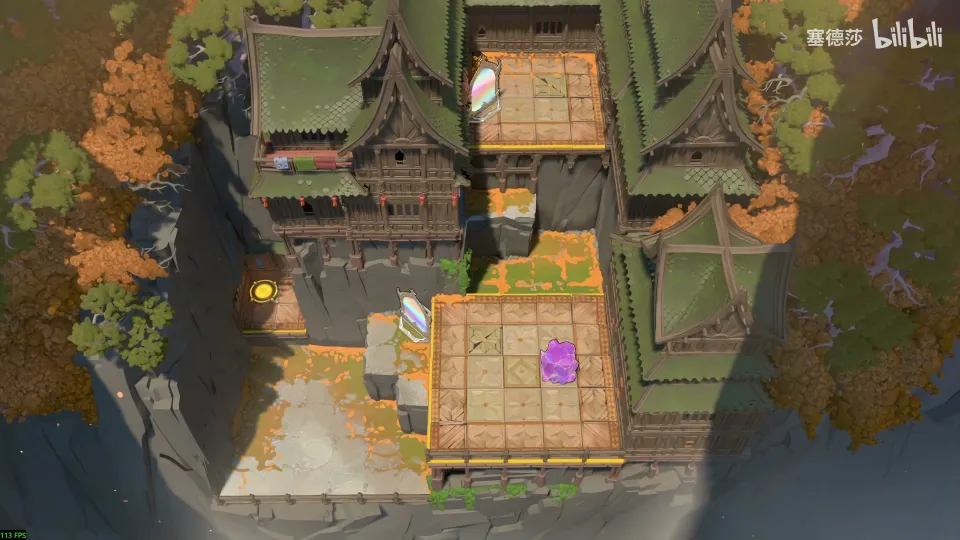
塞德莎 reaches this part after the Mirror Falling name appears on the map. (5:42)
- Put the mirror on the marked tile and fall from the far right. Reflect during the fall to land on the other side. (5:55)
- Repeat the idea: push the farthest stone down as a step, reflect it into place, then drop yourself and reflect. (6:02)
Puzzle 6
Key idea: reflect from as far away as possible, including from the empty air beside the cliff. (塞德莎 P31 6:20)
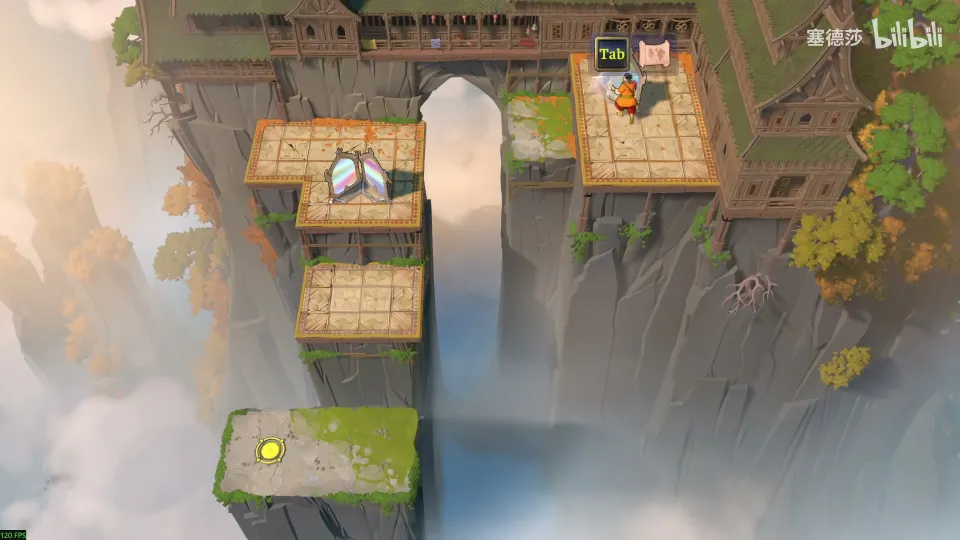
- Put the mirror at the far end, drop from the bottom and reflect. (6:20)
- For the next jump you want to reflect from the air on the left, so push this mirror down from here. (6:25)
- Use the upper mirror to reflect into that spot in the air, fall, and you’re done. (6:40)
Puzzle 7
Key idea: the obvious reflection works, but the left mirror also makes a clone of you, which falls into the abyss and fails the room. Arrange things so a stone, not a clone, lands next to you. (塞德莎 P31 7:05)
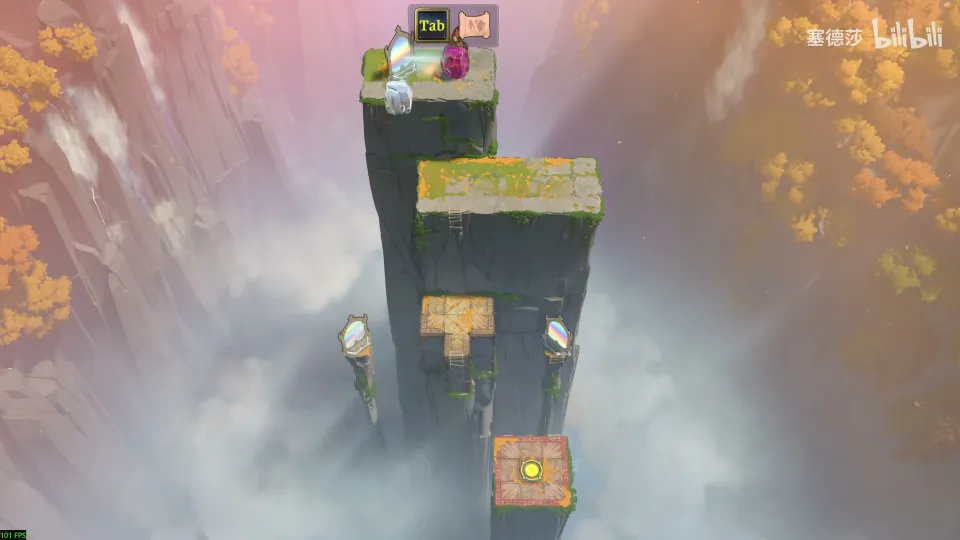
Getting there: once the cage on the map opens, fall from it and reflect onto the high ground on the right. (6:51)
- Coming down and reflecting from below gets you above the exit, but it creates a clone that dies. (7:15)
- Use the upper mirror and the stone: mirror on the marked tile, stone moved down and then onto its spot. Its reflection lands one tile left of the lower mirror. (7:36)
- Stand on the first spot (not the obvious one), reflect, then walk down quickly. The stone is reflected in beside you, so no clone appears. (8:00)
Puzzle 8
Key idea: the Trader on the high pillar must reach the blue high ground on the left. Of the three reflections available, only “walk forward, fall, reflect in mid-air” leads anywhere. Then work back from the exit to see which mirror you need. (塞德莎 P31 8:46)
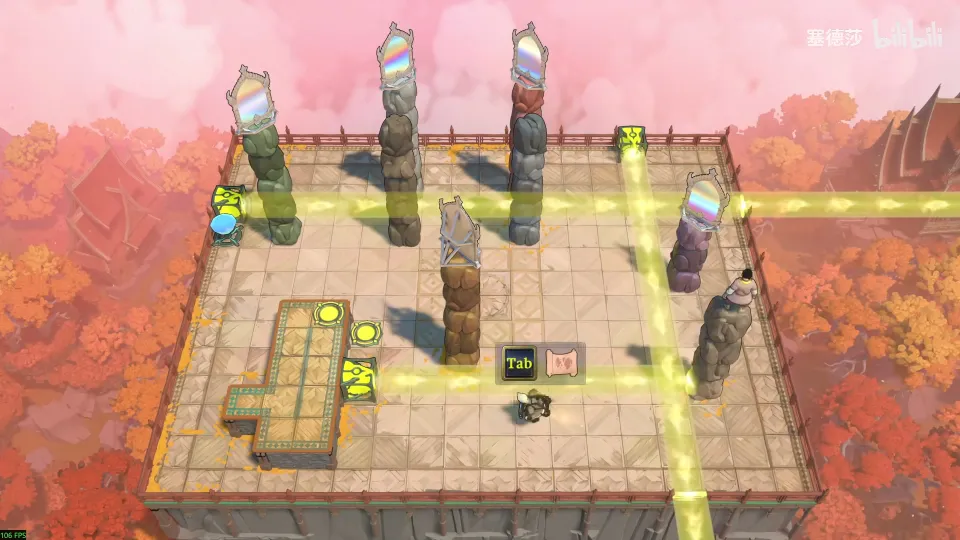
Getting there: put the mirror where its tip can reflect down, then walk round, fall from the edge and reflect onto the lower block. (8:21)
- Staying put reflects you to a diagonal tile that no other mirror reaches, and falling backwards is blocked by a stone. The only route is to step forward and reflect while falling. (8:48)
- Work back from the exit: the right-hand mirror is the one on the diagonal, and its final spot is where the stone falls when pushed left. (8:48)
- A falling reflection needs a mirror at least one level lower than you. Lower the five-high pillar to four, and set the next mirror to three high. (11:02)
- Lower the spike by one so it doesn’t make a clone, and lower the stone that blocks the line (at most one stone high, since you walk left later). (11:33)
- Go and wait at the exit, start the Trader: reflect, reflect again at once, walk left, fall and reflect. (12:03)
Puzzle 9
Key idea: only the gem on the right can hold the button. The Explorer fetches it in two steps: reflect far down into the air with one mirror, then, while falling, reflect sideways with the other. (塞德莎 P31 12:16)
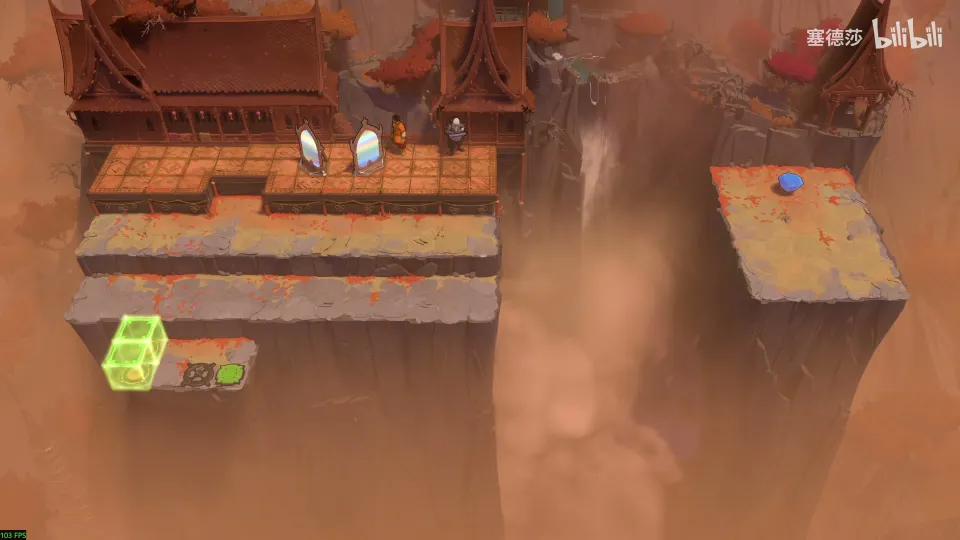
- The two mirrors can’t reach the button, so the gem is the only option. (12:27)
- Put one mirror near the edge and drop the other one down. (13:27)
- Start the Explorer from the far left and reflect into the air; as it falls, the other mirror is one level down and sends it right. 塞德莎’s first try was a tile short, so he adjusted the mirrors. (13:45)
- Coming back works the same way: bring a mirror down, push it below, then reflect twice. (14:14)
- Put the gem on the button and let the Trader push. He can’t push the Explorer while it stands on the gem: that stack is too heavy. (14:41)
Puzzle 10
Key idea: a stone has to sit in front of the bottom-right exit, and no push gets it there. Draw the diagonal: the mirror must be in the air, so push the mirror off the edge and reflect the stone while the mirror falls. (塞德莎 P31 15:56)
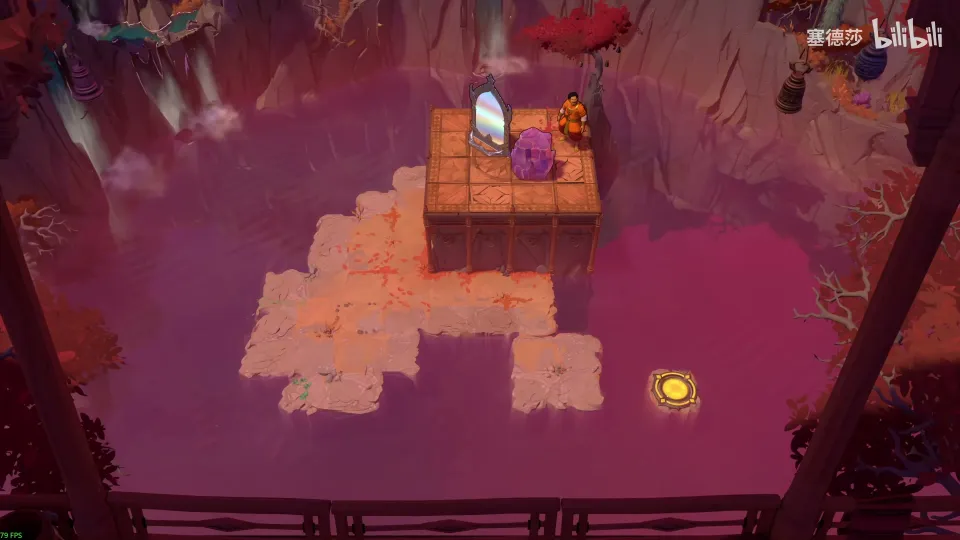
Getting there: open the path on the right first, then use falling reflections twice: down to the bottom left, then from the high ground jump right and reflect onto the middle high ground. (15:16)
- The stone can only end on one tile; the diagonal from there puts the reflection point in mid-air. (16:13)
- Bring the stone down, push the mirror off the edge and reflect once while it falls. (16:40)
Overworld puzzle 1
Key idea: use the trick from puzzle 10 on the map: push a mirror off the edge and, while it falls, reflect the new stone down to lay a path. (塞德莎 P31 17:03)
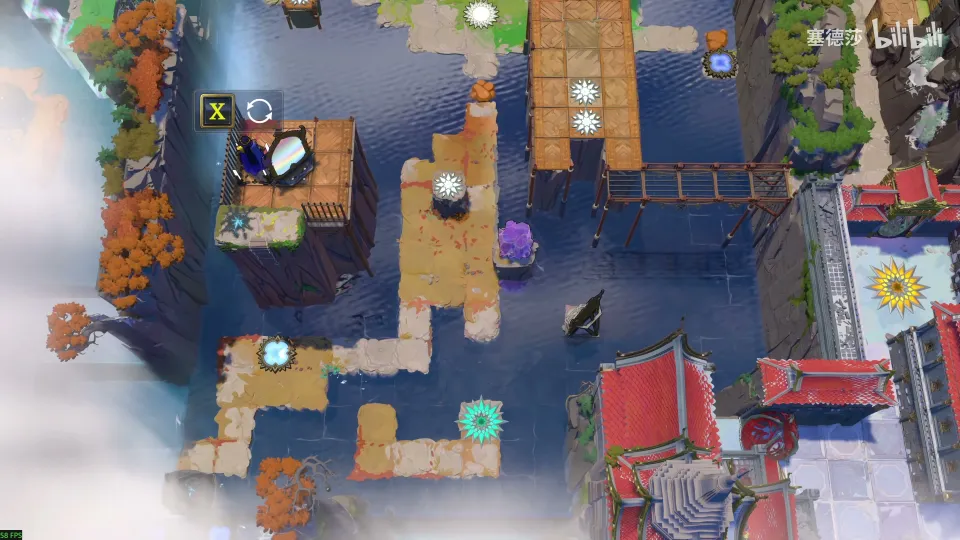
- Go up and reset the mirror, then push it down from the marked spot and reflect the stone down. (17:14)
- That lays a path. Reset again and reflect down to reach the next room. (17:25)
Puzzle 11
Key idea: the red beam falls with gravity. Stand on a red block while it’s lit and the block under you drops. Build a tower of two crystals with the red beamcaster on top, then reflect the crystals out one at a time so the beam drops a level each time: off, on (the door opens), off. (塞德莎 P31 17:40)
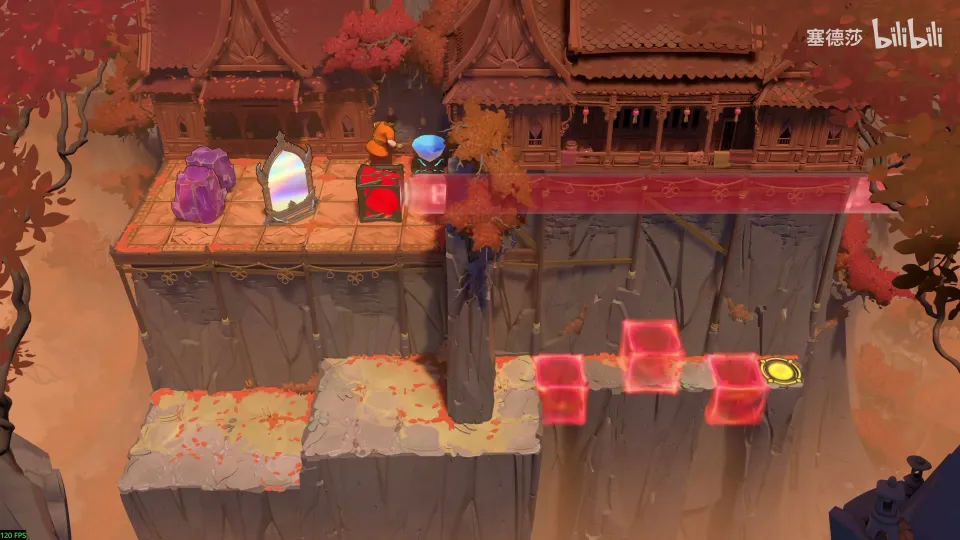
- Pushing the red beamcaster down and walking to the door doesn’t work: lit red blocks under you drop away. (18:11)
- You need three phases: beam off your path, beam on the door, beam off again. (18:21)
- On the left, stack crystal 1, crystal 2 and the beamcaster on the third level. Place the mirror so it reflects the crystals into the air, where they fall away. (18:51)
- Walk over, reflect once (the beam drops onto the door and opens it), reflect again (it drops to the floor, out of your way). (20:09)
Overworld puzzle 2
Vertical Mirrors
Key idea: the first vertical mirrors are on the map. Use them to fall and climb, and get a stone into the water to bridge the gap. (塞德莎 P31 20:33)
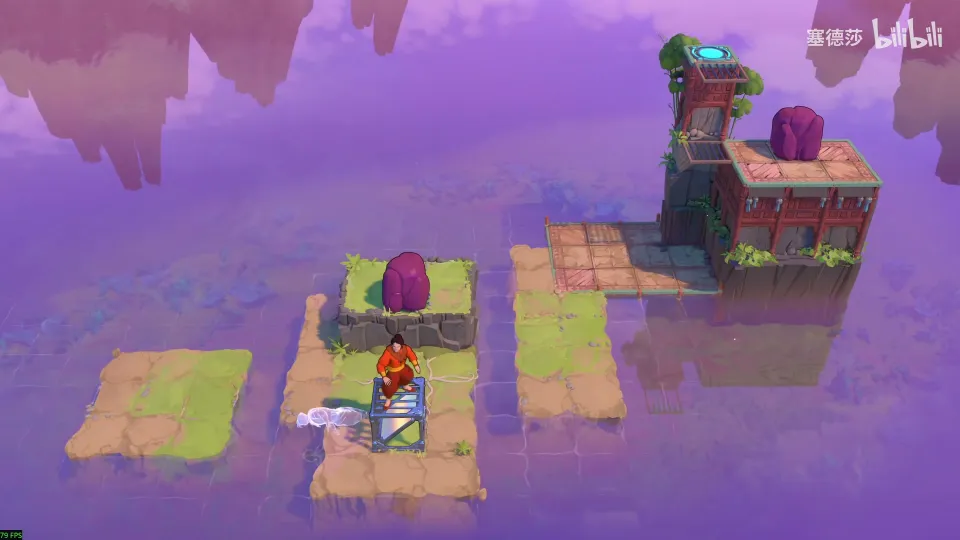
- Reflect across with the vertical mirror. You fall, and you always land upright however close to the mirror you were. (20:45)
- Go up and push the stone down. Don’t push it straight into the water, or the mirror can’t get past. Then push the mirror right. (21:15)
- Push the next stone down, push the mirror down, reflect up and drop into the gap to take the stone out. (21:35)
- The reach is one tile short, so push the stone into the water. Activate the teleporter below. (21:45)
Puzzle 12
Key idea: mirror shuffling with a vertical mirror. Never park the mirror in a corner, where you can’t get it back, and lay the mirror before the stone at the end. (塞德莎 P31 22:13)
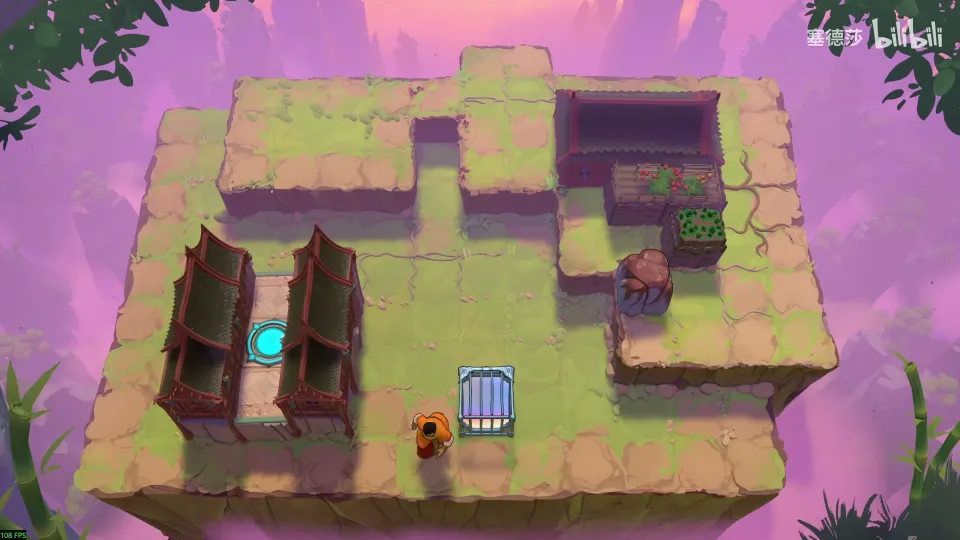
- Place the mirror, push the stone down one tile, reflect and push it right by exactly one tile; any further and the mirror can’t come back. (22:22)
- Move the mirror, reflect up, push up one tile and push the stone across without coming down. (22:35)
- To push the stone further left, build a platform under it out of the mirror itself, loop round and use the notch above to take it out again. (22:45)
- Two gaps remain: one for a stone, one for the mirror. Lay the mirror first; if the stone goes first it blocks the mirror’s landing spot and you can’t climb back. (23:05)
Reflecting up afterwards shows the Vertical Mirrors name and a hint that reads roughly “stand at the summit, look higher” (puzzle 19 explains it). (23:28)
Puzzle 13
Key idea: pushing the crystal into the one-wide gap blocks the water channel it has to travel along. Use a mirror in the water as a bridge you can raise and lower by reflecting. (塞德莎 P31 23:49)
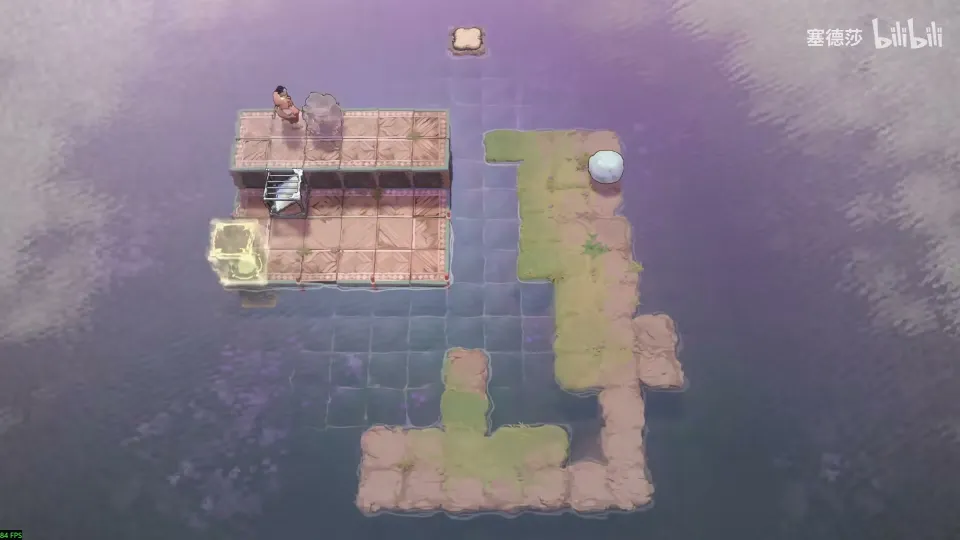
- The obvious push into the gap is wrong: it blocks the channel. (23:49)
- Reset, go up, and push the stone into the water, then the mirror into the water. A reflection now lifts you (or an object) up and the next one brings it down again, like a drawbridge. (23:49)
- Push the stone into place, raise the bridge, push across and lower it. 塞德莎’s explanation and the moves run until 25:34. (23:49)
Puzzle 14
Key idea: two tiles of water need filling, and you can’t push them full. Use the mirror to lift the crystal out of the water and then push it across. (塞德莎 P31 25:34)
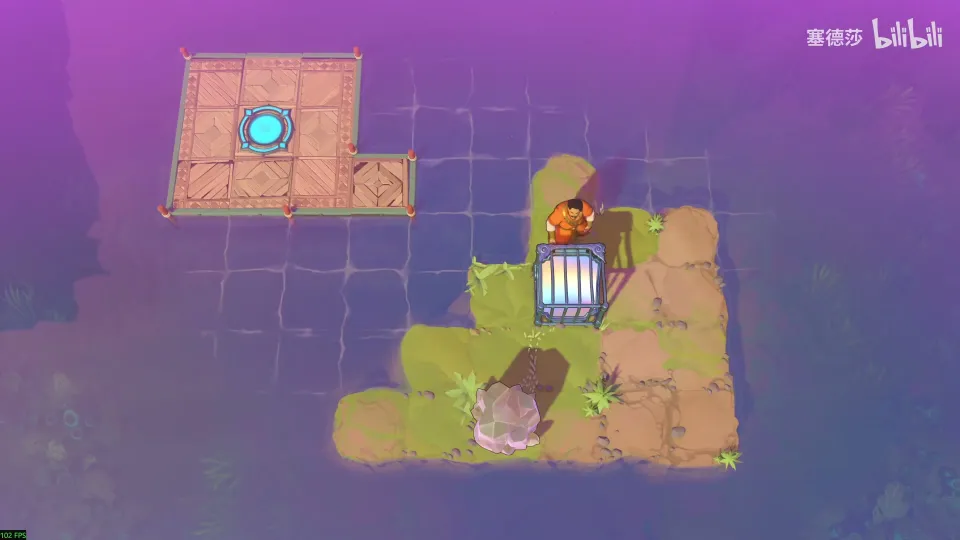
- Take the mirror out of its notch. (25:48)
- Place the mirror, reflect up and back down, and push the stone right by one or two tiles. (25:48)
- Move the mirror to bring the stone up. (25:58)
- Push the crystal next to the water and the mirror beside it, lift the crystal out of the water and push it left. (26:19)
Puzzle 15
Key idea: two vertical mirrors facing each other make a U. Each bounce moves you towards them by the gap between them. Set the gap to the drop you need. (塞德莎 P31 26:45)
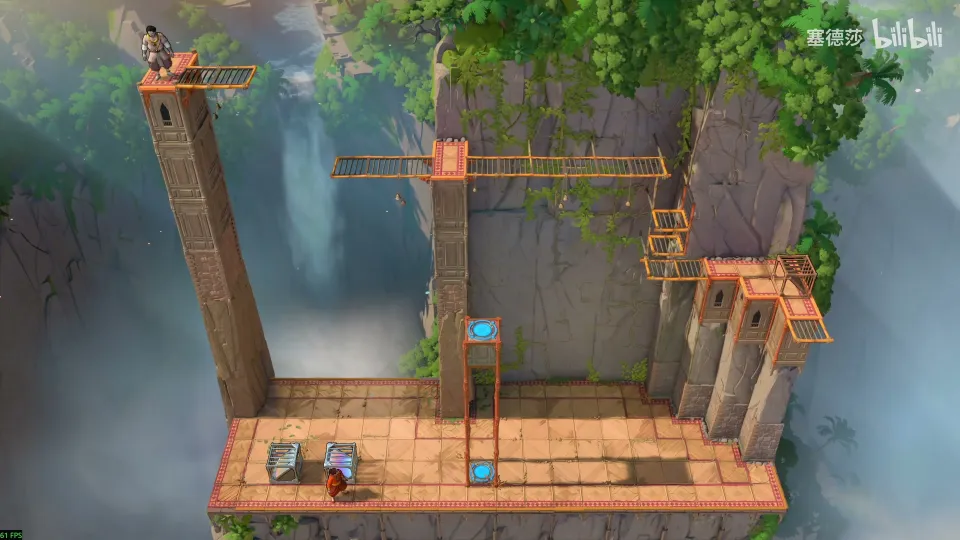
- Line up the two lower mirrors as a U. With a gap of three, every reflection moves you three. (26:58)
- On the right you need to drop four, so set the lower pair four apart. (27:53)
- Put the remaining mirror under that mirror. (28:02)
- Don’t take the top Trader to the top exit; he can’t get there. The lower Trader reflects off the farthest U onto the exit, and then the top one can walk down. (28:23)
Puzzle 16
Key idea: a bigger tower. A U takes you across, a falling reflection takes you left, and the last drop needs timing: reflect into the air and back again so you land exactly on the exit, which has a net above it. (塞德莎 P31 28:48)
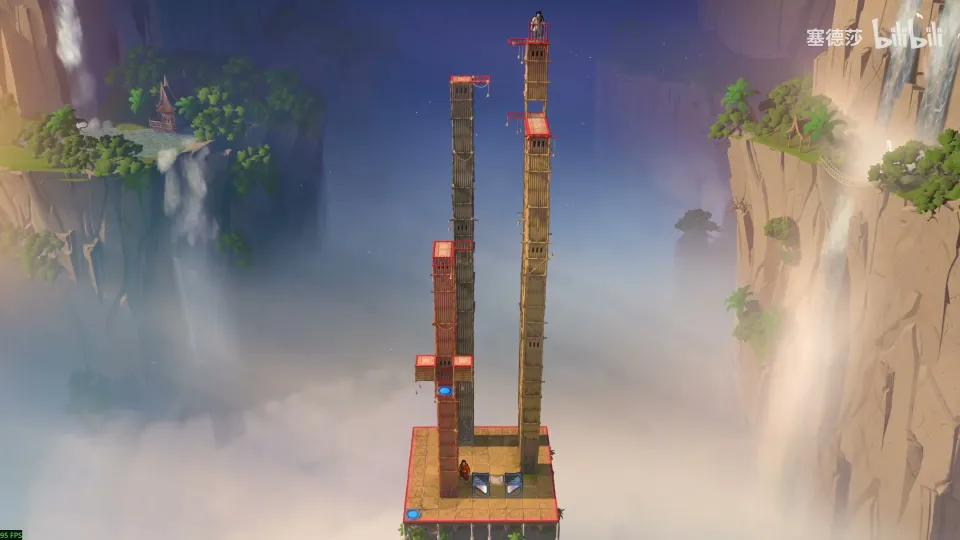
- Set the two mirrors as a U and reflect twice. (28:56)
- In the top-down view, where you fall to the left lines up with the net on the middle left. Put the mirror there. (29:09)
- Put the spike in place, drop and reflect to reach the left. (29:19)
- The exit is straight below, under a net. Use the U to send yourself into the air, watch your shadow and reflect back as it reaches the exit tile. (29:51)
Puzzle 17
Key idea: the Wizard has to get up. A falling reflection off the vertical mirror lifts it, and the Wizard can swap with an object while falling (a North mechanic). Swap with a stone at the moment you’re level with it. (塞德莎 P31 30:27)
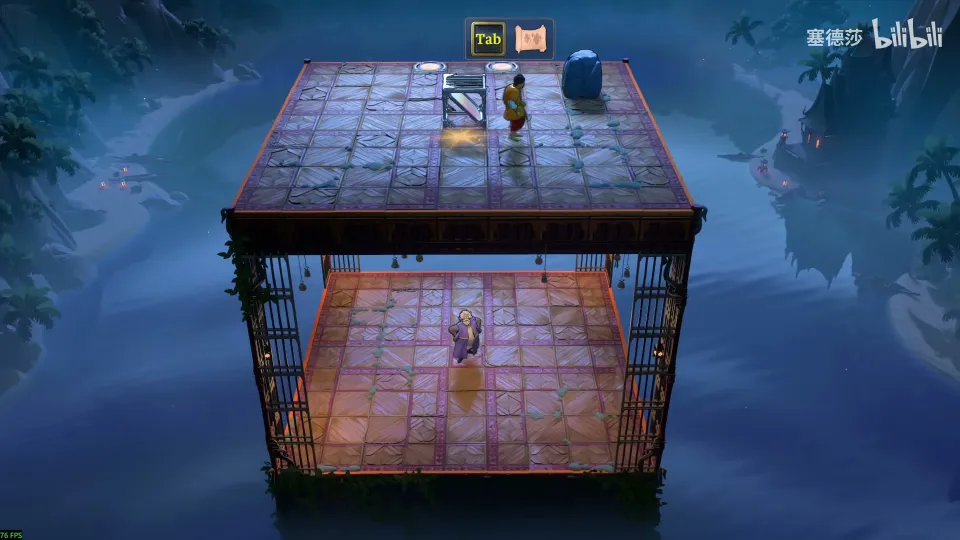
- Put the stone roughly on the marked tile, and push the mirror down so it is level with the Wizard. (30:58)
- Step out of the line of sight and stand the Wizard at the far end, or the swap won’t work. (31:09)
- Push, step aside, switch to the Wizard, and swap with the stone while the reflection puts you level with it. (31:20)
Puzzle 18
Key idea: the only mirror reflects downwards. Reflect, and your mirrored spot drops fast to the side: a reflection plus a fall is a sideways shift. Shift yourself, then the crystal, then use a gap in the side netting to come back up. (塞德莎 P31 31:58)
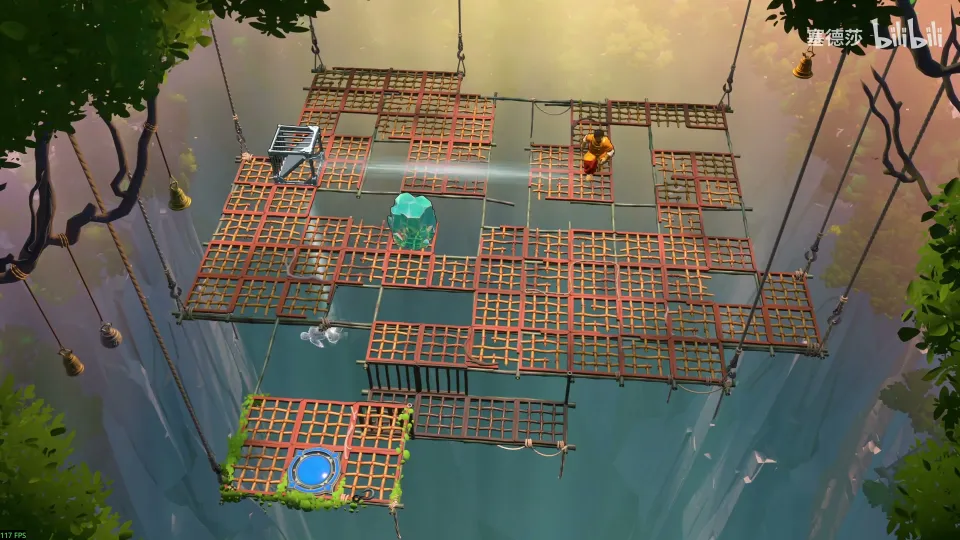
塞德莎 calls this room a big star room. Getting there: the mirror outside is only for reaching the highest point; place it and go round to the left. (31:29)
- Reflect, and land at the right moment: the shift moves you to the right. (32:07)
- Push the mirror up one, reflect here and shift onto the right-hand block. (32:37)
- Shift the crystal the same way: wait until it drops level with the opening, then reflect it back. (32:51)
- Put the crystal at the opening, move the mirror to this row and shift yourself in to take the stone out. (32:59)
- Last, a stone (or mirror) must go on the final tile. The side net has gaps you can walk down through: put the mirror here, walk down and reflect to come back up. (33:20)
- Push the stone down, go down, push it into place and come back the same way. (33:46)
Puzzle 19
Key idea: a short extra room. Reflect from a right-hand spot down into the empty ground, then quickly push a mirror down from above and use it to reflect yourself left onto the exit. (塞德莎 P31 34:40)
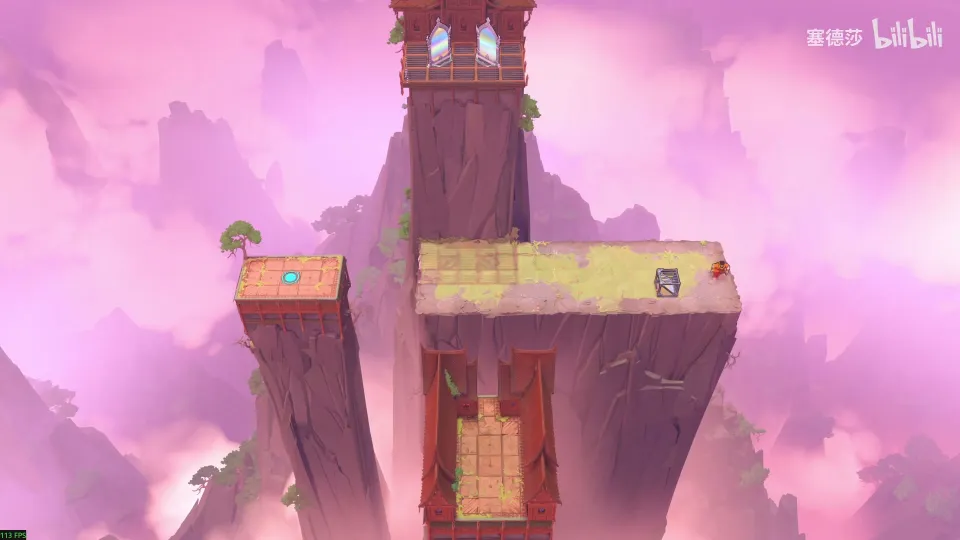
The hint from puzzle 12 refers to the big star’s crown: it now has a mirror that reflects you higher. 塞德莎 solves this extra room before going up there. (34:14)
- Plan: pick a spot on the right, reflect with the down-right mirror into the empty ground below, then reflect left with a down-left mirror. (34:56)
- Go up (you need the height), push the box down, go down and place the mirror. (36:23)
- Go back up and push the mirror down from the marked spot. (36:39)
- Immediately reflect down with the lower mirror, then across with the down-right mirror; once the falling mirror has landed, reflect with the down-left one onto the exit. (37:05)
Overworld puzzle 3
Key idea: from the top of the big star, the mirror on its crown reflects you to a new area at the top right. Here you learn to shift things on the map with a reflection and a fall, and use it to drop a stone exactly onto a target tile. (塞德莎 P31 37:31)
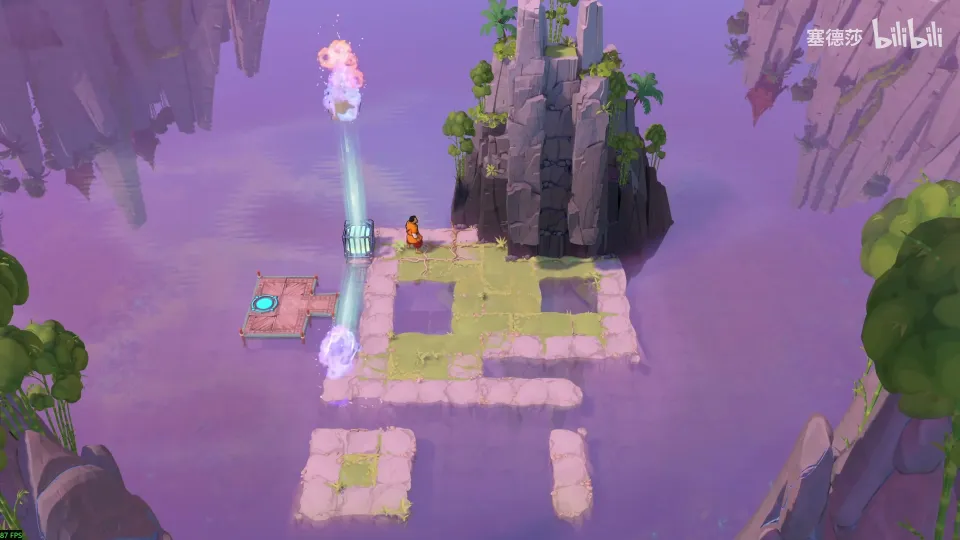
- Drop down: you’re trapped. Reflect just after you land to get out, then take the object out. (37:58)
- Use the shift (reflect, then fall towards the mirror) to bring a stone that is too far away closer. (38:08)
- Put the stone and the mirror in place, face the right way, and release at the right moment so it drops onto the marked tile. (38:28)
- Go up: from here you reflect onto the second island from the right. (38:42)
Puzzle 20
Key idea: walk from the left onto the middle 4×4 platform and then to the exit by laying a bridge in the water. Push the mirror into the water and reflect from there. (塞德莎 P31 38:55)
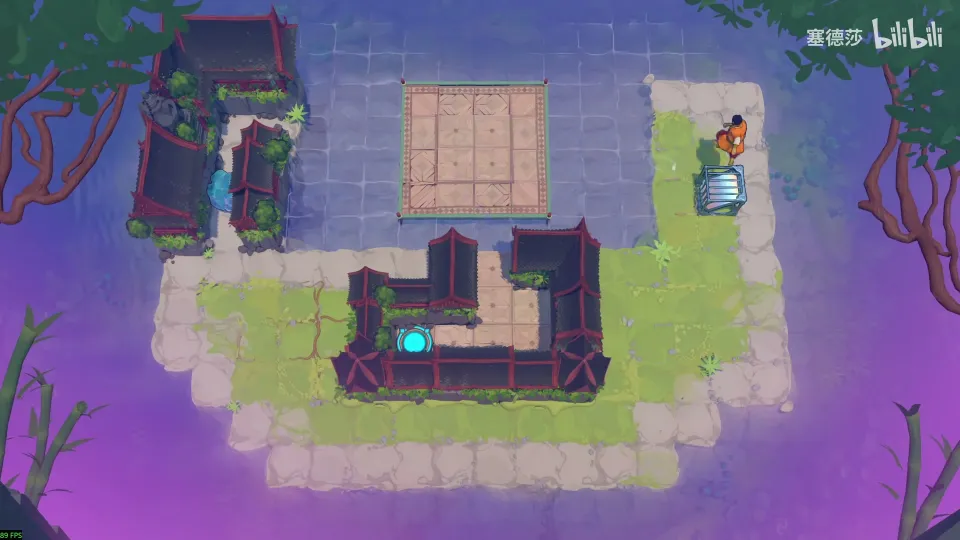
- Take the left stone out: place the mirror, push the crystal inwards and let it drop to the far right. (38:55)
- You need to control where the bridge lies in the water. Push the mirror into the water, put the stone in position and reflect. (39:35)
- Lay the first tile, go up and reflect again to lay the second. (39:46)
Puzzle 21
Key idea: the Explorer must walk right without losing height, so it needs a three-high step. Stack two crystals by timing: reflect the far one into the air, and while it falls, reflect the near one up underneath it. (塞德莎 P31 40:12)
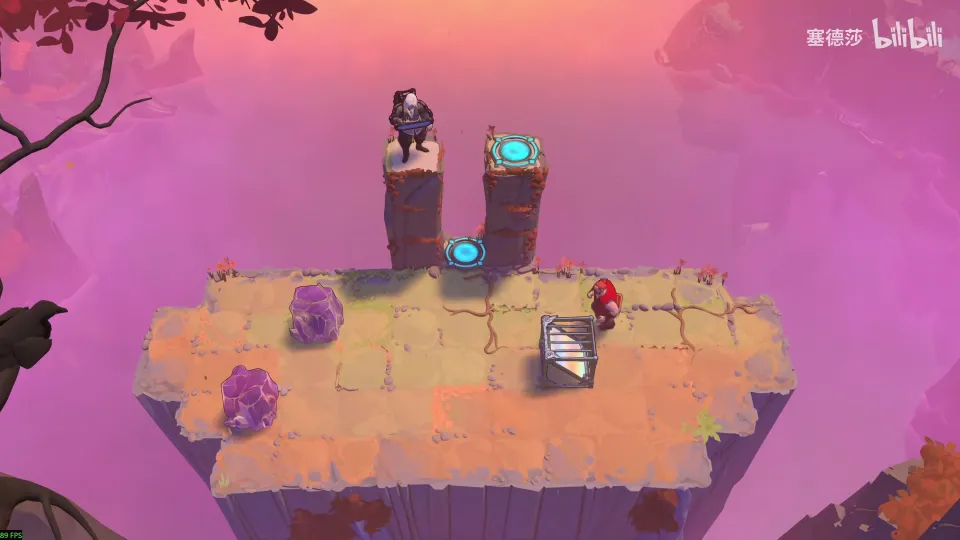
Getting there: the cage on the map opens after puzzle 20 and leads to the middle island. (40:00)
- Put one stone as far away as possible and the mirror as far left as possible. You’ll need the mirror again afterwards. (40:30)
- Reflect the far stone; while it is still falling, move the other stone close to the mirror and reflect it up. They land stacked, three high. (40:42)
- Bring the Explorer up and walk across. (41:03)
Puzzle 22
Key idea: the stone must land on the right-hand button. Reflect it high first, then switch to the other mirror while it’s up there and reflect it onto the button at the right moment. (塞德莎 P31 41:21)
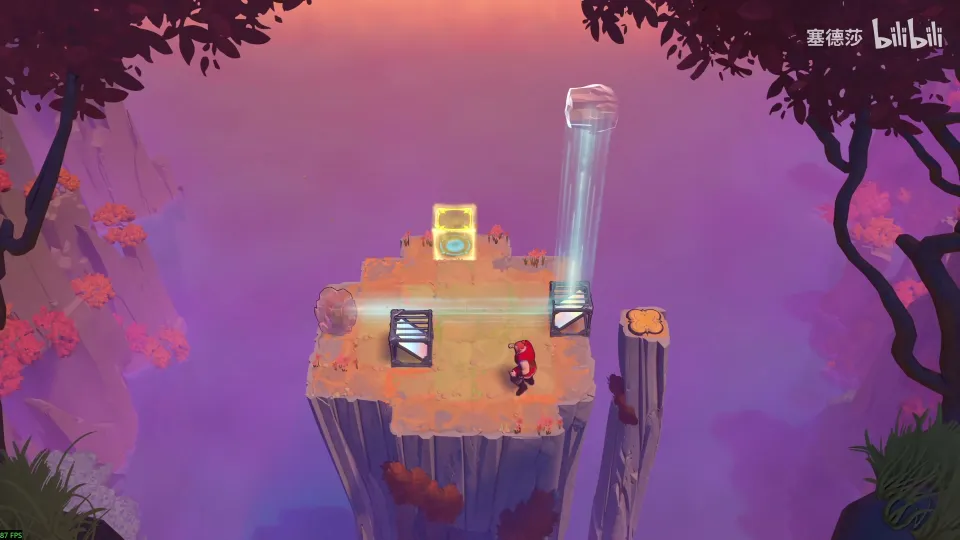
- Use the first mirror to send the stone to the farthest high point. (41:38)
- While it is up high, switch mirrors and reflect it onto the button. (41:52)
Puzzle 23
Key idea: kill the goblin by dropping a crystal on it. Reflect a far crystal so it starts falling, push the goblin near the mirror, and reflect the goblin up under the falling crystal. (塞德莎 P31 42:11)
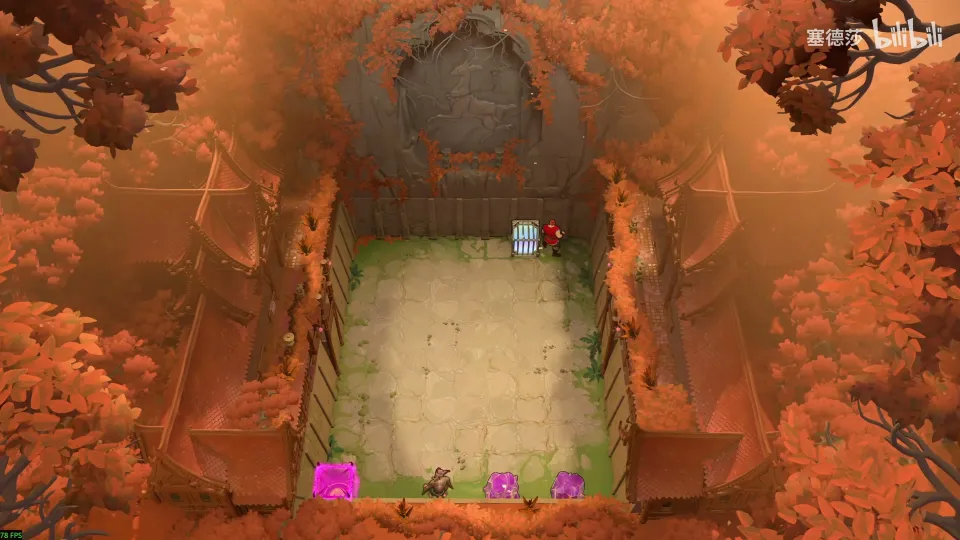
- Move the goblin to a spot close to the mirror. Don’t put it next to the spike. 塞德莎 uses the tightest spot, one tile off. Take the mirror out. (42:41)
- Take out a stone too: you can’t push the goblin directly, so you push it with the stone. (42:52)
- Reflect the far stone, push the goblin in at once and reflect it. The falling stone crushes it. (43:03)
Puzzle 24
Key idea: you need a five-high tower but only have two mirrors and one stone. Use the two mirrors to clone the stone into five, then stack them by swapping a falling stone in for the mirror. (塞德莎 P31 43:20)
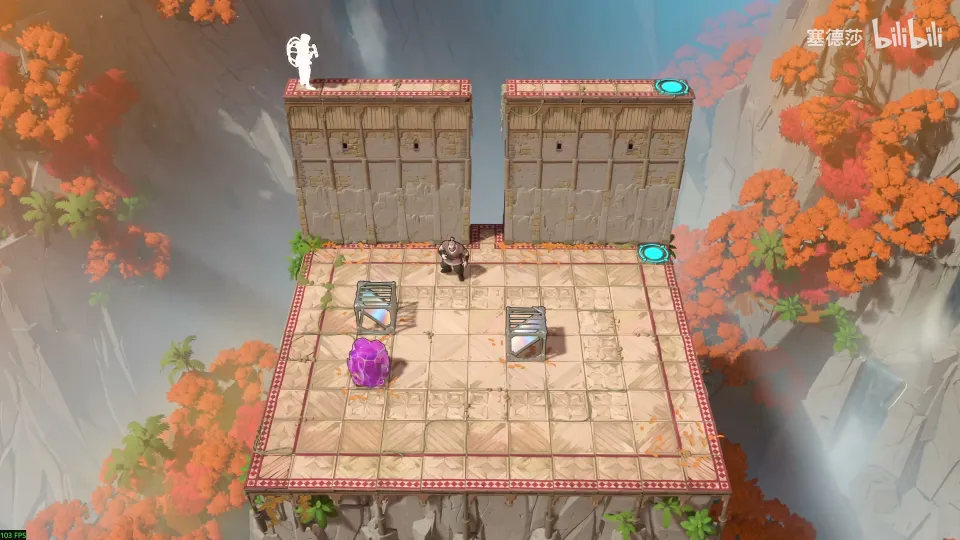
- Make clones of the stone with the two mirrors until you have five; more is no use. (43:47)
- Send one stone very far, and while its reflection is falling, replace the mirror with a stone. Now you have two high. (44:14)
- Repeat with another far stone each time: three, four, five high. (44:45)
Puzzle 25
Key idea: only one mirror reaches the top, and even at its longest reach it is one tile short. Lengthen the reflection by sending a hero high into the sky first, then slide the mirror in and reflect. (塞德莎 P31 45:13)
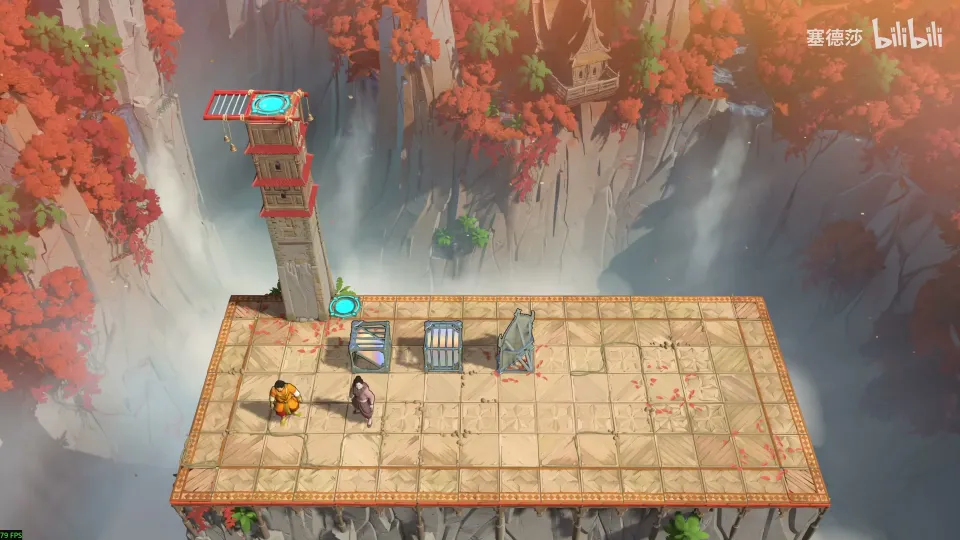
塞德莎 calls this another big star room.
- The mirror reaches the top, but the farthest point is still one tile short. (45:37)
- A hero high in the air over the mirror gives a much longer reflection. Set up, send a hero to the far end and reflect, which puts them very high. (46:13)
- Right after that reflection, push the mirror up into place and reflect. (46:25)
That clears the high ground of Vertical Mirrors’ first half. (46:36)
Puzzle 26
A Mirror Overhead
Key idea: carry the stone on a hero’s head and use the mirror to put it on the ground. Only the top-left tile works, and it has a notch above it you can slip the stone into first. (塞德莎 P31 47:15)
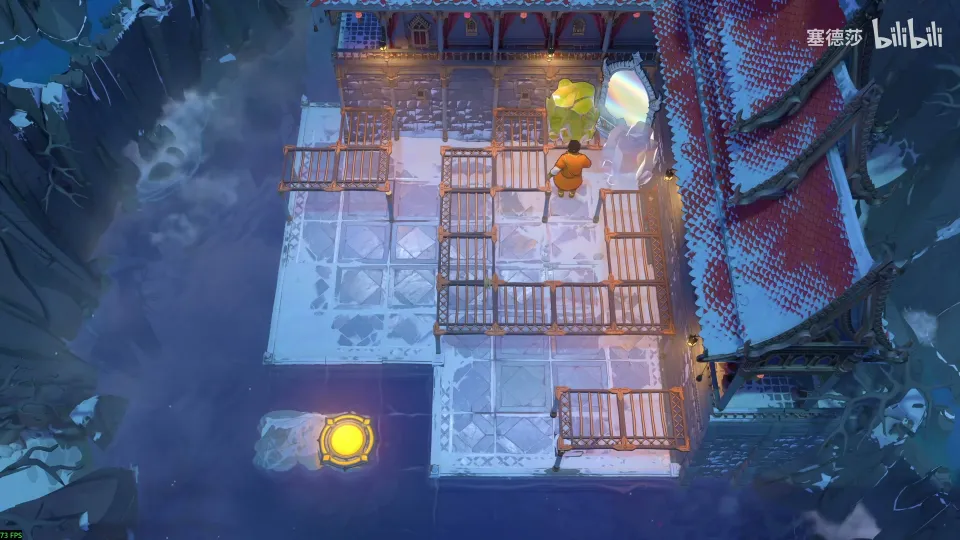
Getting there: from the map, go down the path below the big star; the middle part is reached with a reflection. (46:56)
- Goal: get the stone off your head onto the ground, then push it into the water. (47:28)
- The ground tiles you can reflect to are in one row and one column; only the top-left one works. Slip the stone into the notch above it before reflecting. (47:37)
- The real target is the bottom-right net. Get out: put the stone up, reflect here, send it on, reflect, send it on again. (48:11)
- Wait inside the top-left spot and the stone comes out. (48:21)
Puzzle 27
Key idea: the lower Trader must keep its height, so the upper Trader carries it. Then push the mirror onto a Trader’s head: it can reflect from anywhere and turn. (塞德莎 P31 48:41)
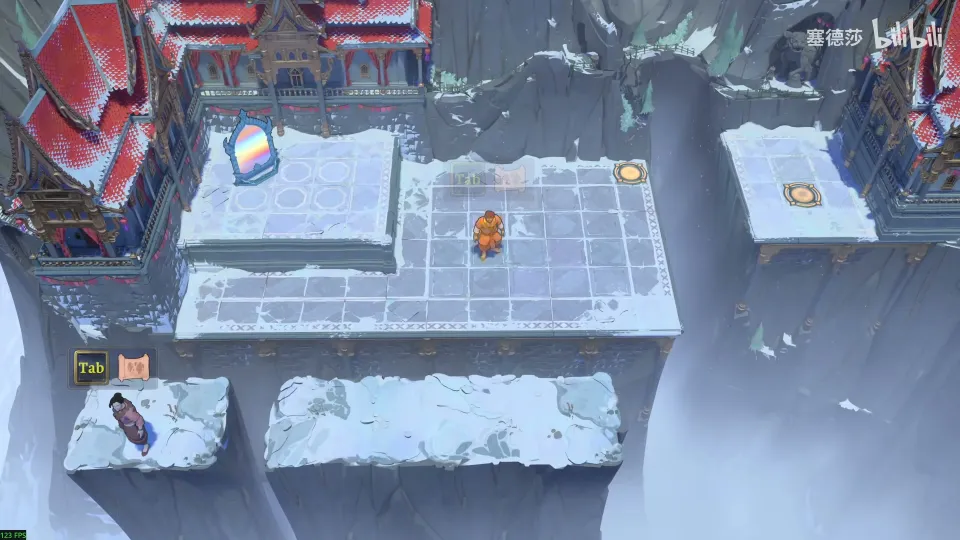
- Use the upper Trader to carry the lower one; the right side is high ground, so it can’t lose height. (48:52)
- Drag it onto the platform and take the mirror out. The mirror needs to end up roughly where the right-hand Trader stands. (49:01)
- Push the mirror onto the Trader’s head. Reflect the other mirror down, turn, and reflect right. (49:18)
Overworld puzzle 4
Key idea: the map’s reset point holds a mirror two levels up, so you reset with the mirror on your head and use it to move a stone round the courtyard while you hold the yellow button. This gives you A Mirror Overhead. (塞德莎 P31 49:45)
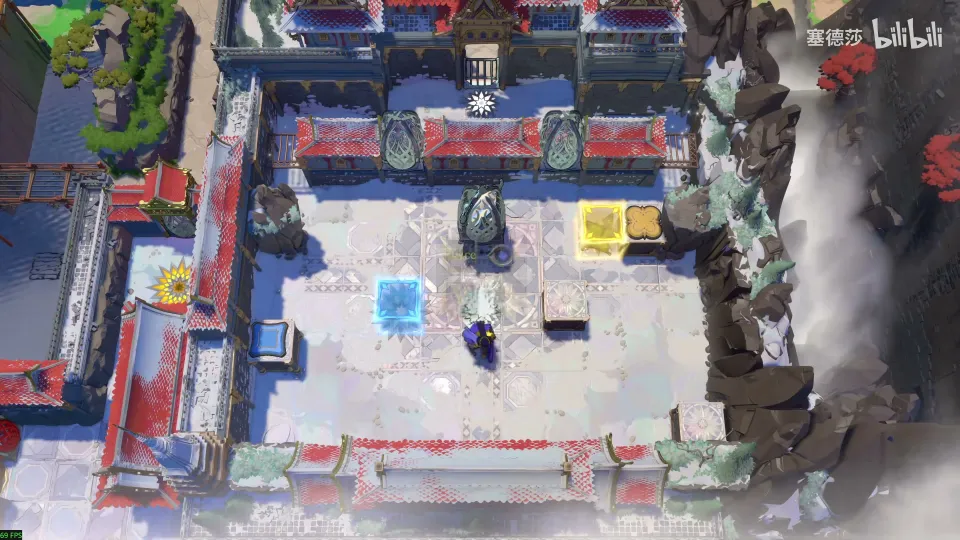
- The reset point keeps the mirror two high, so you come back carrying it. (49:56)
- Hold the yellow button on the right. Reflect the stone to the empty bottom-right tile, then on twice more. (50:03)
- The A Mirror Overhead name appears. (50:16)
Puzzle 28
Key idea: kill three goblins with the mirror on your head, using the checkerboard rule: a goblin moved only by mirrors stays on its square colour. Bring the light-square goblin next to you first, then the other one between them. (塞德莎 P31 50:26)
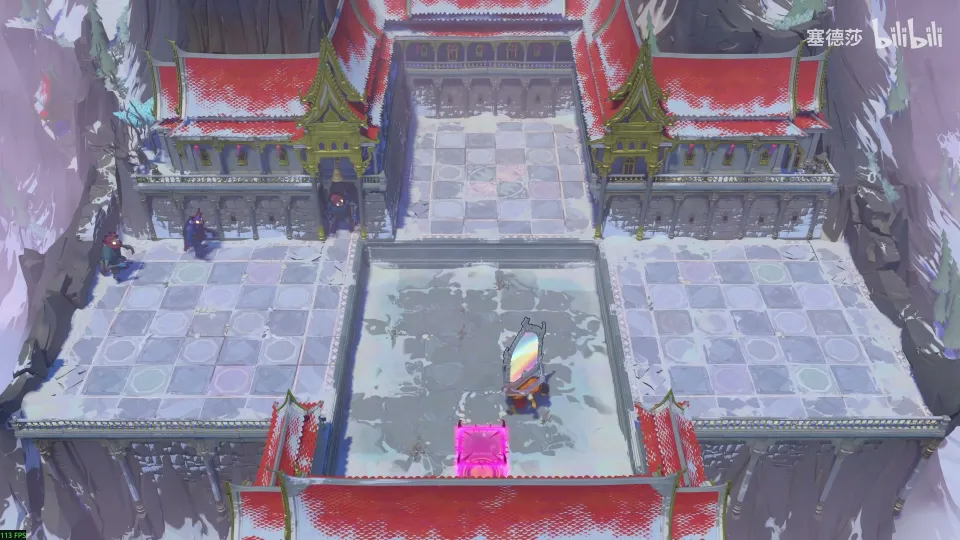
- The floor is coloured like a chessboard. One goblin stands on a dark square and always will; the other is on a light square. (50:43)
- Move the light-square goblin to the tile nearest you: reflect it here, then right, then to the diagonal spot, then here. (51:23)
- Reflect the other goblin up, right, to its diagonal, and finally between the two. (51:48)
Overworld puzzle 5
Key idea: in the courtyard, two stones must hold the left button. One direct reflection falls a tile short, so first reflect a stone to the ground and push it back into range. Reset facing down so the mirror on your head points the right way. (塞德莎 P31 52:11)
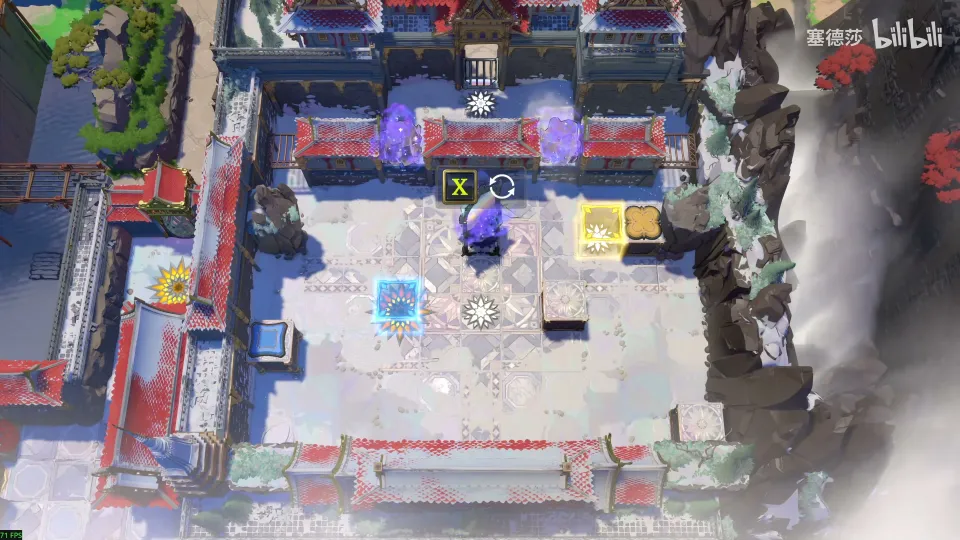
- Reset first; the stone is badly placed. (52:19)
- The colour is right for a direct reflection but the distance is one short. Reflect one stone to the ground, push it back, then reflect it into place. (52:51)
- The head mirror’s direction depends on how you faced when you reset. Reset facing down. (54:10)
- Reflect the second stone, then walk left to reflect it onto the button. (54:23)
Puzzle 29
Key idea: the big star room. Use the checkerboard to see that only one stone can reach the odd-coloured button, then find the single spot far enough away to reflect it there (塞德莎 counts 24 tiles against 22 and moves the setup one tile right). (塞德莎 P31 54:32)
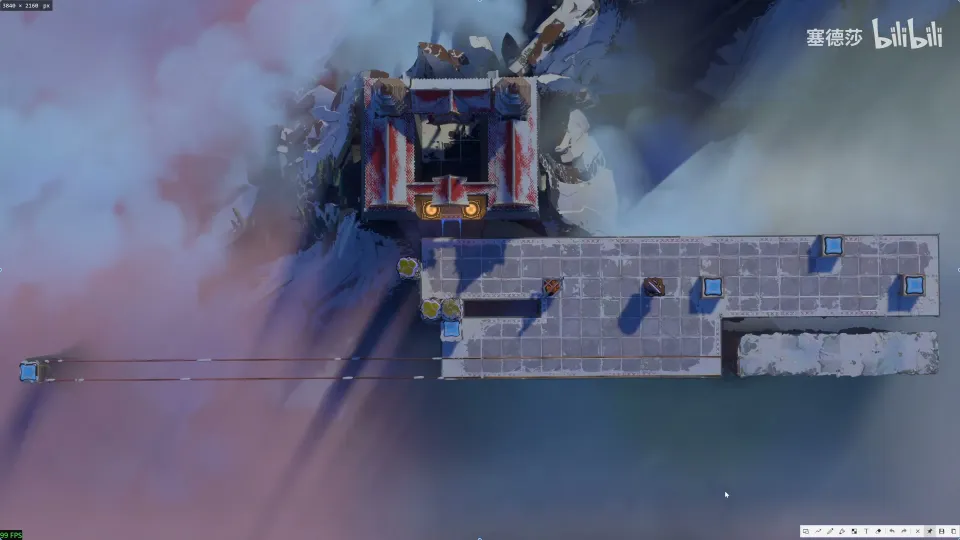
- The far-left button is hard to count. 塞德莎 takes a screenshot of a grid column and pastes it alongside to count the tiles. (54:41)
- Mark the squares by colour: one stone sits on the other colour, so it must go to the one button of that colour; all the other buttons share the other colour. (55:01)
- Find the farthest reflection point that reaches that button. 塞德莎 counts 24 tiles one way and 22 the other, so he shifts the setup one tile right. He believes it is the only spot but hasn’t checked. (55:01)
- Reflect two stones to the spot, then send the right stone to the leftmost button. (58:28)
- Send the next stones to the rightmost button and the nearer ones, and the last one with a U-shaped double reflection. (58:38)
Puzzle 30
Key idea: the easy-looking route makes two clones, because both mirrors are at the same height. Drop a stone so it smashes the lower mirror at the moment you reflect. 塞德莎 left this room for later and solves it in part 32. (塞德莎 P32 20:55)
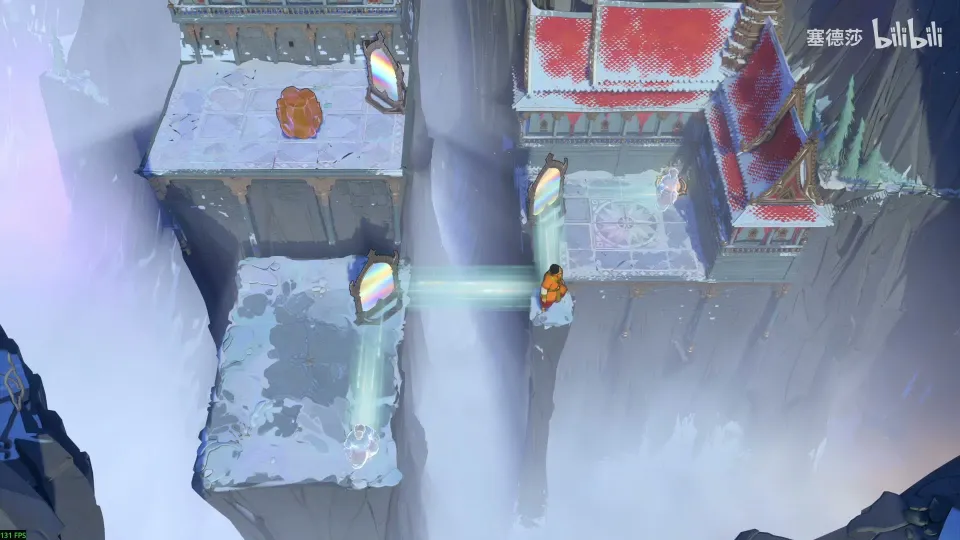
- Reaching the platform and reflecting twice looks enough, but the second reflection creates two clones. (21:17)
- The clone comes from the lower mirror still being there after you reflect. Break it with a falling stone at the same moment. (21:37)
- Put the stone where its reflection lands on that mirror’s tile, then go down; the stone stays up. (21:57)
- Place the mirror and reflect: the stone falls, the mirror breaks and no clone appears. The door on the map opens. (22:17)
Puzzle 31
Vertical Mirrors (continued)
Key idea: a chain of rooms where the Thief heads to rescue the Cleric from a goblin fort. The Thief can only pull. A stone that reaches the shore can never go into the water again, but one that falls onto the space above the vertical mirror can be slid along the shore, so you choose which tile it fills. (塞德莎 P32 0:41)
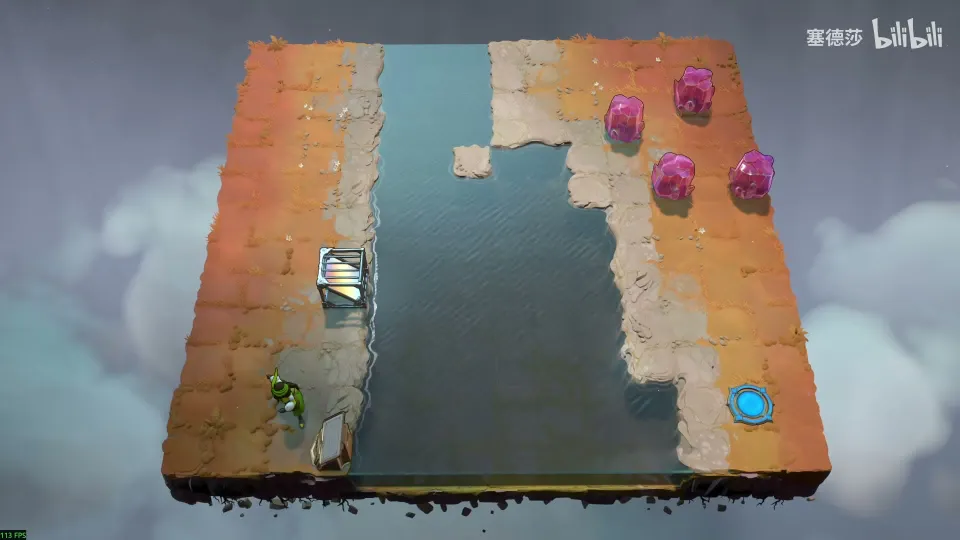
Getting there: in part 32 塞德莎 heads down from the map’s top and drops the mirror into the water to make a path. (0:21)
- The vertical mirror lets you pull a stone into the water. (1:01)
- The two stones in this row make two tiles in a row, joining the single tile already there. (1:41)
- Pull the farthest stone over to fill the last gap, and drop the remaining two on the marked tiles. (2:03)
Puzzle 32
Key idea: the same idea, one tile short. Two stones in a column plus one pulled from the other side make three; for the fourth, pull the mirror over that tile and drop a stone through it, which needs one extra ground tile first. (塞德莎 P32 2:23)
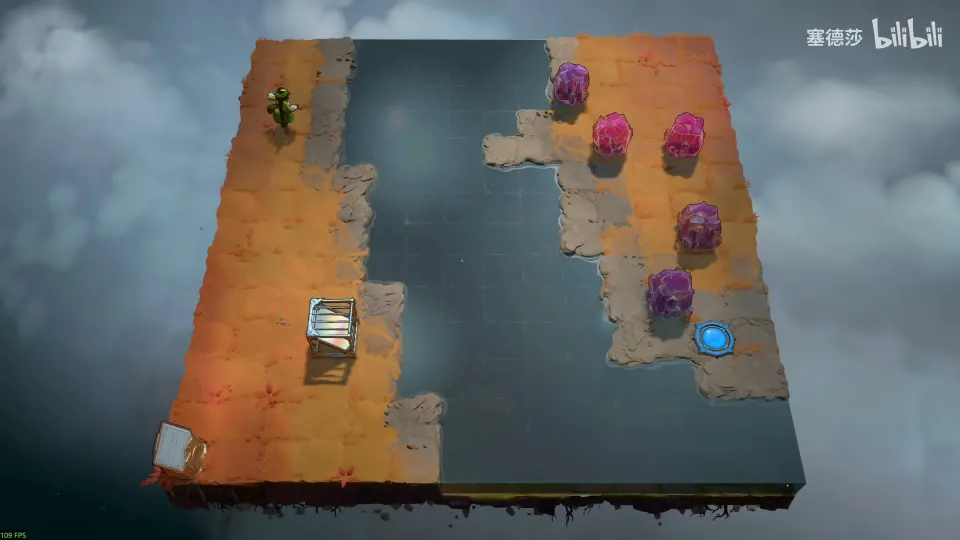
- The two stones in one column and a stone pulled from the far side give three tiles. (2:45)
- The other stones are too far, so use the mirror: pull it above the stone’s tile and drop the stone into the water. (3:05)
- The mirror can’t quite get there, so drop one stone as extra ground first, then pull the last stone across. (3:27)
Puzzle 33
Key idea: this exit is higher, so you must bring the mirror across too, which needs a straight path. That decides where the first stones go. (塞德莎 P32 3:49)
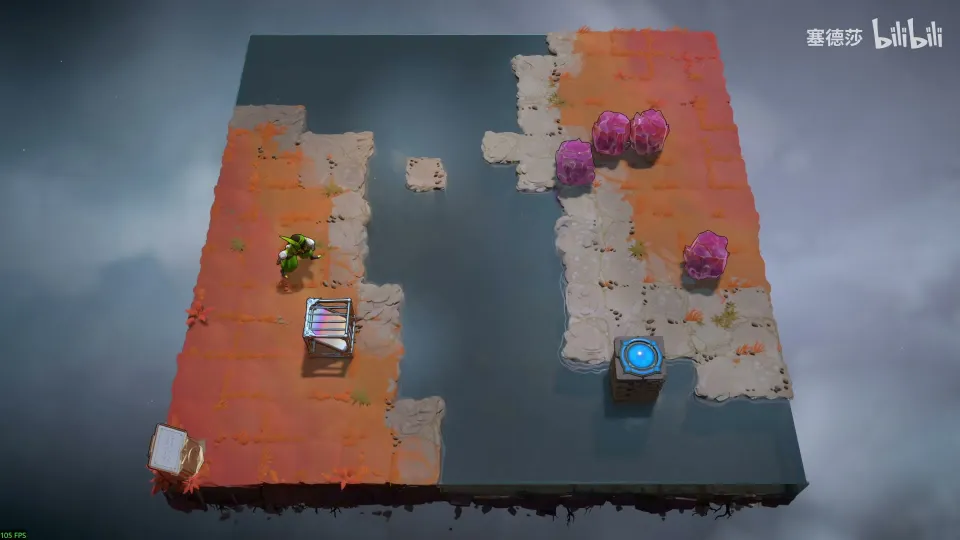
- You have no choice at the start: drop the first stone here and the next two on the marked tiles. (4:09)
- Once across, place the next stone and drop it so the mirror can be pulled over. (4:31)
- Pull the mirror across to the marked spot, then left. (4:51)
Puzzle 34
Key idea: the fort’s outskirts. You must pull the far mirror back, but the Thief can’t pull it into this row or column, so you can only climb to the second level here. Open the gaps first, and use the bottom-left vertical mirror to pull apart two stacked crystals. (塞德莎 P32 5:21)
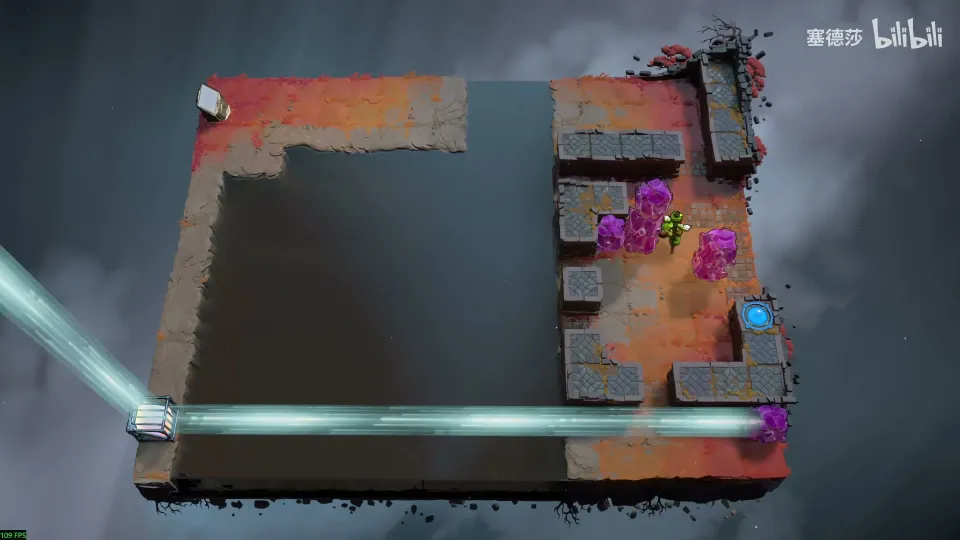
Getting there: the previous room unlocks a crystal. Reset, put the mirror in the crystal’s row, drop the stone, cross to the right and drop the mirror into the water. (4:51)
- Pulling the mirror back needs three stones: pull the three-stack of crystals here. (6:11)
- Pull one more over from the other side. (6:33)
- Two crystals are stacked and you can’t split them by pulling. Use the bottom-left vertical mirror to pull out the bottom one. (6:54)
- Do the same for the other, and leave one stone at the doorway. (7:38)
- Pull the mirror up while you fill the path, fill the water, pull the mirror over and climb up. (7:58)
Puzzle 35
Key idea: the fort gate is full of goblins. Plan the kills: three triple kills on the high platform using three outside goblins, then two double kills. The trap is the one goblin that can reach the bottom-right corner; if you use it anywhere else, the room can’t be solved. (塞德莎 P32 9:05)
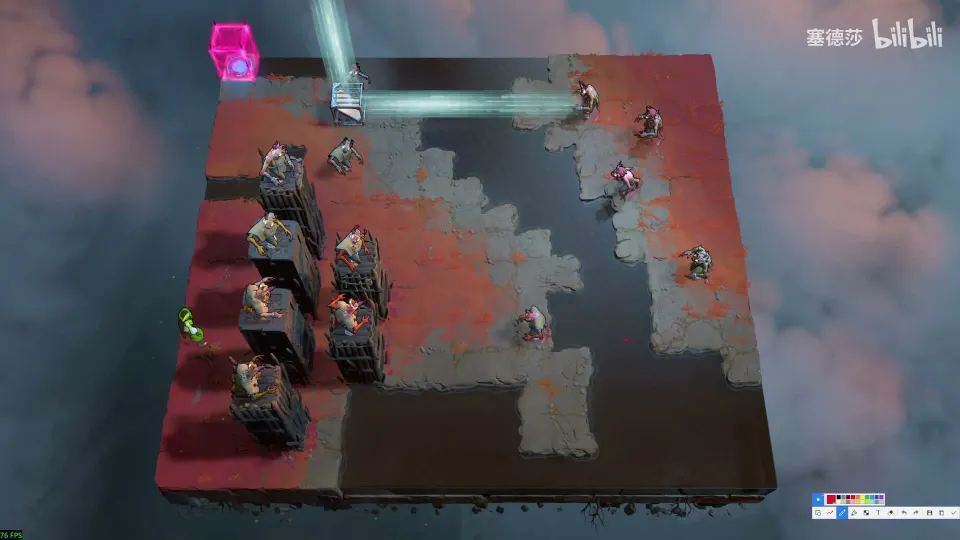
Getting there: the previous room unlocks a plain stone. You need the mirror to climb the high platform, so throw the stone into the water instead, from the crystal’s row, and drop the crystal into the other gap. (8:21)
- Count: three goblins dropped onto the platform give three triple kills; the four left over make two pairs. (9:26)
- Reflect up (the goblin is pulled along) for the first kill, move the mirror and pull a goblin next to another. (9:48)
- Two goblins can be pulled straight into place, which is tempting but a trap: one outside goblin has to go between them, and only the goblin at the right of this row can ever reach the bottom-right corner. (10:33)
- First drop the goblin that blocks the bottom-right gap. (12:14)
- Pull the mirror over, reflect out, put the goblin on top and pull it down; go out, drop it on the marked tile and pull the left mirror over. (12:38)
- Pull the last one over, drop it far away and pull. (12:58)
Overworld puzzle 6
Key idea: a goblin blocks the way into the next room. Kill it by dropping another goblin on it from height, as in puzzle 35. (塞德莎 P32 13:23)
- Use the goblin from the nearby platform and drop it from height onto the blocker, then go up. (13:23)
Puzzle 36
Key idea: the Cleric is surrounded by goblins. Drop one goblin from above to break the ring. Only the goblin on the bottom-left island can be brought, and it must be dropped from a spot that clears the goblin above. (塞德莎 P32 13:43)
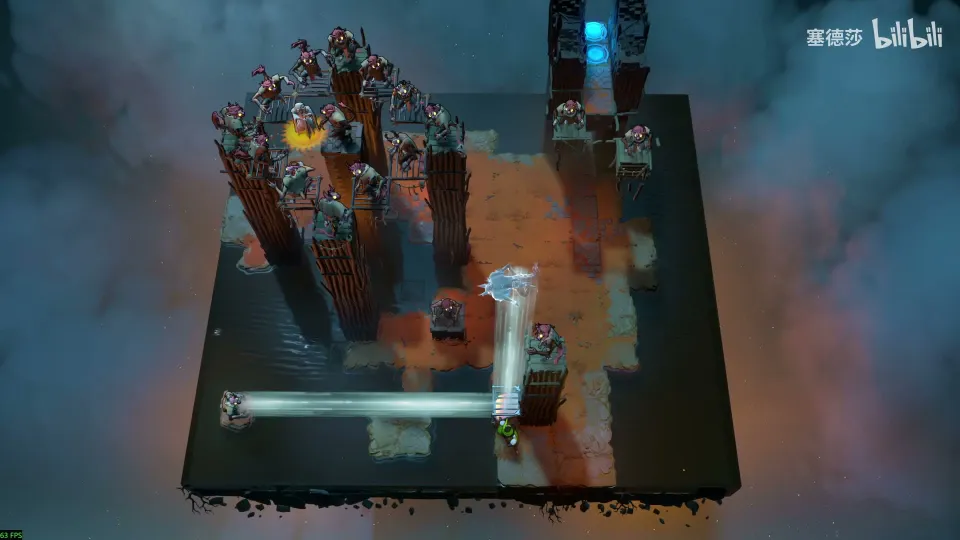
- Dropping the goblin at the first spot causes a double kill, so reflect it over and pull the mirror down first. (14:04)
- Reflect out before dropping it here, or you can’t leave. Pulling it straight out would kill it against the goblin above. (14:24)
- Leave it, go out, pull left, then right; now it is closer to the shore, so the drop height misses the upper goblin. (14:44)
- Break a gap where the Thief stands in the top-down view: pull the mirror over, drop the goblin, pull the mirror back. The Cleric is free. (15:24)
- Both must reach the top-right high platform: the Cleric goes first to the far back, then the Thief, and they leave together. (15:45)
Puzzle 37
Key idea: the last room of the chain. The core is clear: two upward mirrors in the middle, and the Thief and the Cleric far to the right reflect up at the same time, with a goblin there so both are protected. Build everything else around that. (塞德莎 P32 17:32)
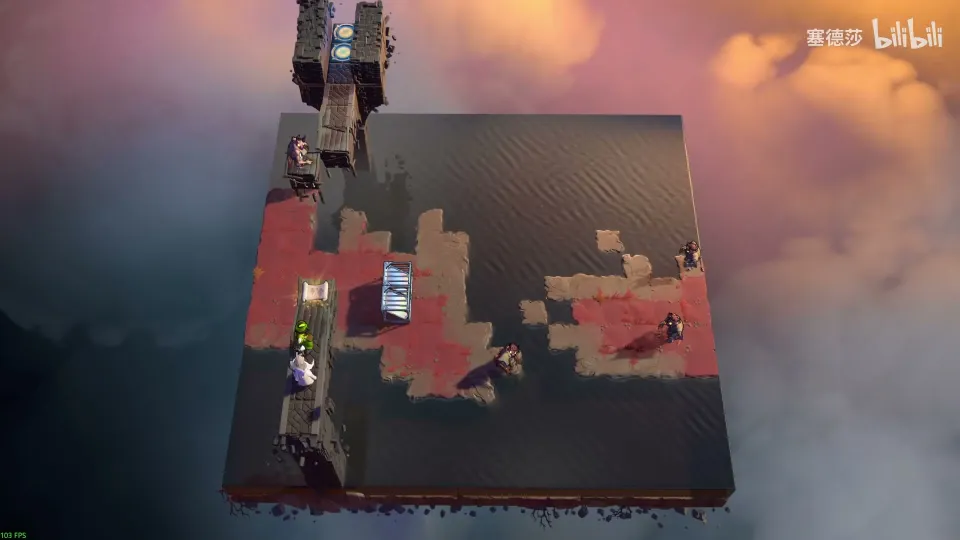
Getting there: reset on the map (everything is gone), reflect up to the top left and fill the hole there: move the stone into the gap’s row, place the mirror and drop the stone in. (16:25)
- Final set-up: the two upward mirrors on the marked tiles, the Thief and the Cleric on the far right. (17:53)
- Move this goblin here so you can float up, and that goblin there so you can get over the next part. (18:34)
- Placing the second mirror traps the Thief, so park the other mirror nearby first, pull this one in, and leave by reflecting off the other. (19:14)
- Bring the Cleric right, the Thief up and the Cleric round, then reflect both up together. (19:55)
Puzzle 38
Key idea: the Sailor, the Trader and the weak Wizard must reach the left. The Wizard can’t swap onto the exit (the two-high stone stacks would crush it), so someone below acts as a carrier, and the carrier can only get up with the mirror on its head, which falls off afterwards. That carrier move must be the last one. (塞德莎 P32 22:41)
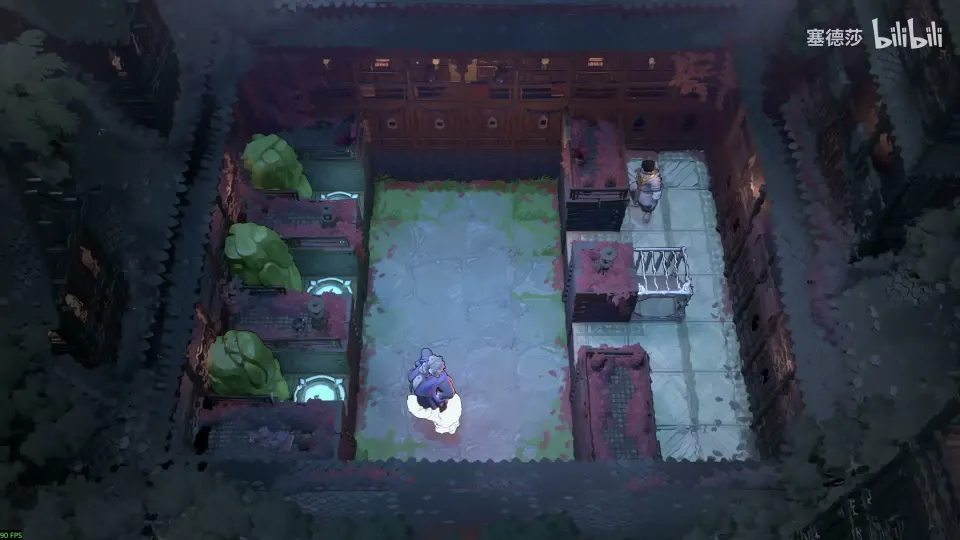
- Swapping the Wizard straight up doesn’t work: the stacked stones crush it. (23:03)
- Something has to be on the exit for the Wizard (a teammate or the mirror), and the carrier below needs the mirror on its head to come up at the end. (23:23)
- So move the mirror left first: send the Trader over, send the Wizard, swap Wizard and Trader, come back, put the mirror on the carrier’s head and swap again. (24:45)
- Send the Trader to the other exit and bring the Wizard over to swap with the mirror. The Wizard can’t swap with a mirror’s reflecting face; turn the mirror first. (25:29)
- Reflect the mirror onto the carrier’s head, then reflect the carrier onto the last exit. (25:50)
Overworld puzzle 7
Key idea: build a path upwards with the mirror on your head. Reset on the second level to pick the mirror up, ferry stones into the water, and at the end press V so only you go up while the mirror drops. (塞德莎 P32 26:14)
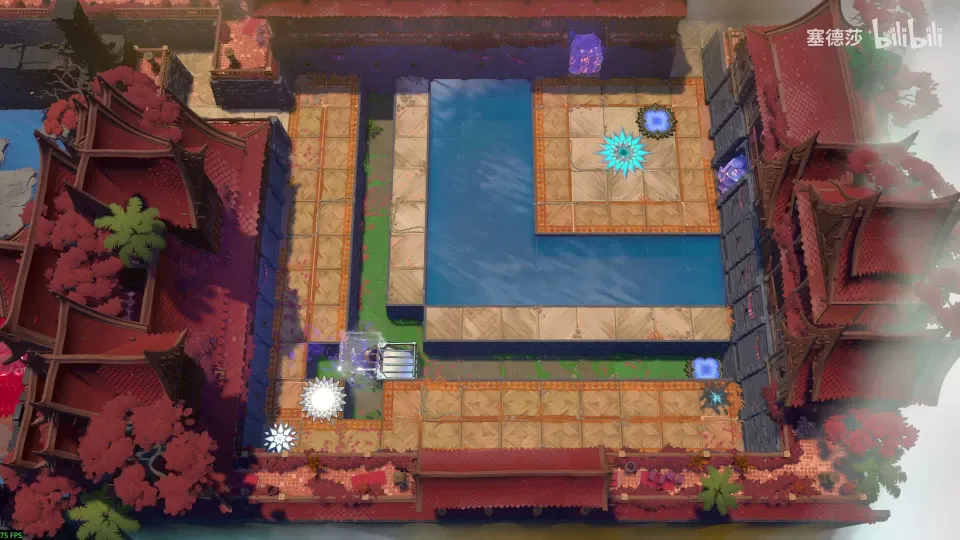
- Reset on the second level to put the mirror on your head, ferry a stone straight into the water and bring the next into the same column. (26:14)
- Drop that stone in too, then press V on the marked tile: you go up and the mirror falls onto the tile. (26:35)
Puzzle 39
Key idea: get a crystal onto your head without dropping it on you. Throw it far into the air, step aside and reflect as it falls beside you so it settles gently. 塞德莎 thinks this room has unintended solutions; he also shows a much shorter one. (塞德莎 P32 26:55)
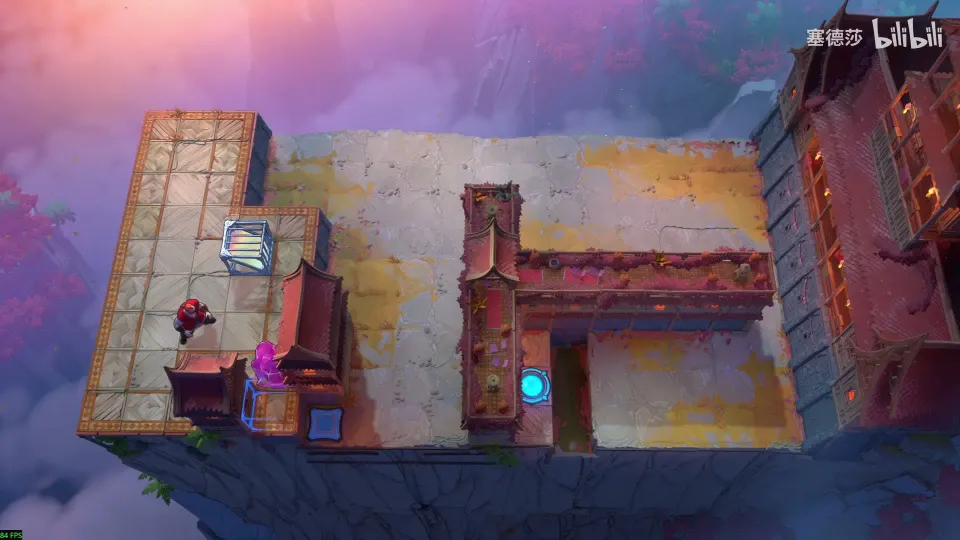
- Use the mirror to take the stone out and park it towards the top. Put the mirror on the horizontal energy gate; pressing it sends the mirror onto your head. (27:16)
- The button faces left and the mirror’s direction is fixed, so a stone placed by the edge is reflected away from you and then falls on you, which crushes you. (27:37)
- Instead throw the stone far into the air, step right, and reflect as it drops beside you: it lands softly on your head. (27:58)
- Shorter way: stack the stone on the mirror, put that on the energy block and it goes straight onto your head. 塞德莎 suspects this will be patched. (28:59)
Puzzle 40
Mirror Road
Key idea: one of two bonus rooms on the road towards the Antipode. Move the Cleric step by step to the exit with dragons and goblins, and kill the dragon above your head early, because otherwise you arrive one tile too high for the exit. (塞德莎 P32 30:25)
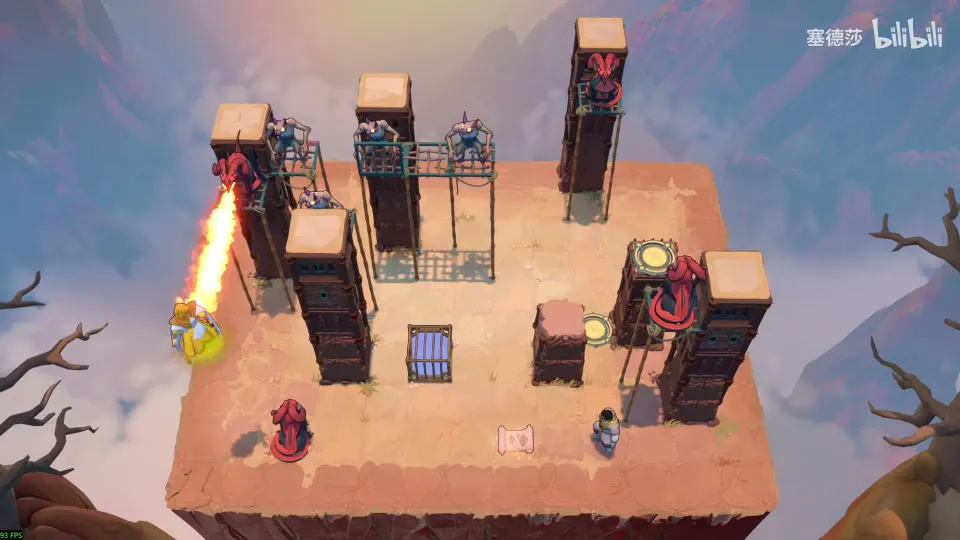
Getting there: the area to the left belongs to the West, so 塞德莎 leaves it. With all the star rooms of the east done, he heads up the road to the Antipode. (29:43)
- The Cleric can walk to the first spot. Walking right looks safe, but a fence under the goblin there stops it from protecting the Cleric, who falls. Kill that goblin: put a mirror right under it and let the dragon breathe. (30:45)
- With the lower dragon’s help, place a mirror to go up and over the goblin, then move the mirror to the top right. (31:25)
- Do this now: kill the dragon above your head. The exit is four high and you’re at five, so arriving with that dragon alive leaves you too high. (31:45)
- Move the Cleric on to the right; the dragon has to go up, and you reach the exit. (32:46)
Puzzle 41
Key idea: the second bonus room. Bring the Trader from the top right down to the low exit past four obstacles, with the Cleric protecting it in the dragon’s fire. Each step means re-placing the mirror and the dragon. (塞德莎 P32 33:07)
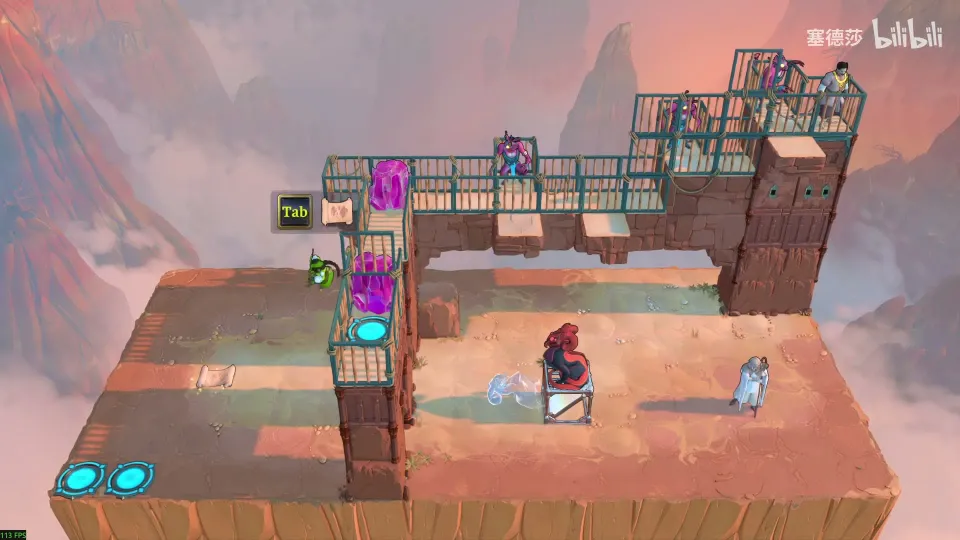
- Reflect the dragon down, pull it close and put the mirror beside it; the Cleric stands here, at a height that reaches the platform, and the Trader crosses the first goblin. (33:27)
- Second goblin: move the mirror, pull the dragon away, bring the Cleric down and pull the dragon back up. (34:08)
- Third: put the Cleric on the platform right of the Trader, shift the whole set-up one tile left and reflect the Cleric across. (34:30)
- Pull the mirror left, pull the dragon up, and let the Trader push the blocker away. (35:11)
- Last is a pit the Trader must float over: the dragon’s fire has to reach it. Place the mirror, bring the dragon down, reflect the Cleric from the farthest point to one tile above the Trader, and walk the Trader across under its protection. (35:32)
Puzzle 42
Key idea: a pure falling-reflection room. Reflect, reflect again as you fall past the next mirror, and once more after dropping three tiles. (塞德莎 P32 37:00)
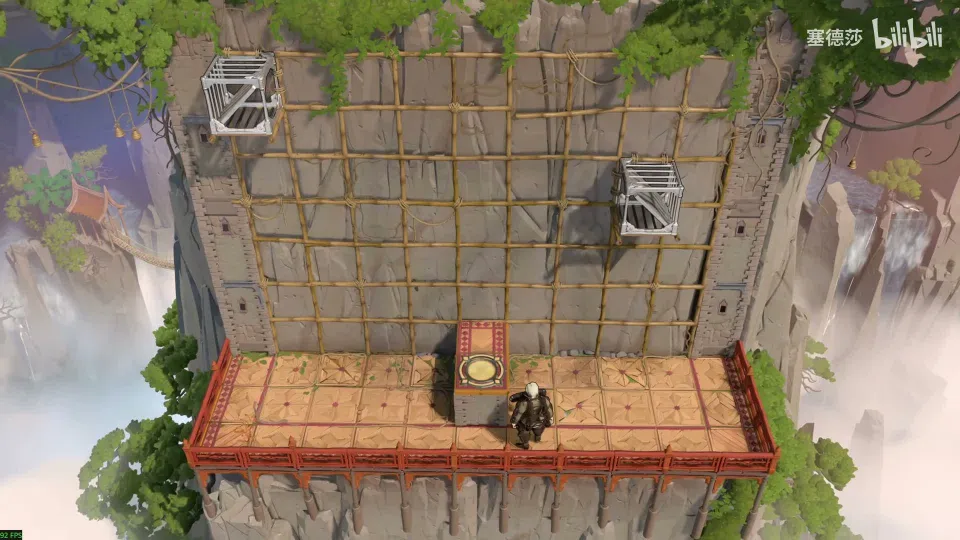
Getting there: this is Mirror Road proper. Move along by reflecting from right next to the mirrors, and use falling reflections from platform to platform until you’re at the top. (36:17)
- There is nothing else to do: reflect here, reflect again as you fall to the next point, and reflect once more after a three-tile drop. (37:00)
Puzzle 43
Key idea: looks huge, but the Explorer just waits at the far right while you push the mirror straight down, then reflects as soon as it can and again right after landing. (塞德莎 P32 37:21)
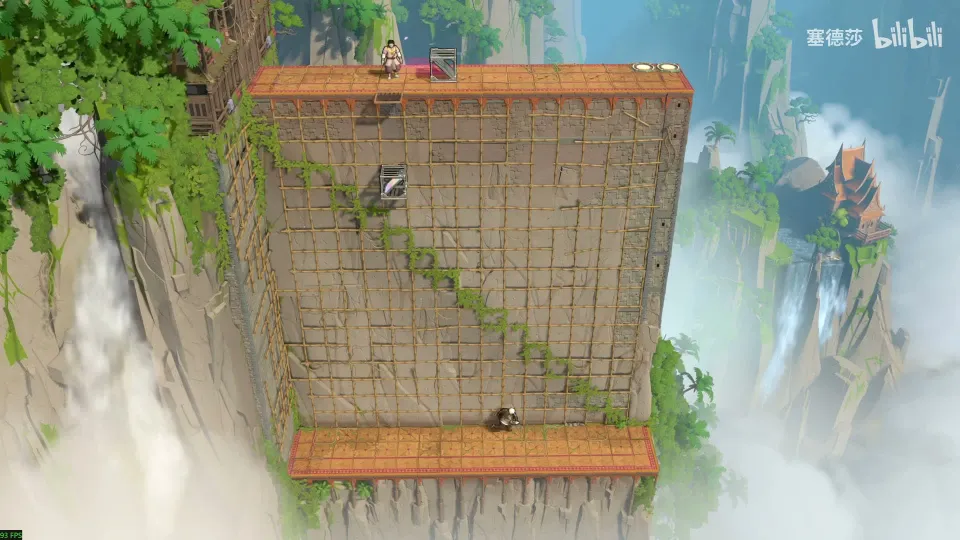
- Keep the Explorer at the far right, push the mirror straight down and reflect at the first chance. (37:21)
- Once you’re at a spot the mirror can reflect from, reflect again at once to go up. (37:21)
Puzzle 44
Key idea: one of two clone rooms in a locked cage in the north, reached by a mirror on this face of Mirror Road. Use a clone as a step to reach the bottom right, then put the mirror on the lower clone’s head and merge the two again. (塞德莎 P32 38:02)
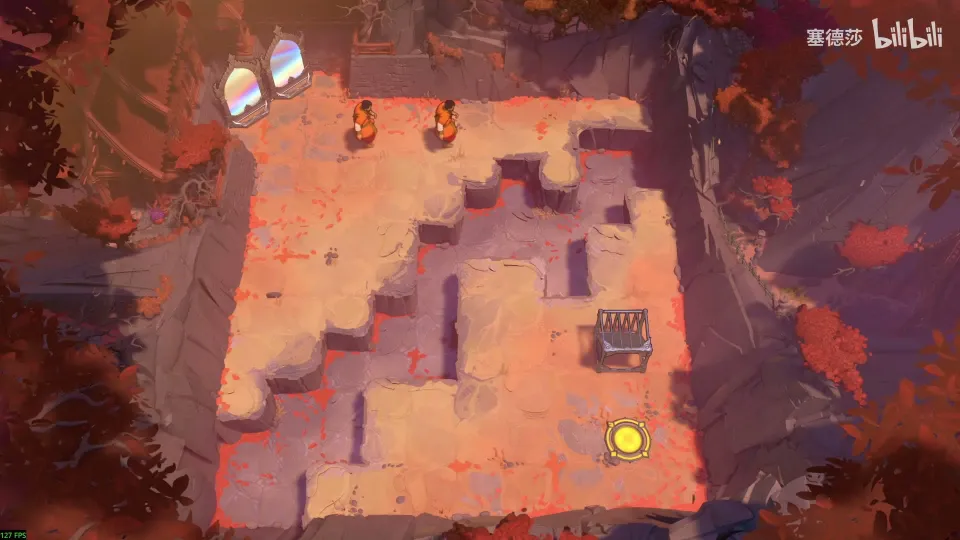
Getting there: one of the two mirrors on this face drops you into the caged rooms you may have seen locked in the north. (37:42)
- The only way to the bottom right is to make a clone and stand on it. (38:02)
- Shuffle the mirror over the clones, line the two up and get onto the lower one’s head. (38:24)
- Come round again and use the mirror to put the clone on the second level while the mirror drops into place. The two merge into one. (38:44)
Puzzle 45
Key idea: a straight merge. Set both mirrors so their reflection points are the same tile, get both clones onto the mirror, and reflect. (塞德莎 P32 39:05)
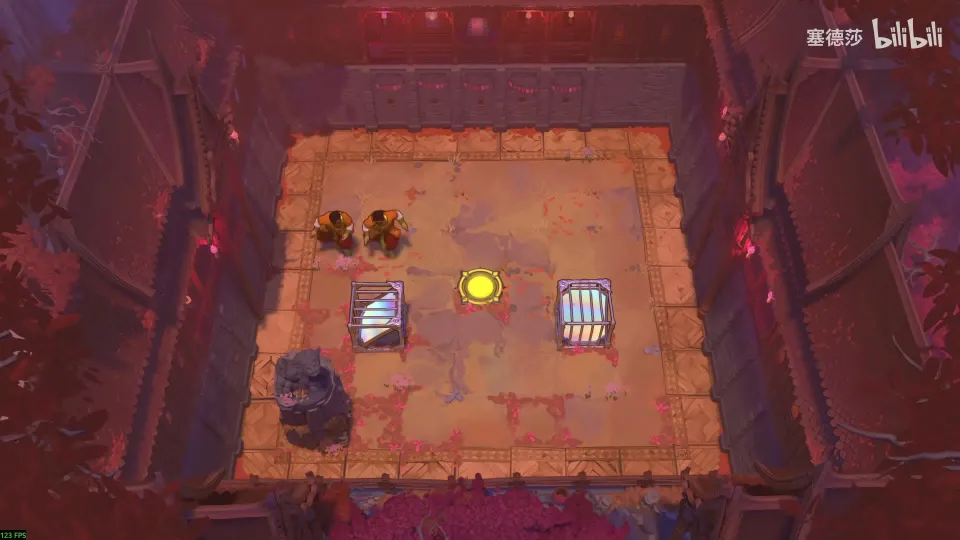
- Place both mirrors so they reflect to the same tile, get both clones on top of the mirror and reflect. (39:05)
- The cage opens. To its left is a drop to the area 塞德莎 calls 英雄与复制 (heroes and clones), which his earlier north-east supplement part covers. (39:25)
Overworld puzzle 8
Key idea: the end of Mirror Road. Press two buttons, one with a stone reflected over and one with a stone knocked down by an arch while the mirror is on your head. The last reflection takes you to the Antipode sign. (塞德莎 P32 40:05)
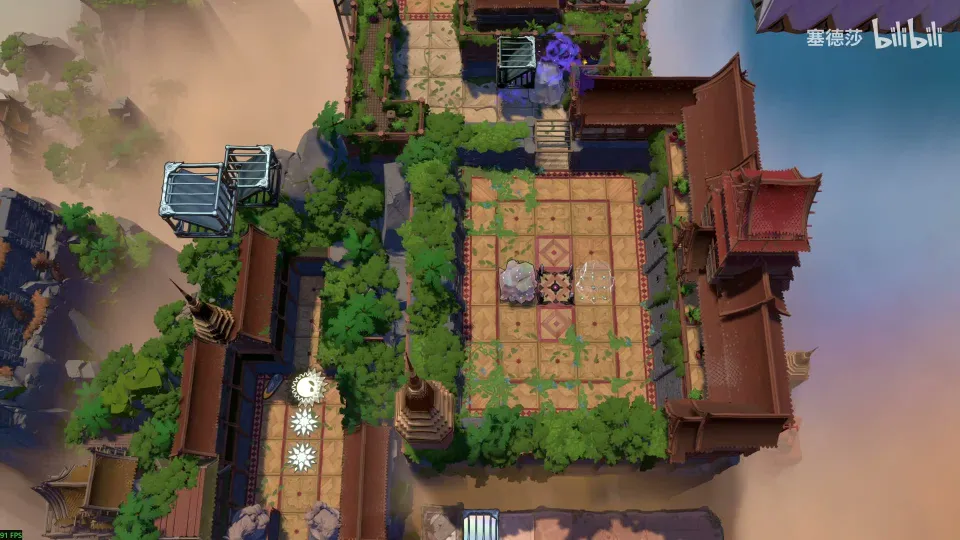
- Walking back the long way takes ages; 塞德莎 uses undo instead, which doesn’t remove the rooms you’ve solved. (39:45)
- Left button: bring a stone up, reflect onto it, push it over, reflect it across, follow and push it onto the button. (40:05)
- Right button: put the stone in place, reflect the mirror onto your head, carry it over and use the arch to knock the stone down. (40:25)
- Reflect from the marked spot to reach the Antipode sign. (40:45)
That completes the upper east. 塞德莎 notes two more drop points in the east that lead further down; he covers them in a later part. (41:06)
The third-stage counterpart is Low Mirrors.