Major spoilers: this page is for after the third ending. The developer rooms only open once you have finished Endgame Low, and the last section describes the story of a hidden recording. The rooms themselves are safe to read about if you have finished the game; skip the spoiler section if you want to hear the recording fresh.
After the third ending, the Prologue opens a last secret: a set of rooms where the developers show how some of the game’s levels began. Each comparison puts an early version of a real level next to one or more revisions, and a recorded developer commentary (in English) explains what was wrong and what changed: too hard, too cramped, too many ideas at once, unintended solutions, a hero who didn’t belong. There is also a wall of art boards and, elsewhere, a hidden recording that continues the story. This page follows 塞德莎’s narrated walkthrough, the 69th and last part of his series, and links every point to the exact second.
These rooms are extras. 塞德莎 points out that they don’t count in your save: the 920 on the counter covers only the main world, and neither these rooms nor the two official bonus hard rooms after Endgame High are part of it (2:02, 2:08, 2:12). He mostly lets the recordings play and comments less than usual (0:20, 0:26).
At a glance (final versions matched to our pages):
| Start | Original idea | Became | What changed |
|---|---|---|---|
| 1:09 | Thief pulls a crystal round columns | Heroes of Hauling, puzzle 7 | Columns replaced by rooms and halls; the point became walls |
| 5:11 | Goblins wearing lily pads | High Skipping Stones, puzzle 5 | Goblins swapped for dragons; where to drop the pads matters |
| 6:28 | Dragon and mirror burn goblins in four directions | Heroes and Mirrors, puzzle 27 | 5×5 chamber grew to 7×7; a statue stops mirror shortcuts |
| 12:33 | Priest pushes monsters in a strength beam | Gold Room HxB | Four rounds of cuts: crystals, double beam, rocks gone; a second gem; socket moved |
| 20:35 | A Thief level across East and West | Reflected Beams, puzzle 7 | Shrunk, Trader instead of Thief, two worlds instead of three |
| 23:41 | Send a goblin up to infinity | High Beamcasters, puzzle 12 | One gate instead of two, clean geometry |
| 30:31 | Plan crystals, then drop down and push | High Heroes, puzzle 2 | 8 buttons cut to 6; the hole trick reduced |
| 35:28 | A bare room where the answer is a stack | High Mirrors, puzzle 21 | Redesigned so the stack is obvious from the start |
| 43:17 | Three mirrors and a crystal | High Mirrors, puzzle 11 | Same trick, different reason, clear route |
| 46:38 | Float up on a beam end to a chosen height | High Beamcasters, puzzle 53 | Water, skipping stone and lily pad removed |
Where the developer rooms are
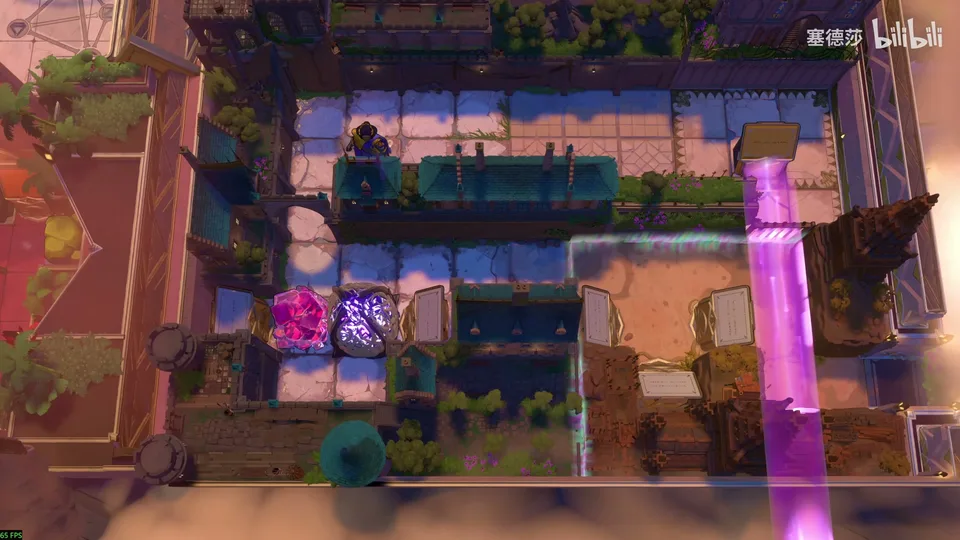
- Finish the third ending first. On the way back from Endgame Low, the Prologue’s signs tied to the third ending open, along with a cage that frees a cart so the purple beam can carry on upward (P68 24:40).
- Go to the Prologue and ride that purple beam up. The place it brings you to, now that the cart is free, is the developer area (0:50, 0:52, 0:54, 0:58, 1:00).
- The rooms are laid out on the map like a small overworld: each comparison is a set of rooms with a recording, labelled with captions such as the original version and the simplified one. Walk from one to the next in the order below.
- When you are done, the purple beam takes you back. 塞德莎 notes that with this, every map in the Prologue has been shown (52:41, 52:45).
The developer commentary rooms
1. The Thief’s crystal and the columns
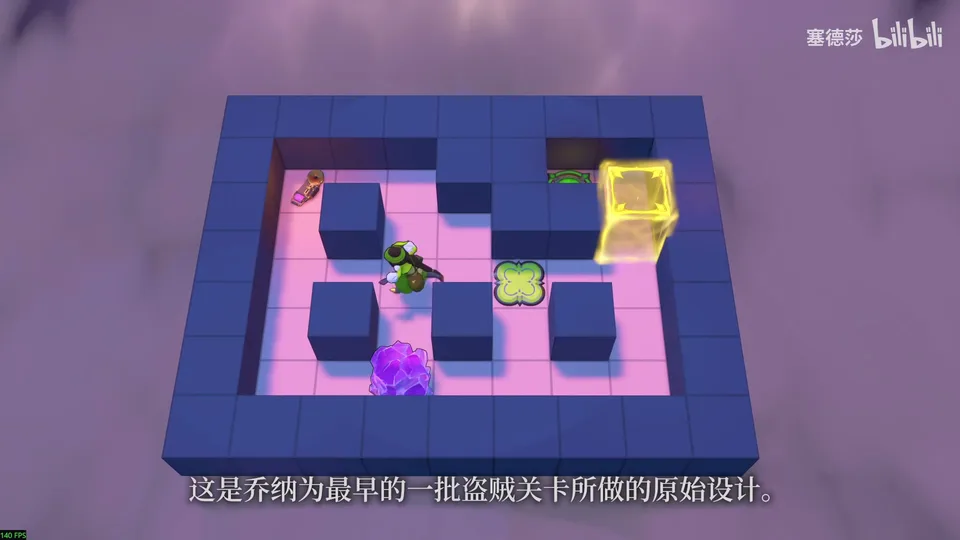
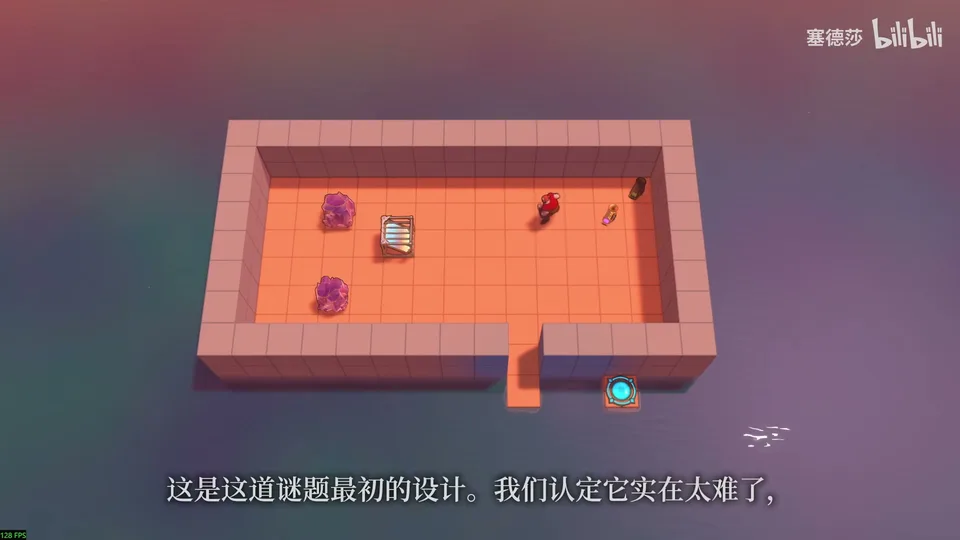
The original is Jonah’s design for one of the earliest Thief levels. The Thief can drag the crystal onto the button only by one particular route, and once it’s there she can’t help pulling it straight back off, which shuts the gate again; the commentary finds that funny. The columns are awkward for her because she can never take the crystal round one of their corners, and an unused northwest corner of the map only hints that the grid carries on (1:09, 1:41, 1:46). 塞德莎 lets the recording speak for itself (1:56).
The final version is Heroes of Hauling, puzzle 7, the Thief room near the start of the North (2:22, 2:29). The designer rebuilt the idea into a bigger level than usual for this point, as practice in how the Thief moves. Columns are rare in the game, so it became rooms joined by halls. The button joke stays, emphasised by starting the Thief right beside the button and putting the crystal far away: easy to reach, silly to drag back. The lesson changed from corners to walls: the Thief can never pull something up against a wall (2:45, 3:16, 3:22, 3:58, 4:16). He doesn’t replay it, as he solved it earlier in the series (4:28).
Next to it is the first art board, for the Beamcasters vault; see the art boards below.
2. Goblins wearing lily pads
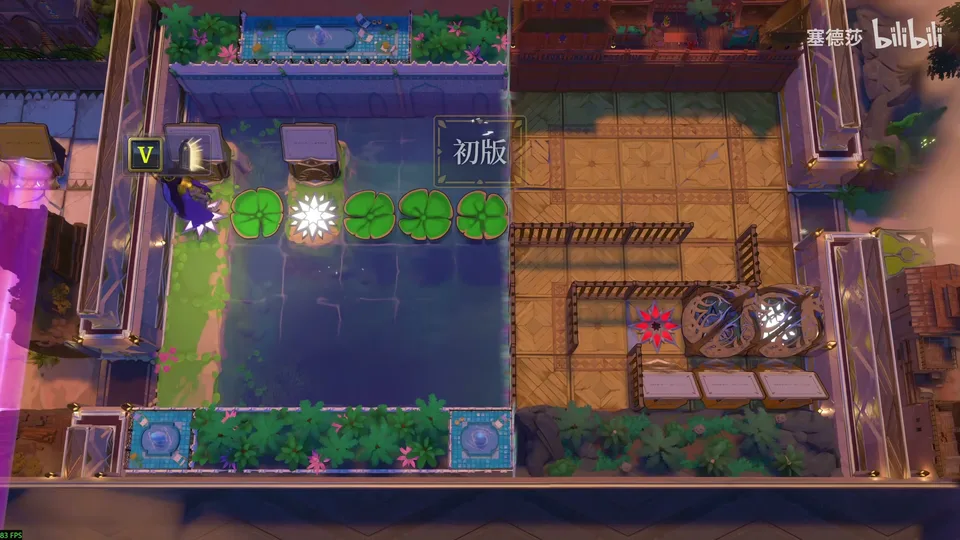
The original is Zach’s: goblins wear lily pads as hats, and when a goblin dies in the water its pad is left floating. A second goblin blocks the second island. The commentary likes the interaction but finds the stone-pushing in tight spaces beside the point (5:11, 5:17, 5:22, 5:28).
The final version is Patrick’s revision, High Skipping Stones, puzzle 5 (5:43, 5:50). It goes deeper into the same interaction: you have to work out exactly where to drop each pad to reach the next island. The goblins became dragons, which can be pushed without a stone in between, so trying ideas is quicker and the puzzle can be richer with fewer objects (5:57, 6:01). 塞德莎 only remarks how big the change is and doesn’t play either version (6:18).
3. The dragon, the mirror and four directions
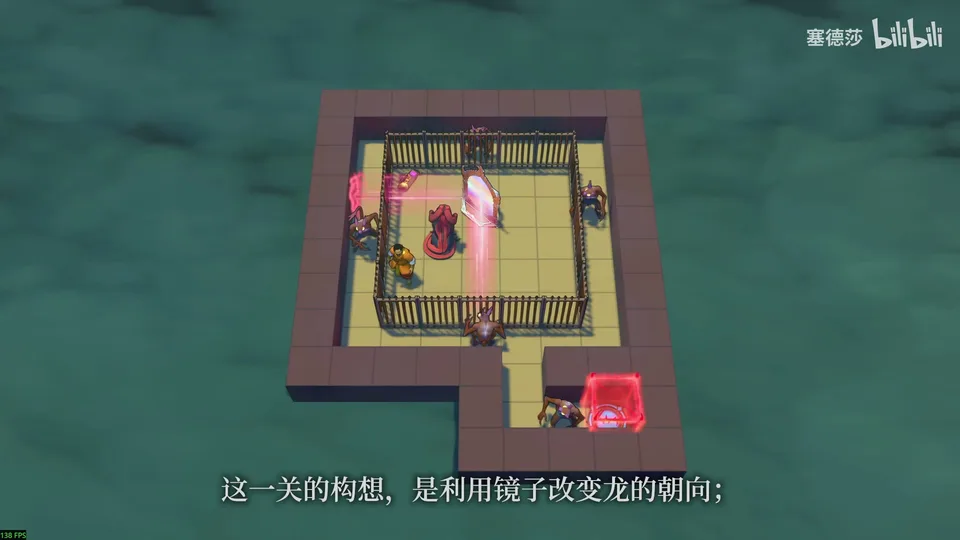
The original: use a mirror to turn a dragon so it roasts goblins in all four directions. It dates from when the team felt levels had to be hard and full of careful moves (6:28, 6:38). The commentary lists three problems:
- Too cramped. In the 5×5 chamber you keep walking into the dragon’s breath, often bounced off the mirror with no warning, so many moves are fiddly repositioning (6:57, 7:24).
- Mirror shortcuts. Goblins are easy to mirror into the chamber or to another side, so a player who is just experimenting makes a mess, and you don’t really need fire in all four directions (7:31, 7:35).
- The ending takes over. The surprise last step, killing the fifth goblin, is hard and feels disconnected, so it ends up bigger in your memory than the idea of the level (8:02, 8:16).
塞德莎 sums it up: too hard because too narrow, too many fiddly details, and a finale that drowns out the core (8:42).
The simplified version grows the chamber to 7×7. Now the commentary finds it perhaps too easy, like homework where you follow steps. The solid outer wall limits mirroring, but you can still clear one island on the east or south and mirror the other goblin onto it. The surprise ending, drowning the dragon, is easy this time (8:56, 9:01, 9:26, 9:35, 9:51). 塞德莎 shows that shortcut himself, moving a goblin onto another island with the mirror so the dragon never has to fire four ways (10:07, 10:13).
The final version is Heroes and Mirrors, puzzle 27 (10:46). It keeps the 7×7 chamber but puts a statue in the middle. That gives you another way across the breath, so the puzzle is about aiming the dragon rather than dodging. The east and south goblins are set back, so to mirror one onto the other’s spot the mirror would have to stand where the statue is: you finally have to fire in all four directions. The ending goes back to the original kind (teleport the dragon into the right place and facing, then escape the cage) but tuned easier (10:51, 10:59, 11:19, 11:40, 11:43). 塞德莎: that is why the statue is there, to stop the mirror copying goblins (12:04, 12:12). He doesn’t replay it (10:49).
4. The strength beam room (four versions)
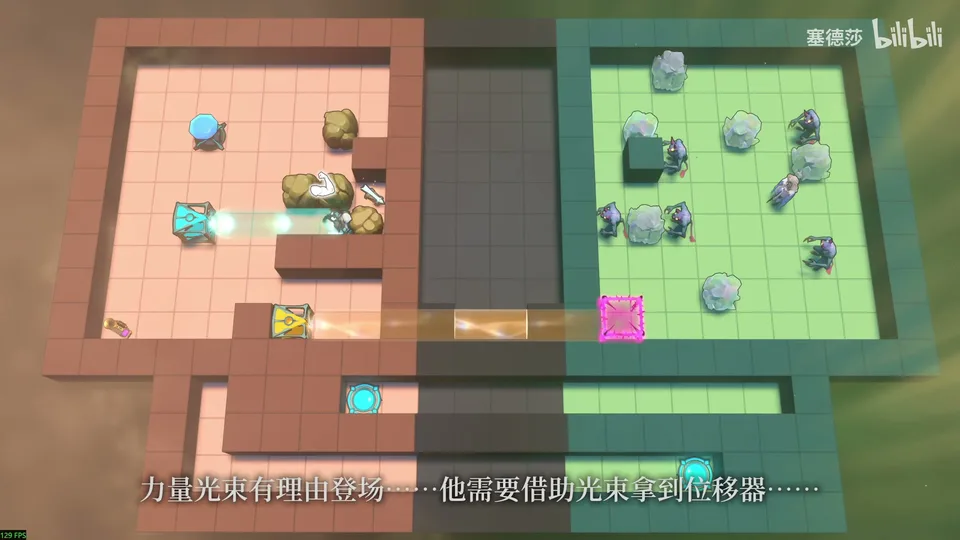
This series of rooms sits under a caption about being clear and focused (12:33).
First version: the strength beam has an excuse on the left (the Explorer needs it to fetch the displacer), but it is really there so the priest can push monsters. That could be fun, but there are several hard-to-see solutions, the blocking crystals feel random, and a double beam that only serves to exit makes you wonder what else it is for (12:44, 13:06, 13:16). 塞德莎 calls this version a mess and shows only the route he thinks was intended, skipping the many odd unintended ones (13:26, 13:34):
- Move the two crystals out of the way first, then push the right-hand goblin over (13:54, 14:00).
- Push this goblin up so the two top goblins meet and clear each other as a pair (14:03, 14:06).
- The other three must go together, but you can’t push them there directly, so use the Explorer on the left. Push these two to these spots (14:11, 14:24).
- With the Explorer, push the cyan emitter right and along this row: the three clear at once (14:30, 14:39). He isn’t sure this is the intended solution (14:44).
- Someone still has to reach the exit below: bring the Explorer over, put the priest to his left, and the Explorer sends the priest down into the lower channel (14:50, 15:00).
Second version (15:18): no crystals and no double beam, a monster gate on the beamcaster side instead, and five goblins, so you obviously need a group of three, made with the displacer (15:22, 15:38). 塞德莎 says unintended solutions remain. His guess at the intended one: push all four stones over, push this goblin into this column so it flies up to meet the top ones, then push this goblin all the way up (15:52, 15:57, 16:06, 16:13). The bottom part is already the final small puzzle: push the cyan beam down so the priest can push the stone away (16:20, 16:26, 16:32).
Third version (16:42): the pointless rocks on the beamcaster side go, and a second gem appears. Two gems and only one socket should make you ask what the spare is for. Five monsters become three, and the displacing now needs the priestess (17:11, 17:23, 17:34). The goblin room still has a shortcut: push the two outer goblins one square south and zap the third, which uses less of the strength beam than intended (17:47, 18:03, 18:16). 塞德莎 adds that this shortcut does kill the three, but the cyan beam is then stuck on the second row and can’t be brought down, so it is really a dead end that only lures players off course (18:22, 18:27, 18:33). Apart from that it already plays like the final (18:40).
The final version is the Heroes and Beamcasters Gold Room (HxB) (19:05, 20:04). The power socket moved so the priestess can no longer push the two goblins south, and the third goblin’s area is less of a closed room, so it doesn’t suggest pointless displacing through a long wall. The hero side may be a couple of rows too tall, but the beamcaster side needs two empty rows at the bottom to displace the emitter back north (19:31, 19:39, 19:51, 19:58). 塞德莎 notes the level is well liked; the main complaint is the top row, whose shadow makes many players think it can’t be entered (20:10, 20:20).
5. A Thief who didn’t belong
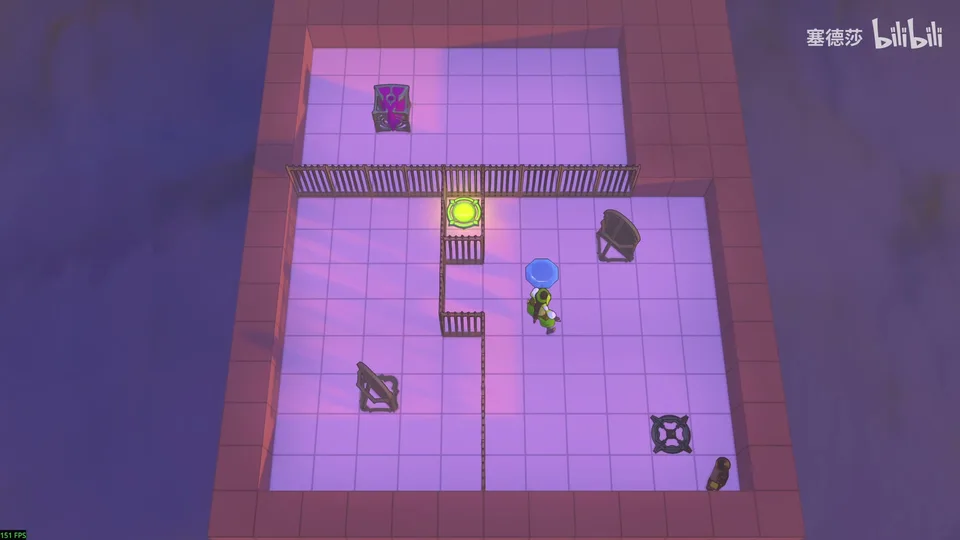
The original is Zach’s level for the first-stage crossover of East and West, oddly with the Thief (20:35, 20:50). The commentary found it hard and never quite clear about its idea beyond going back and forth between rooms. The Thief’s pull has nothing to do with the core idea and makes the level bigger; the team avoids off-topic objects and ideas, and that extends to hero abilities, so when you only need to move things, a hero who pushes one thing adds the least noise (20:52, 21:25, 21:40, 21:53).
塞德莎 solves this one. The pull isn’t needed, and because of where the gem activator and the left mirror start, you need one whole extra round of moves compared with the final (22:10, 22:15, 22:18). The video jumps through most of it; the last moves are to pull this mirror over and then pull it to here (22:35, 22:40).
The final version is Reflected Beams, puzzle 7 (22:54). It is much smaller, the Trader is the main hero, which removes the question of whether pulling matters, and it uses ingredients from two worlds instead of three (23:03, 23:12). 塞德莎 points out a big change the recording doesn’t mention: the left mirror now starts in the same row as the activator, which saves that extra round (23:20, 23:27).
6. A goblin sent up to infinity
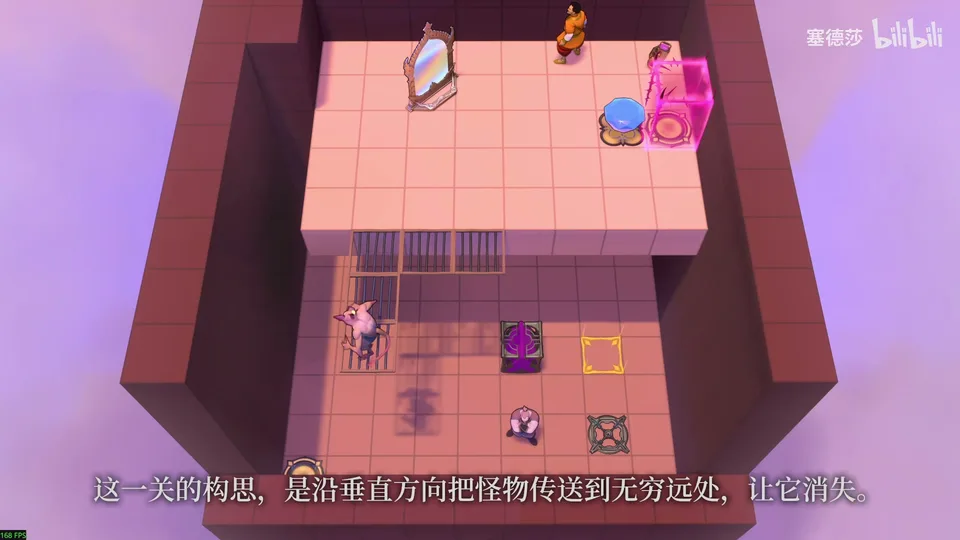
The idea: make a monster disappear by teleporting it infinitely far upward, using a purple emitter and an upward energy gate (23:49, 24:14).
First attempt: hard to read and misleading, because the goblin starts where you can teleport it straight onto the button, which isn’t part of the solution (23:59). 塞德莎 plays it through quickly, showing an unintended route and then the intended one; follow the video for the moves (24:25, 24:35, 24:47).
Second attempt (25:07): one hero who goes up and down, and instead of an elevator a second gate: one raises an object onto the plateau, the other raises the goblin away. Two gates mean odd geometry, the level is hard to read, and setting up the final trick takes fiddly pushing that’s hard to picture. Using the gem for two jobs might look like tight design, but here it clouds the core; the first attempt at least had a lone vertical gate in the middle of the floor that you knew you had to use (25:15, 25:34, 25:51, 26:00). 塞德莎 adds that newcomers won’t see the goal, and you have to hold one button and send something up from below (26:26, 26:39, 26:51).
The final version is High Beamcasters, puzzle 12 (27:07). The odd geometry and second gate are gone, since lifting things to the upper level isn’t the core idea: the gem and the emitter start at the top and you only bring them down. The gate is a little hidden, because you also use it to get up, but with only one gate it stays the focus. A common trap remains: pushing the goblin next to the gate with both the emitter and the gem and then trying to get the emitter down, which can’t be done; put the emitter on the lower level first. The team chose not to start the emitter at the bottom, which would come close to giving the answer away (27:16, 27:25, 27:39, 28:02, 28:18, 28:22). The recording ends on how much uglier the earlier versions were and how hard it is to get every puzzle of a big game near its best (28:46, 29:07). 塞德莎 finds the final much better, though the emitter on top can make players think it is for pushing the goblin (29:21, 29:42).
7. Plan first, then drop down
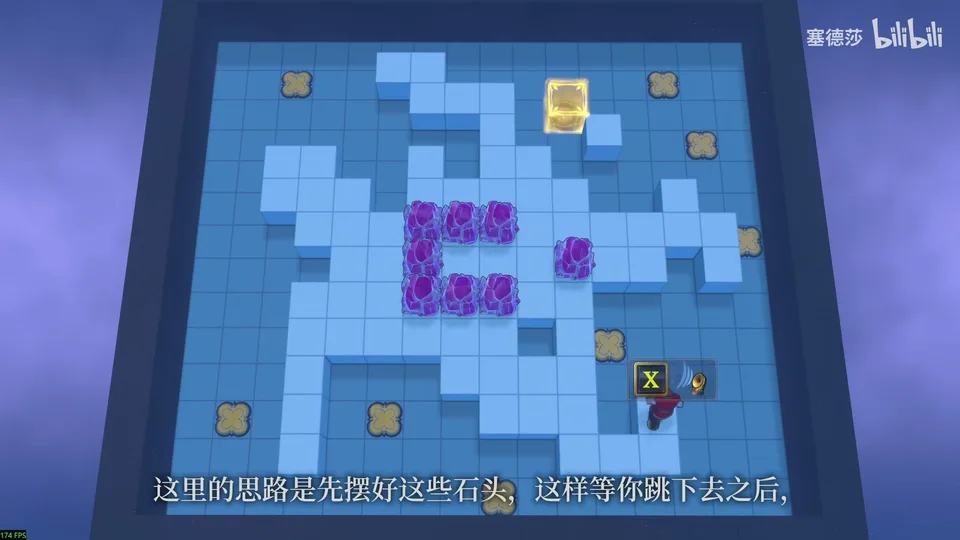
To get here, he clears the area, resets at the bottom right and takes a stone out to walk across (30:14, 30:17).
The original: set up crystals on a plateau so that once you drop down you can push them onto buttons. Tricky button positions and the plateau’s shape make it hard to see how to cover all of them. It splits into a setup phase and a pushing phase, so it is a big mental maze: once you drop, you can’t fix your setup. One trick: push a crystal in front of a hole and drop into the hole to reach it, but only once, so you have to find the one button that needs it (30:31, 30:47, 31:00, 31:29, 31:37). The recording plays over his moves; he doesn’t narrate a route. 塞德莎: it is already close to the final, with two more stones, two more buttons and some deliberate pits; of the several hole spots, only the top circle must be used (31:42, 31:53, 32:14, 32:20).
The final version is High Heroes, puzzle 2 (32:33). Eight buttons became six and most ideas stayed, but the hole trick is now just one of several ways to reach buttons. With a smaller maze you spend more time on the individual cases. The commentary warns designers not to call it too easy just because they already know the answer (32:39, 32:56, 33:05, 33:25). 塞德莎 agrees from his own experience: he found the South’s first big tutorial easy because he had played the much harder prototype, while many players complain it is badly guided (33:51, 34:37, 35:00).
8. The stack you didn’t see
He reaches it by reflecting to switch a button and going up (35:14).
The original: a simple room that looks impossible until you notice one small thing. The team judged it too hard and made it easier, though the commentary admits that in a short game this mysterious version might be the better one, and suggests trying it before the second recording (35:28, 35:45, 36:02). The second recording is about difficulty: a puzzle can be hard in a good or bad way, and one that gives you nothing to start from, again and again in a long game, turns into the same tiring experience of being stuck. Worse, you spend most of your time on random tries and only see the idea at the very end. So the team cut the grinding box-pushing they once took for depth (36:09, 36:30, 36:56, 37:28, 37:39).
塞德莎 plays it while the recordings run: the answer is to stack three things, and the real difficulty is realising that this is what the room wants (37:54, 37:59, 38:05). He takes the point further: even clever hard puzzles wear players out if a huge game is full of them (38:39).
The final version is High Mirrors, puzzle 21 (40:13). It is redesigned so you see at once that you need a stack, since nothing else gets the other hero to the exit; the only question is how. That makes it easier, but in a long game it keeps the ideas coming at a pace you can feel, and the commentary compares a song slowed down until it is no longer music (40:23, 40:44, 41:03, 41:42). 塞德莎 recaps: one look tells you to build something three tiles high (42:07).
9. Three mirrors and a crystal
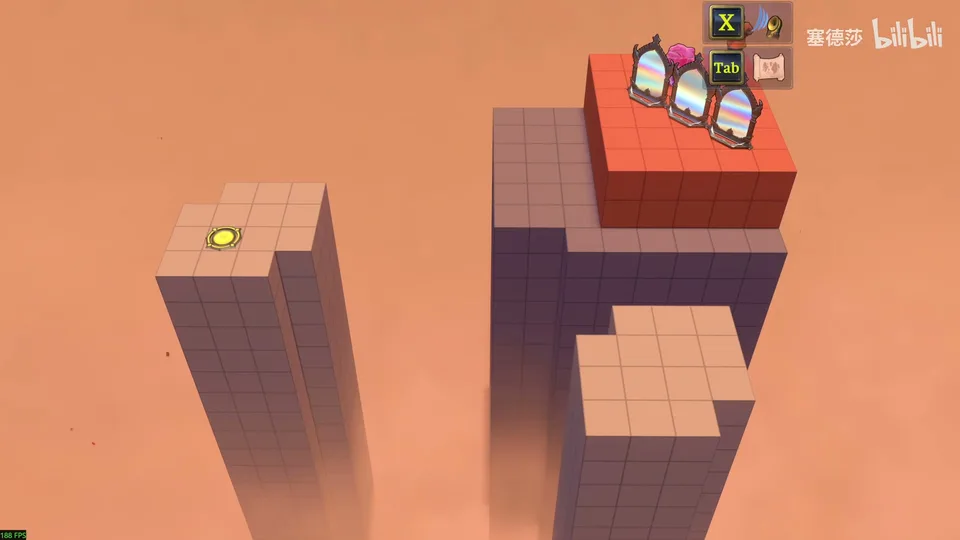
The original is Zach’s. The idea, a mirror that helps you early but blocks you later, is buried: the route to the goal island is indirect and hard to picture, and three mirrors with a crystal invite you to clone the crystal over and over, which doesn’t help at all, so the level actively misleads you (43:17, 43:25, 43:36, 43:52, 44:05).
塞德莎 solves it first. The trick: put a stone under the mirror beforehand so you can’t be copied at the start, then pull the stone out; the mirror drops and copying becomes possible (44:28, 44:37, 44:42). He agrees the terrain hides that idea and that cloning crystals to build up is the natural, useless first instinct (44:45, 44:58, 45:06).
The final version is Patrick’s revision, High Mirrors, puzzle 11, with the red beam (45:19, 45:22). The core is similar, teleporting a crystal out from under the mirror, but for a different reason and twice, which fixes the idea in your mind. Above all, the route is obvious: get past the gates (45:32, 45:41, 45:52). 塞德莎: raise the red emitter, then pull the floor out from under it one piece at a time with the mirror, so only the middle stage opens the red door (46:01, 46:07).
10. Floating up on a beam’s end
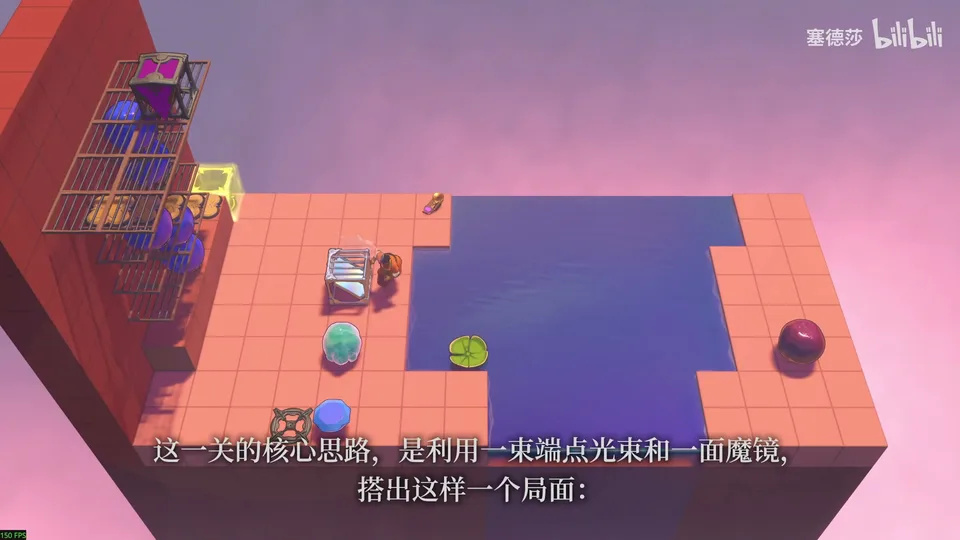
The original: set up a beam end and a magic mirror so you can choose how high to go, teleport to that height, be held up by the beam and step onto the platform. On top of that you must fill the far end of the purple beam, use the lily pad only once to reach the far shore, recall the skipping stone with the mirror, and wonder whether you should reuse the pad or sink the stone: too much uncertainty around an already hard core (46:38, 46:53, 47:11, 47:19). 塞德莎 adds that the purple emitter starts up on the ceiling, and you can only move it down first and then up, or it jams (47:28, 47:42, 47:49).
He finishes it (48:04):
- Float the lily pad over to the right to fetch the stone there (48:11, 48:16).
- The stone has to be mirrored back: put this stone here, reflect it back and recover it (48:22, 48:31, 48:35).
- Switch on the purple beam and throw the stone to the right as its end (48:43).
- Go up, teleport to the very top first and push this in, then the fourth level (48:47, 48:50, 48:52). In the final version this became five wide; the fifth you walk up yourself, and a reflection gets you up there too (48:54, 48:58).
The final version is High Beamcasters, puzzle 53 (49:08). Water, skipping and the lily pad are gone. You still set up the crystal to block the beam, but in a way that is on topic, and the purple beam now sits on the far side instead of on top, so returning to move it costs less grinding. Easier, and better, because you stay on the core idea. The general lesson: for each subtask, ask whether it really has to be done that way (49:14, 49:23, 49:31, 49:45, 50:11). He doesn’t replay it (50:31).
That is every development level. 塞德莎 sums up what they teach: how difficulty is controlled, and why levels get simplified, made easier or lose elements (50:35, 50:51).
The art boards
Two groups of boards show areas going from prototype to mid-development art to final art:
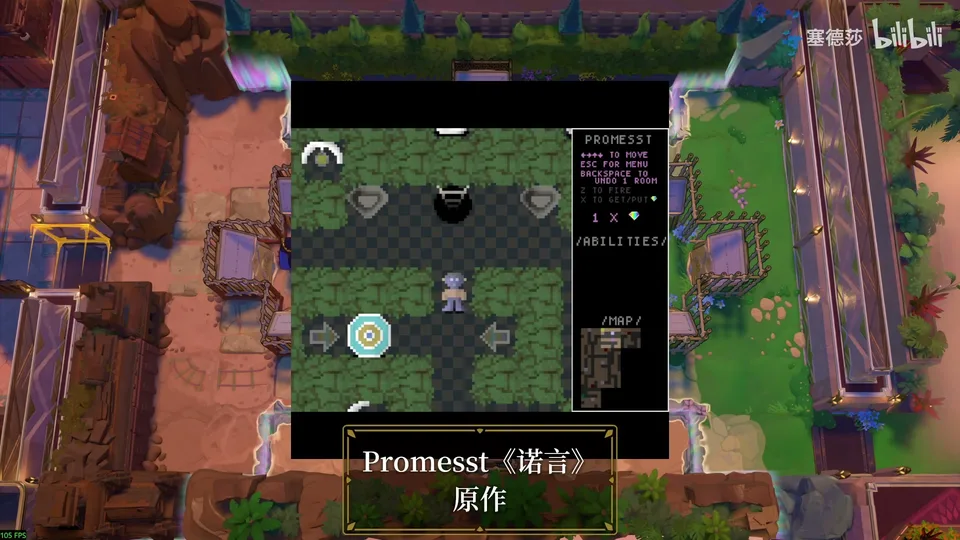
- The Beamcasters vault near the first room. Its level was once called Promesst; the boards show the first layout before any art, the redesign after the strength beam, cart and displacer changed, a mid-development art pass, and the final one, easier to read, with cleaner walls and trimmed down (4:33, 4:43, 4:51, 4:54). No level is playable here, probably because it would be too big (5:02).
- The four worlds at the end: original, mid-development art and final art of the North’s Hearty Heroes of Hauling, the East’s Mirror Isles, the South’s Skipping Stones to Lonely Homes, and Promesst, the West, whose name has since changed to Vault of the Beamcasters and has nothing to do with it any more (51:05, 51:15, 51:25, 51:35, 51:49).
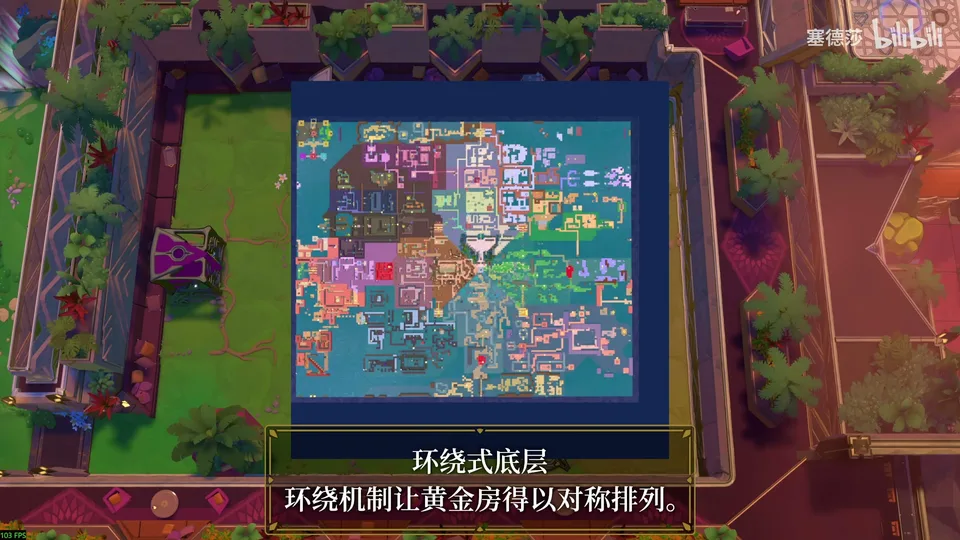
- The overworld and the lower layer: the main world’s design, an early sketch of the lower layer, Zach’s draft from before the map wrapped round, the wrap-around lower layer (the wrapping lets the Gold Rooms sit symmetrically, close to today’s layout) and the revised layout with art (51:58, 52:09, 52:14, 52:22, 52:30).
The hidden recording (major spoilers)
Story spoilers below. This section describes the two Queen recordings. 塞德莎 calls the second one a hidden extra that almost nobody knows about; he found it only days before this part (0:35, 53:01).
First: the Queen’s recording on the Crossroads
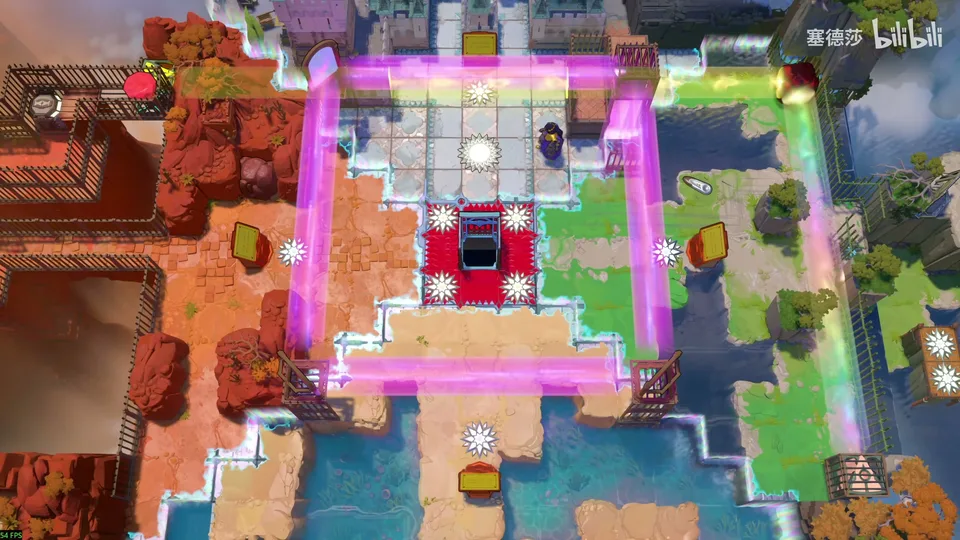
Listen to this one first, because the hidden one answers it (57:03, 57:08).
- Go back down from the Prologue and take the lift to the main world, then to the Crossroads (53:08, 53:16, 53:25).
- The recording is under the stone in the bottom-left corner (53:42, 53:44).
- The bug: in the version he first played, when the red stones were blasted during the red puzzle on the way from one stage to the next, that bottom-left stone didn’t blast, so the recording couldn’t be reached. It has since been fixed. To show it, he moves a red stone down from above to that spot and clears it; the corner stone now blasts normally (53:38, 53:49, 53:54, 54:02).
- Play the recording on that spot (54:06, 54:26). He notes the recorders look just like the ones in The Witness (54:15).
What it is (spoiler): the Queen, just before she enters the world of the game. Sensing danger, she prays that, if she can’t come back, her loyal soldiers be spared and returned to their families. Then something attacks (he hears an arrow) and she vanishes, which leads into the voice at the very start of the game (55:53, 55:56, 56:16, 56:38, 56:44).
Second: the hidden recording behind the two fogs
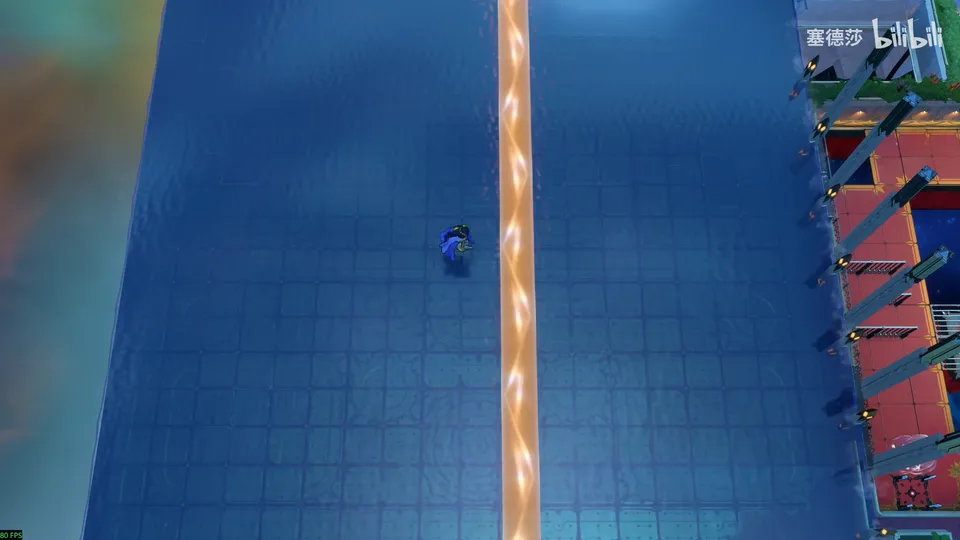
Unlock condition: complete the third ending (58:13).
- Go down into the underground, to Crossroads Low (57:11, 57:13).
- Head to the zone with the yellow beam and go all the way down along it; the name card Three at Once appears here (57:22, 57:27).
- Make an adjustment at this spot (the narration is unclear about what; watch the moment), then come down (57:30, 57:33, 57:36).
- Right in the middle, walk boldly to the left. There is a hidden path here (57:38, 57:43, 57:47).
- This is how the two fogs open that 100% players wondered about (57:51, 57:58, 58:00); in his earlier part he said they couldn’t be opened (Low Beamcasters).
- Go up: the fog clears completely, all of the lower layer’s fog is gone, and the recording is hidden here. Open its sign (58:05, 58:07, 58:09, 58:16, 58:20).
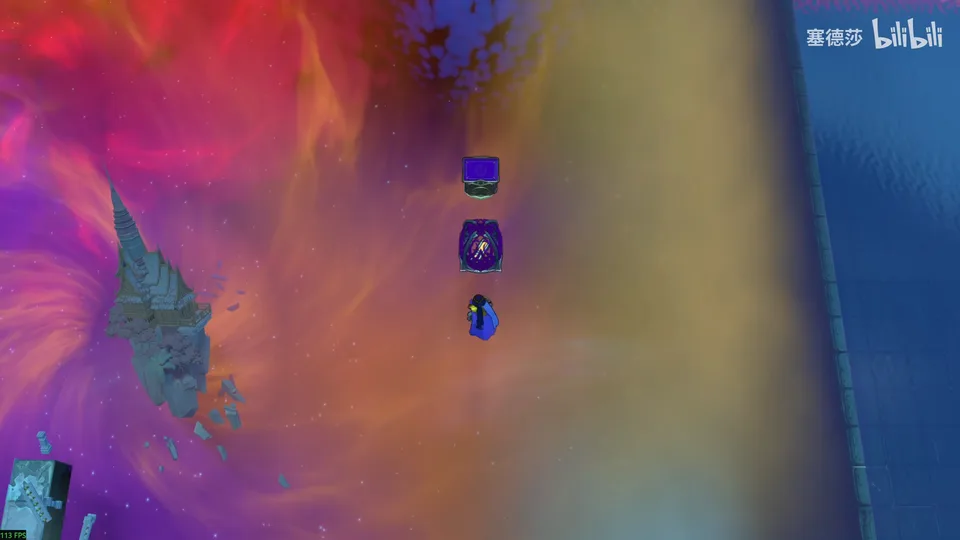
What it is (major spoiler): the first half is the same recording as on the Crossroads. Then it keeps going after she vanishes: her guards say she was gone for less than ten seconds: she has returned to her own world, and the people she met in the four worlds of the game have come with her. Surrounded, they turn the tables, and you hear the sounds of each world’s abilities (he picks out the Wizard’s swap, the mirrors, placing a gem, a skipping stone and the Bard’s music). 塞德莎 reads it as the true, happy ending (1:00:37, 1:00:42, 1:00:50, 1:01:06, 1:01:25, 1:01:55).
Still unexplained: the numbers on the very first signs. 塞德莎 reads the most important one as 069104 (he isn’t sure of the digits). Nobody knows yet what it is for; he checked it against the hidden coordinates and found no link, and asks if anyone can dig it out (1:02:03, 1:02:10, 1:02:19, 1:02:22).
The end of 塞德莎’s series
This is the last part of 塞德莎’s 68-part walkthrough: with it, he says, everything in the game has been shown (1:02:31, 1:02:36). His verdict in short: not quite a masterpiece, with some problems and no single standout level, but very polished and carefully designed throughout, aimed at a broad audience, and, after Patrick’s Parabox, his first recommendation for newcomers to logic puzzles; he hopes the South’s open world gets smoothed out and the remaining unintended solutions and map holes get fixed (1:02:49, 1:03:06, 1:03:28, 1:03:36, 1:03:50). He plans to add every recording in Chinese once the Chinese voice-over arrives, expected in two weeks to a month (1:04:03, 1:04:11).
Back to Endgame Low or the Antipode Low hub.